Leaderboard


Popular Content
Showing content with the highest reputation on 01/27/2024 in all areas
-
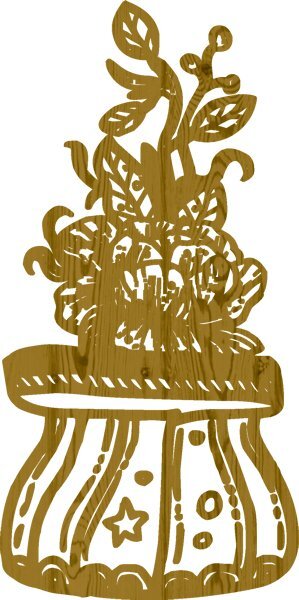
This was one of the dingbats in today 2/26/24 free font on Creative Fabrica. " House-Plants-29702631" I used one of them and put it on a wood background and did the cut out the way Cassel showed us how to do in the recent workshop. I thought it turned out pretty so I am posting it.
 8 points
 -
7 points
-
I guess you can't teach an old dog new tricks! I do not remember PSP being this hard 12-15 years ago when I was doing digital scrapbooking Anyway here's day 4.
6 points
-
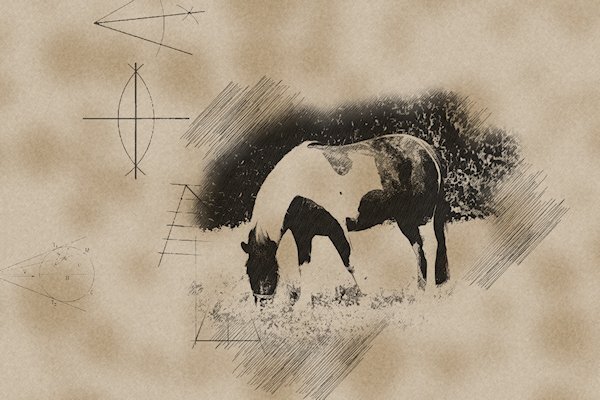
I haven't made anything with it yet, I've had the script since yesterday and am experimenting, I think this is such a cool script! me and Poncho, a photo of a horse that I took on one of our walks, and my daughter, years ago when she still worked as a tour guide
5 points
-
I have also played with the pencil script here are my photos the last one I used also the watercolor script3 points
-
Last - Template 7 Diamond. All the papers and the brad group are from Cassel's Fire and Ice kit. The bow at the bottom is also from Cassel. The font is Violenty Script.
3 points
-
here is my day 7, day 6 is not finished yet2 points
-
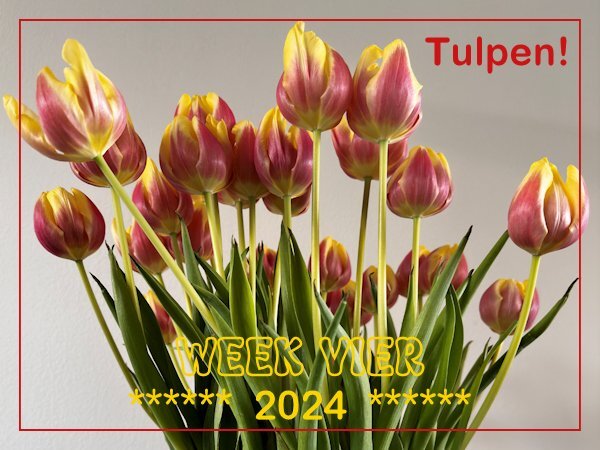
Week four and the start of the Tulip season! 🌷 Tulips are now widely available in the shops and I bought a bunch. It will take 3 or 4 months before they will be in bloom outdoors; the ones we can buy now are grown in glasshouses. The start of the season is always on Tulipday, which is the 3rd Saturday of January and is celebrated in Amsterdam on a square in the city center. There is a huge display of tulips and when the official opening is over, people can come and pick a bunch of tulips for free. I have never been there because it is not where I live. I'll buy them in a shop, but it always gives you the feeling that Spring isn't that far away!
2 points
-
Yes, it comes with 34 brushes!2 points
-
I am glad to see those workshops being enjoyed by the participants, even though they are repeated. I guess the next workshop will be an easy one for you!2 points
-
I created this one for the challenge --- https://scrapbookcampus.com/invision/forums/topic/1634-january-string-of-words-challenge-2024/?vgo_ee=WImv8ZbX0V2OVMo7jXIFuXLkR8paCHociubarwrrq%2F1IzIbO6E4y%3Akyh5hX%2Fm7YnWp%2FA5862zDrk%2BGomvFGG%2F
2 points
-
That wonderful illustration is by Elsie Julia Miller. I don't love the finished product (ran out of creativity last night lol). But I wanted to share how to get a great background paper by using Cassel's Painted Background script. It takes colors from the original pic and, using one of five painting methods that you pick from, creates the paper for you. I think I used the Sponge option. The fonts I used are Varsity Team (from 1001 Fonts) and Brilliant Signature (from a CF bundle).2 points
-
Lesson 7 done! Cassel, that you for offering us this free workshop. It has been a thoroughly enjoyable course to take and your explanations are clear and to the point.
2 points
-
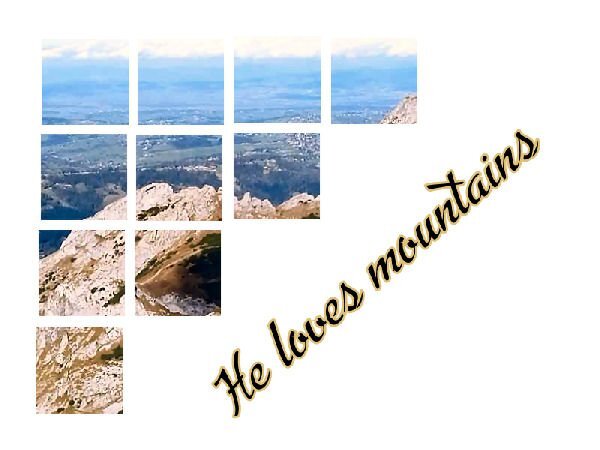
SUBSET. You know, JK likes mountains. I use pics he sends to me, I use right now a mask 'Send Me an Angel' created by me in PSP.
2 points
-
Good morning, here I'll show you my further progress in my PSP training in the new German forum. Unfortunately, I'm not allowed to publish my own training tasks elsewhere (at the moment sign tags) despite many credits on the picture (the artists who gave permission to the forum can only be shown edited in the forum), but my own frames around my own photos, which can I show where I want. With frames you can easily get into a routine with PSP. Unfortunately there is no filter. With filters I always have to save in .psd and then insert the filters into PI. I can't even insert the "Filter unlimited" into PSP because many filters are integrated.
2 points
-
Day 7 I changed the template completely (started with the Diamond Day 7 template). the little tag is where the journal spot was and the title is in the same spot as the template. I did add shadows but they arent going to be visible, except on the screwhead. I originally wanted to use a label to cover up the alligator clip but thought it would look more "specimen-y" with it. the title and the outer frame have an inner bevel. Filled with a gradient (all the frames) and a pattern called Black Gold for the fill in the title. Fonts used: Herkings (Creative Fabrica), and Arial (Windows) Tag: my tag from the Vector Workshop (highly recommend this workshop!) Thank you Carole for another wonderful workshop. I'm always so delighted to re-remember the things I forgot from the last time through. I saw so many beautiful and inspiring layouts and often thought; "that's awesome, why didn't I think of that"?
2 points
-
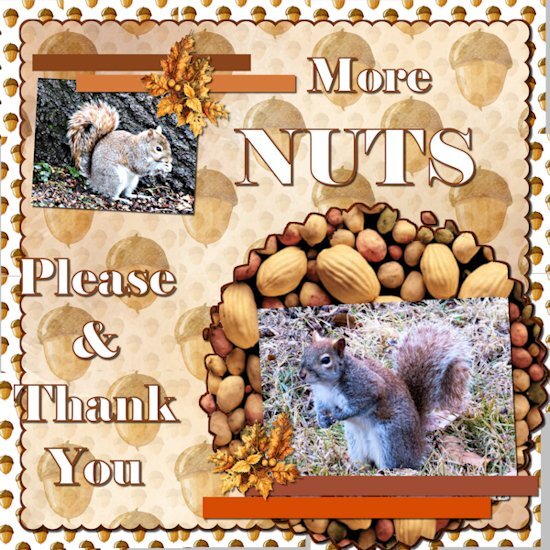
Here is my take on day 7. I kept hem hawing about what to do for this one. I got lucky and got the picks in my yard this morning. The squirrels were really active today. Yesterday we had freezing rain from about 3AM to noon. I did not go anywhere.
2 points
-
L4corrected. btw, Carole, thank you very much for nowaday activity:)))))
2 points
-
It's been a while since I had time to create a new one. (They've been repeating themes from 2017 so I've been repeating my layouts with a few adjustments.) The background paper is a chevron from PS/DS by Sheila Reid to which I added a Gaussian blur. I used the Andrea Bilarosa font I got in a free font bundle from CF and the flourish is from my collection of scrapbooking "stuff." 🙂 As you probably already guessed, the illustration is by Hayden Williams. The best part, and the reason I wanted to share this, is Cassel's gimp trims picture tube. I used one to frame the illustration and the layout.2 points
-
Jacek loves mountains. He often goes there, Once I've seen a template, which I use here ( coz I created it with PSP). I already know to see/watch many templates, don't copy them at once.
2 points
-
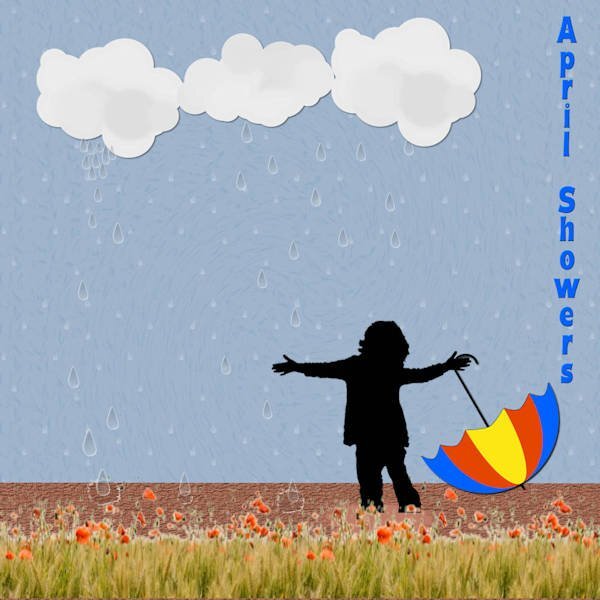
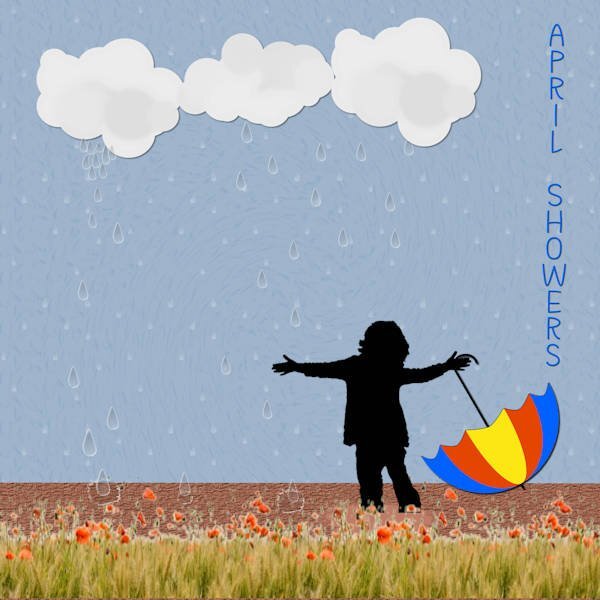
I'm really not happy with this layout, but it is what it is! Lab 11 Mod 9: requirements: water droplet (2 on the ground); cloud (made 3 and they are shown); umbrella - had fun with this. In addition to the water droplet, I used the tutorial for the droplet to make water drops and made a pattern of scattered raindrops (water drops) and then an overlay for a 12X12 paper. I used the overlay on the background paper and scattered the water drops coming down from the clouds; and put a water drop in each of the droplets. I also made a "Puddle" which is what the boy in the silhouette is standing in. Don't remember what the font name is.
2 points
-
The Campus is the perfect place to learn more about photo editing, various techniques, or PSP in general. This challenge will allow you to practice some of those techniques or use some tools. This time, the Tut/Tech Challenge will be to create the folded edge effect that was demonstrated during the last Master Class, Bordermania 2. That class is still available for free when you log in. This particular technique is illustrated at the 24th minute of the video so you can fast forward until that point. Show us what you learned.1 point
-
I just check it out and it's a cool script. I'd also add to watch the video, it's very good. Michele, does all those brushes shown in the video come with that script? that alone is worth the price!1 point
-
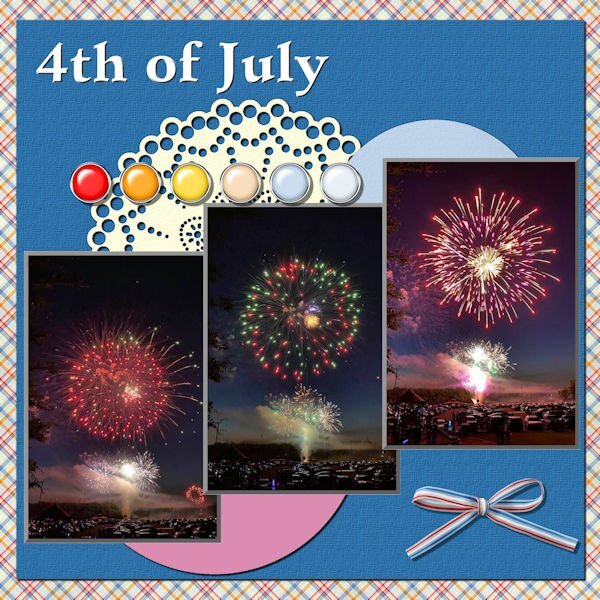
These are perfect fireworks! They look like flowers with a stem.1 point
-
I cannot agree more. Very nice layout, Mary, and a great story to remember.1 point
-
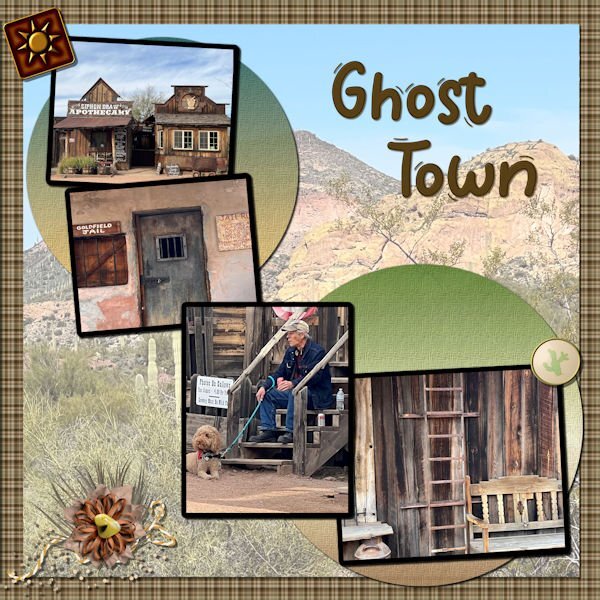
Template 7. The background paper, the 2 round papers, and the elements are all from my desert kit we did last year. The font is Wigglye from CF. The paper on top of the background paper is a picture from the same group as the 4 pictures that are dominant; however the opacity has been reduced, the underlying paper is white, and the blend mode is Multiply. The font was innerbevelled and shadowed.
1 point
-
S = Swimming for seniors, which I'm doing for many, many years now. It is a mixture of aquafit and aquajogging and a coffee afterwards with a lot of chitchat is our reward1 point
-
I love how you wound the ribbon through the Font. What a stunning layout and that photo is outstanding!1 point
-
Template 6 Diamond. Because one of the pictures was horizontal, I had to change the layout somewhat. I colored and textured the 3 ribbons; that Winter Vibes font that was talked about and several of us downloaded it, the sticker and the mitten banner are mine as is the background paper. The Hot Chocolate card in the center is from Pixel Scrapper – Jessica Dunn (one of my favorite developers). The 2 hot chocolate buttons holding the mitten banner are from Pixel Scrapper – Brooke Gazarek. The 3 generations are from different families of mine.
1 point
-
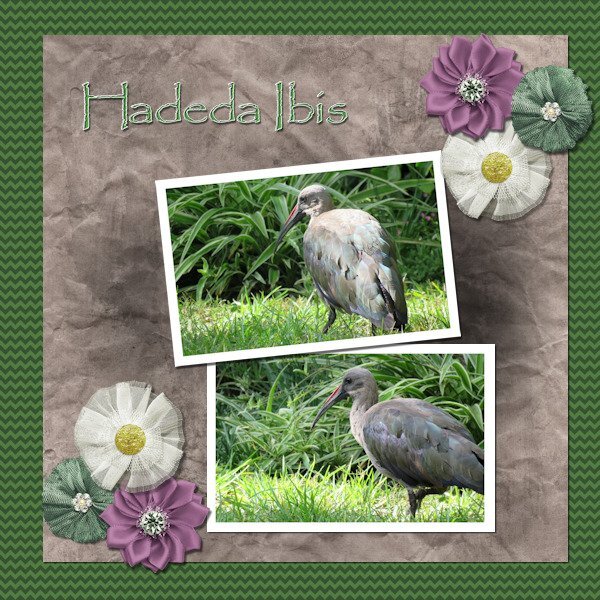
Lesson 6 done! We have a flock of about 10 Hadedas that visit us every day and most times spend the day in our garden. They are large birds (about 76 cm (30 in) long) and very noisy. Their call sounds like their name HA - DE - DA. When they make a noise, don't even try talking because someone standing in front of you won't even be able to hear you. I love these birds.
1 point
-
Template 6. Changed the layout by moving the title to the bottom, moving the pictures up, adding a journal sheet, and removing some of the elements replacing them with my own elements. I had fun – and learned something new – to put a paper on top of the textured layer and working with the blend mode and the opacity of the paper layer. Great stuff!! The title is Annie Tobin’s font (she was such a wonderful lady) which I glittered and innerbevelled. The heart in the top left corner is from CF and I innerbevelled it. The bow I made with Cassel’s Bow 2 script. The Santa sign is from my stash as is the poinsettia cluster in the bottom left corner. The star tube is from Cassel. The pictures are from scanning 1991 35m prints. They were in bad shape and I used every trick that PSP has (well almost). I had forgotten about fade correction, but Cassel reminded us of that tool and I used it and de-noised it to the max and sharpening it to the max. The difference is amazing. That trip was special and finding it was such a gift. You can't imagine - as we went down the road into the town, it was dark - everything was closed up tight - no lights - off to the left at a distance was an oil drum that seemed to have a fire in it - something that the people on the road in the depression might have used to keep warm or cook food - the scene was really eerie. Dolores really wanted to turn back, but I just felt we had to go further. And then, when we turned that corner it was like Judy Garland opening the door into Oz - from blah to radiant color. I will never forget it.
1 point
-
Beautiful layout, France!1 point
-
Day 7. This for a bit of a test for me, but I certainly did learn a lot.
1 point
-
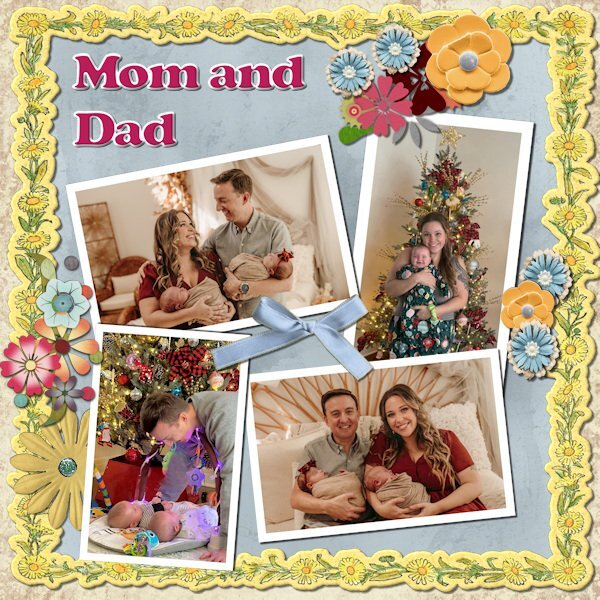
Time to pay tribute to the parents!
1 point
-
Hi here is my day 4, getting a little behind, I can't sit too long as I have been getting migraines. I am also on a time schedule to get my Granddaughters scrapbook finished which doesn't help, so today I have managed to use the given template for a double purpose. I wasn't sure if it would work because the book is smaller and not quite square, but its all good so happy me.
1 point
-
Lesson 6, cass-Template6.jpg with the kits; The Master Of Time Sampler by Malo Scrap & Christmas dream by Malo Scrap
1 point
-
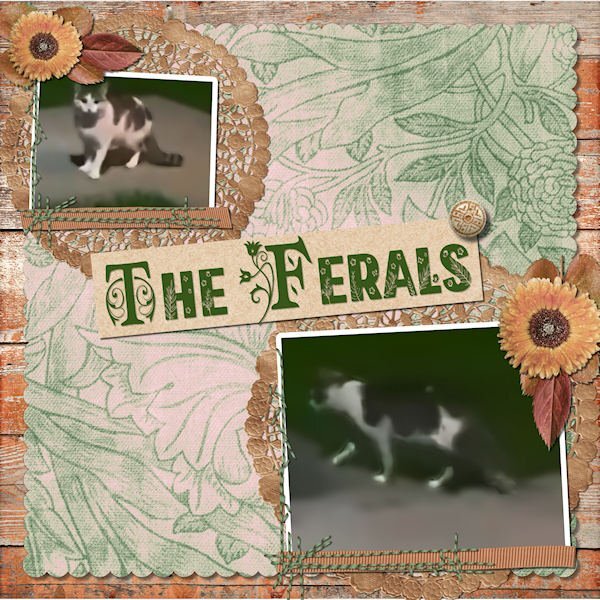
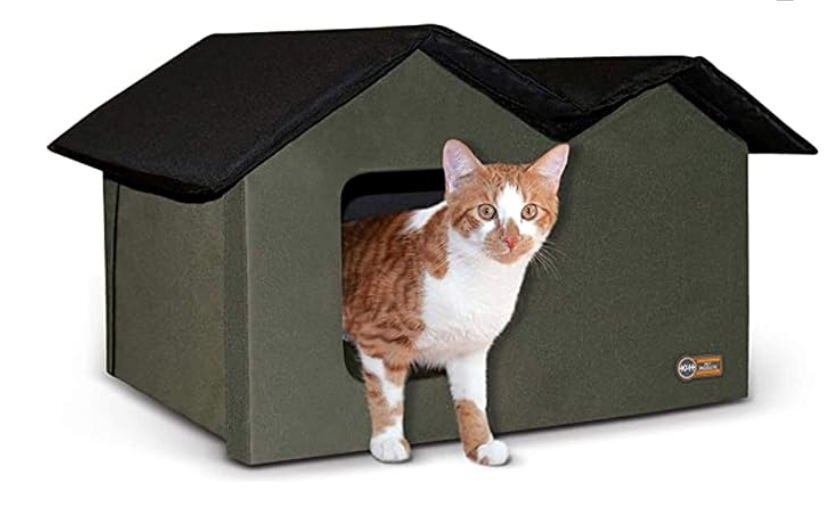
LESSON 7 - A classic scrapbook page, hoping to overcome some really lame photos clipped from a video. A little more involved than I usually do but I think it looks nice. All the elements and papers came from a kit called True Heart Digitals and the fonts are am-index and flora garden. The top cat is a mature female (I think) and the lower one is probably her nearly grown (possibly male) kitten. They seem to act as a bonded pair. She hides under a neighbor's car when I come out on the porch whereas he is bolder and comes running, meowing at me for food. I now have a Cat Cabin on the porch with straw for bedding. I've included a promo photo of it here.
1 point
-
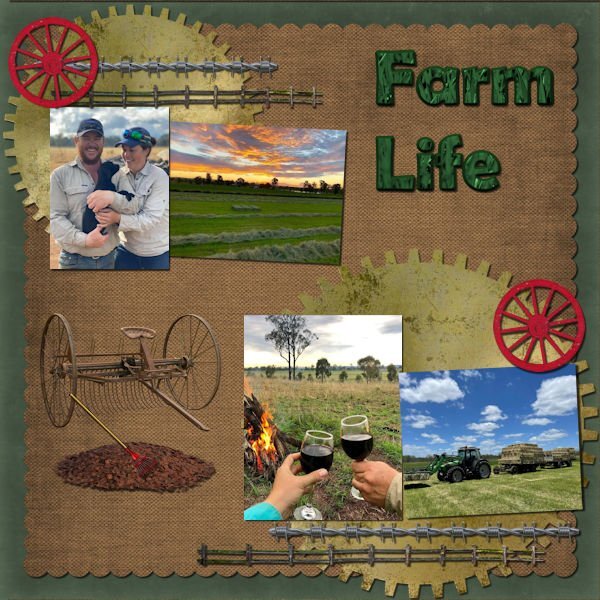
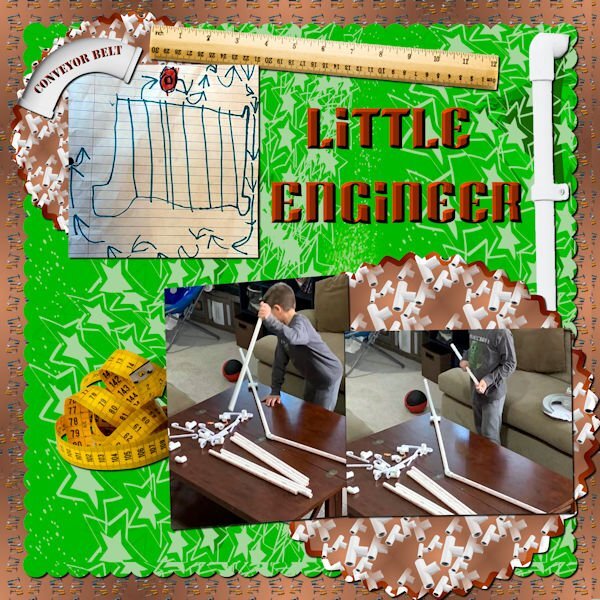
Day 7 Photos of my youngest grandson are from my daughter in law. Thomas loves to build things. The background was created using cass seamless background script with tools from Marisa Lerin. The pvc pipes, ruler and measuring tape were all from in Canva. The pvc patterns were created using cass scatter script and then cass seamless background. The green background paper was actually created by Thomas in Procreate. The font is Super Blash from Creative Fabrica.
1 point
-
Day 6.
1 point
-
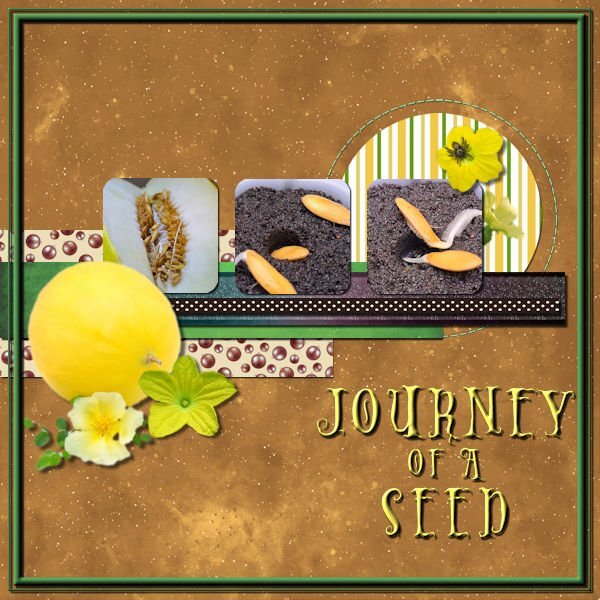
Day 5 done, I decided for this one just to focus on one seed, the Melon that I threw in just for fun and didn't expect to sprout. For just a few days it's doing really well. The font is Holiween one that I really like, all the elements are melon flowers hopefully I will get to see some one day and I added a tiny spider, just because. I used techniques from one of the earlier lessons to add a frame. I didn't like the ricrac so added a second ribbon instead.
1 point
-
Repost of Day 2. I did not put the drop shadows on the first one.
1 point
-
Day 4 I used stock photos from Pixabay. Font is Magnolia Script. I made the paper. And I added an inner bevel to the title.
1 point
-
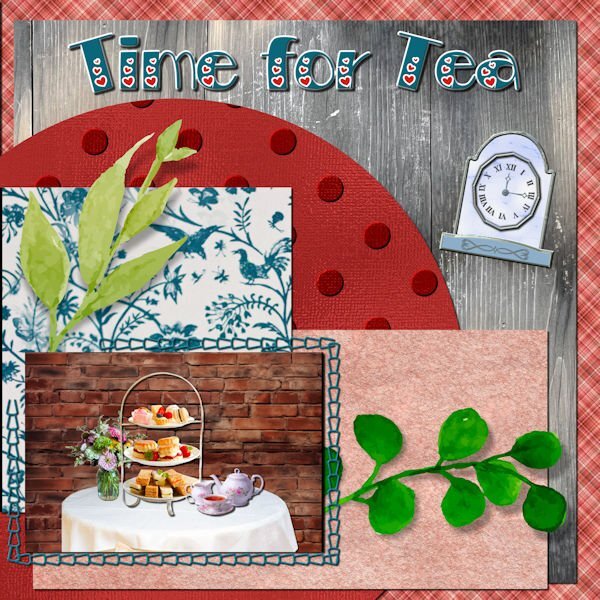
My daughter found an afternoon tea event in Fredericksburg that we will be attending. Since I don't have any good teahouse photos, I created one using Canva for the table, tea tray and tea set. The brick background is from deeezy.com. The bird paper is also from Canva; the polka dot paper is my own, the parchment is from FF, the wood from one of my daughter's photos, the plaid is one of my own and the clock is from my build a kit. The font is Bravo from Creative Fabrica.
1 point
-
I managed to do template 2 and although I have Caroles scripts, I wanted to do this template as instructed and after a few attempts I managed to do it. I learn by getting it wrong first time rather than right and hopefully with good notes I remember how to do it. Anyway,here is my result for template day 2.
1 point
-
day 4
1 point
-
@Ann Seeber I've just been going over the lot of pictures we've posted in this forum. How did you get that wavy effect on the striped paper in the kit???? It's so even.
1 point
-
I know I am a but late to do this, but it has been a very busy week. I know that is no excuse but I have decided that I am sick of doctor's appointments, x-ray, MRI's etc. This is my Day 2 attempt.
1 point
-
Day 3 template. Kit used: cpjess-tomorrow-folder-mini for the 3 patterned papers; I colorized and texturized the 2 small papers; the font I used was Brailganta Script (Creative Fabrica); I made the tag in back of the title from a preset shape which I texturized. The picture is from another Jessica Dunn kit. I did colorize the stitching and innerbevelled it.
1 point
-
OKay - here it is with the change that Ann Seeber recommended.
1 point
-
A visit to Sweet Frog Frozen Yogurt turned out to be a special event...sponstaneously. Sometimes those times turn out to be the most fun. Template 311 by Chantahalia Designs.1 point


Resized.thumb.jpg.d25811db03a63358cedab1e79f527635.jpg)