Leaderboard


Popular Content
Showing content with the highest reputation on 11/27/2023 in all areas
-
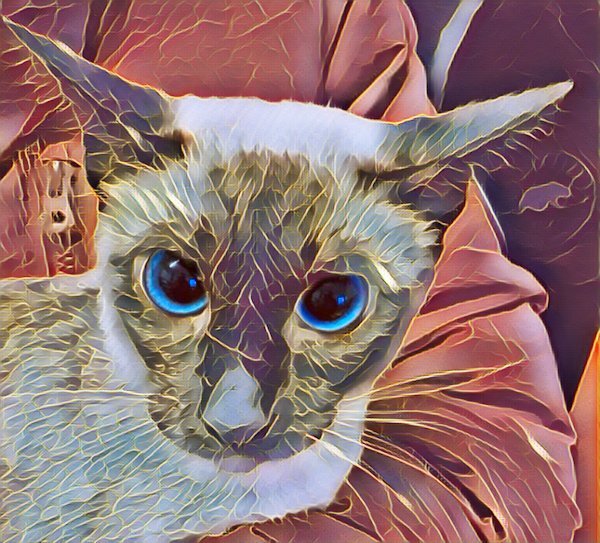
You've all been so busy this November. Loved what you've been doing. I have made a greetings card or two and then looked at the Campus blog subject on 'Dual Effects on a photo'. I think I can have fun with that and, although a little bit late for Halloween, created this Dual Effects cat image. In Palettes I used Instant Effects 'Gemstone' for the jaggedy image and for the cat's eyes adjusted the main photo using the vibrancy scale, painting out the eyes on the Mask.
 5 points
 -
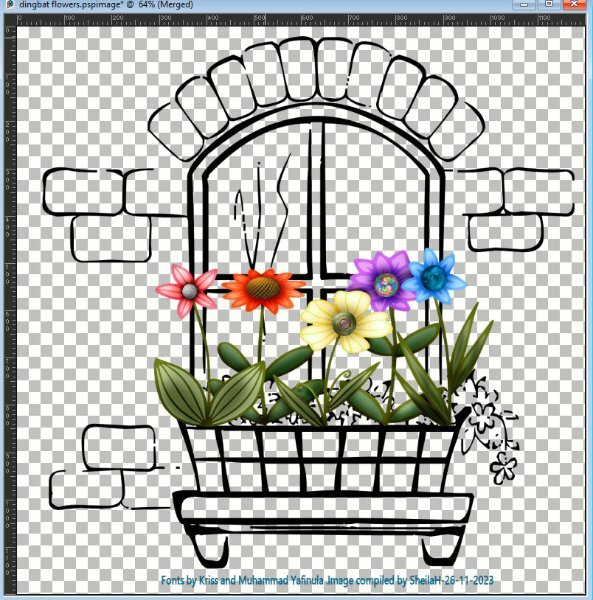
What to do with buttons? This image sort of came to mind so has kept me busy tonight. I love to turn Dingbats into shapes and can do this using SS-making preset shape script. I don't know if you can still get this free script. Anyhow, I used preset shapes made from a window font by Kriss and Wildflower font by Muhammad Yafinuha. I suppose you can just use as a font but being as I have sooooo many, it is easier to find them as a shape, especially if I am likely to make good use of them. I coloured and shaded the flowers. I used button balls I made in Filter Forge over time as the flower centers. As I wanted to keep the background transparent, I used the print screen function, cropped it, saved it as a jpg and hopefully will look transparent. TFL
5 points
-
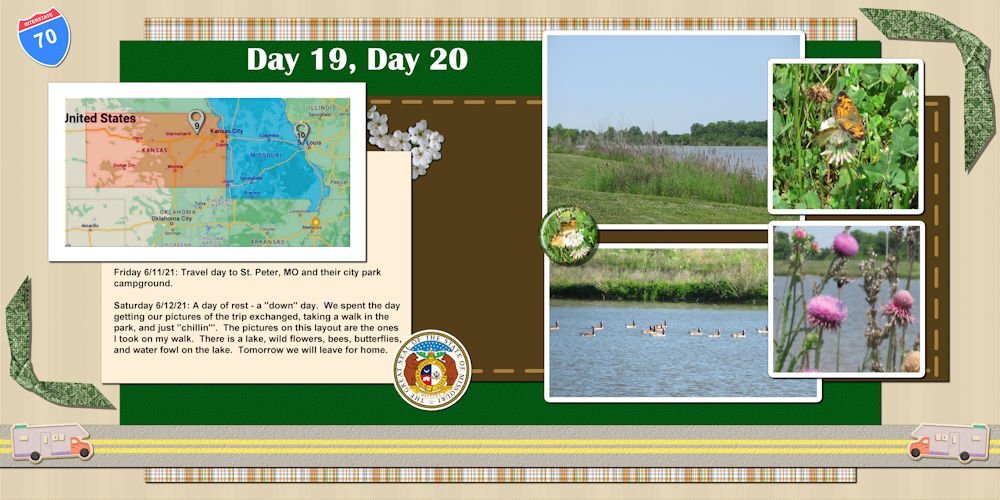
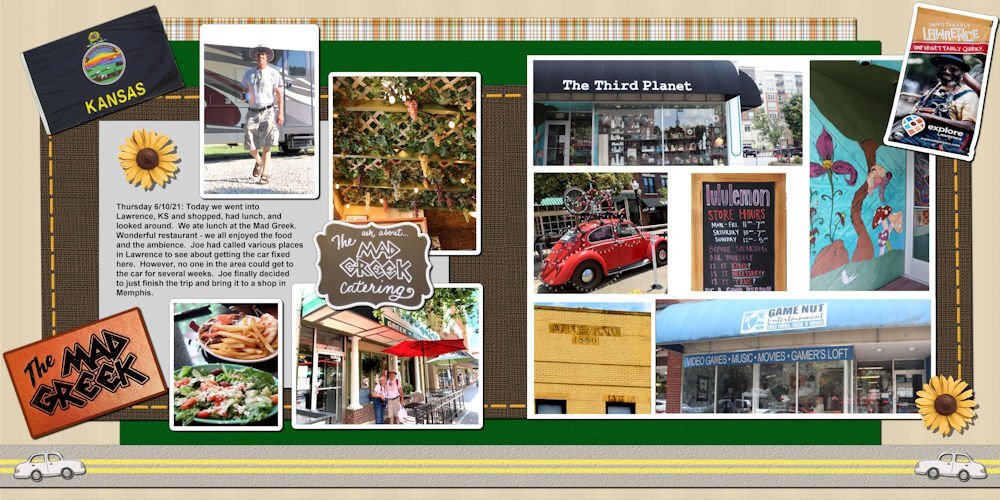
These are the last 2 layouts. There are 45 pages to this album.
4 points
-
Sure! I am just not specifying what year!3 points
-
I love the suggestions and ideas people have been coming up with. Here are a few of my thoughts. I’d organise the book in a number of sections – 5 to 10 with lots of subsections. For example: Introduction – yourself, PSP, Digital scrapbooking. 1. What is Digital Scrapbooking Topics might include: Why make a scrapbook page? What makes up a scrapbook page? Using Quick Pages, Templates, Sketches What size scrapbook pages are. Digital Scrapbooking Supplies: Where do I get them? What type of things can I get? Does it cost a lot? Can I make my own 2. Layers The sandwich exercise in Bootcamp is a perfect introduction. It helped me enormously when I only knew about tweaking photos. 3. Using photos All the ins and outs including how to resize, create different effects etc.. 4. Papers and non Photo elements What these are, why use them, and how to use them 5. Titles and Journaling Types of titles for scrapbook project. What to add in journaling? Anything important about using text. 6. Making it special I’d include some of your wonderful design tips here – how to choose colour schemes, themes, how to get the best balance and so on. And, of course, a special section on how and when to use shadows. 7. Examples to work through and try Step by step guides to producing specific pages3 points
-
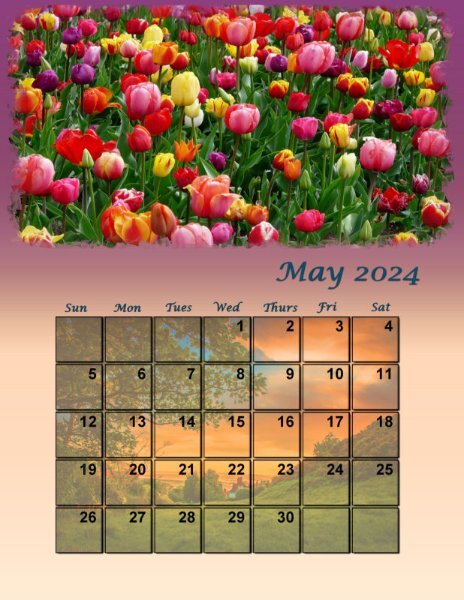
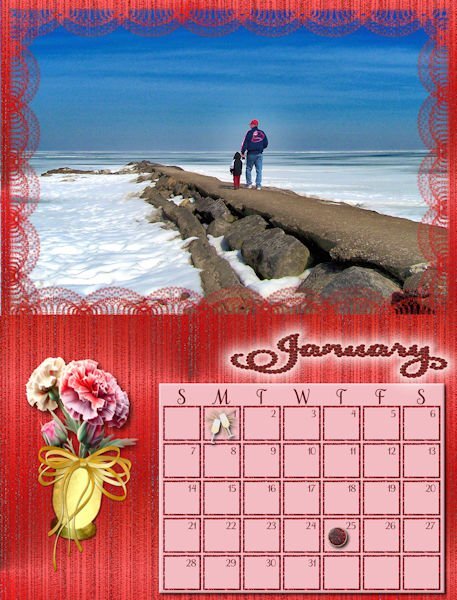
I also wanted to print these borderless but I hadn't thought to fill in borders with a pattern. Carole laid these out to print 8"x10.5" at 300 dpi and I wanted to print 8.5"x11". I wanted to keep it at 300 dpi just because that's the standard resolution for printing. That meant increasing the image size instead of reducing it. I decided the image could stand a little increase because the elements were so high quality and I changed the image size from 2400x3150 to 2550x3300. Even at that size when I dragged it onto the page layout I still had to futz around trying to get the borders perfect. That was very time consuming! I decided to add a few extra pixels to both dimensions. That meant when I dragged the image onto the page layout I got the message my image was too big and I could sit back and let PSP resize those few pixels to make it fit perfectly with no time consuming futzing. If anyone is interested the final image size I came up with is 2556x3307. That prints 8.520"x11.023" at 300 dpi which gave me a tiny bit of wiggle room around the edges so it fit perfectly with no borders after PSP resized it in the page layout. I'm sorry this was so long winded. You can tell I work as an engineer! I really want to thank Carole and everyone else for this workshop. I learned a huge amount having never worked with layers, or masks, or gradients and a whole bunch of other new things before! Each new calendar month I learn something new. Here's my May Calendar resized to print on 8.5"x11" paper.
2 points
-
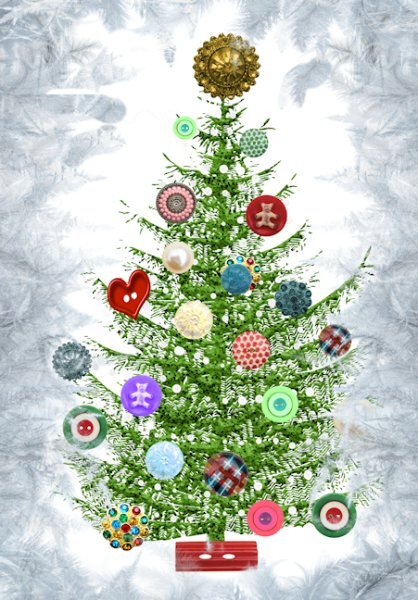
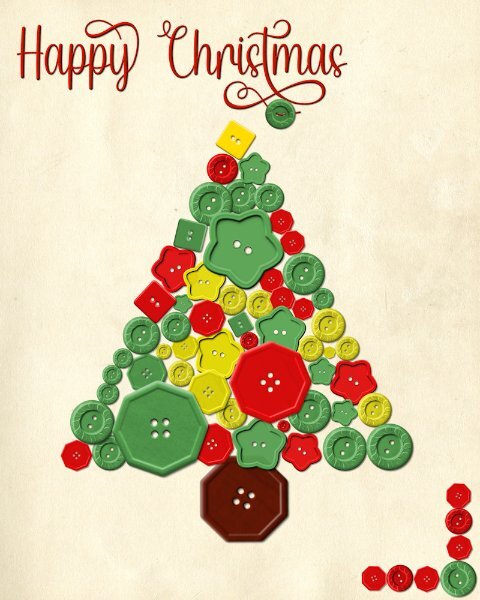
The tree was from digital scrapbooking "Christmas-Tree-Bauble-82464322" (it was grey and I turned it green.) The lights were the red button picture tube that I then turned to all white. The buttons are some I downloaded over the years and I did adjust some of them.
2 points
-
I have been experimenting with borderless printing on my Epson and have finally determined the correct settings so that edges and borders are equal. I copied the calendar page to an 8.5 by 11 paper and filled the edges with a pattern. I have a lot of different kinds of paper and will test the heavier papers to see if you can write on them. I have also been researching how to bind the pages together with ribbon or yarn. My calendar making slowed down, first because I kept changing my mind on the calendar and the shading and the because my grandsons were visiting from Las Vegas for Thanksgiving.2 points
-
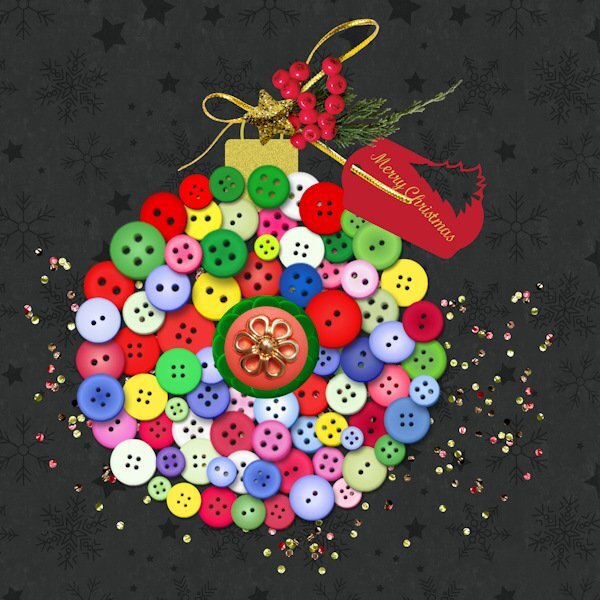
My first idea for this Button Challenge was a Button Tree, but luckily I noticed Sue has already done one and I didn't want to do something similar. As you can see I emptied by button box and made a bauble with some decorations. I mostly used the picture tubes that are inside PSP but changed some of their colors to give it a more christmas feel. Their original colors are more suited for Easter in my opinion at least. The decorations come from my stash and are by Marissa Lerin.
2 points
-
Had fun with this one. I updated the one I made years ago for the same theme. (I've been doing that a lot lately to save time.) The font is Little Brushy Regular.2 points
-
Just a small X-mas star with a decoration. As most of you know I'm taking the Scripting Course and in this week's lesson we had to use a preset shape and rotate it. Then write a (simple) script using what we had learned in that lesson. For fun I used a star preset shape and when finished with the lesson I thought well that looks like a nice X-mas star. The result from the lesson was quite small because we had to use a 200x200 image. This evening I played a bit with that script and redid it on a 400x400 image. After running the script I placed a decoration on it and I have something to use on cards or whatever related to X-mas. I love it when I can make something with the knowledge I'm getting in this course.
2 points
-
Now I've really got the hang of adding multiple images. The first time I went back into edit, then added an image. This time I simply added one at time. I feel so silly, as initially I was making a real meal of it, and failed. 🙂 I will summarize how I created these, and others, as I have lost count of the tools I used. I'm in my element doing intricate stuff like this. The gold rings are vectors. The most difficult part is aligning the vector elements to the rings. (Making them one) (used the pick tool, free, and sheer) warp brush, push. I also used the warp brush push, on the rings to have then higgledy piggledy. Lock transparency to colour the berries red. I used the create a gold element technique on the holly and berries, Using the blend mode I liked the screen effect. Selected the elements, expanded and deleted the one ring. Keeping the outer frame consistent. Floral elements from CF.
2 points
-
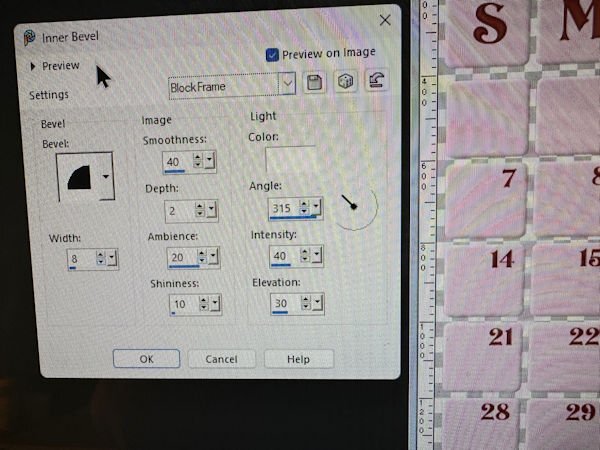
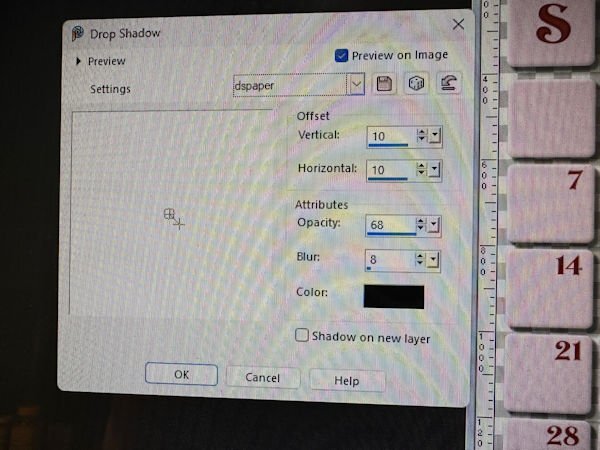
Julian, here are pictures of the settings that I used for the bevel and drop shadow. I couldn't figure out how to do a screen shot with the bevel screen up so I had to take camera pictures. They are sort of rough looking.
1 point
-
Thank you, Julian. I like your resized page better than mine with the border. I am going to try your dimensions. Thank your for your thorough explanation.
1 point
-
@Ann Seeber I do plan on getting it printed. Thank you for your kind words.1 point
-
Wonderful album, Mary. This was a labor of love! ❤️ Will you get it printed? I found my local Staples office supply store will print my 13-page calendar for under $25. I pick it up tomorrow! I'll report back on the quality. They tried on Sunday, but it was too dark, and I rejected it. Luckily, I had withheld payment until I was satisfied.1 point
-
@Mary Solaas: Many TFS!!! You have made such a gorgeous album. 💓1 point
-
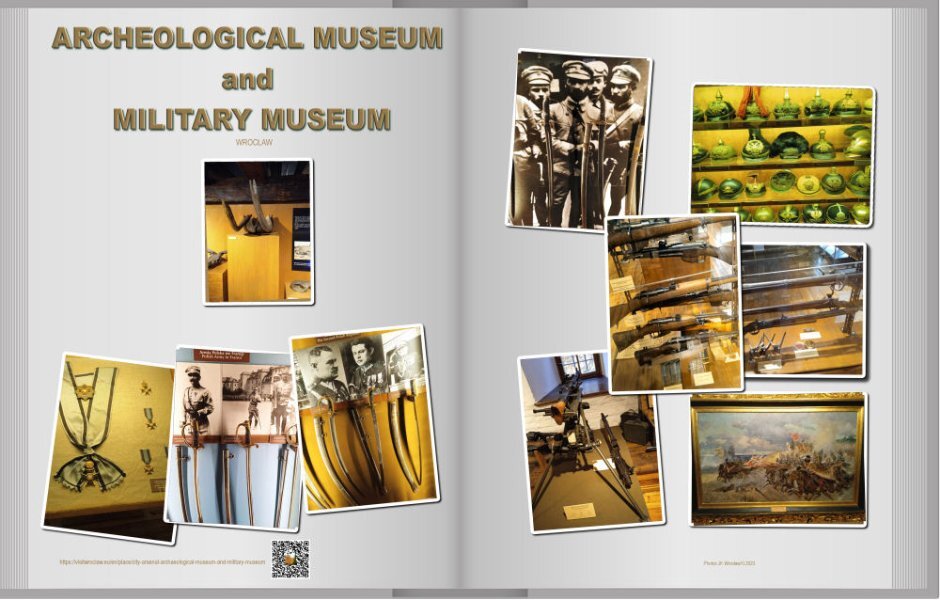
JK 's trip to museum, My fiest QRCode in use 😉 I know how to should look but I cannot check out, sorry. There are some internet-problems today so I'll download my work tomorrow, sorry. NOPE. Today....
1 point
-
Very creative, Sheila!1 point
-
Be my guest 😉1 point
-
For the button frame I used the blue button picture tubes, which comes with PSP. The colours were to pastel for my liking, so I changed them.
1 point
-
Great idea making the snow lady out of buttons!1 point
-
Nothing very original. I raided some of Carole's freebie buttons from the Creation Cassel blog. I did use the pen tool to extend the swash, in order to accommodate the button, threaded through.
1 point
-
This is what I created for the Nov. random challenge. Using buttons. This was fun but time consuming. The background was downloaded from CF, "Winter-landscape-74761386". All components of the Snowlady are buttons, some distorted to make them work. Also the walkway from the woods. am_intex that I have no idea where I got it from. I did a search in my saved stuff and found over 80 buttons. Of course some were only different colors of the same one.
1 point
-
This was fun but time consuming. The background was downloaded from CF, "Winter-landscape-74761386". All components of the Snowlady are buttons, some distorted to make them work. Also the walkway from the woods. am_intex that I have no idea where I got it from. I did a search in my saved stuff and found over 80 buttons. Of course some were only different colors of the same one.
1 point
-
Sue, I value your input also. You are a master.1 point
-
These are gorgeous. When I read all the tools/steps, my head starts to hurt! But you are the master at intricacy!1 point
-
A tip, I like to keep one whole vector circle, as it makes it easy to use the magic wand to select inside, in order to copy and paste an image, or flood fill.
1 point
-
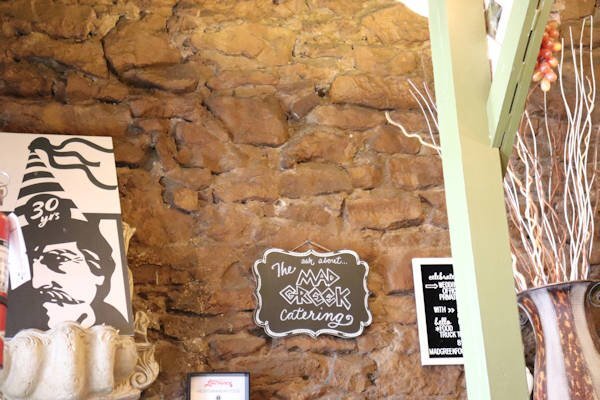
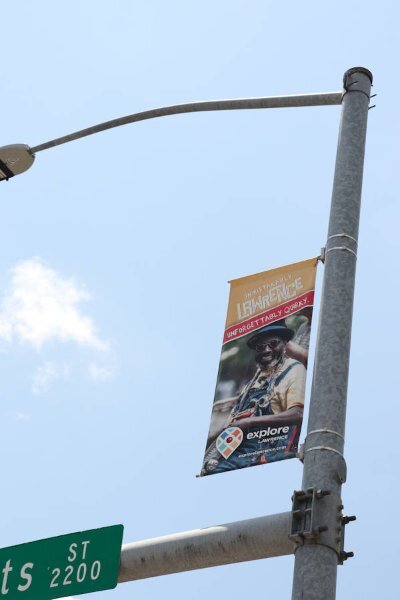
You did a professional job on the straightening the poster, using the perspective correction tool, also an equally as good job on the extraction. Did you use a mask or several masks for the extraction? I do.1 point
-
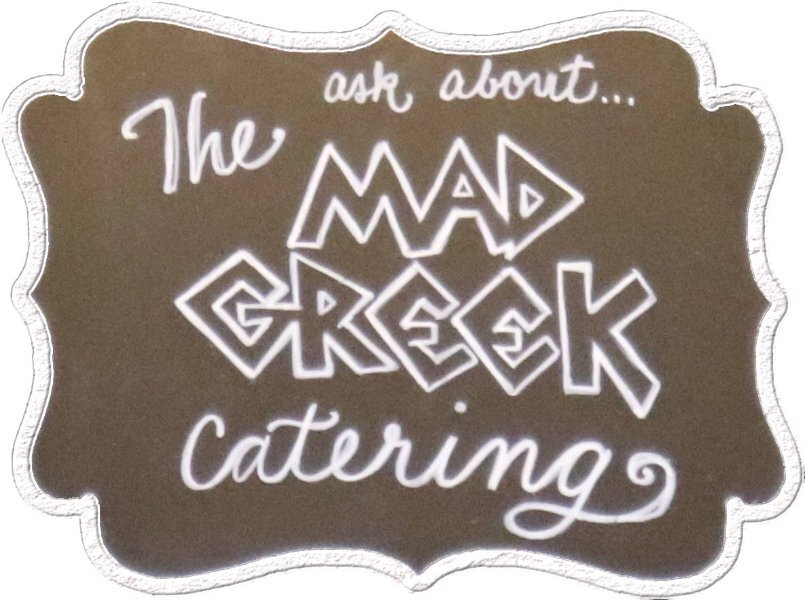
And another was to extract a plaque from the wall and make an element of it.
1 point
-
I've had a lot of fun with finishing up my Travel Tale. I've made several things I thought I would like to show. One is straightening out a poster in Lawrence, KS that I had photographed and so I'll show the photo and what I came up with for an element to add to the layout.
1 point
-
It's so much fun when the daily theme for my Fabulous Divas group has an "f" and a "d" so I can play with the text. The font I used is Bernal Sans, a duo that has a regular version and an alternate one.1 point
-
And now Lawrence KS
1 point
-
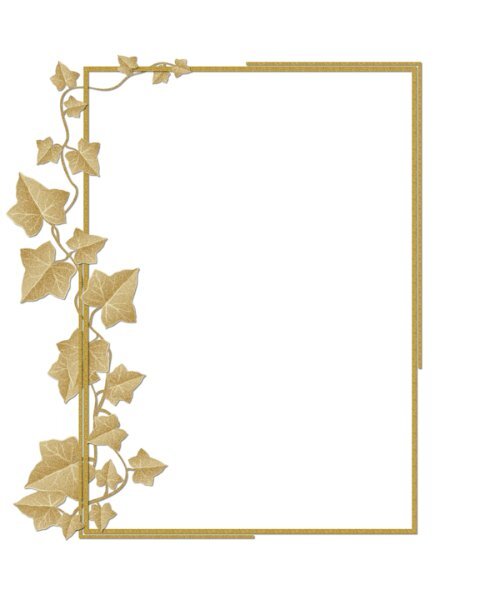
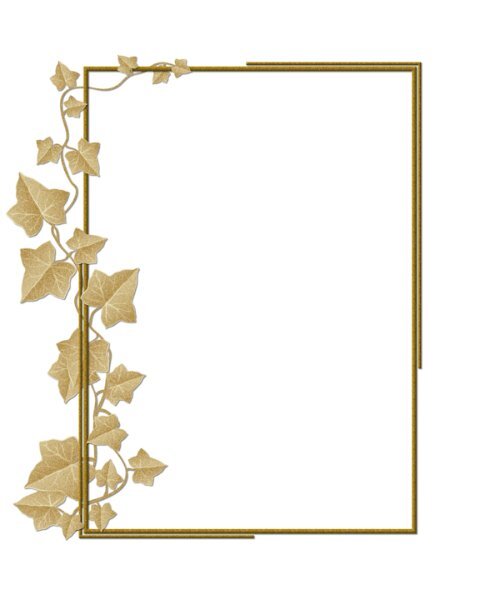
I thought I'd try adding more than one image to a post. I'm still playing a round creating gold decorated frames. The ivy was an ivy green in colour, which I turned to gold. It worked, now I know how to add more than one image.
1 point
-
So far, I have created January thru June. The font is Samantha Upright from Creative Fabrica. I use the Vectorstroke script to add the birthstone for each month. The flowers for Jan and Feb are from Creative Fabrica and for March my own photo and bow. I used layer styles to highlight the month. The background is my own which I call glitter streaks. I redid the months using the cass custom calendar script which was just updated. Thank you Carole. All the calendar photos are my own or from family. Jan is a picture of Lake Erie in winter, the second is from my grandson on his way to snowboarding and the third is my picture of Detroit taken from across the river.
1 point
-
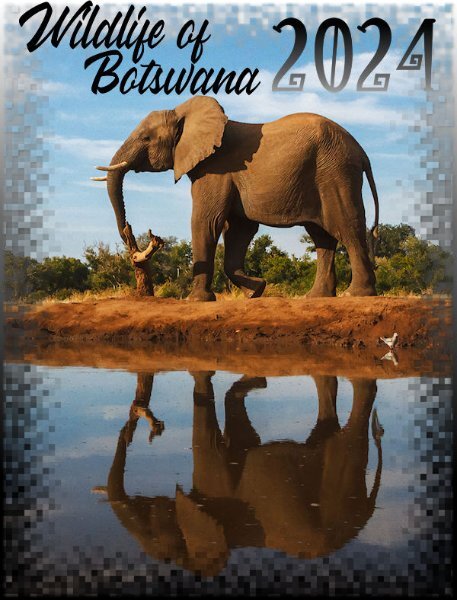
Working on the cover gave me the opportunity to showcase this elephant photo which is one of my favorites. The title font is still Wakanda and the font for the year is Witch Mystery because I thought it looked rather African. I do love African art.
1 point
-
Sharing to show how wonderful Cass's Two-Toned Stitch Fonts are. I used them to make the border. I've had the fonts for a while now, but I plan on using them more often and not just for borders. (Lots of clip art and an alpha were used for this layout.)1 point
-
One of the festive gold framed tags, using floral elements from CF.
1 point
-
I found a use for Carole's latest script. Stacked wooden alpha. I've been creating gold frames, and gold bordered tags, decorated with festive clipart.
1 point
-
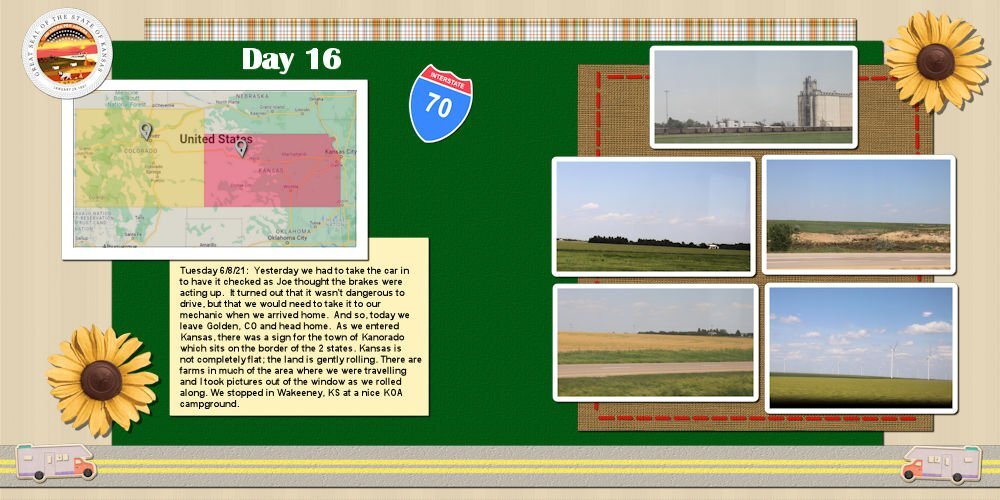
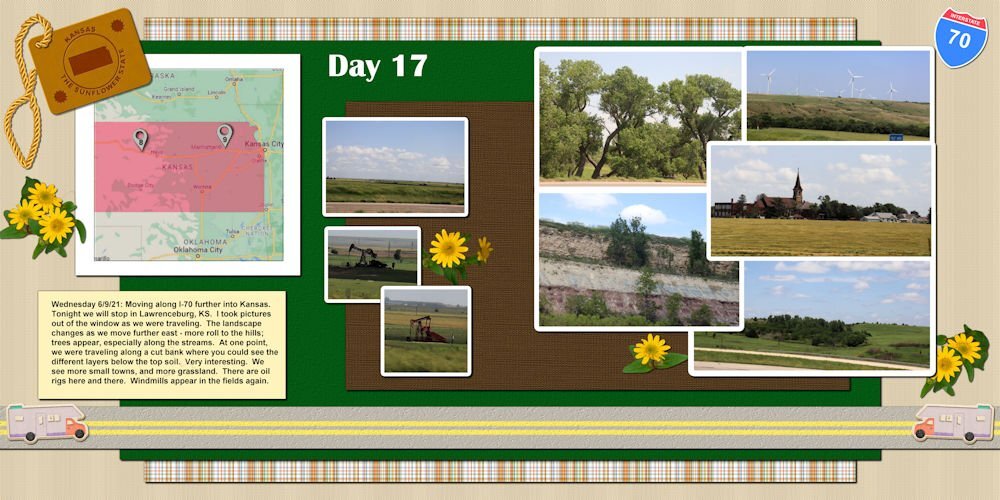
Getting close to the end of the year. Think I will be able to finish this project before the end of the year. This is the day before our visit in the town of Lawrenceburg, KS.
1 point
-
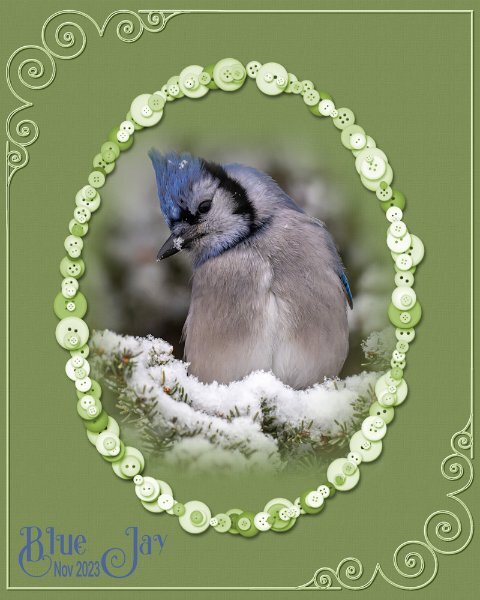
I started this page 3 nights ago, all that was left to do was to add a post it note, date stamp, and an alpha bead. All element tutorials can be found in the creative scrap. I think I have the titles of those tuts correct) My very first sighting and photo of this secretive bird will be a memory I shall cherish. I used the same technique that I used on the Great horned Owl. Created a mask, by using hide all, this time I added a frame. If the frame doesn't look right to you let me know
1 point
-
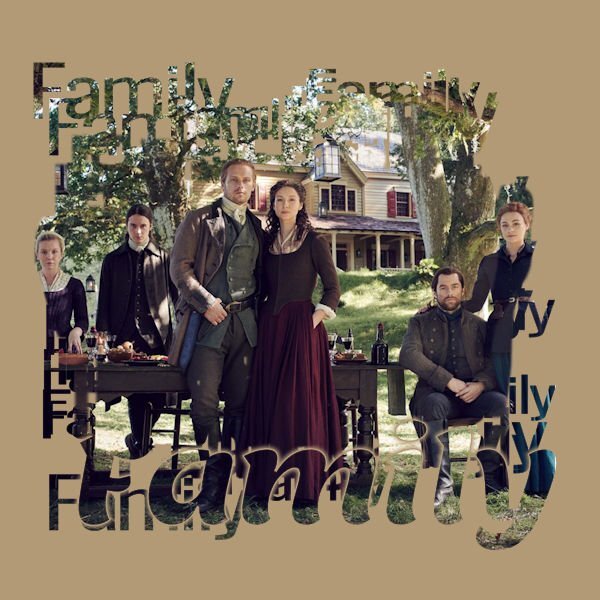
I tried the Cassel's Echo Text Mask-Family Sampler . First with a photo of my family, but It didn't look nice. Now I used an Outlander Photo, this looks better, will play around with it more.
1 point
-
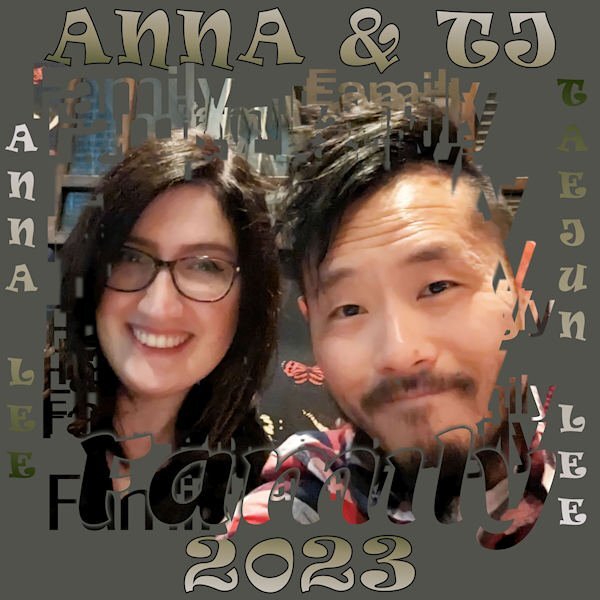
Decided to play with Cassel's Echo Text Mask-Family Sampler. I played with various group photos, but this seemed to work the best. This is a great portrait of my granddaughter and her husband from earlier this year. It turned out like a Word Art comp. The font for the title and side info is Ravie. Now I'll acquire the script so I can customize it.
1 point
-
The next day. Heading to home.
1 point
-
The little green grasshopper had discarded it's exoskeleton, and is in the process of hardening it's new one. When I zoom in I can see that it is still translucent. Semi transparent. The exoskeleton in the page doesn't belong to the little green grasshopper.
1 point
-
I love your work, Michele, and your choices of illustrations.1 point
-
Next day Laurie and Joe took a trip in the Rocky Mountains - Front Range.
1 point
-
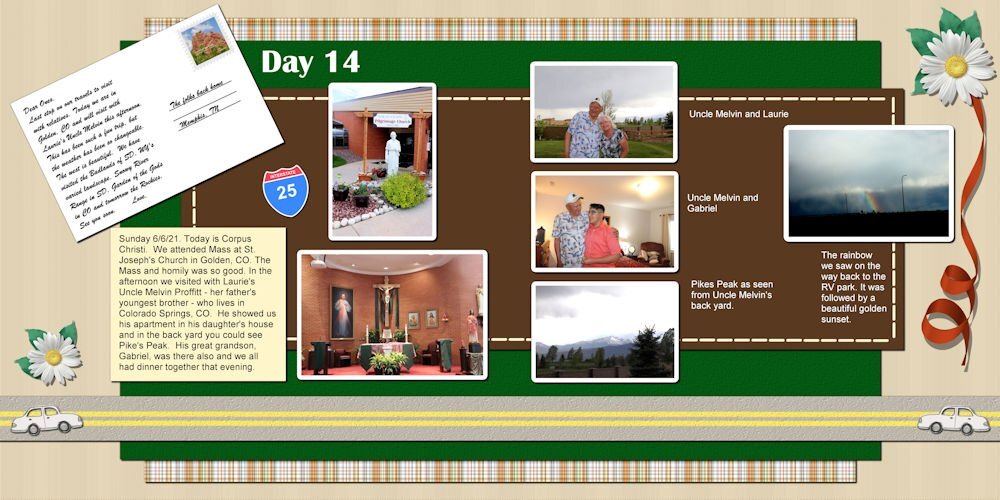
Day 14 - Sunday. Daisy, leaves and ribbon are from PS - DB Magnolia.
1 point
-
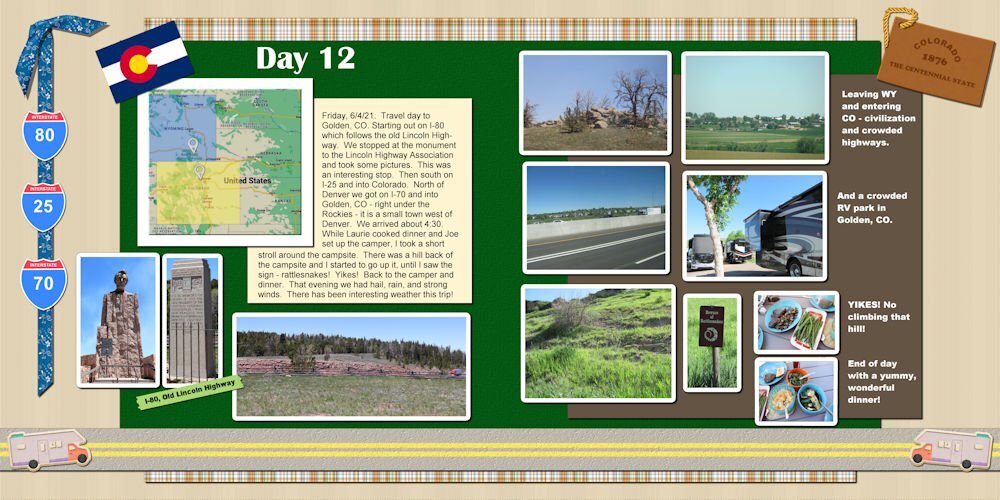
And now into Colorado - travel day.
1 point


.jpg.6261982a5cafc25358e1895746365d19.jpg)