Leaderboard
Resized.thumb.jpg.d25811db03a63358cedab1e79f527635.jpg)


Popular Content
Showing content with the highest reputation on 01/29/2023 in all areas
-
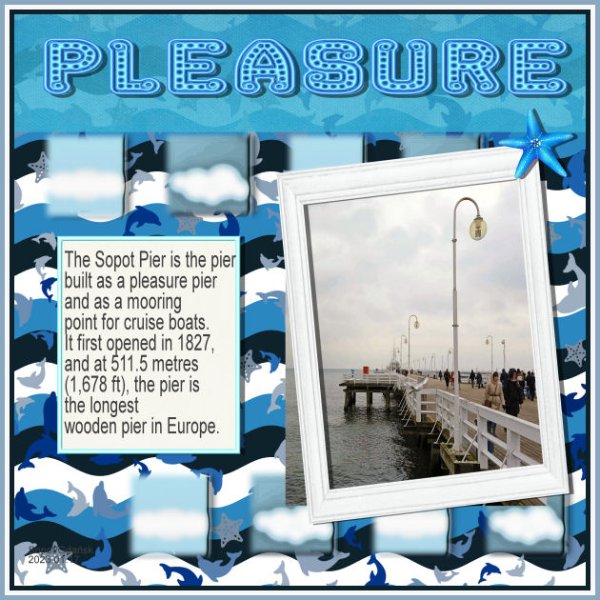
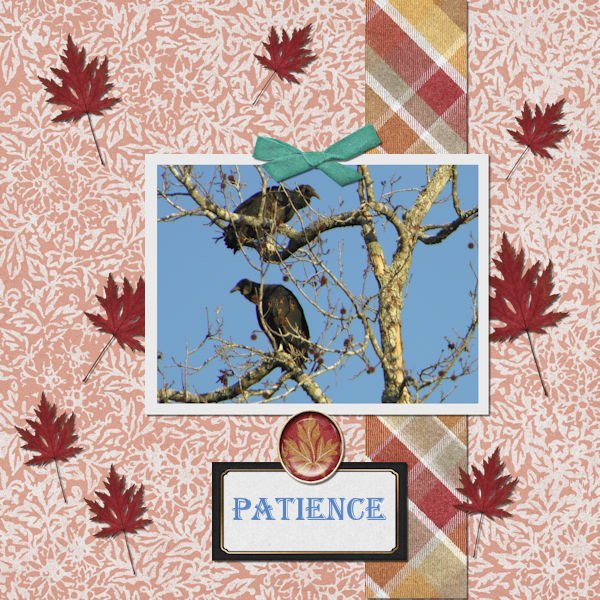
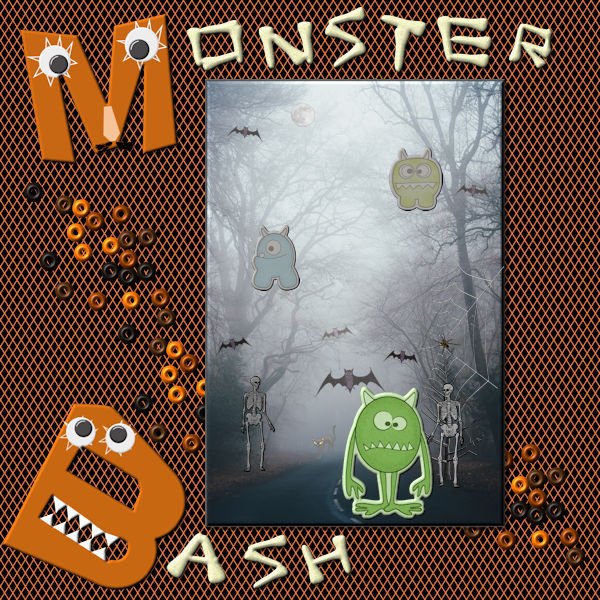
Probably the last for January. This is Lab 10 Mod 11. Requirements: crazy monster letters, googly eyes, beads in a picture tube. All done. I also created letters from a bone that was in one of the Halloween picture tubes (there are several). I also used those tubes for the bats, cat, spider. The spider web is mine from a previous lab. The picture is from Unsplash - by Annie Spratt. The 3 monsters are from PS -- Sheila Reid; The skeletons are from PS - Brooke Gazarak. Think I have credited everyone. The background paper is mine created in another lab.
 8 points
 -
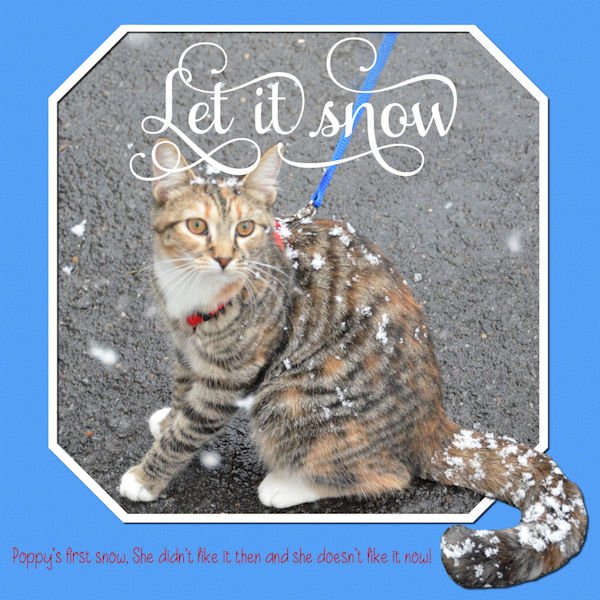
Another IWAS template. Poppy still does not like snow.
7 points
-
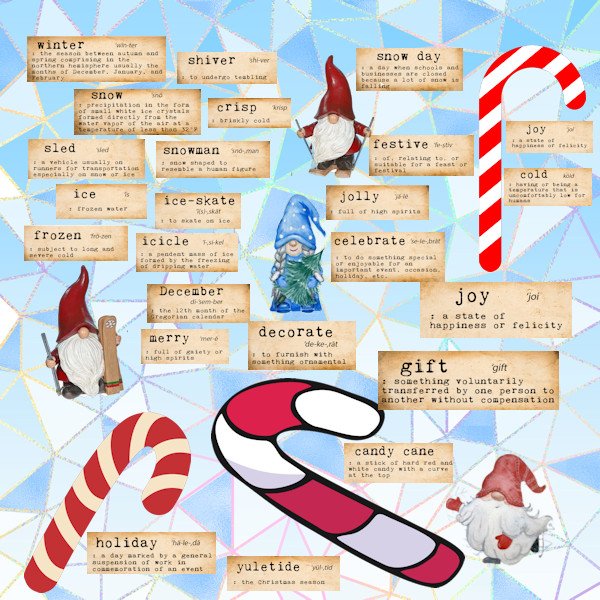
OK the last one for this month, it a gnome word wall. I took the words from a free download from Creative Fabrica the gnomes moved in and set up home in the depths of my computer; they pop up from time to time, I don't remember where I got the candy canes from, I have about 80,000 clip art items mainly on two discs. Keeping track of that lot is a nightmare
6 points
-
I found the fifth project a difficult one as far as design goes. I had forgotten the tip that I learned in a different class that if you don't change the text inside a self-wrapping selection that it will disappear on you when you resize. But when my text disappeared, I remembered and didn't panic. The papers and elements are from the May Flowers mini kit at digitalscrapbooking.com This is inside the chapel at Dog Mountain (St. Johnsbury, VT)
6 points
-
Inspired by a layout from Promethean Concepts by Laurel Stone in the ALFLT January 2022 Blog Train, Heart Full of Love. The font is Poor Richard; I have a lot of valentine/heart fonts, but I thought the template had enough hearts already lol. In fact, there was another bunch of hearts on the top that I deleted to have room for my titles.5 points
-
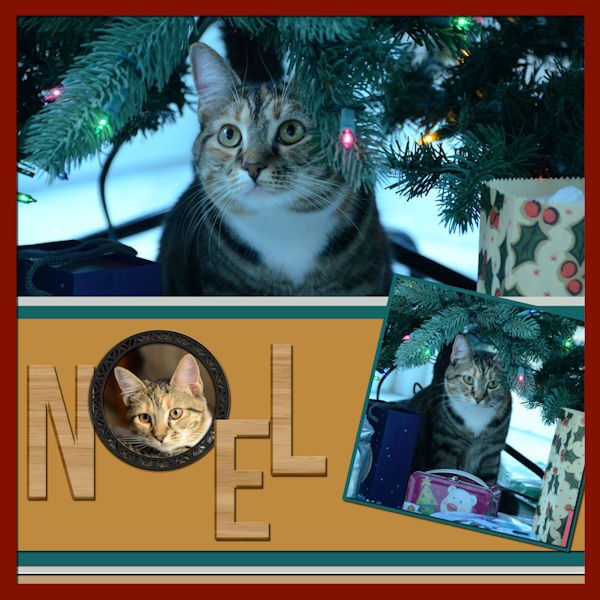
Wonderful layout Mary! Love the teeth on the 'B' and the nose and mustache on the 'M'. The bone letters are very fun looking. Did you make a whole alphabet? At my Lab pace I'll be doing that in a couple of years.?5 points
-
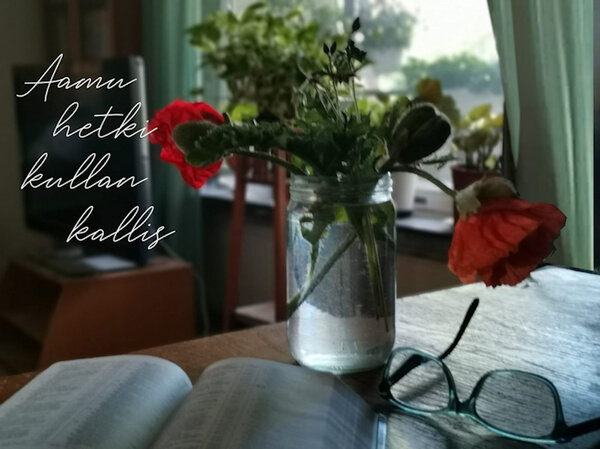
This photo taken last summer finnish text translated: morning moment precious in gold
4 points
-
It was fun ..so i made another one ...little more simple !! Fonts used : ActionIs------&----Mr.Haviland Kit used: Dainty Spring Butterfly Element are from some years ago ..... Something i learned ....is that Pick tool for resizing !!
4 points
-
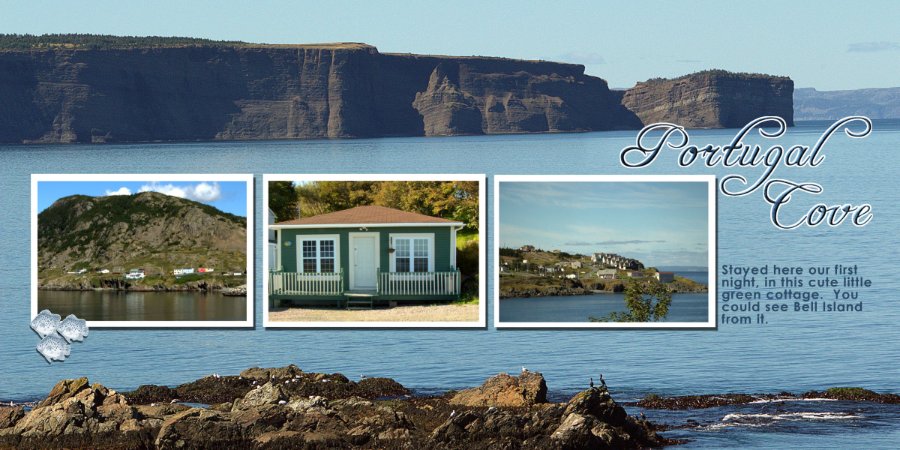
I did this layout for a photobook I made from my trip to Newfoundland.
3 points
-
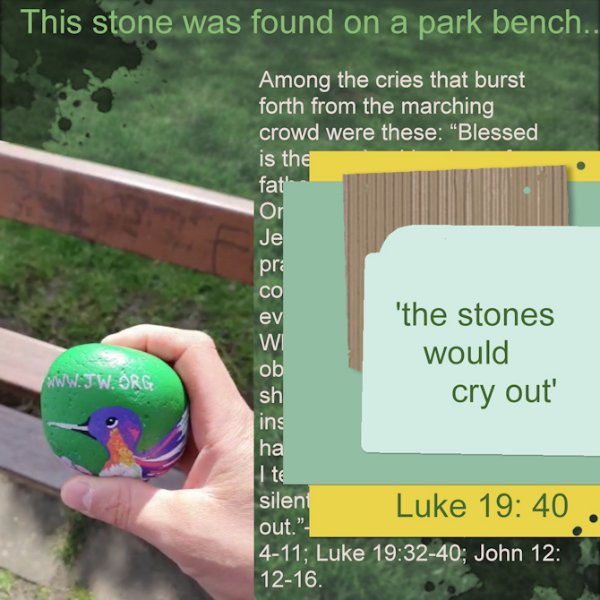
Here is another - very interesting stone - I don't know who the painter was.. photo taken last summer, too
3 points
-
Hi all, I know I'm getting a pain in the you know where, but this one is just for Cassel thanks for the window and garland, hope you like what I did with them
3 points
-
This month's almost out time to think about Feb which marks the depth of winter. This little piece is Lab 6 08 had some problems getting the push brush size to fit the length of the ribbon a bit of trial and error with that. Yes I remembered the shadows this time ?
3 points
-
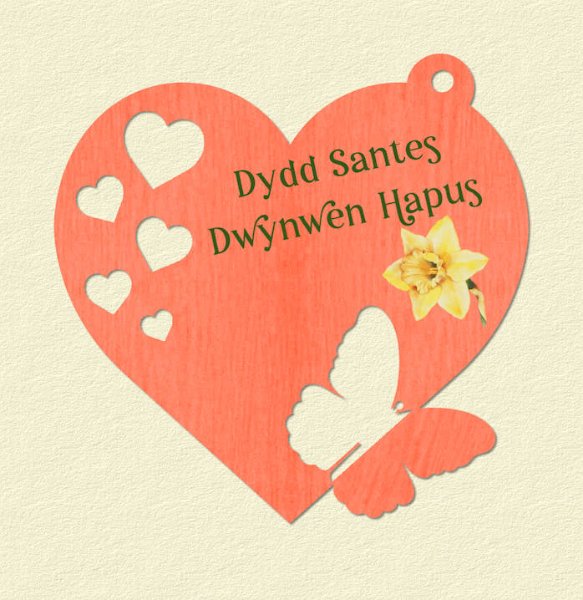
It was Saint Dwynwen's Day on Wednesday in Wales. 25th Jan. I made a tag for an ecard I sent to family and friends in Wales. St Dwynwen's day dates back to the 12 century. A true love story about a young girl named Dwynwen. The Welsh equivalent to the American St Valentines day. I used vector shapes. I had to change it to a raster to add the butterfly.
3 points
-
2 points
-
2 points
-
From 2018. My friend and her brother.
2 points
-
Thank you Ann for your description of your setup. I've been looking for the "Organizer" that I found once, then closed it and then wanted it back - but couldn't figure out how to get it back! Your description helped - Thank you!2 points
-
I LOVE gnomes!2 points
-
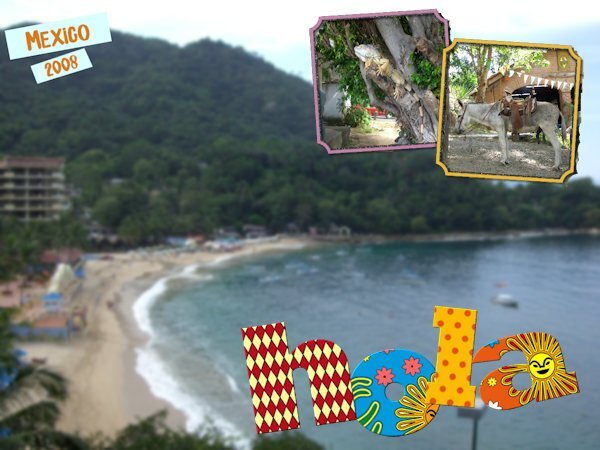
After going through my stash of photos, I realize I could do this challenge for weeks with all the uninteresting or bad pix I have! But it's a great way to use a boring photo. I made the "hola" text using individual images for each letter for the first time! That was fun. (Some edges on frames still a bit ragged....oops!)
2 points
-
Fun project! I had trouble right at the end - my quote didn't save until I converted that layer to a Raster. Is that normal? And at the top of my window, my "File" Menu disappeared from the toolbar! I haven't figured out how to get that Menu back! Thank goodness for the icons on the toolbar to help me out with saving and opening files. Any thoughts on solving this menu issue? Key take-aways from this class: Drop Shadows! Adding more layers (than I was used to) and finding sources for papers and elements. Eraser tool to create a "pinking shear" edge! Using patterns in place of solid colors. Developing my own patterns, too. Great class - now I'm kicking myself for taking so long to sign up for a class! So much easier to watch how it's done and then recreate it, than figuring it out on my own through LOTS of trial and error! Thank you!
2 points
-
Project5corrected. My pic is too blue. But I like its blue;)
2 points
-
Here's another:
2 points
-
I have used this technique several times. I like it! Here is one:
2 points
-
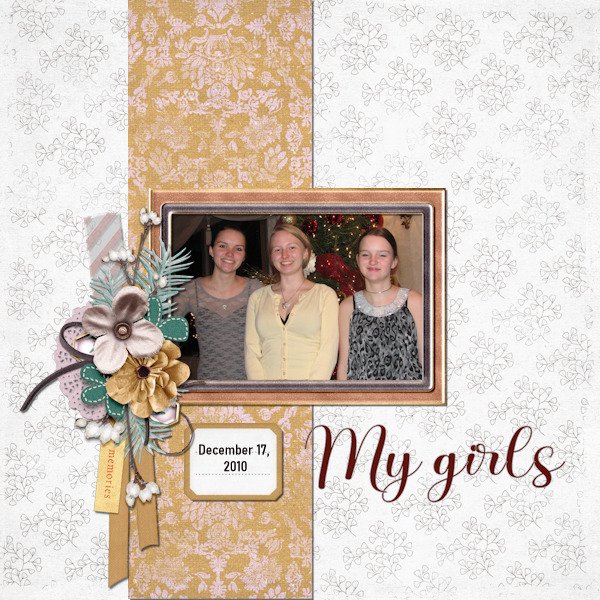
Here's the other half of the double honeymoon layout...2 points
-
Just an example of using this technique, here's part of a double layout I did for my granddaughter's honeymoon in Feb 2022.2 points
-
A British native woodland and hedgerow flower. This particular layout is one that I do quite often. Adjustment layers.
1 point
-
Project5.Last version. Probably;)
1 point
-
Another great use of the stencil tutorial in Lab 13-01!1 point
-
 morning moment precious in gold photo taken last summer1 point
 -
@Betty Welcome to the Bootcamp. Looking forward to seeing your projects. You still have a couple of days to enter the draw but this thread will stay open even if you take longer to post your projects. @Leslie JostesFor the "disappearing text", it is a known oddity. It is explained in this article. I am glad you enjoyed this workshop. And that is the exact motivation for me to offer those: I also did the guessing game myself for years, so I know the struggles! @Lesley MapleGlad to hear that you didn't panic!!1 point
-
Corrie, this is very beautiful! the stencil, the colors and the owls. Together a wonderful result1 point
-
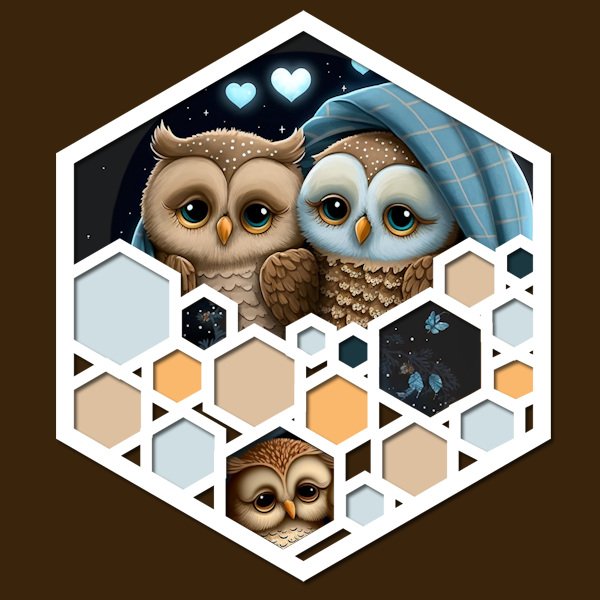
I like the idea to make a stencil, so here is my go on it. I used this lovely owls, which were a freebie by CF a couple of days ago. The colors are taken from the owls and I have saved a version of this layout without the background color to probably use on a card. Next I try the Happy Birthday stencil too and also for use on a card because it is another way to do this.
1 point
-
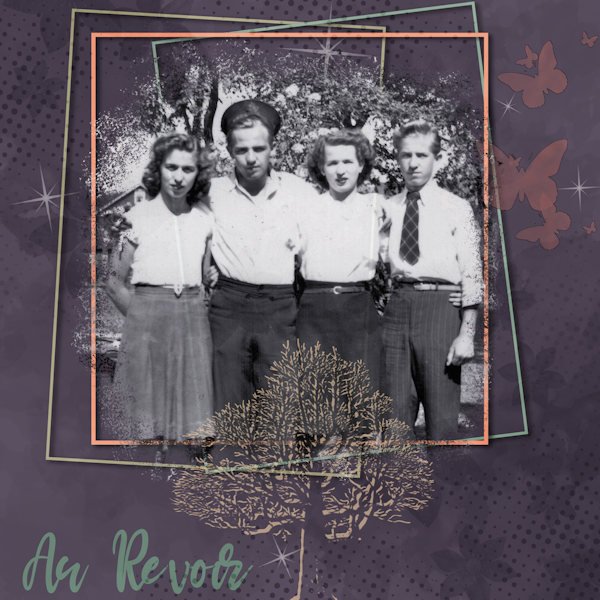
I've known for some weeks that this day would arrive, so I began working on a small tribute to my mother and her siblings, all of whom are now gone. The last uncle just died last night; his brother died last September; and my mom and her sister have been gone longer. I'm not just an orphan but uncle- and aunt-less too! Karel (called Charlie) was 96, so we are not in deep mourning, but I do feel the loss right now...of all of them. Requiescant in pace. The photo is likely from the mid-40s b/c the uncle who died yesterday has on his navy cap. He was underaged but sneaked into the Navy and served on a corvette in the North Atlantic. I do genealogy layouts for my family history, hence the tree.
1 point
-
My scatter brush paper made with script in shop Creation Cassel.
1 point
-
Another IWAS template. Photos from 2012.
1 point
-
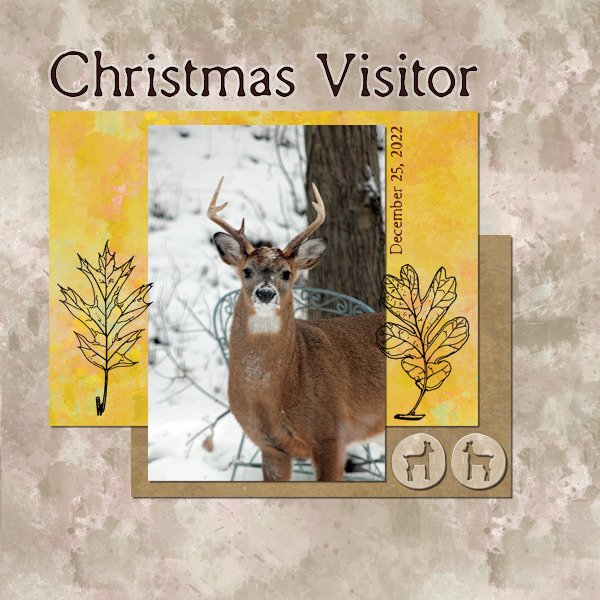
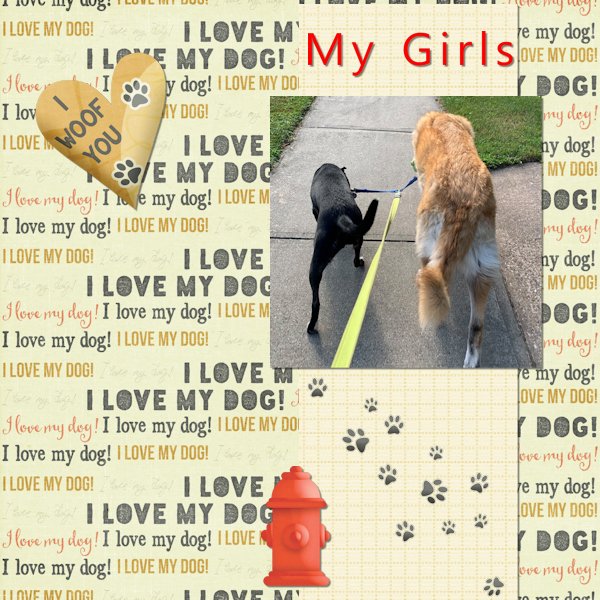
Project 2 We had a couple of buck visit our yard Christmas early evening. It had been a frigid day and they were hungry! I had my camera handy. The font is Remington Typewriter, and I used the chisel effect on the headline. I used the Janet Kemp Woodland Winter kit, from DigitalScrapbook.com
1 point
-
Project 2 really enjoyed this.
1 point
-
1 point
-
here is my project 2 , Photo is mine and the fonts are Hi Summer and Chicle kit credits in the gallery -1 point
-
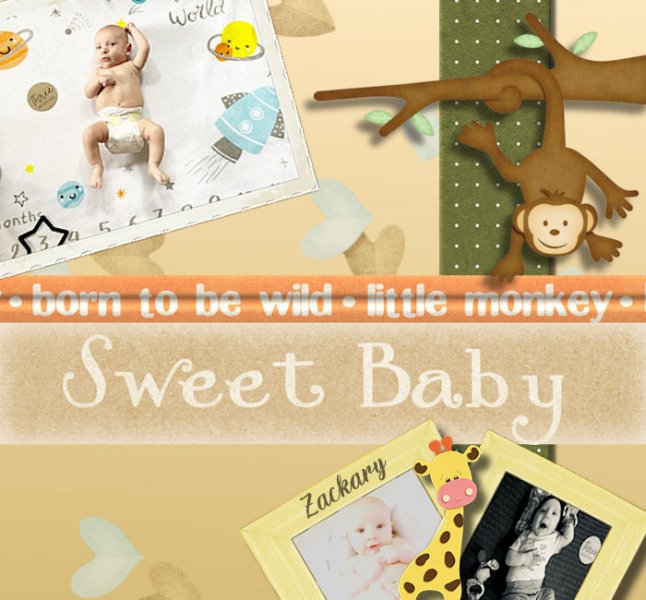
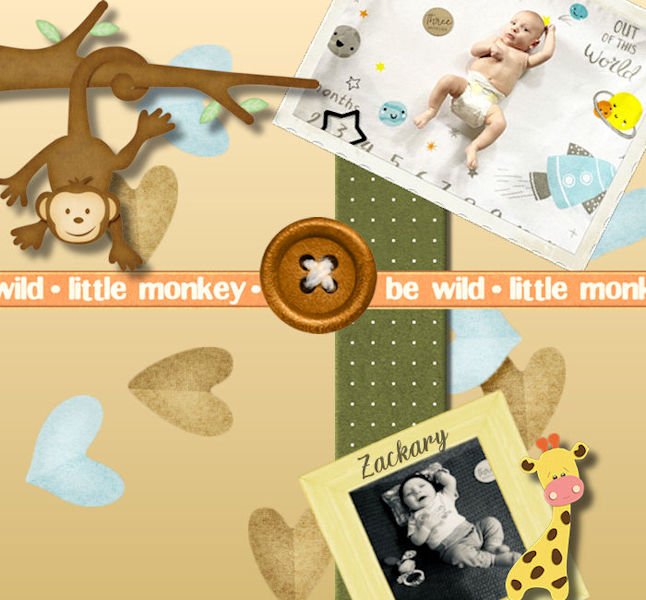
Hey there, I just wanted to stop in and say hello. I signed up for the bootcamp, which is very exciting. I am very new to scrapbooking, but I have been using PaintShop Pro for many years. I will probably be scrapbooking a lot of pictures of my children. This is my first photo for the bootcamp project; it's of my 3-month-old son (Zackary) , I'll post my first project; I did two of them (kind of roughly the same), ) I couldn't decide which one I liked best.
1 point
-
Project 1. I used the Frosty Fall kit. The drop shadow on the script text looked odd, so I didn't add it.
1 point
-
1 point
-
Hi all Stencils : lab 13-01 Background pattern made with font dingbat : Seamless Pattern Various font A Grunge overlays from Pixel Scrapper Drapery made with brush + flower brush + festoon bottle : shapes, brushes, gradient Framed image duplicated 3 times and scattered
1 point
-
My great-nieces, Corinne (6) and Amelia (2). The papers and elements are from a kit called Autumn Joys designed by Digital Design by Jodi.
1 point
-
1 point
-
1 point
-
I just finished project 1. It's always about my kids.
1 point
-
Joining Boot Camp was a last minute decision. I always enjoy going back to the basics where I always learn something new. Because of major life changes, I wasn't able to finish the workshops at the end of 2022. I went from helping out with my mom to being her full-time caregiver. The pace of Boot Camp fits perfectly as I learn to carve out time for little projects. My workspace is basic with some adjustments. I use larger icons and have a couple of Carole's scripts, Open as New Layer and Clip-to-It, bound to menus. As a recovering "Early Adopter," I use the latest version of PSP. However, I always keep the previous version in case there are bugs in the new version when it is released. The picture in the workspace is my niece and her daughter. The other picture is of her boys.
1 point
-
I've been a member of The Campus for over 2 years but I decided to try something new with my PSP setup. I activated the Navigation on the Manage tab in order to create thumbnails and then switched to the Edit tab and added the Organizer palette for the first time and voila, the thumbnails appeared as if by magic! It seems I'm forever hunting for the photos or elements I need so now I can gather them all in a Tray, which is also new to me. Here's my setup:
1 point
-
here is my screen, I use the dark grey mode, made toolbars and sometimes I use the ruler I want to use photos from Berlin , we visited 20101 point


.jpg.340281b235a955ef1516a937e934c034.jpg)