Leaderboard
Popular Content
Showing content with the highest reputation on 10/14/2023 in all areas
-
7 points
-
5 points
-
4 points
-
4 points
-
4 points
-
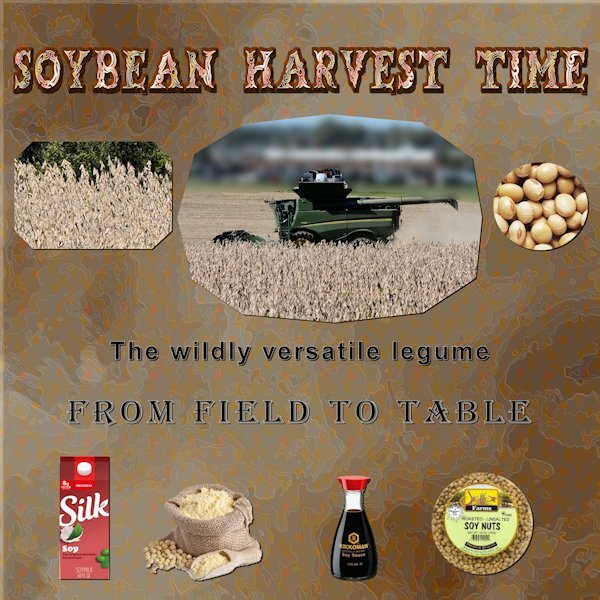
Yesterday was a beautiful day so I was out taking some photos. I got lucky and one of the farmers was out harvesting his soy beans. The two field photos are from the ones I took then. The other pics are "borrowed" from online shopping sights (I know, shame on me) The background paper was created from two papers I downloaded from Creative Fabrica.3 points
-
And many people just let things grow and never tend to them. I've had some plants put in by a company that did landscaping work for me. There is a lovely yellowish plant they put in a few years ago that I fell in love with and had them put a couple more in after taking out the hydrangea that ended up being too much for the area. My neighbor does pruning for me and has kept the original gold mop cypress to a nice height. I asked the landscaper this summer what plant a different neighbor across the street has as it looks a lot like the gold mop cypress. It goes to the roofline and pretty much hides the windows. Turns out it is the same thing I have... gold mop cypress. They have never pruned/trimmed it in all the years they have had it nor have they done anything with the shrubs by the house. The only thing that gets trimmed is a shrub that is by the stop sign and road sign in their yard. And all that gets done is cutting the weed that grows up the middle of it to the same height as the shrub. I wish I was able to do yard work but unfortunately I can't. With arthritic knees and allergies, it just doesn't happen. Thankfully I have a neighbor that is willing to do it. I pay him for it just as I pay him to mow the grass and collect the leaves in the fall.2 points
-
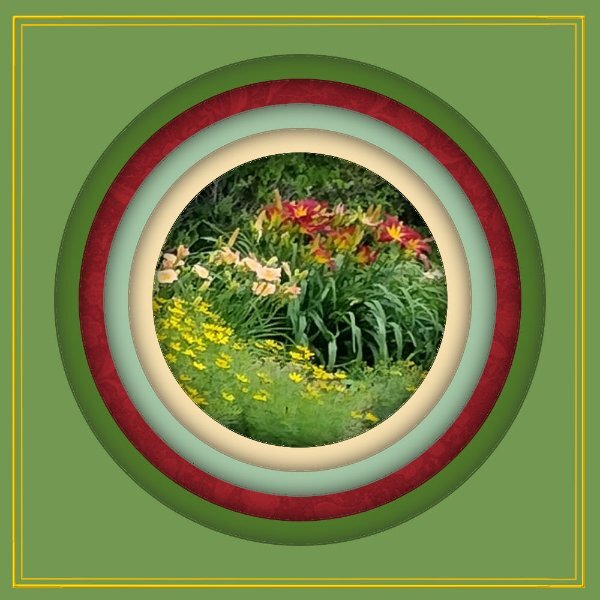
Fabulous colors. Looks like they are on a little mound or hill. This is how a lot of the flowers were at this Garden place I used to go to as it was quite hilly there. the flowers had to lean forward to reach for the sun as there was also a lot of huge evergreen trees. My sunflowers did this too. Inexperienced as i am, I put them too close to the garage wall and they had to grow at an angle to get to the sun by having to go around the eavestrough. But then, they were mutants topping out a near 10' when they were supposed to be 6-6.5 feet tall.2 points
-
Actually, that was the case. I had to go back to look where I took that from and that was the case. I was standing at the bottom of a slope and the hedge was at the top of the slope and the flowers were just under it. I know that your winter scene will be beautiful. Love your pictures of the Hudson Valley. The colors are so vivid. It is beautiful country. In fact the whole of New York state is beautiful. I only saw the upper region of it, but I loved the views.2 points
-
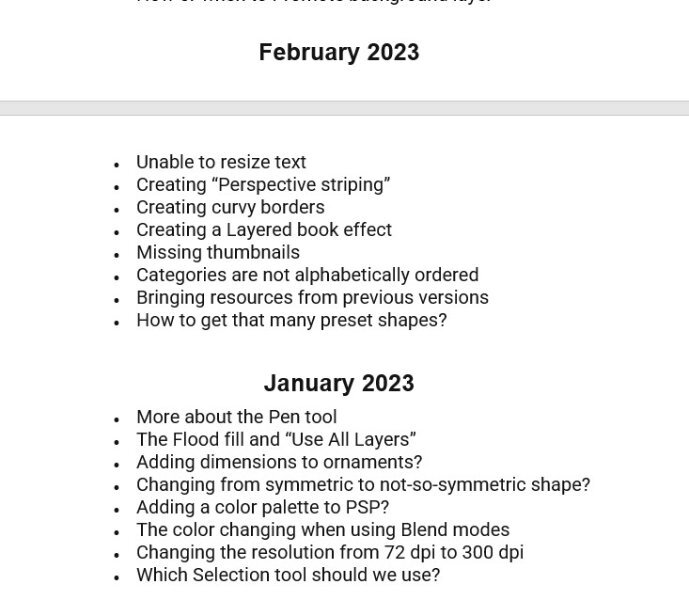
I'm pleased you have found it. For anyone else wanting to know how to create the effect, scroll through to 38 minutes and 30 seconds. Carole demonstrates the technique after creating a shadow box. What threw me was that I was looking at the list of contents of the Q&As. As the shadow box wasn't mentioned. So I scrolled through the months where I thought it would be, and found what I was looking for. Actually Jannette I use 2 slightly different techniques, with the same result. I use vectors, as the edges are ever so much sharper and cleaner. I create each layer, with the colours I'm going to use. ( from vector shape) Creating the shadows after each layer.2 points
-
Can anyone remember the short tutorial Carole did on creating a cut out, similar to what I did in this page. I'm unable to find it, I think it may have been a zoon tutorial. It isn't in the shadow box masterclass. I've done a few of them, using 2 different techniques. I would like to refresh my memory on how Carole did it. Please send me a link, if you know where it is.2 points
-
1 point
-
I love how the background, you can see what it is but doesnt overpower. And of course your text on a path is mimicing your words about the Merlin's flight patterns. Magnificent birds. I'll have to get onto FB to see the full size one.1 point
-
ABRMate will convert the abr files to png files. Then, you would need to export them into a brush.1 point
-
Ah, this worked out nicely for one of the new great grands this year. I didn't really do a layout for Jonah, Logan's little brother, born June 20th. He was GG #4 and we're also welcomed Raja as GG #5 when I did the Sketch Challenge. I found neat sequin photo corners from Elif Sahin at Pixelscrappers. The clips from my stash labeled LF-Choose-to-Shine were originally copper but I changed them. The Polaroid frames are all part of a vintage collage. The fonts are Bungee Inline, Cabin Sketch and Brush Script. The background paper is from a Marisa Lerin Kit called "Touch of Delight." The photos all came from the Paolucci family. Ilana is my youngest granddaughter, with my Laurey as her mother.1 point
-
1 point
-
Susan, inexperienced or not, it is quite a common mistake. Especially when planting trees. Many people forget or do not take into account that a 6inch sapling will grow to possibly to 100ft tall, and spread branches. Same goes for flowers. It is amazing how plants will adapt to their location, twisting, turning, stretching to reach for the sun.1 point
-
Two done, another two seasons to do, and you will four lovely prints, which will look great wall mounted.1 point
-
1 point
-
Carole has so many wonderful techniques, remembering them all, and where they are can be a challenge in its self. I have started to use this technique to create some Christmas decorations. Using winter scenes. You matched the colours well. Looks like your flower bed is on a bank sheltered by a hedge. With the flowers facing towards the sun.1 point
-
1 point
-
Very nice, Mary! Your colors are gorgeous. The only thing that looks a little odd, to me, is the photo is tilted to the right and the flowers end up growing sideways a bit. I'm not sure if that's what you intended...1 point
-
1 point
-
I'm in too. But on Saturday 21 Oct. some of my grandkids come to visit me. One of them is ICTer. He will watch my laptop. He might restore my laptop to factory settings, cause my 'Thefonthing' is put down by Microsoft. A PC virus crept into it in the spring. Now they think it comes from there. Or do their computers think so? He said over the phone that that is the best thing in these situations. Then it will take some time before I get everything back on track.1 point
-
I did too. CF Spark is ok and I have used it several times with good results. Also have been able to download fonts and graphics which are not the freebies.1 point
-
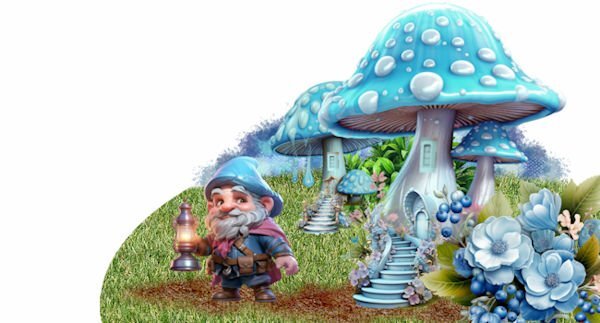
Now that the fairytale months have arrived, I can't stay behind. NO Halloween here. Nevertheless, I am in a fairytale mood. The scrap kit is from Adrienne's design AI. To be able to place the stairs against the mushroom I had to make the base of the mushroom a little wider with the warp tool. I just installed some windows in it too. It came from a castle. The grass just comes out of our picture brush.1 point
-
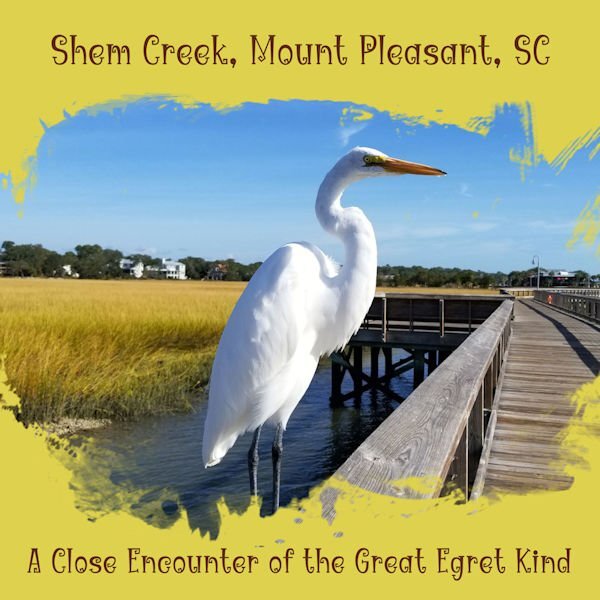
The best kind of close encounter! How do they stay so white. Beautiful bird and photo. I like that mask. I did not know Bourico Casper is Lady 22.1 point
-
1 point
-
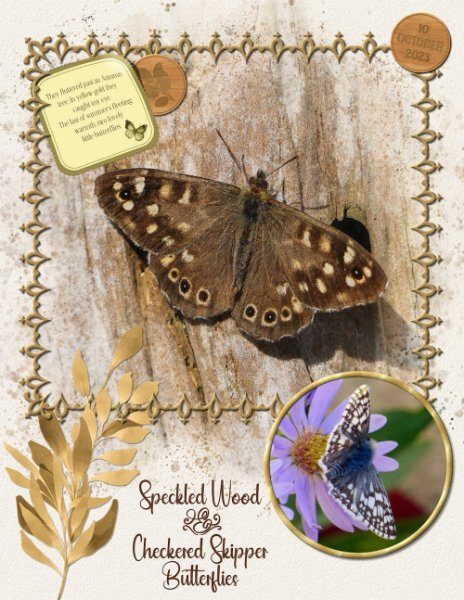
I still have 2 native Aster plants with some flowers on. The little skipper turned up on the 10th October. I was pleasantly surprised to see, and be able to photograph it. Last night I worked on finishing off creating rectangle, and square frames using Carole's frame punches. Now I have all the punches framed, ready for use. I used one them in this page, also used the wood token 2 tutorial to date the page.1 point
-
Susan I can only repeat what I replied to Cristina's comment. If nothing else, some of my pages may inspire you and others, to do something similar.1 point
-
Cristina, you are always so kind. Although the little details are subtle, they do make the page stand out, which is why I like add them. Of course I have Carole to thank for me being able to do such little things, as without the campus (tutorials etc) my pages wouldn't be as interesting for the viewer.1 point
-
I like them too, they look so real. And I like that the frame they are tucked under is a little off kilter (crooked) and the photo is a little lifted. It's those little details that elevate the layout. Aren't they a delight to discover?1 point
-
I started playing with Vision FX. Uses some memory, but gave nice results. One minor thing is, when you choose one out of five, that's the only one you can Save. It is save and close. See screendump. Because you have to close the plugin, I tried it again with same image and prompt, but got other results than the first try. Typical AI programming !!! An dthere is no manual available, but we have the corel forum and there you can find a some explanations about the use of the sliders.1 point
-
I have been working on this collage for my grandson. He sent me the pictures that he wanted to include. I made the hearts and the arrows and used a lot of techniques learned in the Travel and Magazine workshops. The background was made using the plug in gmic. The original size is the poster size 24 by 36 and will be on canvas from Easy Canvas.1 point
-
That is the nice thing about this platform. We are all so different from each other. We seem like a good-sounding orchestra together.1 point
-
Thank you for that Sue. It was pretty easy to imagine it that way. I love leaves too, especially this time of year. The color in the dried ones are so nice. And I have an indoor cat who makes it her mission to try and capture them as they fly by the window outside, so in turn, I spend a lot of time watching the leaves she is trying to chase down. We also have big trees on our street and in the fall it's raining leaves, really spectacular to watch. I have a co-worker that I walk into work with and we are constantly stopping to look at leaves or various natural things, we are delighted when we see a little whirlwind with circling leaves in it. The other day the wind was making the leaves tumble across the pavement and the leaves make the mose interesting sound. although I did say it sounded like giant alien insect feet scampering about (at least that's what Hollywood wants me to "think" is giant insect feet scampering about). Nature is awesome.1 point
-
We all have different approaches to starting a page, and seeing it through to its fruition. You and I couldn't be more different in our approach, from start to finish. I always start with a photo or photos, from there the photos determine the colours, and layout of the page. I have very few resources. Probably a dozen kits. I do have a nice small selection of elements. Also a small collection of fonts that I favour, and use repeatedly in projects. I like to create my own elements, and papers. So in a nutshell, my way of working is to select photos, and see where they lead my creativity. My aim is always to focus on showcasing the photos, with a minimalistic, and relevantly plain no fuss papers. That doesn't mean I don't like busy scrapbook pages, on the contrary, I do. It's just not in my nature or my style to create pages like that. You must sometimes have a heck of time deciding what kit etc to use. Only joking! I never started out a scrapbooker, which may have something to do with my style, and approach to showcasing photos.1 point
-
quote, I changed the font for the main text Heading. As I didn't like the font used for the font challenge. Although it isn't Halloween themed, it is a very seasonal, appropriate page, for this time of year. We must make choices in this hobby as well as in our daily lives. Subject, A theme, Colors, Arrangement. My first choice is always the subject, the most difficult one. Sometimes I use at the same time two windows beside each other and make them different. In all these years I collected thousands and thousands of scrapkits and single pngs. I've all the mushrooms in one file. Leaves in another etc. etc. And on top I've made color files. Then I open the organizer and make a choice. That's my way of working.1 point
-
1 point
-
1 point
-
1 point
-
Hallo Doro, versuch es mal mit den Videos von Carole, ich hatte auch Angst es nicht zu verstehen, aber sie spricht wirklich sehr akzentuiert und deutlich, und mit dem was sie macht und spricht ist es wirklich gut zu verstehen. Viel Glück im Bootcamp, und wenn Du fragen hast immer her damit , hier ist immer jemand der hilft lg Anja1 point
-
GRANDDAUGHTER ANNA & HUSBAND, TJ, VISIT HIS FAMILY IN SOUTH KOREA - SEPT 2023 - Anna and Tj live in San Jose, California. She is the daughter of my daughter, Debbie, and aunt to baby Magic and Raja. Anna is a Speech Language Pathologist and Tj is a Senior Software Engineer for Meta. They've been married for 6 years and have 2 cats. All papers and embellishments are from Marisa Lerin "Korea" kit except for flag and map from Google search. Scraplift: Travel Challenge Day 8 by Mary Solaas (mostly for paper layer design). cass-date stamp 13-softlight layer effect +reverse shadow. Font = Agency. This is a departure for me. I usually prefer cleaner, less fussy pages, but this just worked this way, I guess. Maybe it's the Korean influence. ?1 point
-
1 point
-
1 point
-
Love this, especially the plaid. You are on a roll with layouts. I will be working on Monday. Long weekends are my least favorite weekends because they are the opposite for me, they are short. We have an extended Friday shift to have a shorter Monday shift. Which is just means less weekend for me. But I am thankful I have a job and will remember to be thankful on Monday.1 point
-
1 point
-
1 point
-
No need to prep since the very first lesson will be about setting it up. Just relax. The Bootcamp reuses the tutorials that are actually available already, so you CAN go ahead and check them out HERE. In the bootcamp, there will be additional links to supplies, and such, but you might not need more as I assume you already have some! Shhh! And unfortunately, I don't have a written version of those tutorials. I might look into that in the future though. Thanks for the suggestion.1 point
-
Hello Carole, I have now registered for the PSP course here. I already have the trial version. Could I maybe do a little preparatory work before the course starts? Make default settings, get to know tools or design papers, e.g. B. PI also works with layers. Do you have free tutorials to read? (So that I can copy and translate them. Videos in English are a bit difficult as a beginner) Have a nice sunday. Doska1 point











Resized.thumb.jpg.d25811db03a63358cedab1e79f527635.jpg)


.jpg.74d3420d2013f8bca83a1d4c0e89cfd8.jpg)

