Leaderboard


Resized.thumb.jpg.d25811db03a63358cedab1e79f527635.jpg)

Popular Content
Showing content with the highest reputation on 08/28/2023 in all areas
-
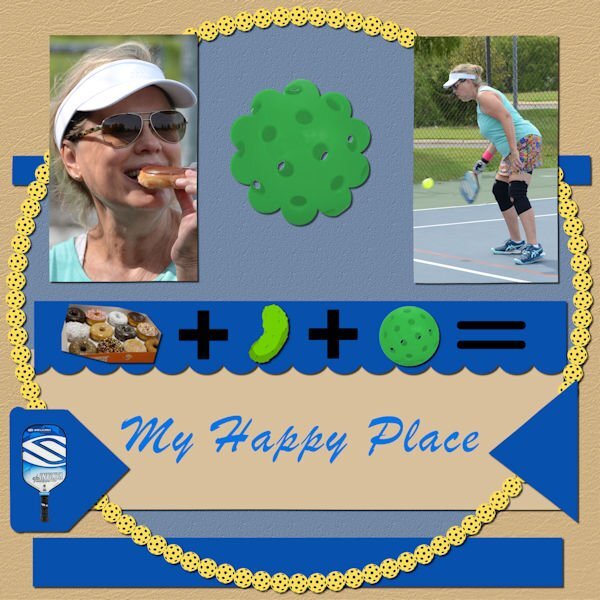
here is my page for day 5 and 6 papers made by me from the photos using the tutorial for the postcard and stamps, recolored a button made by me, and used the datestamp script by Cassel template by Marisa Lerin11 points
-
I don't have access to the pics I took in Ireland as they were not digital and they ended up in storage. Instead, I decided to make stamps from some floral pics I had taken during a spring walk a number of years ago.9 points
-
Carole, I know now that I haven't done this workshop before... It's different than I thought and I like that it's different. Day 3 & 4 Doing the stamp took me the morning of yesterday and today I did the double page but I forgot that I had to do a logo. I'll add it tomorrow, it's too late to continue now. I like the achievements presented so far. Nice job everyone!
 8 points
 -
.It's Sunday and I found some time for this incredible workshop. Many thanks again, Caroline and everybody else who has posted their fantastic projects here!. This is my day one with the region shape done in what I intended to be a distressed or chalky stamped look. Not sure if it is recognizable as such but I am not too unhappy with the way the shape turned out. Supplies I used are all freebies by Robyn Denton of Dancing Tiger Designs (dancingtigerdesignsaustralia.blogspot.com) Here is my day 2 indicating the way to get to the destination. Again supplies are all by Robyn Denton, except the background by myself. My version of the day 3 prompt 'postage stamp'. Leather tag was the prompt on day 4. I'm sharing them here. [img]https://i.imgur.com/GzsnyJu.jpg[/img] I made a tutorial on how to make a chalked look (like on the day one prompt layout) in Corel PSP. You can dl my tut here. I must have mixed up something with the postage stamps.... Anyways here are the missing days, and some snail mail elements and a frame template that I am sharing here. Some more leather tags, prompt day four. These tags are a bit traveled , which happens going from France to Belgium.... Click image to download.
7 points
-
Here is the Leather Tag I worked on. That was fun to do. Three more Lessons to go and I have already learned to do many new things with PSP.
7 points
-
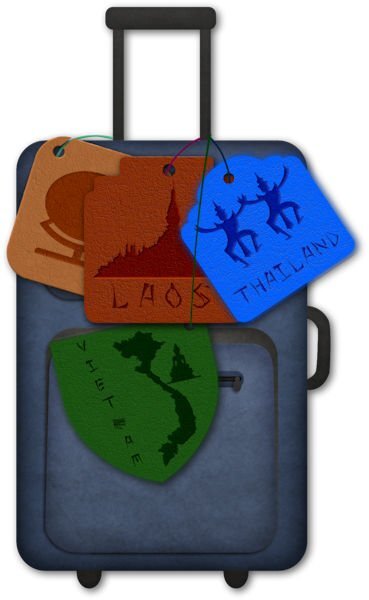
Finally, Day 4 - I didn't use a template, but decided to attach my leather tags to a suitcase provided by lsj kit called" world geography101." The font is an open license font called Peel. The graphics were downloaded from pngtree.com. I tried to use pngs to reflect the different countries.
7 points
-
And this is my 2nd layout of the Grand Canyon and the photo of the condor comes from the internet. I have seen 2 condors perched on a rock but I don't have the photo equipement (very big telelens) to get a shot like this. I have takken a couple of photos of them but when I would use those here it won't show much, but everybody seeing them was very excited, there was a general buzz going round. On this page is my tag and I used a photo for the background too. I found a nice journaling card in my stash for writing the dimensions of the canyon, it is huge!!! On the day I was visiting, there were birds flying around, so that's why I included some.
6 points
-
Ok, so here's my Day 5 & 6, individually and as an Open Book, plus my postcard for readability.
6 points
-
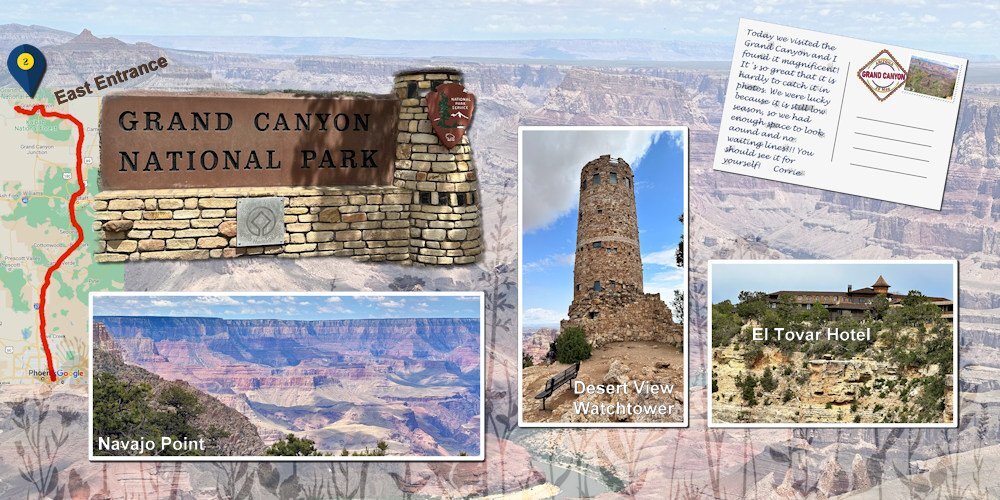
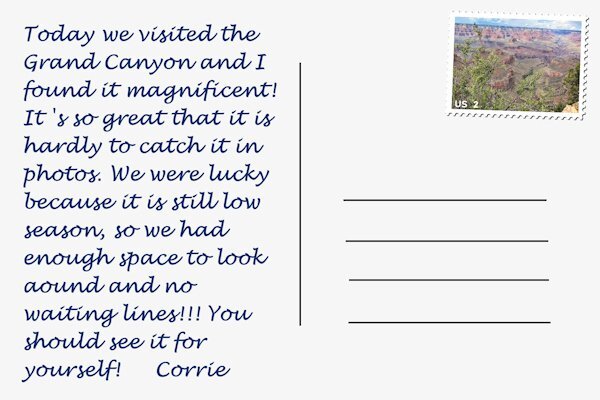
I'm getting on track now and this one counts for day 6 because I made a postcard with a little story. I used the Extra template of day 4 as a starting point but I changed it (as always) for my photos. The Grand Canyon is thrilling and the photos don't do it justice. My photos were a bit hazy because when we started out it wasn't clear, but I'm becoming a fan of the new Haze removal tool! However it should be used with care not to overdo the effect. Later in the day it became more sunny and my photos are ok from there on. I'm going to make a day 2 as well. I included a separate image of the postcard for better viewing here. On the big layout I smudged the text a bit, my cards always became smudged when they arrived. One more advantage of using email of facebook, whatsapp etc.
6 points
-
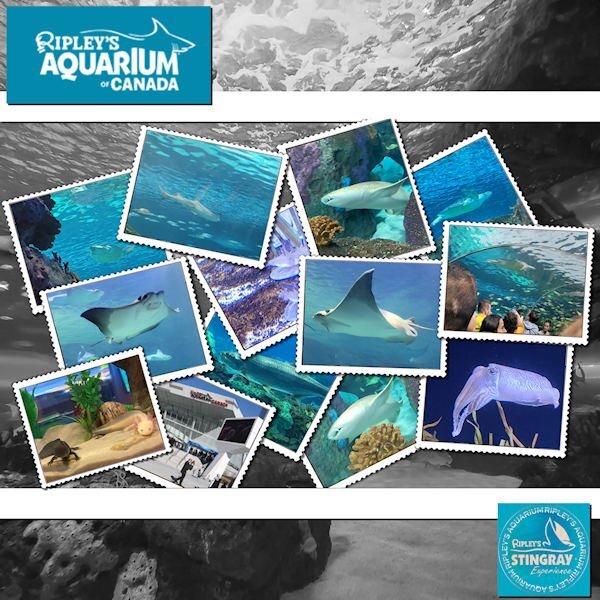
This is page 5 - visiting Ripley's Aquarium in Toronto. I incorporated the stamps to showcase the many photos I was given. Thanks to Gerry for the inspiration! I used the cass-Scattered Photos script but had to re-arrange everything anyway, but it gave me a start. The background is another photo from the aquarium but with a layer effect of Luminance (Legacy) which allowed the colors of the scatter to stand out.I will now do page 6 and incorporate it with this one into another Open Book layout.
6 points
-
I had a lot of trouble with this tutorial. It's taken me a couple of days to get these done. In fact, I tried so many different things that I'm not sure I know what I did. By the time I got a result I liked, I had no idea how I got there. For someone who usually keeps great notes, this is very frustrating. lol5 points
-
Halfway through finishing uploading my holiday photos and creating masks for them from the template, I suddenly realised that I had previously purchased Cassel's 'Clip To It' script and not only that had been useful and bound it to my layers palette! Duh! Much easier now changing the template areas to Masks. I haven't tried it yet but wondering if the photos would benefit from a drop shadow like on the pots card. I am not sure what layer to use for each Mask group in the template though.
4 points
-
Day6 postcard. I have made a crumpled version as my postcard got messed up in the post. I suppose I should have warped the text to match the crumple. The font used is Harabara Hand. I used a white fill with a large stroke to try to give a scratchy look.
4 points
-
Day 3 I really fudged and used scripts to create these two datestamps. Datestamp 6 and datestamp 7.
4 points
-
@SuzyThe templates are there for inspiration and of course, there is no way for me to know exactly what kind of templates and photos one will want to use. If you don't use those templates, they will be stored for another project. I wanted the DIAMOND members to get something more for future use if it is not for this time around. That page with all the stamps look very interesting. @Corrie KinkelNice variety of datestamps! And yes, the scripting course will wait and you should easily catch up. @Susan EwartThat could be a way to go too. Since various elements are taught throughout the 7 days, one can combine them into one page. I just wanted to add something exclusive to the DIAMOND members. @Ann Seeber There are different styles of scrapbooking: some will include lots of embellishments, some with none, and some with anything in-between. If an element fits, it will fit, but if the images are showcased enough, that is ok too. @Rene Marker That is exactly what I keep saying: templates are a starting point. From there, you can go in any direction! @Bonnie Ballentine Scripts are tools too. Why not use them!? Eventually, you might put everything together. @Anita Wyatt It is very tempting to fit the photo to the space, but it is better to crop some edges than to squish the photos. It is like fitting a round peg in a square hole: to make it fit, one will be larger than the other. No way around it. Check this article on resizing photos. @Gerry Landreth Oh no! She is caught already? What will happen to the rest of the workshop? Unless she escapes? @fiona cook If you have small details to show, you can size a double page to 1000 pixels OR split them in two too! (oops I now see you did exactly that!) @kasany Can you share a little bit of context for your project? I am unclear why the baby feet. @Michele I am sure you will find occasions to retry the tutorial so you can figure out how you did it correctly. @Donna SilliaA great idea to attach the tags to a suitcase! @bina greene Even if the shape of the map is not obvious to outsiders, you will include that information somewhere else in the layout or album so it is not an issue and the texture makes it unique too. Keep it up. The lessons will stay available until next Sunday so you still have a week to catch up if you need to, or that long to change your mind (which happens often!). Great work everybody.3 points
-
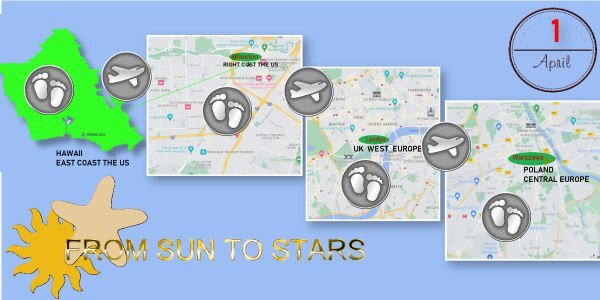
My travel FROM SUN TO STARS /from sunny Haitii to see stars on the top of MaunaKea/.
3 points
-
Day5 Decided to add the postage stamps to the second DPS which is still in the making. Yet to have a go at the focus template as such a lot to do on the others. Only just caught up to Day6! It's a bank holiday weekend in UK and at the moment the sun is shining so may be the outside backons.
3 points
-
Travel Tale -4: I used a different template so I could place the 2 pictures. better. The template is part of the Templates Carole offered during a workshop. (Template P) The pictures show the Residence Palace in my hometown Würzburg. The photos are mine, I added the date stamp and Würzburg's Coat of Arms. The Font is Franklin Gothic Heavy, which is one of the default fonts on my computer. I will work on the fine leather tag tomorrow. Here is a short description about the Residence Palace which is right downtown Würzburg. I used to sped a lot of time in the beautiful gardens to do my school home-work and feed the birds and squirrels. One of Würzburg's famous landmarks is the Würzburg Residence Palace with its Court Gardens and is considered by UNESCO as “one of the largest and most beautiful” palaces in Germany. It was built in the 18th century by the most skilled architects and artisans from all over the world, led by Balthasar Neumann. .
3 points
-
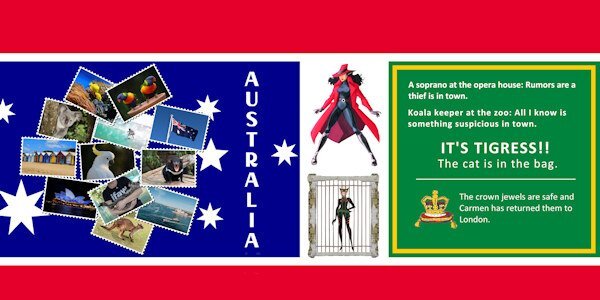
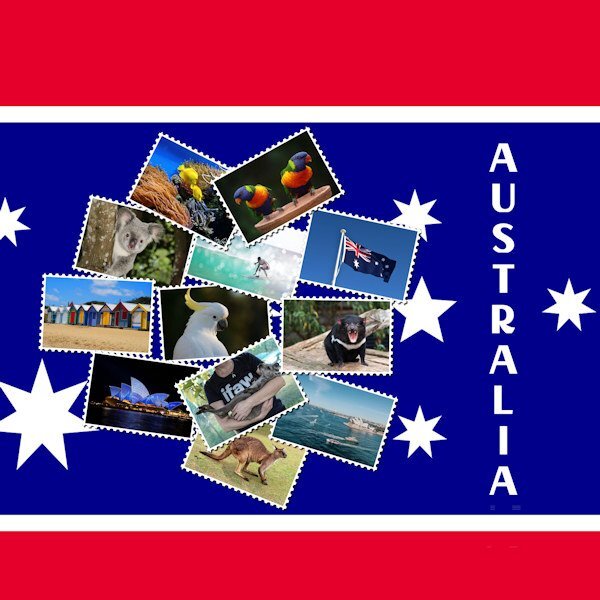
Day 5. The thief has been apprehended, and the jewels safely returned. Good work gumshoes! And thus ends another chapter of Where in the World is Carmen Sandiego. All of the pictures came from Pixabay. The Carmen and Tigress images came from DeviantArt. Red, white, and blue are the official colors of Australia. However, green and gold are the adopted colors for their sports teams.
3 points
-
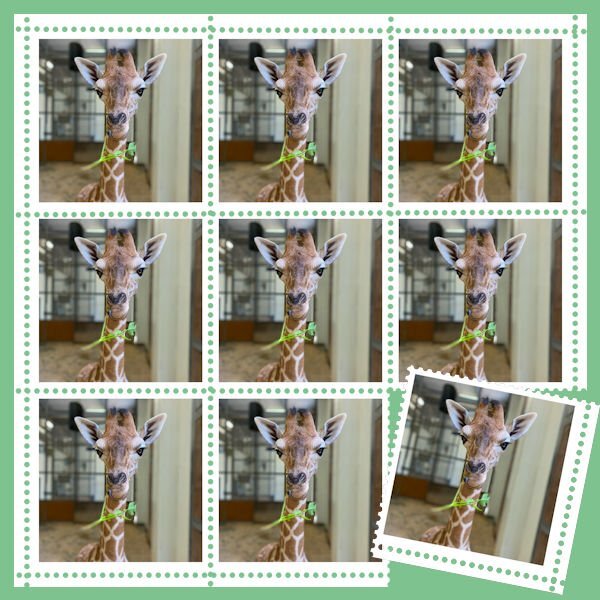
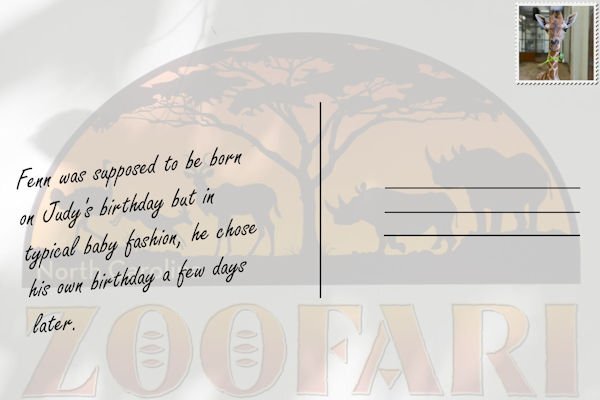
Day 5 Stamp The photo is Fenn. He was supposed to be born on my friend's birthday...you know babies...they are born when they are ready...Fenn entered this world 10 days later.
3 points
-
You all already posted beautiful pages!! Due to unexpected circumstances I have not yet been able to continue. This is what I'm doing for day 3, with the date stamp. I don't know if I will be able to finish this workshop. But then it will be for next time. I also wanted to use the openbook script, but I immediately made the design in a double page and the script only works with 2 pages of 12 x 12. I thought of that too late.
2 points
-
No worries, I figured out how to use a webhost... I was getting '64,2 KB total upload space' which seems a bit small. I also wrote a tutorial, to share with everyone here, on how to achieve the chalked look in Corel PSP that I'm showing in my region shape on the Day ONE prompt page. Here is my share again.2 points
-
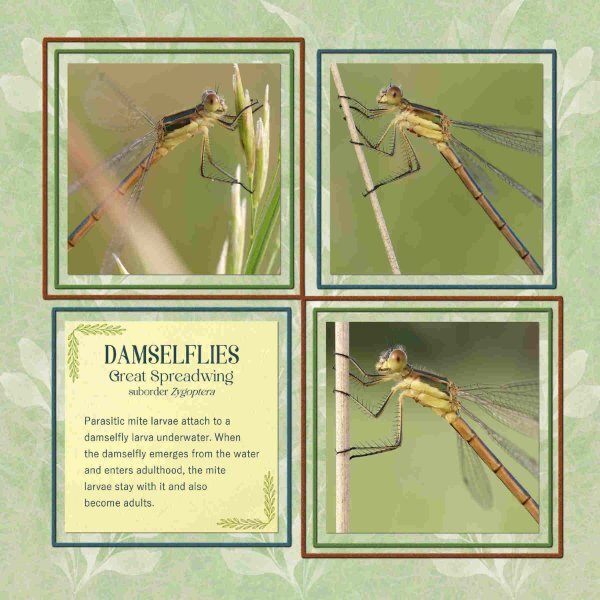
After some thought when I was outside, I came up with this for the Random challenge. I created round beads for the numbers, and a label specifically with a place to put the numbered beads. After looking at Julie's cut out page, I decided to do a cutout for the word Robin. Scalloped edge is always effective, and simple to do. I wanted the labels to be together. I thought to pin them, tape them, thread sting though them to keep them together, and thought no, it might look to busy. Any suggestions would be great, but for now I'll leave the labels as they are. This random challenge was ideal for creating a page on the cycle of the Robin, as I said I was going to do, after doing the Oriole page. Only the Wrens are left to showcase in a similar fashion. Once the Robins have fledged, like many of the Blackbirds, and some other birds, they spend several days on the ground, before taking to the trees. They are able to fly short distances, but when on the ground they aren't to far from low cover, to dash to when they feel under threat. Within 10-13 days they go from hatchlings to fledglings. I have documented that process too.
2 points
-
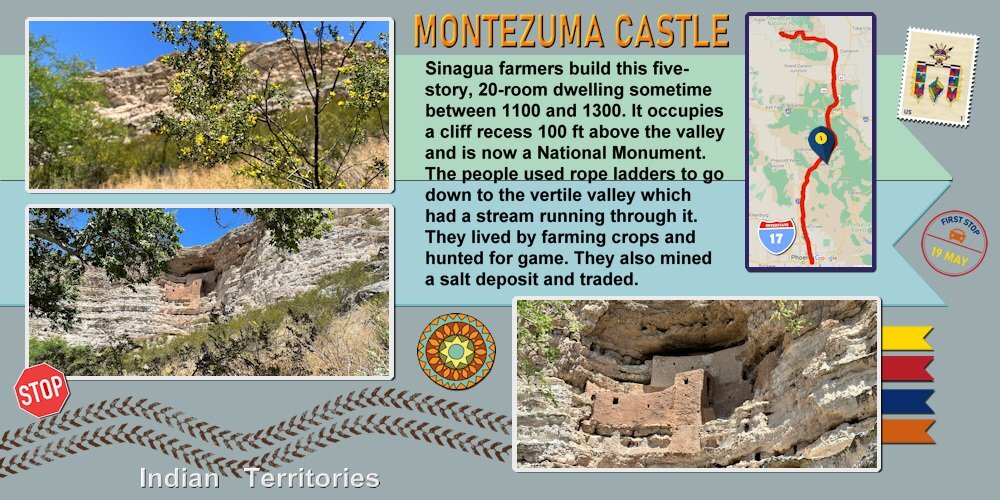
I suppose this counts for day 5 because it has a postage stamp and a postmark too. The tag from day 4 will come in day 6 otherwise it doesn't fit my photos from this trip. I used the extra template from day 6 but changed it for my needs. Just like some of you have said, a template is only a starting point. The postage stamp has an Apache (if I'm right) textile. I used very toned down colors, I first tried more different papers but for me that was too busy with all the other elements and the story. This layout gave me the opportunity to use the tire track tube and thanks to the vector workshop it was easy to make a nicely curved line for them. The highway shield I have made some time ago and I just have to put the right number on it. Ladies thanks I'm feeling ok again, not really great yet. I do not have those dizzy spell often, the last one was maybe 2 years ago.
2 points
-
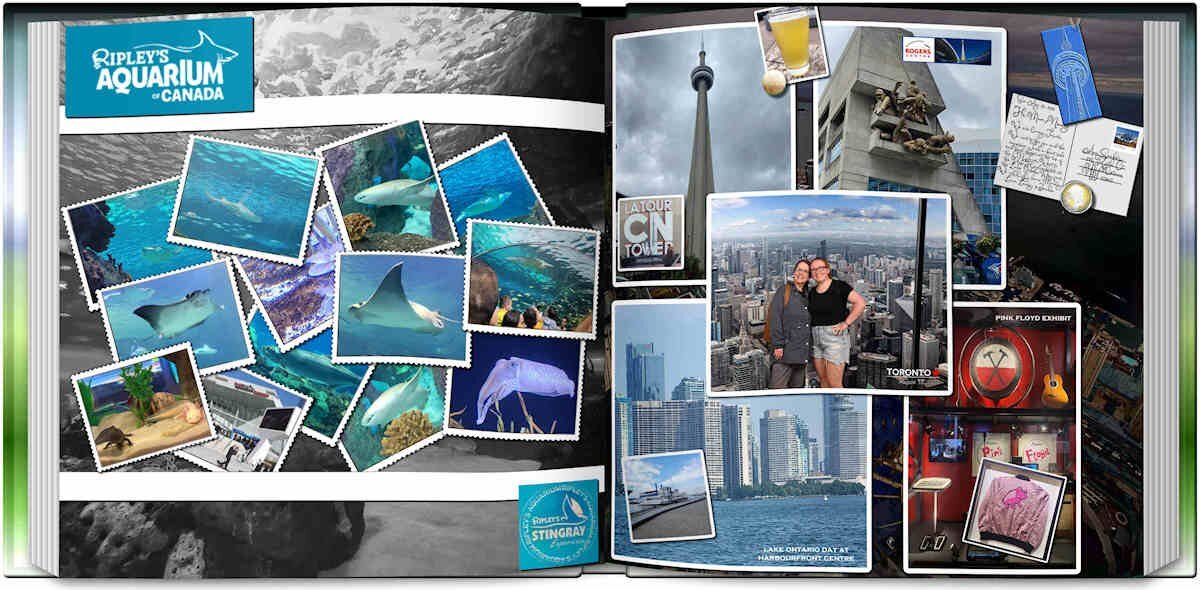
I have another OPEN BOOK for you. This is page 3 and 4 of the Toronto trip my daughter and granddaughter took last week. This time they visited the zoo (of course, because Jackie is also a zookeeper. Can we call it a "busman's holiday?") I already posted page 3 earlier but now I changed it.
2 points
-
Day 6 Postcard I didn't want a white background for my postcard so I used a photo and reduced the opacity.
2 points
-
Day 4 Leather tag
2 points
-
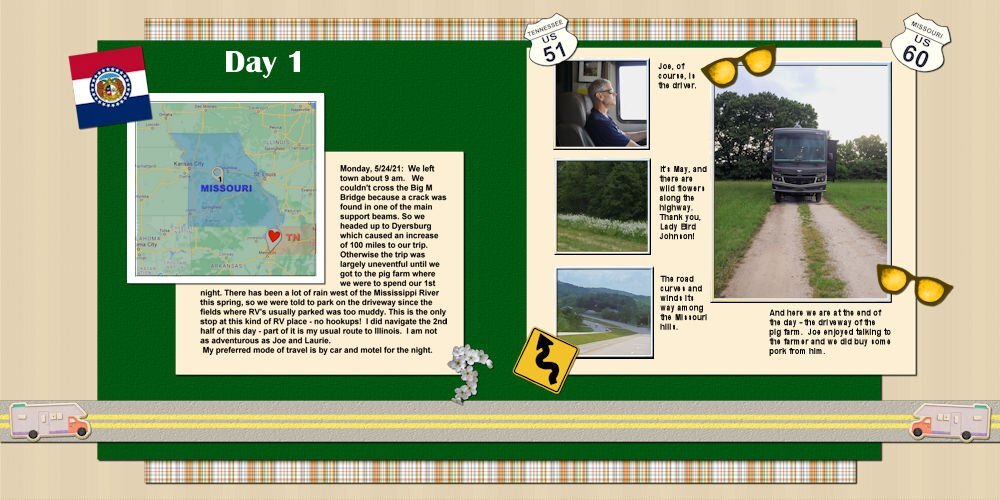
Well, I finally finished the 1st 2 pages after the opening. The sunglasses and curvy road sign are from PS DiHiller; the RV stickers are from PS Marisa Lerrin; the rest of the elements and papers are mine; the MO state flag and state flower (Hawthorn) were obtained from the web. The Day 1 font is Britannic Bold and the journaling is Arial.
1 point
-
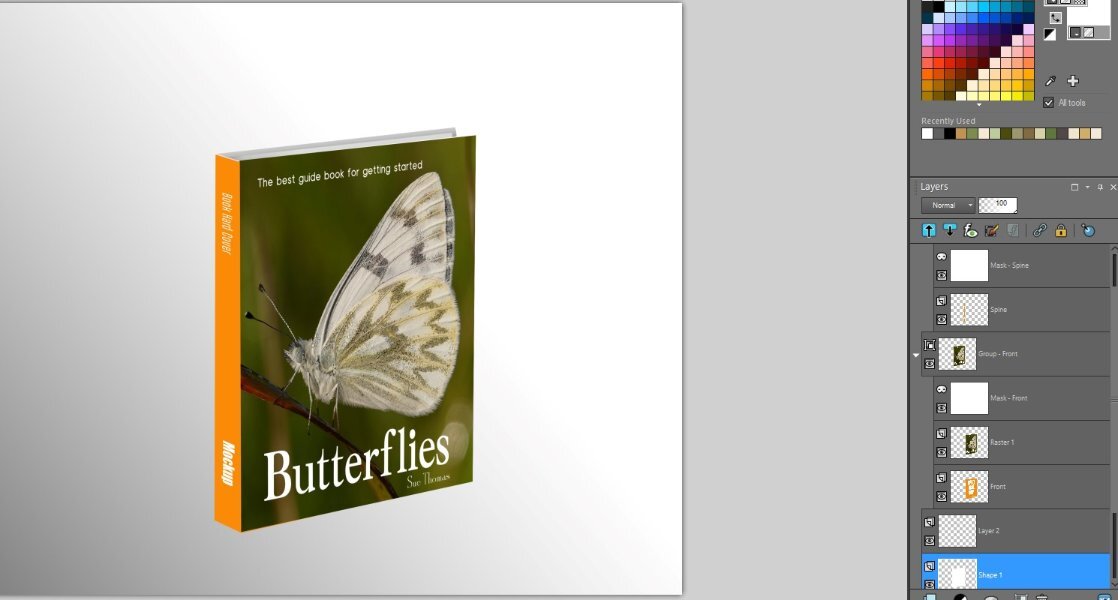
The mockup links you sent me, are not working for me. The mask you used in the tutorial is how it should be. In this mockup and the others, you'll notice the mask is all white, I've included a screen shot. Being a PSD file, how would I overcome this blip? Changing the mask isn't that easy. I decided to create some books to use in future projects. This particular mock up I found on creative fabrica. I'd appreciate some suggestions please.
1 point
-
These are beautiful. dont you find these look amazingly like real stamps. It's a great tutorial.1 point
-
I feel bad that I did nothing for this workshop. My idea, after the first one fizzled out (due to rain) got very involved...in my head, which is where it stayed. I just got so busy with hubby off that I had no time, even though i kept thinking i would. Here it is, Sunday night and still no time. I hope to work on something and post in the What are you Working on forum.1 point
-
There is a limitation just because the system needs one but i doubt anyone would reach it. What message are you getting?1 point
-
Wow! Bina, these are all very beautiful. thank you for the link I love your leather tags and that postage stamp on that background is really cool.1 point
-
We would do this too. Even with holes punched in the lids for air, they wouldn't light up that long so we would usually let them go when they started "dimming".1 point
-
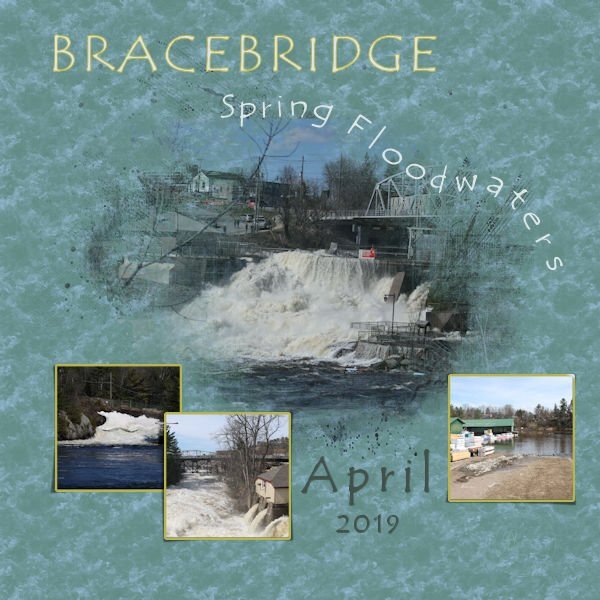
I started the Masks Workshop and decided to combine the August Palette Challenge. The pictures are my own of the heavy flow of spring melt which flooded some properties like the lumber yard in town. The Template is from the class courtesy of Alinamaria. I used the Wet Fall Leaves texture scaled to 250 to give the background a tumbling water look, and used Tempus Sans font with some kerning near the end on a vector path to give the look of the letters going over the falls. ? Both are included in PSP. Thank you Carole for all the lessons taught that I managed to learn to create this page. @Sue Thomas your Humming bird layout is beautiful and your back stories are always so interesting.
1 point
-
This is STUNNING Julie! I've never seen fireflies before. They look very magical. Really beautiful layout.1 point
-
He is a cutie, isn't he. There is a video on FB of his birth. We are going back to the zoo this Fall to see him. https://www.facebook.com/nczoo Scroll down to May 26...it's pretty far down.1 point
-
OmG! This is so cute.1 point
-
I do the same thing, Rene...sometimes it doesn't resemble the original when I have completed my project...but templates are a starting point. My mojo is dead...creating is not happening. I have completed each day but with the element only...no scrap pages. Day 2 I used Google maps; took a screenshot; cut out Virginia and highlighted our route.
1 point
-
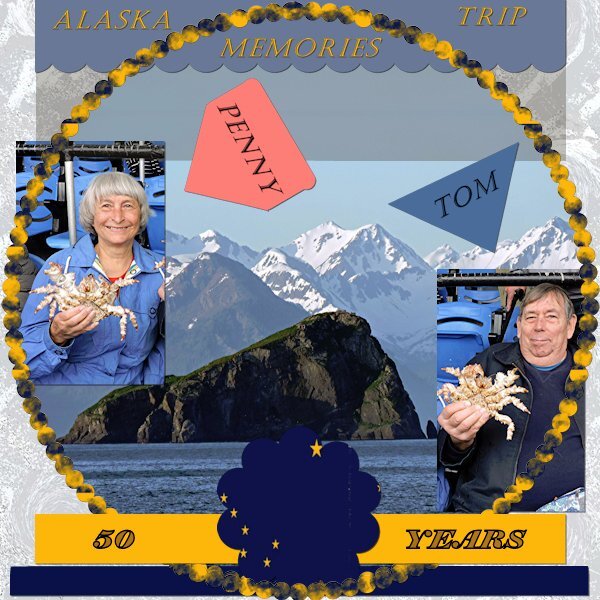
Whew, it was hard to use all those layers. I was tempted to skip a couple of them, but then it would not have been right for this challenge because it says to use all of them. One problem I had was with that many layers going ( I guess I should have reduced the picture file sizes before using them) I wound up with such a large project that my PSP 21 program was taking forever to do anything . Even when I just clicked on (file save as or resize image etc. it was taking so long I though it was frozen. When I was about to give up on saving it as jpg so I could post it, I finally just left the program run while I did some chores and when I came back later I was able to save it. Yes, Penny is my nickname and Tom is my hubby of 54 years.
1 point
-
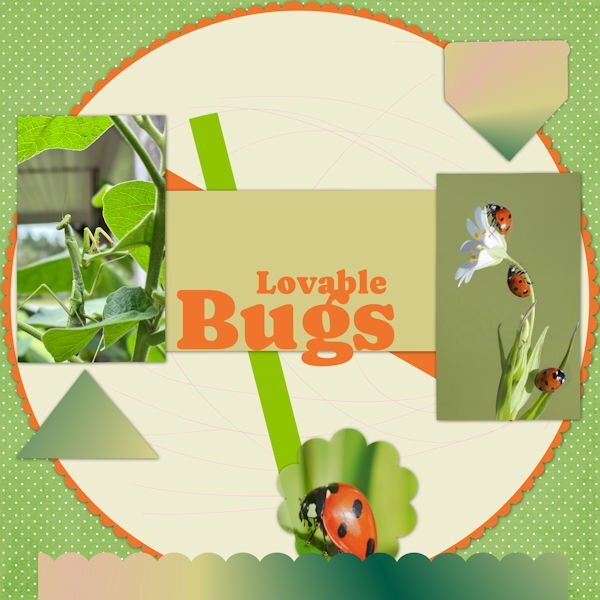
I'm finally getting back in the game. I kept looking at this challenge and had the hardest time to make something work. Too many bits for my taste, but good for me to try. I did not cadge any pix from Sue T (who is back for a while, I see - nice!) only picked them up online from Pixabay. Some insects are more "lovable" to me than others, but I would never hurt one or use any sprays. I kill only mosquitoes. Everything else gets trapped in a bug catcher and taken outside, even if my skin crawls to do it. Shiver. I just played with this, threw a bunch of colours and arrangements of layers around, and this is what I got. I'm not delighted, but I just wanted to DO IT! I have been watching all the amazing layouts and creative work going on. So much good stuff, and so uplifting to see. And some new names and faces too. That's great.
1 point
-
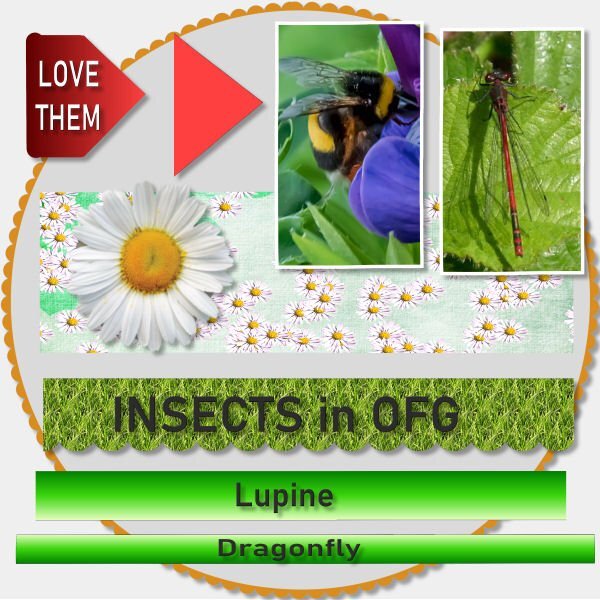
There are many insects in Our Fractal Garden now. I show only two ones. Shots taken by my cooworker in OFG.
1 point
-
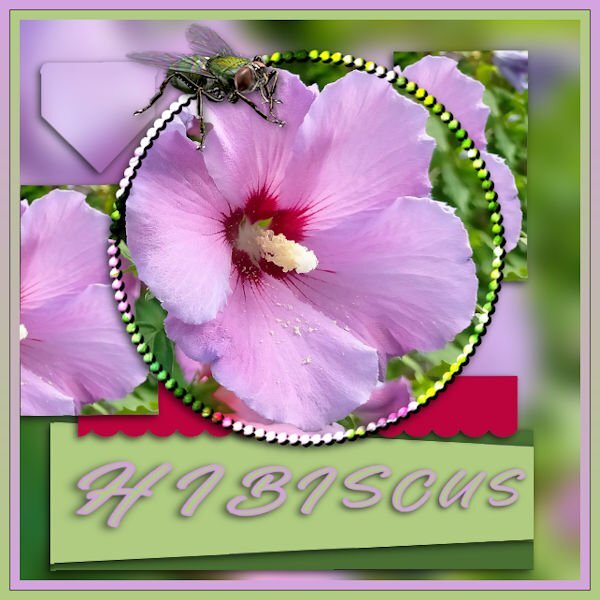
Ik ken een beetje Engels, maar zo nu en dat ik een woord van twee oversla. Hier is mijn bijdrage aan het thema van de maand. Deze heeft mij een paar uren bezorgd. Te veel items naar mijn zin. Ik hou van rustige en serene beelden. De naam van het lettertype is: Morgen, ik heb de foto vorig jaar zelf gemaakt. met mijn mobiel, nu is het dit jaar te regenachtig. IK ZIE GRAAG HET POLLEN OP DE BLOEM.
1 point
-
1 point
-
I like to create magazine covers to showcase my photos.
1 point
-
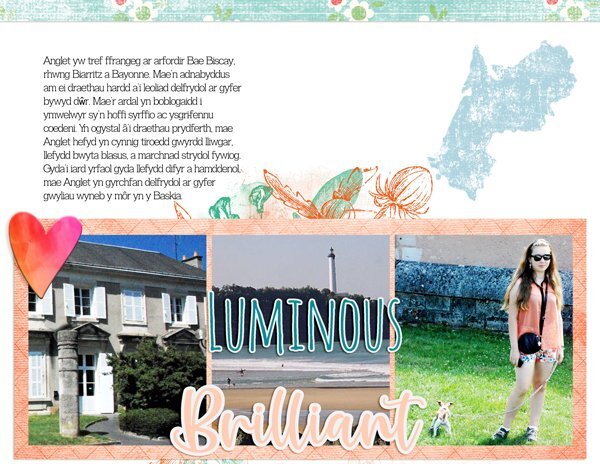
You must be relevantly new to the campus. I have been quiet for the past few months, it is summer after all, and where I now live in Canada, the season is very short, but guaranteed to be hot and sunny, unlike my homeland Wales. I've been active in the campus since late 2015, and seasoned members have become accustomed to expecting my layouts to be of all kinds of nature. Here are some recent posts. I thought my posts would automatically go into the gallery, but I see obviously not.
1 point
-
These delightful interesting bees have consumed a great deal of my time this summer, observing and macro photographing them. Which is very tricky as they are super fast and really tiny. Every year I create more and more bee log tower hotels for them. Drilling hundred of holes in each one to accommodate the residents. This year I had well over a thousand leafcutter bees to home. For those that are interested :The drill bit size is 5mm, with a depth of 2 1/4 inches. Each bee can lay up to 6 eggs. They collect pollen with the " pollen brush" on the underside of their abdomen. Starting at the back of the nesting chamber, the female bee builds a protective leafy wall, which she will pack with a loaf of pollen and nectar (or paste). She then lays a single egg directly on each loaf and seals the chamber with another protective leaf wall. Typically, the females will lay eggs that will become females towards the back of the nest and males near the front. This behavior provides an extra layer of protection for the female eggs.
1 point
-
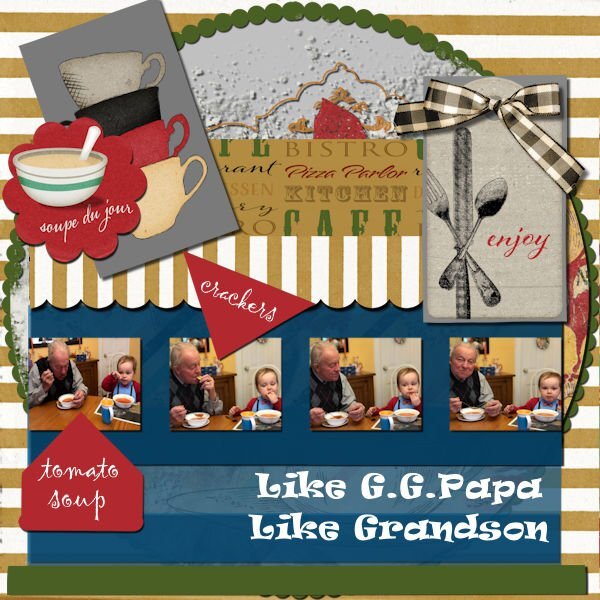
This was a great challenge, and by that I also mean brain smoking! Somehow it came together, I never really feel I'm in control of the out come, I just go with the flow that seems to evolve in the process. There are some fabulous results being posted and tricks / tips shared. Thank you all. This tells the story of my Sister's grandson having lunch with our Dad, his GG Papa. The request was for tomato soup and crackers which is a favourite for both of them! The papers, tags and graphics are from a DS kit of Jessica Dunn's called Bistro. I overlapped a lot of the rectangles at varying opacities. The inner circle was filed with a paint transfer and shadowed which gave it some texture. The large font is Ravi, and the pointers are Gigi, both in my collection, probably from Creative Fabrica, but I'm not sure.
1 point
-
These pieces were definitely a challenge for me. I like my layouts spare and uncluttered usually. I combined some pieces and doubled up on others. The central circle is white reduced to 10% opacity over the background photo. The top border is the scallop clipped to a lace ribbon. The red borders are strips filled with a red pattern called 5Geometry. I filled the beads with a gradient. The top flower is named AHA-hygge, from my stash. This is my grandson Brad and his girl, Livia back in July at an event.
1 point
-
This was very difficult for me. I don't put a lot of elements on my layouts and getting these to fit in a way I liked was a challenge. Not sure I like it now but it's not too bad. I am looking forward to seeing how others interpret.
1 point


.jpg.2a6a27e849c348ffb23225ac4dc04f36.jpg)


_600.jpg.2803cbab17e5ead283ca5f02d3dc405c.jpg)