

Linda J Walker
-
Posts
204 -
Joined
-
Last visited
Content Type
Profiles
Gallery
Forums
Posts posted by Linda J Walker
-
-
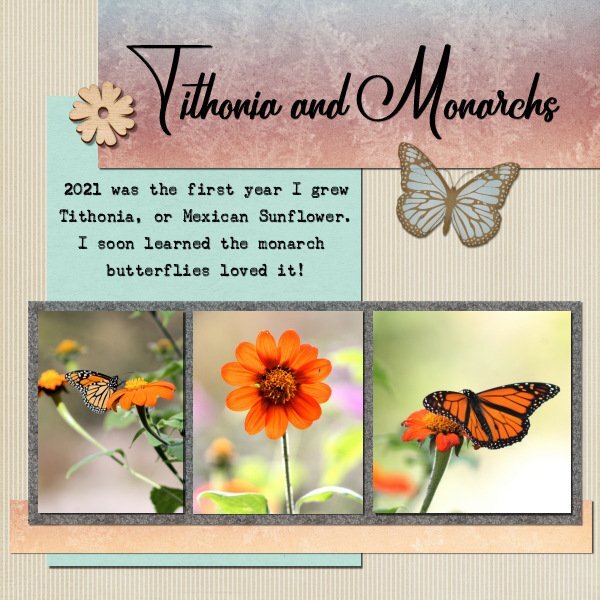
Project 5-
I began to use the "Cranberry" kit, but there are no solid papers in that kit. So I used 2 of the patterned papers for the squares...but it just didn't look good to me. Last night I decided to just close it up and look again tomorrow. Today, it still didn't look good to me! I decided to pull a couple of colors out of the photo and use them for the squares. And then PSP didn't seem to want to cooperate, so I closed it down again. I feel like I have done this page many times today. So I guess that means I am done with it. There are several things I would change, if I had more time or more patience today...

-
 3
3
-
 7
7
-
-
Project 4
I dug in my photos and found some photos from a short trip several years ago, a visit to the 'State Pen'. It was a planned trip, so it was fun.
I used a bunch of random papers and I guess that is how it looks! I should have planned better. I will try to use a kit next time.
I am running to another doctor appointment today, so out of time now.
-
3
-
6
-
-
Project 3--
It is always so interesting to see how everyone uses the tutorial in a slightly different way!
I used the glitters, but I didn't like the color so I adjusted it....and it doesn't look very glittery now. I used the guides, it is a good way to make things the same size that don't start out that way.
I am not sure I am entirely happy with my choice of papers and colors, but I am finished for tonight. Maybe I will like it better tomorrow 😉
-
5
-
7
-
-
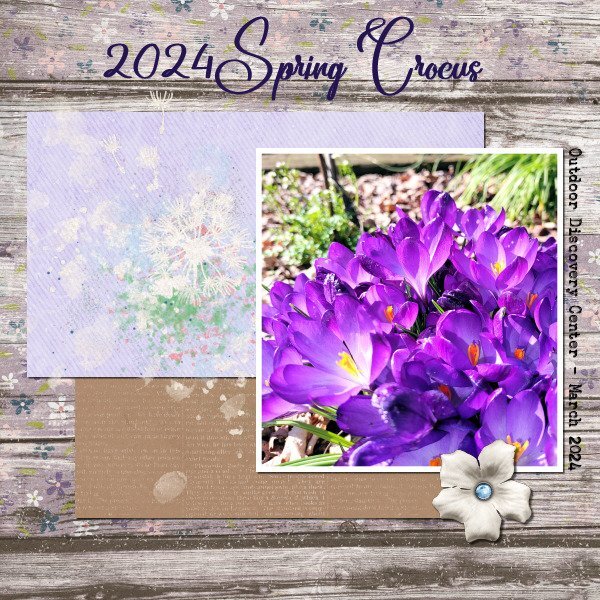
Project 2, but I don't know what day!
Guess I am on a spring flowers theme. I took this photo this past week when I visited a garden that my fellow Penn State Master Gardener's maintain, at the Outdoor Discovery Center. I'm not able to participate in gardening activities right now, because I am in 'recovery mode'. The weather has been tempting me tho! I used part of the same kit I used on Project 1, and the same fonts. I tried rotating the background paper so it would look different, but it just looked odd to me, so I used contol + Z and undid it. I also used part of another kit called Dandelion Wishes. I loved seeing the crocus blooming at this garden. Either the chipmunks steal the ones I plant, or the voles eat them, or both....but I keep trying...gotta feed the wildlife 😉
-
3
-
7
-
-
2 minutes ago, Cassel said:
@Ann Seeber Great photo! I think you could add a large shadow on the flower to give it some dimension.
@MoniqueN.A subtle shadow tweak on the bow is a great touch! On your first page, I am still wondering if there is a vertical offset on the photo shadow.
@Linda J Walker Since you are already familiar with the Bootcamp, I am sure you will have time to catch up. But take it easy if your health is affecting your PSP work. Your health has priority! That is a great photo of a daffodil. That seems like a popular theme. You could probably add a larger shadow to the flower since it is likely thicker than the papers! 🙂
@bina greene Out of curiosity, why do you use Eye Candy for shadows when PSP has it right there?
@Donna Sillia That is quite an interesting font that you used for the title.
@Bill Pearson Did you try to post a photo? It is not showing.
@Corrie Kinkel That dark background really makes the photos stand out!
@Rodney Boyd I see some shadow on your top paper but you could add similar shadows on all the papers, the photo and even the title if you make it out of paper.
@Bonnie Ballentine Oh, I recognize that paper! That is the linoleum technique, right?
Let's keep them coming!
I had to use the jpg Optimizer to get my 600 pixel image small enough. I don't think I had to do that before? Or maybe I am mistaken!
-
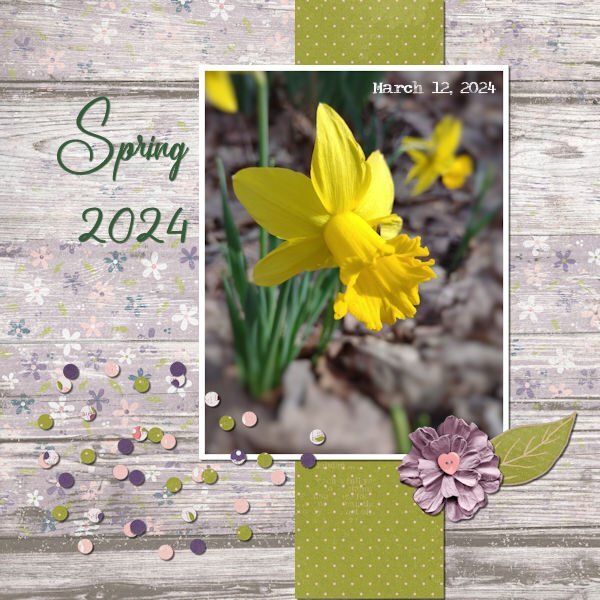
Project 1--The fonts are Strong Signature and Underwood Champion.
Kit is "A Spring to Behold"
Photo is mine.
-
3
-
6
-
-
Hey y'all, I'm here too....I'm just slow.
I have done Bootcamp a couple of times. It is always a good 'refresh' for me.
I will be using 2019. I like a medium gray workspace, and dark gray background.
I don't know what photos I will be using. I had some major surgery Feb 22. When I signed up for Bootcamp, I knew it would be during 'recovery time' for me, but I didn't realize how slow recovery would really be, and how limited I would be physically. I am seeing signs of spring out my window, so I may look for photos of spring to use.
-
1
-
3
-
-
April 2022 Bootcamp-
-
2
-
7
-
-
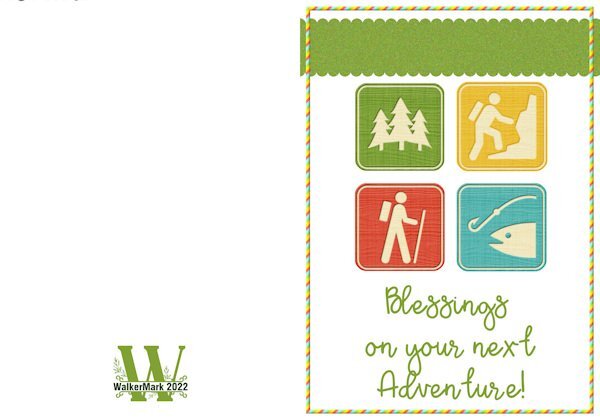
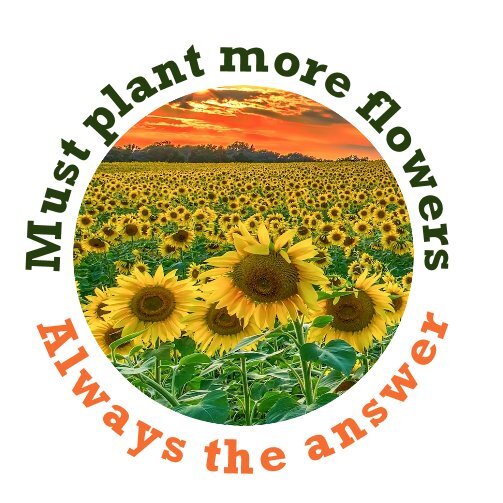
I did this for the Greeting Card Workshop in 2022.
-
1
-
7
-
-
WOW! There is just sooo much to look at in this thread!
Here is another one from the Vector Workshop....again, I don't know how to find the link to post ?
-
4
-
3
-
-
This was done for day 5 of the Vector Workshop. I don't know how to find the link for the tutorial!
-
13
-
-
Lesson 7/day 7--
I feel like it has taken me a while to get here to lesson 7! Sometimes I can't follow directions, sometimes PSP doesn't follow directions or just doesn't want to function right, and sometimes it may be all of the above.
I know I have learned many things. I need to make more notes so I can do a few of them again!
I dug around and found more tubes on an old Jasc PaintShop Xtras disc. I think that is where the pink flowers were.
Thank you Carole for a challenging and informative workshop, and the extra help!
-
8
-
10
-
-
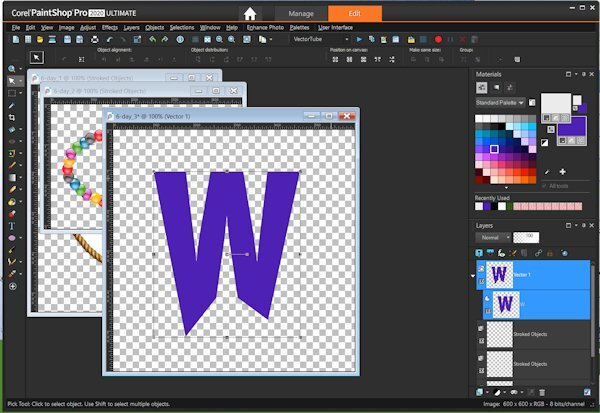
Lesson 6, part 2 or 3, not sure...that last one, with the text!
I fought with this last night-I'm not sure if there is a glitch in PSP, or in the script, or in my laptop. Carole and I will look at it later today. But for now, I will post my 2 attempts that I saved. I had many empty layers, multiple times ? On the one with the balls, I edited the nodes first...maybe that sent PSP into a tantrum ?
-
19
-
-
Lesson 6/day 6--the first 2 went just like the lesson.
But the text....no. I am not sure what I'm missing. I right click, convert to path. Choose picture tube, I do one and test the size, and I see that. When I run the script, I get a new layer named 'stroked object', but there is nothing there. I turn the text layer off, and there is still nothing there. I can change the tube, adjust the size, run it again, and get another layer 'stroked object', but there is nothing there? What am I missing?

-
11
-
2
-
-
8 hours ago, Cassel said:
For the DIAMOND members who are having issues with the videos playing, it looks like it is UNEXPECTEDLY linked to the number of downloads. I made a temporary change for now so you should be able to see them. I will look for a more "permanent" solution. @Linda J Walker @Dorothy Donn
Thank you. That helps and I guess I don't need to adjust any of my settings. I am able to view the videos, but still unable to download anything. So were we charged 'download credits' for viewing the videos...which may explain why I can't download any more guidebooks, or anything else...I keep getting the 'opps' page.
-
1
-
-
Day 5/Lesson 5-Thank you Carole for finding the glitch with viewing the videos! I still can't download the guidebook tho...
Had a little bit of time this afternoon, but had to break it into 2 work periods. I think I learned some of this before, but it didn't 'stick' in my brain....maybe it will this time? Or not!
-
7
-
13
-
-
9 hours ago, Cassel said:
@Susan Ewart Maybe we'll make a design for such a T-Shirt!
@Donna SilliaYes, as the larger nodes are easier to SEE, they are not easier to SELECT. You are doing great and it is nice to hear that things are getting a bit easier. I hope the previous lessons also sunk in to help with the future ones. For the hearts on the ellipse, if you used a brush, change the rotation mode to Directional in the Brush Variance palette for the hearts to follow the path (that is just one option you can try).
@Leslie Gifford Cook Practice helps but so far, so good!
@James Brady A lot of talent, yours included.
@Dorothy DonnDid you try to watch the previous videos too? Are they also blacked out?
@Connie Collier I am glad you got the zip file in the end. If you needed to REVERSE a second time, maybe it had not reversed in the first place.
@Suzy Yes, you can reopen the .pspShape file, tweak it and re-export it.
@Corrie KinkelAs the lessons go, practice should make the whole process easier over time. Glad that the lesson 5 was easier.
@Jnet Allard Do what you can when you can. Even if you only do the basic practice, and come back later.
@Lynda DiGregor You are doing great catching up!
@CristinaI am glad that this lesson was easier. Giving you time to breathe a little more.
@Art Kuiper Keep it up. Nothing fancy is required. Practice is basic!
@Bobby YeaterI was wondering if you had exported that shape with the different colors. Although one can easily use those colors with the "Retain style", it might surprise the user if that checkbox is NOT checked. That's all.
@Anita Wyatt Did you get my email? Sometimes, just a quick Zoom call can pinpoint the exact step that is missing or in the wrong order. I have helped a few participants like that with such tiny details that made all the difference between being stuck and getting through the lessons.
@Gerry Landreth Great results for your practice. When you are not getting the correct selection, is the correct OBJECT selected?
@fiona cook It gives you a better understanding of how the path will affect the text. Did you check that article about moving the text on a path?
@Ann Seeber Catch me by email. A quick Zoom might help.
@Sheila HoggBeautiful projects!
@Linda J WalkerAre the previous videos still playing or are they also blacked out? I have not done anything in the backend, so that is strange. Please, update me tomorrow if the situation changes.
@Deana Davis With practice, it might get more automatic with time!
@Marvin FojtasekIsn't it annoying with a tiny detail is missing and causes the result to not work?
@Lesley Maple Vectors have NOT changed at all since at least version 9. The exact same steps work the exact same way. I wish everyone found the article on the blog about that text in reverse.
@sharon thompsonThat is a delicious-looking project!
@rjay seguraBeautiful composition.
@Cindy Lawrence Great result. You are catching up nicely.
Keep those projects coming. I can see that most of you are getting a bit more comfortable with vectors and nodes. Remember that practice is still important. Tomorrow, I expect the lesson will be easier.
There is no change today. If I am logged in, I can't watch the video, nor can I download the guidebook. I have to log out to see the video, and then there is no option to download the guidebook. I have to log in to get into the campus, but then I can't see any videos! This is very frustrating! It is like I am blocked out if I am logged in.
How do I know when I can download again? I really thought I should have been able to yesterday.
-
 3
3
-
-
2 hours ago, Cassel said:
And they both don't work?
Neither one will play the video. I went into the Campus, and those won't play either. I went to several other sites where I watch video, and those WILL play. And I have rebooted my computer.
Update--I logged out of the Campus, then I could watch the lesson 5 video. But when I logged back in, there is just a black window where the video should be, and a 'play' arrow that doesn't do anything. I can't download the workbook until my counter resets, which I thought would have been today.
-
1 hour ago, Cassel said:
What browser are you using?
I normally use Chrome, but I tried Edge also.
-
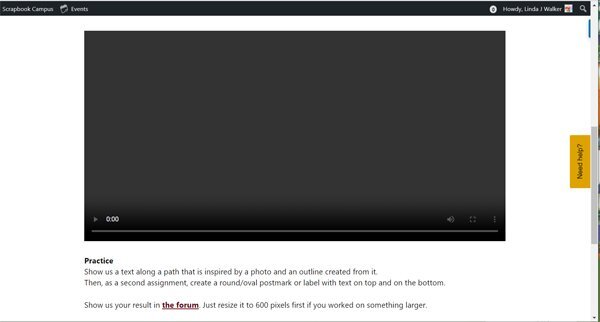
Lesson 5 video will not play for me. But it looks like nobody else has had trouble with it? And I can't download the guidebook either ?
-
1
-
-
Lesson 4 - I was doing okay, then I had to pause to tend to something else. It was downhill from there ?
I thought I would get fancy and put one of my labels from lesson 2 on my mug....but I got tripped up there. Decided to just put the heart that was on the original . But I guess if I wanted to change the color of the heart on the mug, I think I needed to do that before I pasted it on the vector of the mug....my brain is confused now....so I think I am going to call it 'done' for now. There are more things on my to do list for today.
-
9
-
4
-
-
14 hours ago, Susan Ewart said:
I am printing them too and making notes on them. Thank you Carole for the guidebook. This is also making the three Vector masterclasses make more sense.
The guidebook DOES count against your weekly download limit... so I will have to wait to download/print lesson 4?
-
Day 3/Lesson 3 - I watched the video this morning. I felt a bit intimidated....but I had an appointment and errands to do, so I could procrastinate ? But this evening it seemed less intimidating, or easier. It was not as difficult as I expected it to be. And I tried to pick the easiest leaf ?. Gaining a bit of confidence, I think.
-
9
-
2
-
-
10 hours ago, Bonnie Ballentine said:
Day 2
Project 2
I also deleted a lot and started over a lot. It's a lot to remember!
I am glad to hear I am not the only one who 'deletes and starts over'.....sometimes several times.....
-
3
-
3
-


Scrapbook Bootcamp - March 2024
in Showroom
Posted
I have done the bootcamp a couple of times, it is always a good review and reminder. There are techniques I learn and then forget about. Like the pinked paper edge! You could eaily change it to a scallop, and adapt it to your project. Also using a paper to fill the text. I should practice that again. Thanks for the review!