Leaderboard


Popular Content
Showing content with the highest reputation on 06/18/2024 in all areas
-
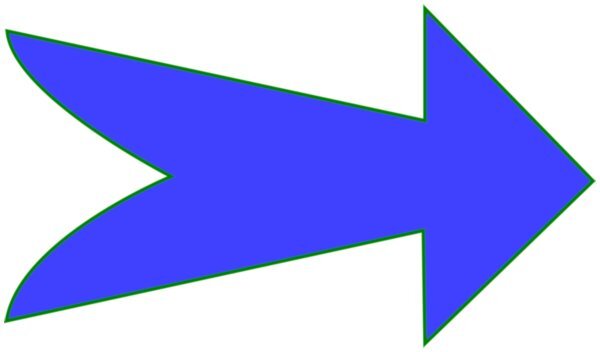
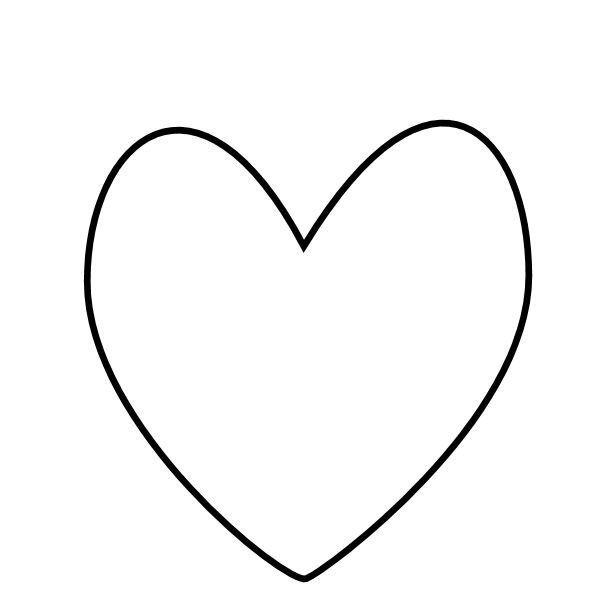
Here is Lesson 1 Heart and Arrow.
 11 points
 -
Hello, I had no problems with the paths and path points, but with the color fill and border settings. I think it has something to do with the performance of my PC, because the color selection scale is difficult to open - I have to wait for minutes. Then suddenly the fill color cannot be set... I had to close PSP using Ctrl-Alt-Delete and start again.11 points
-
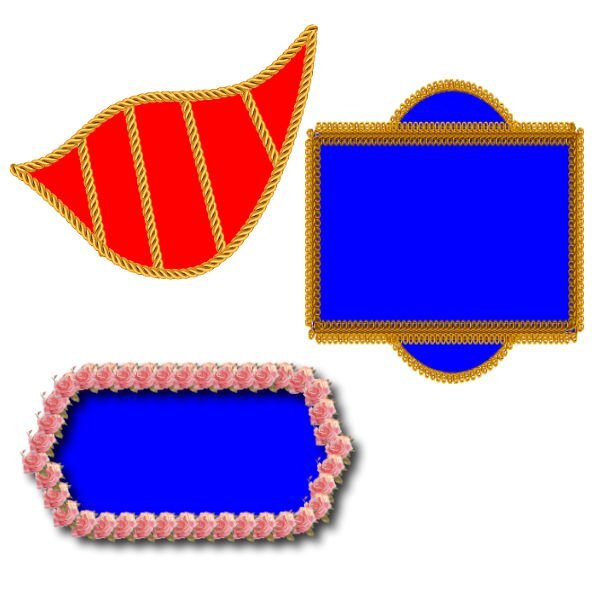
Well, I had to try something different. (1 - Heart4) (I wasn't sure if this would work with a layer that was not raster which is what I have used it for in the past.) I ran a script I created to take copies of the layer, decrease the size of the copied layer. Repeat. Then merged the layers. Then I flood filled with red in some areas. (2 - Heart3) I then took a copy of Heart4 and applied the Colored Foil. I did not show this. I then took a copy of this layer and used the blend mode to get Heart3. (3 - Heart2) Then I used Heart3 layer with blend mode against Heart4 and ended up with Heart2. (Conclusion) I liked the variations that I was able to produce. I like it when it gets to be fun.
10 points
-
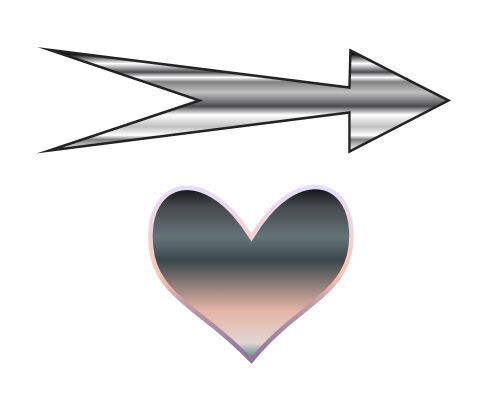
This is my 2nd time and that makes it easier, but nevertheless it took me a while. After I had created the shapes I played a bit with textures, some of which I normally don't use. The heart has the texture glowing edges and the arrow has plastic texture. Maybe I should use those once in a while instead of a bevel, gradient or pattern!
10 points
-
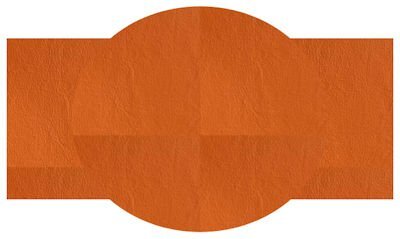
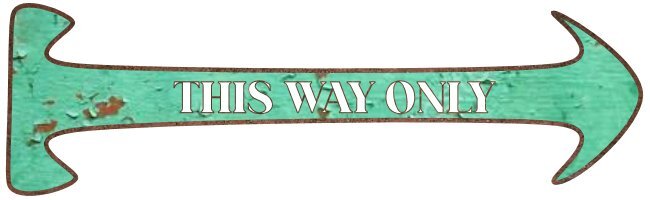
stylized arrow, and a heart
10 points
-
Now I have a better understanding, not very intuitive, I mean why select the pen tool. I draw a shape on a vector layer, the next step I would imagine is modifying the shape, i would have thought the nodes would be available and not having to activate those. So a new day and I managed to draw the shapes without referring to the video. Bit of trial and error but I got there, found grid lines helped to keep things uniform Just tried attaching a png but only Jpeg allowed which is larger than the png, 15kb to 65kb. (post updated typo)
9 points
-
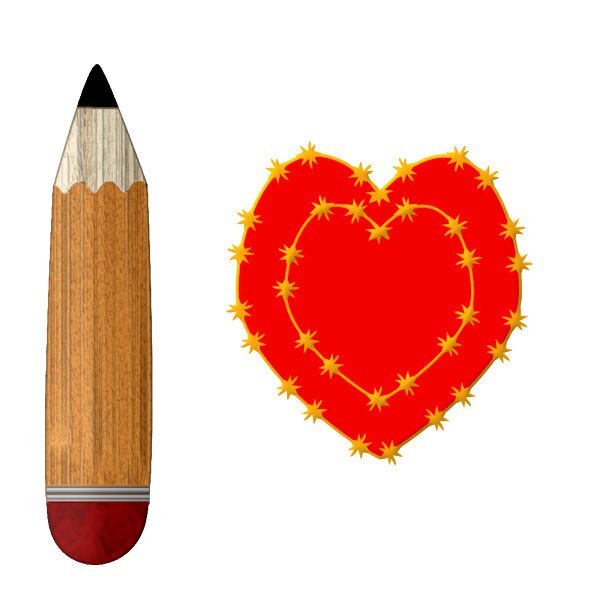
I started to make an arrow, but then began to play with the nodes and ended up with a pencil. I converted the pencil to a raster and filled it in with different textures. The heart was harder than I remembered, but I finally got it to look like a heart using a lot of guide lines. I used a lined stroke, duplicated the stroke and made it smaller to fit inside the bigger heart.
9 points
-
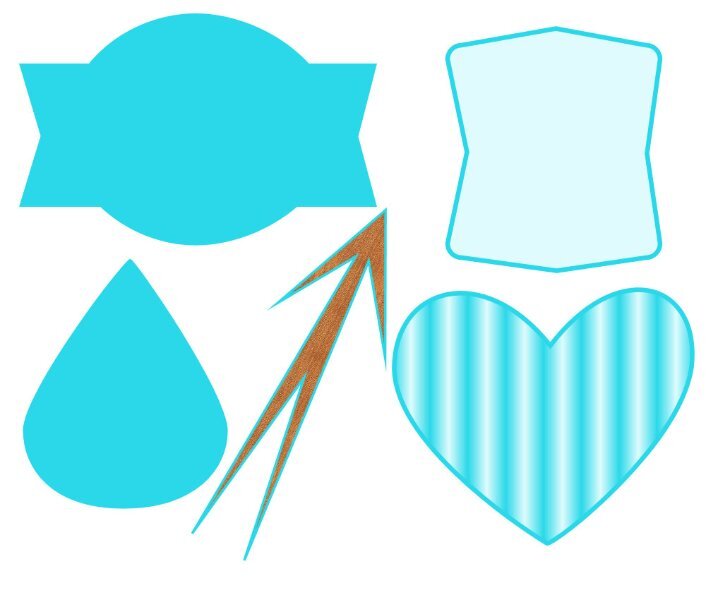
Oh my goodness, some of these vectors look so good. Mine are simple, this topic freaks me out! I'm happy with my first vectors, I hope they are okay. I saved them as .pspshapes, I need to build up my preset shapes library. Jeni
9 points
-
Lesson 1 Heart and Arrow. Lots of fiddling around. I see some very cool hearts and arrows from everyone. It's pretty inspiring. I am keeping it simple for this workshop, as others have said, just concentrating on the forms and taming the nodes. Some of those suckers like to multiply when I accidently click too much.
8 points
-
Working with vectors is all about practice, practice, and practice. In the beginning, we hate it; the nodes disappear, and lots of annoying things happen, but after a lot of trying and error, we start to have fun with it. 🙂 There are a great number of tutorials and masterclasses inside the Diamond Membership. Here is Lesson 2: Edit: The tip for the corner nodes is genius. I have totally forgotten.
8 points
-
Not great getting it actually symmetrical editing cusps...that will take some practice.
8 points
-
Maybe we should use #@%^& instead of the word "nodes"?????8 points
-
I have done some effects.
8 points
-
I have not signed in, but I can follow the Lessons as a Diamond, this is my 2nd try in this WS. so here is my new lesson and this is the old lesson.7 points
-
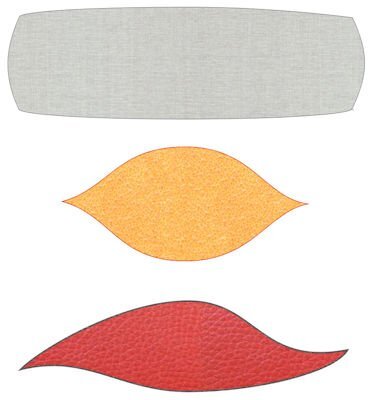
Here are my heart and arrow. I hope to use this in future.
7 points
-
Second time round for me on this workshop..... vectors are soooo very hard to remember let alone use. I didn't use any special fill or lettering as I am still trying to concentrate on node manipulation so my imges are recognizable. Did try a bit of extra manipulation in getting the heart through the arrow but it looked flat so I grabbed a brush to add some irregular marks around the entrance point of the arrow hoping to create the effect of a bruise. Sometimes additional "play" takes the edge off those pesky nodes. I am no artist so I doubt that I will be drawing many vector images but I really want to master text on a path. As for other members comments on PSP9, I still have my old WXP with PSP9 & AS on it and it is my favourite combination by far. I kept it primarily for the seamless integration with animation shop and for its ability to use all of the older free plugins that hate 64 bit installation. I use PSP 16 & 18 but 22 is waiting for me to stop avoiding installing it. I don't mind them adding new features with each release but I just wish that they would leave the old features alone. Change for the sake of change is so annoying and don't get me started on the fine print online manuals. I still have and use the paper manual that came with PSP9, a copy of a "Paintshop Pro for Dummies" book, and , of couse, Cassels own great publication.
7 points
-
Lesson 1 - On the heart, I used no stroke and the fill was a gradient. The arrow is white stroke and a pattern for the fill.
7 points
-
This time around (my second at Vectors), my heart actually resembles a heart! The first go-around it resembled a molar! The arrow went OK too. Maybe not either is perfect, but I'm OK with how much smoother I was able to manipulate the (#@%^&) nodes. For some reason, Carole's explanations this time seem more detailed and I can follow without feeling that I have a blazing headache! 🙂 But let's see how it goes....
6 points
-
I think I should have added some colour and pattern 🙂 I think others figured this out. Maybe next lesson for me.
5 points
-
Thanks for the challenge. Gorgeous page, Corrie.5 points
-
I have done this workshop before, as well as tutorials and master classes, but it's always good to review them. Thanks to these lessons, I don't struggle with the nodes as I used to. After choosing the arrow shape, I changed the node type of the arrow to symmetrical. I added the Text to a separate layer.
5 points
-
It worked!! Thank you so much. I had not altered the radii figures on the top before. I guess it does that automatically from the last time used. Now I have another post-it note on my computer warning me to check for that. My computer screen will soon be covered in them. When I get struck with something I usually open my freezer and take out a box of shortbread to eat (shortbread is so very comforting) but I had eaten up all of my stash so I had to bake some more today. I try the lesson again after I have had some tea and warn shortbread. Thank you for such a quick and efective response.4 points
-
I decided to try to make a character based on the ellipse. I am struggling to alter the shape with the pen tool. It seems that I get knocked off the vector layer I am trying to edit or I just don't have the right tool settings for the pen to easily grab the node and alter the shape or to add a node to alter the shape. Then, when I first tried to save the image after resizing, the version was terribly pixelated. Oh and I see the grey ellipse I put on the image below for a shadow, I forgot to reduce the opacity so that it would look more like a shadow!
4 points
-
day 2 the new lesson, with shadow and the old one with innerbevel and shadow4 points
-
A big welcome to all the participants. Of the 150 registrants, I hope to see a lot of posters in this forum. Don't be shy. We are all here to support you as we have all been beginners too, and we have all struggled with those vectors. Welcome to our newcomers to the Campus: @James Morris, @Patty Swinimer, @Trevor Andrew, @eddie k, @middie. @Randy Yes, we will cover the text on path during one lesson in this workshop. Your arrow and heart show that you are good at handling those nodes! Colors and fill are just extras. Add them if you want, or not. Nice to see you play around. @Trevor Andrew That is probably why vectors are confusing: we usually use other tools and features, and not so much with vectors. @Doska St. Yes, vectors are so convenient when you need different sizes. @eddie k Just in case you are interested, DIAMOND members do get a written handout for each lesson. You can join for one week for $1 and have access to all those handouts and extra assignments when there are some. @Cristina I am glad you are feeling more comfortable with vectors now. Thank you for detailing how you added to the assignment you posted. @Emerald Jay Great start. That is exactly what the assignment asked for. @middie Yes, the assignment is just about manipulating those nodes and that is just what you did. After that, you are allowed to "play" a bit more! @Julie Magerka A heart CAN look like a molar! 😉 But this time around, you did great with both shapes. @Alicia Garbelman Great shapes! Simple but you were successful. That is the goal. @Louyse Toupin It is nice to see you still have energy to play with the shapes. @Corrie Kinkel There are many options you can use, but of course, you will often have to convert those shapes to Rasters to apply most of them. @Jeni Simpson Don't freak out. The lessons are going step by step and you will be able to follow. When starting out, just stick to the basics and you will get more comfortable over time. @Donna Sillia Great work. Yes, you can start with one shape and create another one. You know that many tutorials inside the membership use vectors too! Come post your projects, ask your questions, and encourage others. Share your success and your struggles. We are here to help.4 points
-
Sure, colour is nice, but it works just as well without.4 points
-
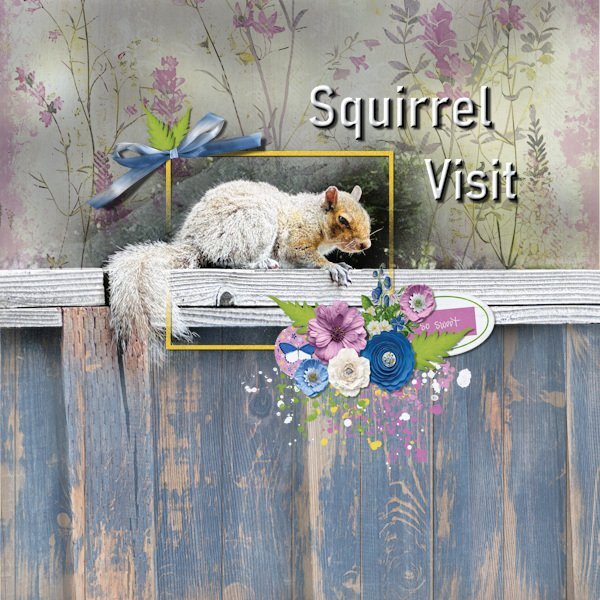
When I saw this Random Challenge on Saturday I immediately thought of a photo that I took when visiting my daughter. The photo was already divided by the top beam of a fence which as such was no reason to take that photo, but there was a squirrel on top and it was looking down directly at me. So I divided the photo and left the fence as it was with an overlay of another wooden background in blue. Then a new background on the top, with a mask for the squirrel. Some embellishments that came from the Meadow Bundle by Jessica Dunn. I wanted to have this idea finished before I start with the Vector Workshop.
4 points
-
I think I need to practice!4 points
-
Ready to go. I am saving all the lessons in a special folder after converting them into Word. I also would like to say Hi to all our fellow members. Furthermore, I have PSP 2023 Ultimate and even PSP 9 because it has a unique animation feature., My son goes around the world setting up computer systems, and I am talking him into getting PSP 2023 Ultimate. He has been using Gimp. Thank you, Carole, for your time Eddie4 points
-
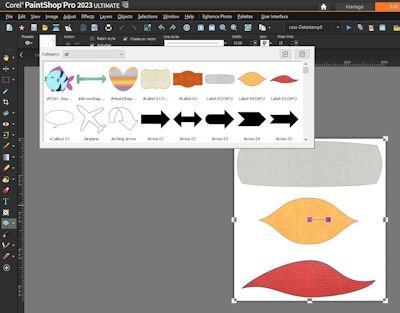
For day 2 I have kept it really simple because I have so much trouble to see those nodes and although I have set the node size bigger you still have to click in the middle otherwise it won't work. Sadly my eyes won't cooperate at the moment. I have not only the shapes of today but also the ones from day 1 exported in one file and everything is in this blue color to distinguish them from the purple ones of last year. When exporting I got a warning that there were already preset shapes with the names Labels so I had to come up with different names or numbers to avoid getting duplicates. I didn't make a screenshot of my preset shapes because the results of the coming lessons are there too and I won't spoil what is to come the next days.
3 points
-
Nothing fancy. I just added some vectortubes. This lesson was very helpful because I had forgotten about the cusp node.
3 points
-
here I used my own kit, to test it, template by Marisa Lerin, font is Starline3 points
-
Nice!3 points
-
That pencil is adorable!!!3 points
-
Yes I forgot that little tip way to often, so I now have made a note in my own list of most useful tips!3 points
-
Me, too, Louyse3 points
-
Lesson 2 I followed the video and saving the shapes worked correctly and now show in the pre-sets. Thanks Carole I did start to create a group of arrows all went well until the program decided to do its disappearing act, at the time I was working on layers and grouping, then a silent closure. Next time it works ok. Png images are not allowed on the forums so is there any benefit in using a transparent background. For me the squares get in the way, I find it better to use a white background with the grid view, now I find it easier to keep things in proportion. I have also noticed that I can use the arrow keys to move nudge the nodes making positioning much more accurate, need to investigate further I’m sure drawing and using those nodes will get easier with practice, I need to watch that video again.2 points
-
Hi Middie The round corners are set from the “horizontal radius” and “vertical radius” Your settings show as 115.50 (view your menu bar at the top) Reset those settings to zero, simply type in a 0 and the corners will be a right angle. Carole shows how to set the corners as round in the video.2 points
-
That arrow reminds me of one of the "angry birds" from the computer game. It just needs some eyes.2 points
-
Show off!!! Wish I could do that.2 points
-
Thank you Mary for your kind words.. there are some good abr brushes out there and the one i used has leaves and shapes that can be used like i did on card... i would also like to take this opportunity to say you are creating beautiful works and i enjoy viewing them... i hope you have some joy in experimenting with brushes. best wishes, Dawn.2 points
-
I'm here, too. I have done a number of tutorials over the years in PSP, but find with some things I have to look them up again to figure out how to do what I want to do. Hopefully I will retain more knowledge id I use it more often.2 points
-
Hi all, I'm also registered. I'm not on the PC that often or for that long at the moment because of appointments, but I want to make progress with PSP operation. A course like this motivates me. In Photo Impact I liked vectorizing shapes so that I could then pull them onto my canvas from the bag of tricks in the size I needed.1 point
-
I'm back to refresh my learning om vectors in PSP. What I learned from earlier classes was enough to meet my needs then and it gave me the background I needed to begin exploring InkScape to create SVGs. Now I want to review and maybe even extend my knowledge of using vectors within PSP. Looking forward to the workshop.1 point
-
I was wondering if we will be using text on path. I watched a Corel video and was able to get it to work once but not second and later. So I ended going back to original and modifying it. I do like using AAA LOGO MAKER But wanted to familiarise myself with how to do in PSP. I had success at one time in last but not again until this week.1 point
-
Hi, Carole, this time am here without any problems😍. Fine to meet PSP-friends:)1 point
-
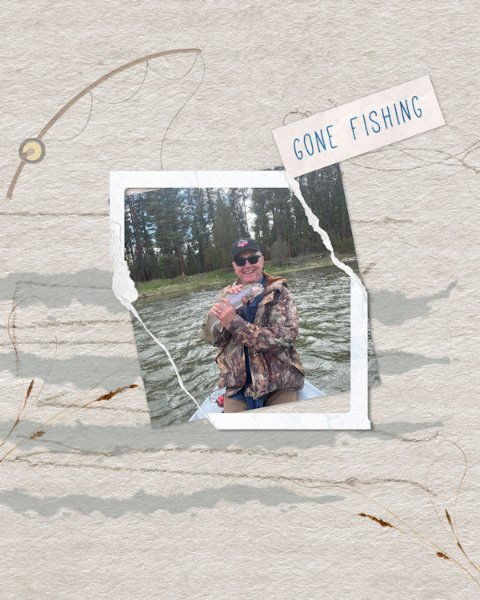
Here's the fisherman.
1 point
-
I am interested in learning more about Vectors and look forward to this workshop. Thank you.1 point
-
I always think I understand vectors and then I go to do something and it tells me to convert to a raster. Or, I know how to do something but I am missing a step.1 point
-
I'm in. I did last year's workshop, but I still have a tough time with vectors.1 point