Leaderboard


Popular Content
Showing content with the highest reputation on 02/15/2024 in all areas
-
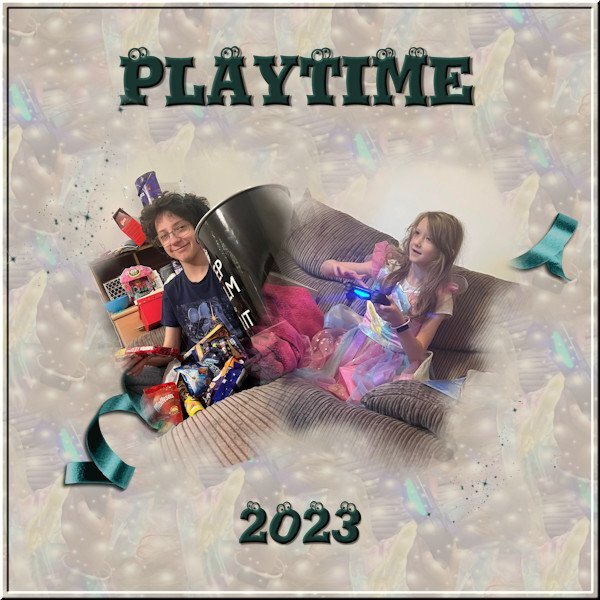
Here's my lesson 4, 2 photos, 2 masks, made the background with a selection from the girls dress, applied balls and bubbles and seamless tile and used as a fill, then put a beige layer on top with an opacity of 50 to tone it down a little. The font is Eyeballs. Then just a couple of scatters and a ribbon to finish it off. .
 11 points
 -
This was a good refresher for me. Font used is Perfectly Imperfect.
10 points
-
Lesson 3 I added some grunge around the edges. I'm not too crazy about the kaleidoscope method.
10 points
-
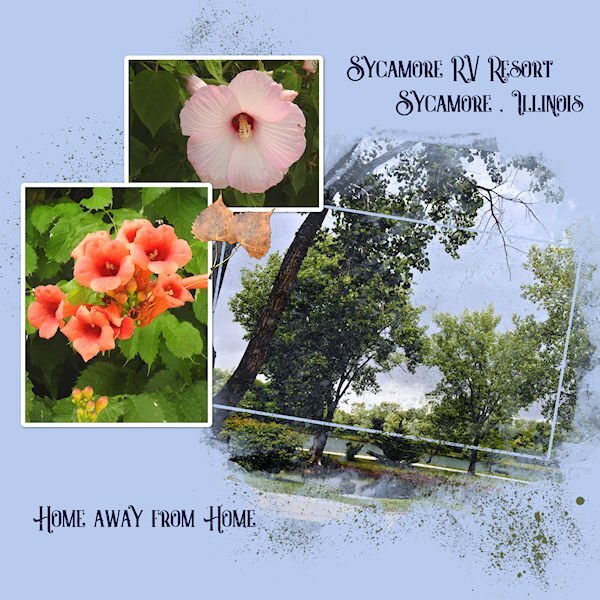
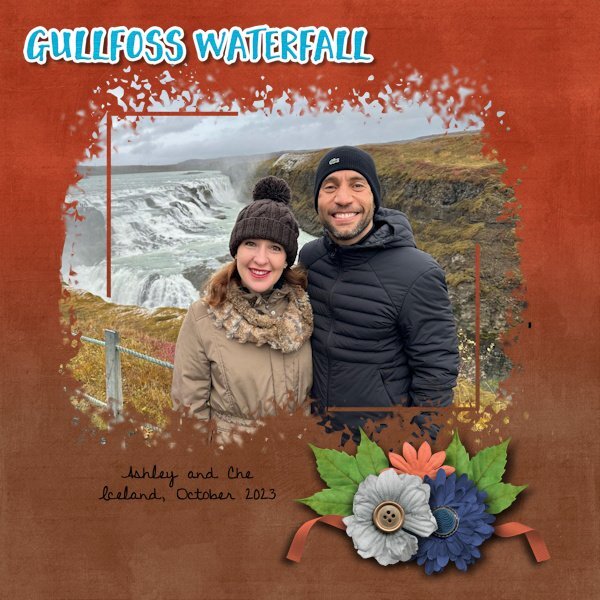
Day 3 are 2 more layouts for my cousin. Layout #1 used the mask by Melo although I added to it so that I could get more of the photo. The kit is a really old kit by a designer that retired over 10 years ago. The kit was called Christmas Time and the designer was A Work in Progress. Again, the font is Discover Beauty. Layout #2 used the extra mask from the 2022 Mask Workshop. The kit is called Around The World: Iceland and is available at Sweet Shoppe Designs. It is a collab kit from 2 designers. I again used Discover Beauty for the font.
10 points
-
Day 3 of the Mask Workshop. This day tested what I have learnt about Masks. I feel so much more confident now. My problem now is how to respond to others on this site. I don't know where to go to respond to anyone. Cassel is there some literature that I can get regarding this? I feel a bit silly that I do not know.
10 points
-
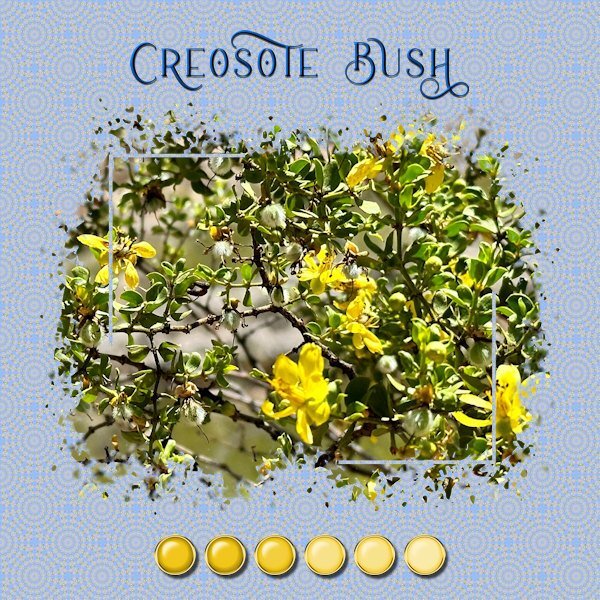
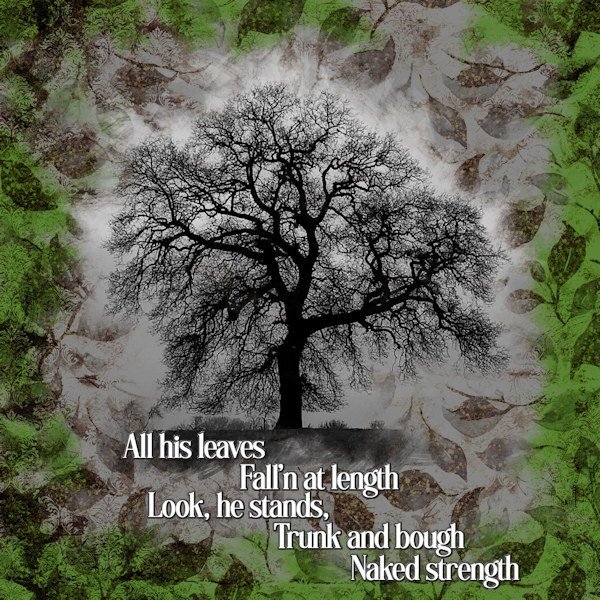
Lesson 4. I had a little trouble locating the image to brush the mask with white because the mask completely blanks it but by trial and error seemed to work out. I made two masks groups including an additional background one for the green bits. The main photo is a colour one of mine that I made monochrome. For the text I used Effects/3D Effects/Chisel (with solid white colour). The words are extracted from the poem 'The Oak' by Alfred Lord Tennyson. Artistic licence requested for the shape of the leaves, not being oak!
9 points
-
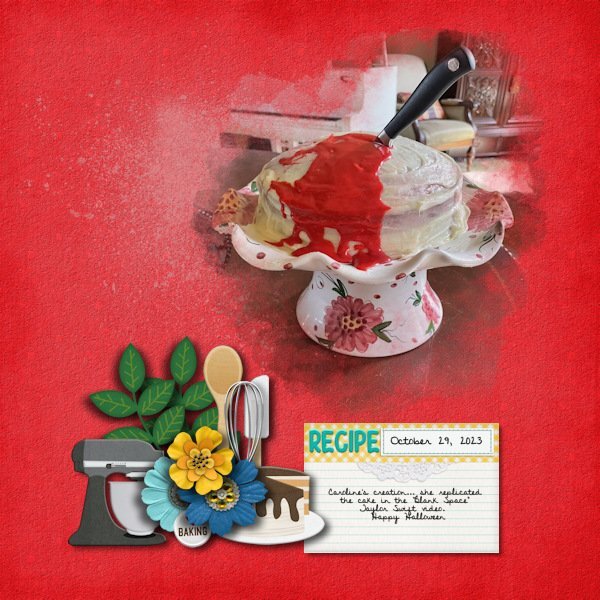
Day 4. I used a brush from the Brusheezy download, #21. It was a lot of trial and error since a part of the photo was very close to the edge and I kept getting the hard edge. I did a lot of fiddling with the size and jitter settings but finally got it. Kit used is called And Bake by Clever Monkey Graphics and is available at Sweet Shoppe. I again used the Discover Beauty font. A note about the cake. My cousin's granddaughter (age 12) has been cooking and baking for about 4 years. She has figured out how to bake using gluten free ingredients since her mother has 2 auto-immune diseases and can't have gluten. Essentially the whole family is eating gluten free in support of Mom. At the age of 10, she knew that she wanted to open a bakery specializing in gluten-free items. And, sweet Caroline is a big fan of Taylor Swift thus this cake!
8 points
-
Day 3...the kaleidoscope is very faint. I have played more with this technique and have learned somethings that make a better selection and therefore, perhaps a better effect. This pattern is from another layout but chosen from the same photo.8 points
-
.... looking at this too often.. it seems. Plaid is by Jessica Dunn as is most of the rest, except a strip by Marisa Lerin and the frame mask by Rachel Martin. Fonts: Omnia, Pinky Funky7 points
-
I said that I didn't care for the Kaleidoscope effect but that doesn't mean that I didn't try it out. Interesting results but too busy for my papers. The 600X600 pixel jpgs were large for some reason & would not load so I resized the to 400X400.
7 points
-
This one depicts random thoughts. If it needed a title, it would be My Mother's Day. Years ago, I started calling my mother on my birthday to thank her for being my mother. I called it My Mother's Day. When I moved back to Alabama to be with her, I would take her to dinner to celebrate (usually at a restaurant that gave a free dessert for my birthday!) This will be the first birthday without her. I may still go to a restaurant. After all, she wouldn't want me to miss out on a free dessert! The mask for my mother was made using a watercolor brush from Rikard Rodin. The raggedy edges and the gold from were made using Picture Frame in PSP.
6 points
-
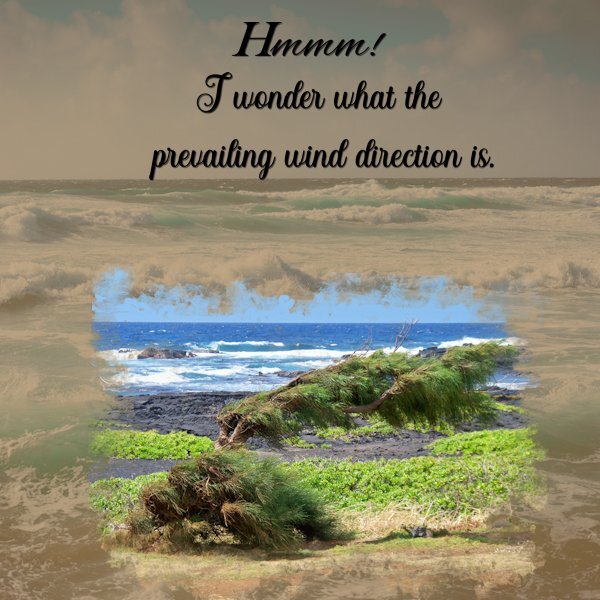
my Day 4 The photo was from the Black Sands Beach area on Hawaii Big Island. The background paper was adjusted from "Ocean-Water-Background-Digital-Paper-27720793 10 " I have no idea where that was downloaded from years ago.
6 points
-
Workshop Day 2 This is the place we stayed at for 7 months while waiting for our home to be built.
6 points
-
my day 3 fonts are Arnold Story and Handwriting5 points
-
Day 2 again, Thanks Carole for pointing out my mistake with not replacing that placeholder with something else. I used a bird from the Escale Amoureuze kit but recolored it to yellow.
5 points
-
The car is from CleanPNG. The mask is from Graphics Creation. When I saw that it was Kaleidoscope Day, I set aside a couple of hours to stare mindlessly at the changing shapes and colors.
5 points
-
Day 4. A very simple layout that has the mask in the right hand corner because that suited my photo best. The font is Better Brush and I used a greyish background with an inked edge. The only extra embellishment is a paint splash that is in my stash and recolored.
4 points
-
now here is my day 4 , font is Arnold Story4 points
-
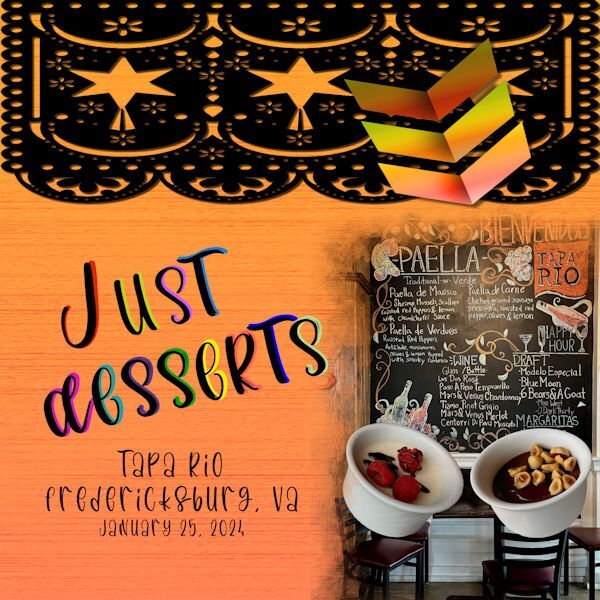
I am continuing with the amazing food the my daughter and I had in Fredericksburg at an Italian-Mexican fusion restaurant. One dessert is a goat cheese panna cotta and the other was a chocolate pot with hazelnuts. The background is actually a wood background that I made, but when I used the textile fill, this is how it came out. The pictures and the arrows are my own. The black border is from Creative Fabrica. The font is called "Los Pinata" from Creative Fabrica. I converted the text to curves as character shapes, duplicated them and now I can't remember the next steps, but I know that I did not use stroke. I guess I will have to keep experimenting and save my steps.
4 points
-
I had fun with this one, the fonts are Retro Daisy and Pristina
4 points
-
Font is Omnia, graphics Marisa Lerin, Jessica Dunn and myself. Haiku myself. This somehow sits better with me.4 points
-
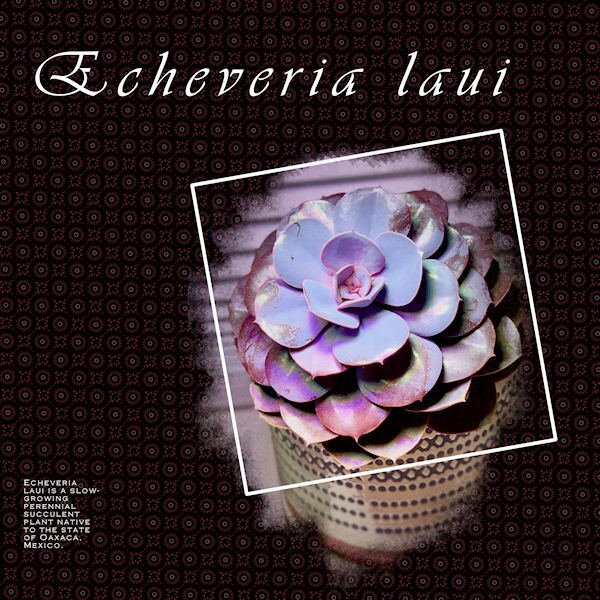
I forgot how interesting the kaleidoscope effect is! This was a little plant given to us when we attended grandchild Jackie's wedding. Her hubby is a horticulture enthusiast and he had put out baby succulents for us to take home that day. Originally it was 1/4 the size of this. One of my few successes with a houseplant. It did stay outdoors all summer. The title font is Vivaldi, the journaling font is Copperplate Gothic, the mask is cass-SimpleArtsy-Template01.
4 points
-
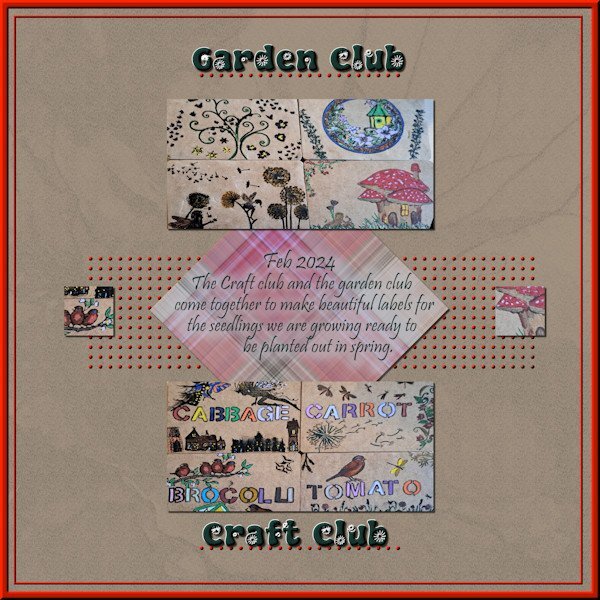
DAY 2 Flair button is from Jessica Dunn on Digitalscrapbook For the two small photos I applied the cass-PencilSketch2 script, but stopped halfway through the script to get a different effect. (not good visible here) The border above the plaid is a font from the Creation Cassel Store: cass-Edge2 Text font: Dialova4 points
-
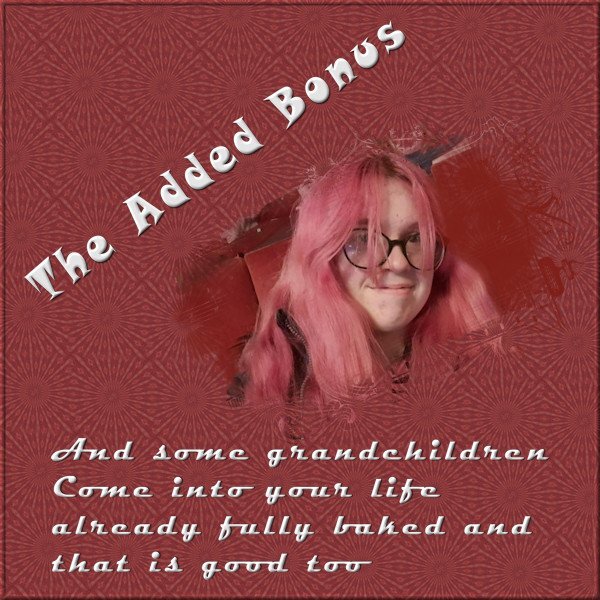
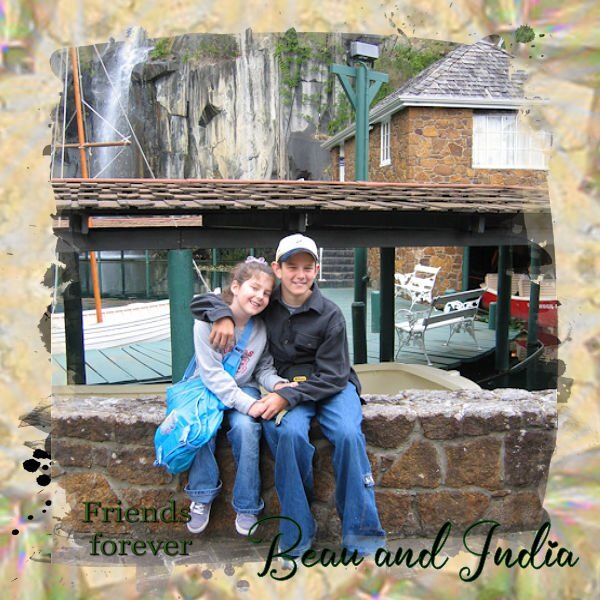
Continuing with the theme of grandchildren, not all grandchildren are directly descended from your own flesh and blood that doesn't make them any the less important. The title font is Snap ITC, and the journalling font is Magneto. I used a free mask from Jessica Dunn's nesting mask kit. https://www.digitalscrapbook.com/jessica-dunn/kits/nesting-masks-kit-baby-birds-precious-love-black
4 points
-
Day 3 and I was looking for a mask in my stash and this one was a Diamond of last year. Just a title - font Bavire - and a string of brads that I recolored. After some trying with the kaleidoskop I'm going for this one, which is a very subtle pattern otherwise I didn't like it.
4 points
-
Font is Omnia, graphics Marisa Lerin, Jessica Dunn and myself. Haiku myself. The kaleidoscope pattern is Greek enough alright. Day 03 :4 points
-
I added shadow to the text which I think makes it stand out better. After converting the text to character shapes and duplicating, I colored the bottom letters and then moved the top letters which kept black slightly using the pick tool to expose part of the bottom layer.
3 points
-
Hello everyone🙋♀️, I'm also there now because I also want to use the masks in PSP. I can already do it in PI. I just need challenges in order to learn as daily as possible so that it sticks in my head. Thank you Carole💞 , for all the learning opportunities and making the material available I have now received the first three lessons, translated and now I'll do one and, if I'm not tired yet, the second lesson to catch up. Here in Germany it's only 2 p.m.3 points
-
Ha, ha, Susan! The crane did very well and ended up winning Queen of the Court that day!3 points
-
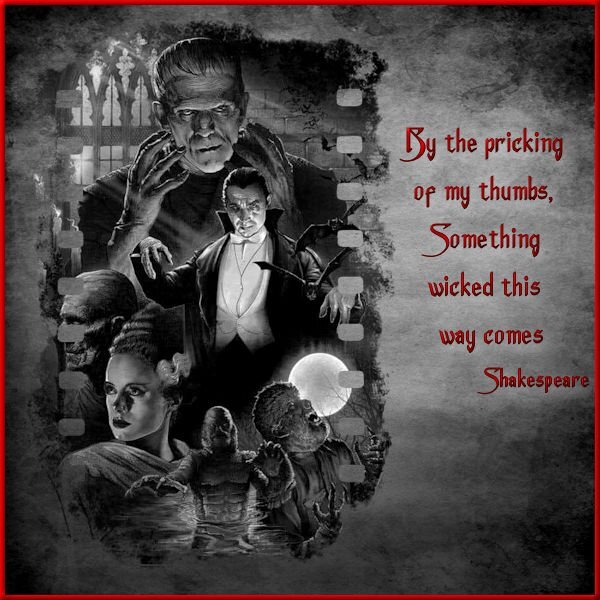
Day 3 - Still can't figure out how I locked that color palette for my project but decided to work around it. If anyone can help sort that for me, I will redo the project but with a colored background paper as originally planned. I flattened the image & exported to a jpg and then reopened it, treating it like any other jpeg & then finished the lettering & border. That restricted my background to b&w instead of the red bloody splattered grunge paper that I wanted but, it seems to work. I did have to change the quote though as my original choice went better with the bloody paper. The film style mask is a snag from Pinterest, the monster collage is from a horror movie archive, the paper texture is from Freepick, and the font is Anger Styles from Dafont. I am not a fan of the kaleidoscope effect but that is just a personal preference. I am too busy making more plaid patterns from yesterday's lesson.
3 points
-
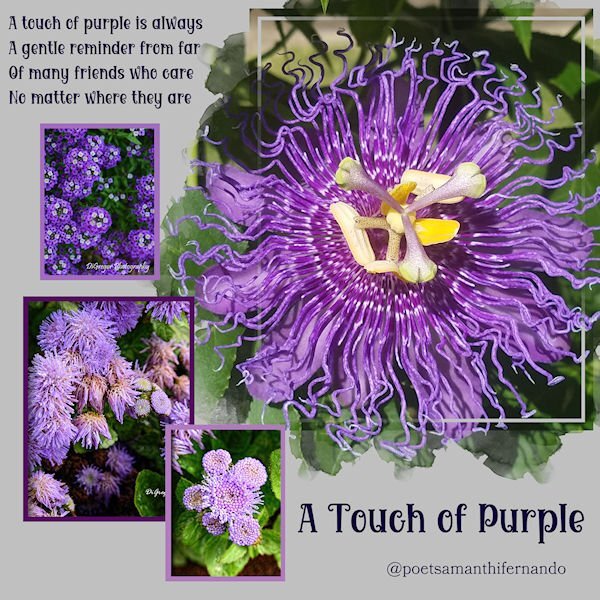
Mask Workshop Day 1 Getting off to a slow start. Still moving in and figuring out what furniture we want to put into this place. Time is always short. The poem is an excerpt from a poet, Samantha Fernando. Her credit is included on the bottom of the page. If you would like to see the entire poem you can find it at https://starsafire.starrayz.com/wordpress/2014/07/a-touch-of-purple/ All the photos are mine.
3 points
-
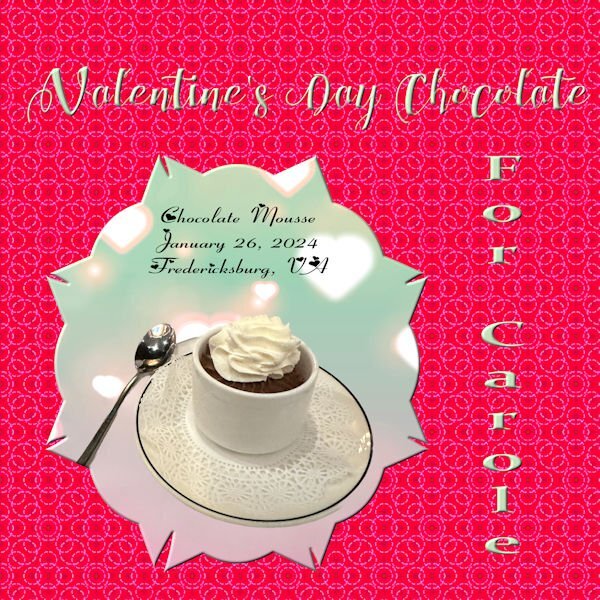
Day 3- More chocolate for Carole. The mask was made from a preset shape converted to a raster with raster to mask script applied. The picture is of a chocolate mousse cup from a French restaurant in Fredericksburg, VA. (and I wonder why my sugar is so high) The font for the title is Chocolateheartfree. The side font is Constancia from Creative Fabrice, and the journal font is Fiolex Girls(not sure where I got that). The background is from the background of the mask, but I changed the color to a more red for Valentines Day. It is actually two layers of the same pattern with different colors and a blend mode of burn for the top layer. BTW, the mousse was outstanding. I think there may be more to see of this restaurant.
3 points
-
3 points
-
Lesson 3 I made the kaleidoscope pattern from a selection using the main photo (mine from my window) so that the colours matched a bit. I used another Melo Vrijhof Mask from Digital Scrapbook.com as it fitted the format of the photo better. For the 'Mama' text I used 'Selection from Vector Object' and placed the text selection over the main image and Promoted the Selection as a new layer which I slightly offset on top of the original white text.
3 points
-
Thanks for lesson two and the template update @Cassel and especially for the plaid trick! It works really well. But in this case (I played around with a plaid but then decided against it) I left the plaid at home 😉 . Lady22 (Bourico at digitalscrapbook dot com) has been sharing such lovely templates! I really do like these simple, photo centered templates without much frou-frou... My take for day 2. Haiku and most supplies myself. Mask Lady22. Fonts is Poppins on haiku and Omnium on title.3 points
-
Day 2 of the Mask Workshop. It am finding it easier each time I attempt doing this. Thank you Cassel for your comments regarding my beautiful grandchildren. These photos were taken many years ago, and as adults they are still beautiful. I really like the way you did the background on this workshop.
3 points
-
That's great, Harmony! The font is outstanding! 👀2 points
-
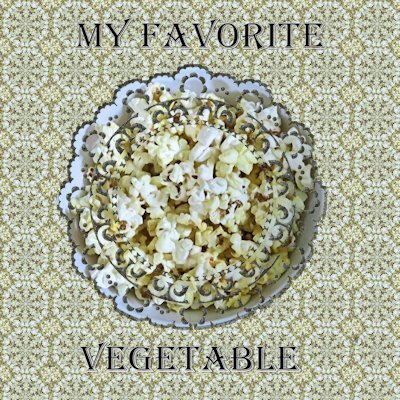
Project 3 Hey corn is a vegetable.
2 points
-
Took Judy shopping for new pickleball shoes. While she has played PB for years, this is her first pair of pickleball shoes. Our DSW has Sketchers PB shoes in stock which means we can try them on before buying. Judy is very difficult to fit, so being able to try shoes on is a real treat!2 points
-
The bird works just perfectly with your photos1 point
-
Hi Ann, for me this is a wedding with a touch of nature, everyone is wearing cheerful colors, the bride is still in white, I can still tolerate that for a wedding, but the wedding I described was in the early 90s and the bride was in black ( I was once offered an embroidered black dress at a bazaar in Egypt, something Bedouin women wore, I had long black hair back then ;)) it shocked me a bit, despite the fact that I have a live and let live attitude. As "sad" as the marriage began, it will probably end, she is in the final stages of MS and have 3 children (grown)1 point
-
@ Corrie Kinkel Yes I know and completely overlooked it, I'll rectify!! I was too hasty....1 point
-
Thank you Carole, but I'm not sure if I did it right in the first place. I lowered the opacity of the photo and overlapped them onto the small rectangles (to be made into masks) and moved and resized those rectangles to fit the photo. then once happy with the placement I made them into masks, then duplicated the photo (which I had put back to 100 % opacity) and moved each one into each of the masks. Is there a different way to do it? I've done it this way before but curious if there is a different/better way to do it.1 point
-
This white crane was at our pickleball clinic. The yellow plaid and the green/pink plaid were created from that photo. The blue plaid was from Day 1 layout. Neither the yellow or green/pink plaid looked good with my layout. Shadows added.1 point
-
All of my layouts for this workshop are being done for a book I'm doing for my cousin's family. So because of that I am using kits that I have in my stash so the book will look cohesive when done. I had the template from last year's workshop so didn't even try to download it. Layout #1 for Day 2, kit is a retired kit from Bella Gypsy (Christmas Cheer). Template from 2023 workshop. Layout #2 for Day 2, I used 2 kits, both retired from Bella Gypsy (Soul Sisters, Woof). Template is from 2023 workshop, extra for diamond members. Font is Discover Beauty for both layouts.
1 point
-
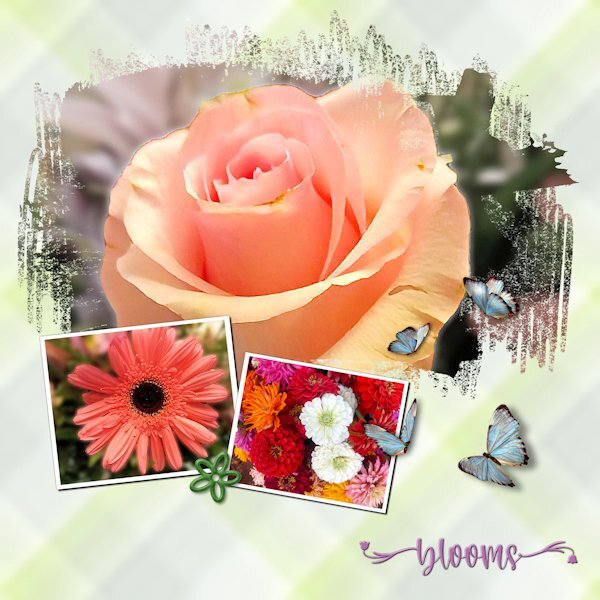
I spent lots of time experimenting with the plaid, including tinkering with the settings for seamless tiling. Since the photos are "busy," I wanted a pattern that wouldn't compete. The green "plaid" looks closer to a grunge effect. The photos are mine. Although I'm not a good photographer, I keep finding little bits of a picture that look nice enough to showcase. The font is Welcome Spring from Creative Fabrica. The butterflies came from Pixabay. They already had shadows but in the wrong direction. Flipping them solved the problem.
1 point
-
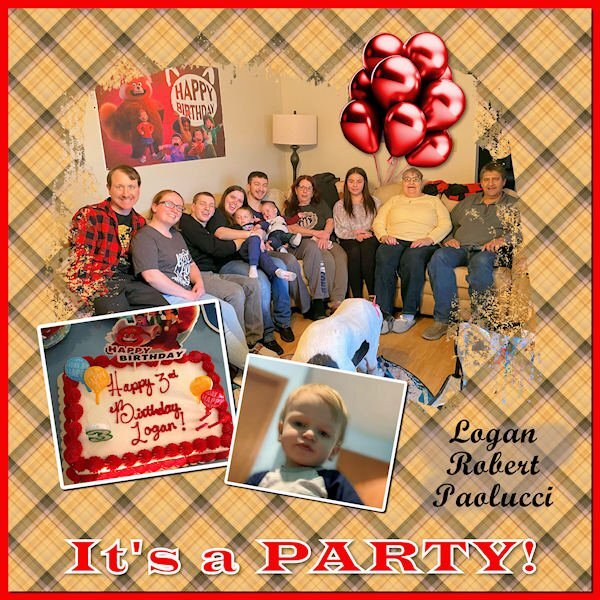
My Lesson Two - It's a Party! This occurred Saturday, Feb. 10, though his birthday was on the 6th. I used the same old template as last time. Discovered some strange layers. 😁 It happens when I'm struggling with masks, especially if they're in French! 😆 I created the plaid, and the balloons are a template from Marisa Lerin. I do struggle to align photos in a mask that is on an angle. I tried the Free Rotate tool but didn't see much change with it. Is there a trick to it?
1 point
-
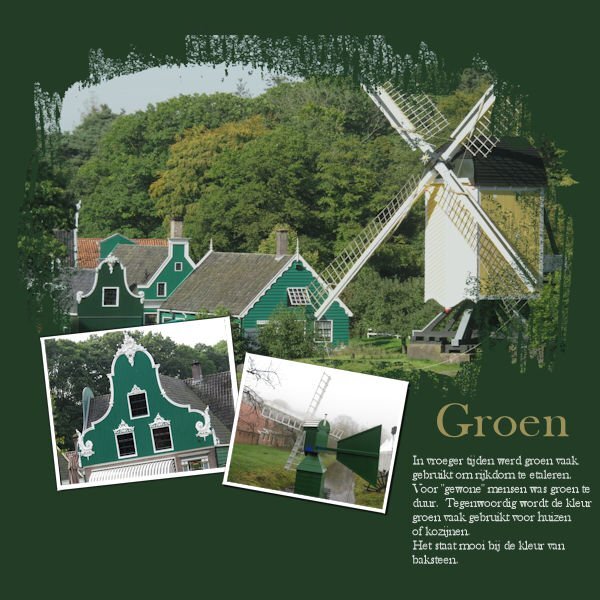
Day 2 "Green" In earlier days green was a colour to show you had money. Green was too expensive for the "common" people. Nowadays green is still a colour people use for their houses, it matches well with the colour of brick. Baskerville old face is the font. Photo's are my own, taken at the Openlucht museum .
1 point
-
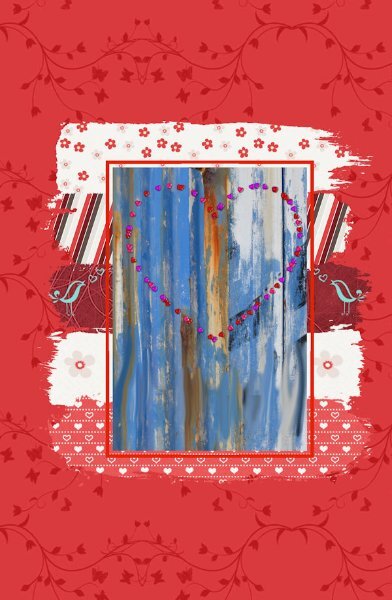
I have now used the extra template and some supplies that Carole gave us to practice the technique. It did help to question with each move what I was actually trying to achieve with each layer. Thank you Harmony for your help there. For this template I found it easier to rename the Stroke layers (1-5) to differentiate them. The main image I created from a picture tube I created of hearts and placed it on my photo of an old painted wall. The wall image fell short of the Mask window so I duplicated the wall image to fit, and used the Smudge brush to blend the join. Then Merged down to one layer.
1 point
-
I found the cutest photo of a kitten online at https://picjumbo.com/latest-free-stock-photos/ I made a card front using the kitten. Thank you for the lesson Carole.
1 point


Resized.thumb.jpg.d25811db03a63358cedab1e79f527635.jpg)