Leaderboard


Popular Content
Showing content with the highest reputation on 01/18/2024 in all areas
-
I know I am a but late to do this, but it has been a very busy week. I know that is no excuse but I have decided that I am sick of doctor's appointments, x-ray, MRI's etc. This is my Day 2 attempt.
 13 points
 -
graphics myself, you can dl them here12 points
-
11 points
-
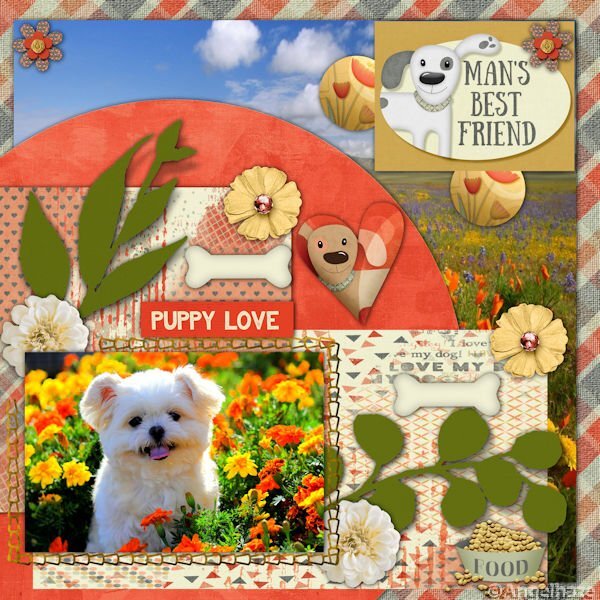
Some of the text blurred in the reduced size, but is clear at full scale. They are adorable!
11 points
-
Finally got started so here is my day 1
11 points
-
Water plants by Jessica Dunn at Digital Scrapbooking, Coastal Spring. Sand dollars by Elif Sahin, also Digital Scrapbooking, Sand and Beach. Papers by Marisa Lerin, Coastal. Word Art by Marisa Lerin, Ocean. I cut and divided the word art to fit my space.11 points
-
Day 3 template. Kit used: cpjess-tomorrow-folder-mini for the 3 patterned papers; I colorized and texturized the 2 small papers; the font I used was Brailganta Script (Creative Fabrica); I made the tag in back of the title from a preset shape which I texturized. The picture is from another Jessica Dunn kit. I did colorize the stitching and innerbevelled it.
10 points
-
Day Three: I have stayed with the template for this one. The papers are from Janet Scott’s kit “Look a Book”. The photo is from Freepik.
10 points
-
Day 4. The picture is from Pixabay. A pond in our neighborhood is a favorite rest stop on the migratory route. A neighbor posted a picture of some late-season travelers waddling around on the ice that has formed during this brutal cold snap.
10 points
-
Day 3. Panicked a bit when I saw a different template in some of the members comments until I saw a reference to "diamond" so I guess that group is getting different templates, I hope, as I just did my day 3 using this one. Now that I have the use of papers and selections & deletes in the right way, I hoped to get to that wrap text that I missed in the previous lesson. PSPX8 is supposed to have a wrap text feature but I sure can't find it. I got into the Corel site and found it being demonstrated and I did what their video said but to no avail. PLUS, when I try and type in that selection area, the text defaults to a huge spacing between lines. I played around with the "leading" settings but still got huge spaces between lines. So, back to separate lines of text on separate layers and moving them around manually. At least I know how to do that..... tedious but less frustrating. The subject for the picture is shasta daisies, one of my garden favorites. I cut them to the ground in October and they were up and blooming again in early December (it helped that we had no snow yet).
10 points
-
Template Lesson3 : cass-Template3.jpg done with, Fido Bundle By Gina Jones
9 points
-
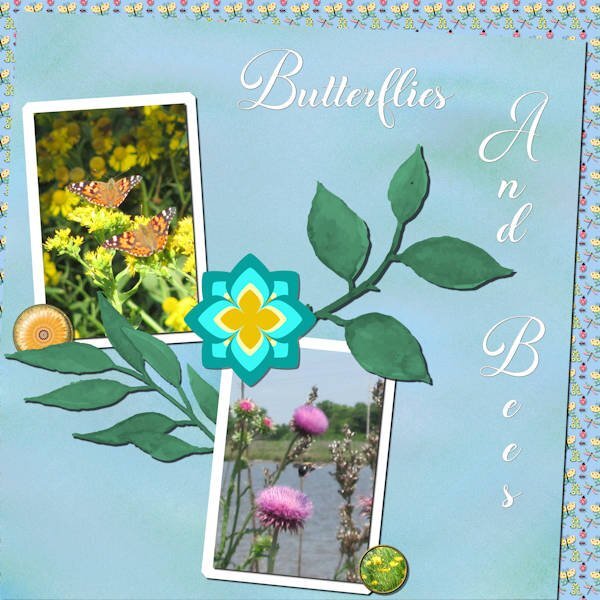
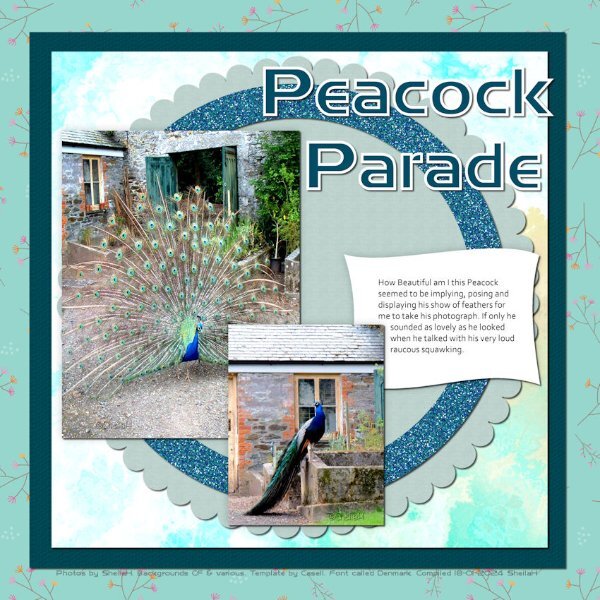
Day 3 - Diamond template. All the papers and elements were created from scratch – the flair buttons from tutorials by Cassel as well as the stylized flower in the center. The font is Butterfly Wish – most of my fonts are from Creative Fabrica. The butterfly picture was taken in Blue Earth, MN, and the bee picture was taken at an RV park in St. Peter, MO.
9 points
-
Day 3 I used my kits. Font is Forte.
9 points
-
And here is my Lesson 2, though not totally happy with the curvy text but practice makes perfect! My photo...
9 points
-
The extra from day 2. I treated it as a poster. The 2 pics are watercolors from Creative Fabrica.
9 points
-
resized this a bit and also moved it around a lil.... graphics by myself9 points
-
Day 3 After the snow photos of day 1 and 2 I used 2 photos of the same Hortensia that was in my day 1, but here in full bloom. I used the extra template for this one and colored the leaves with the technique of the lesson. The papers are my one creation and I had them in my stash. The flower elements are by cpjess-old fashioned summer. The button is one I use often and recolor as needed. The butterfly I forgot where I have that one from. I have accumulated a whole bunch of butterflies. Last the front is Bastro.
9 points
-
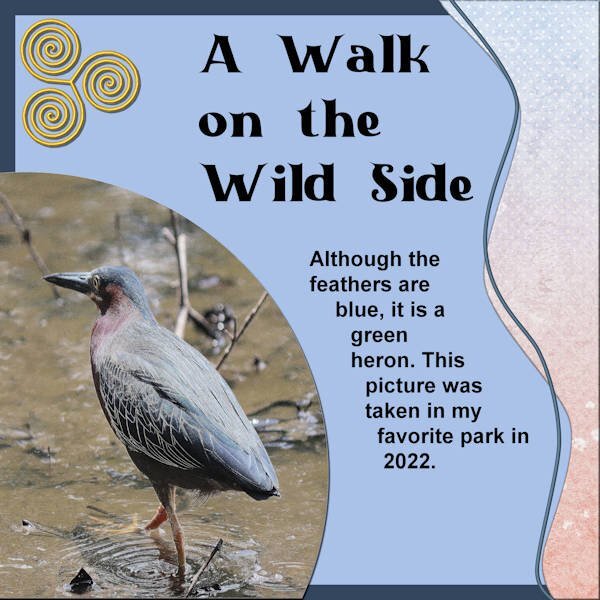
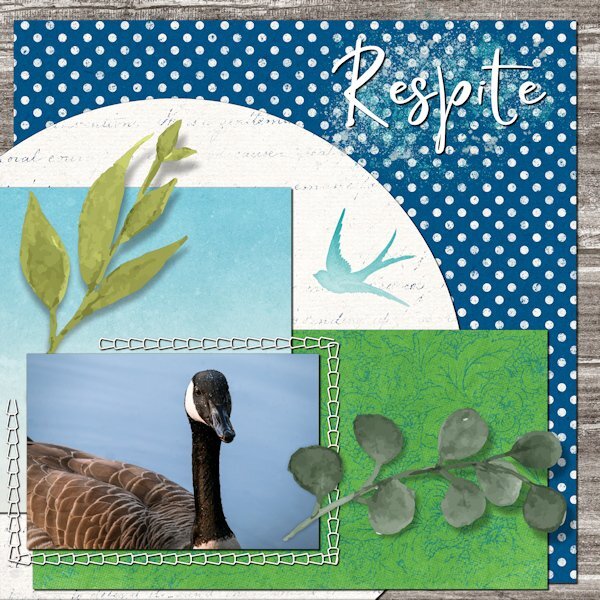
Trying to catch up. Day 2 Diamond template. The paper on the right side was taken from a kit: cpjess-reach for the sun; the background paper was colored with a color of the bird as was the journal paper; the triple spiral element I made in a recent lab; the title font is Black Castle (Creative Fabrica font); the journaling is arial. Again the text tool to determine the size of the text was wonky – don’t know why this happens as it doesn’t happen except once in a while. My daughter and I went to our favorite park in Memphis (not far from home) where there is a lake. The lake has “Canadian” geese that live there year round and ducks, but occasionally a heron stops by – usually a great blue heron, but sometimes we have other herons that appear – I have a picture of a LITTLE blue colored heron as well as this one of the green heron.
9 points
-
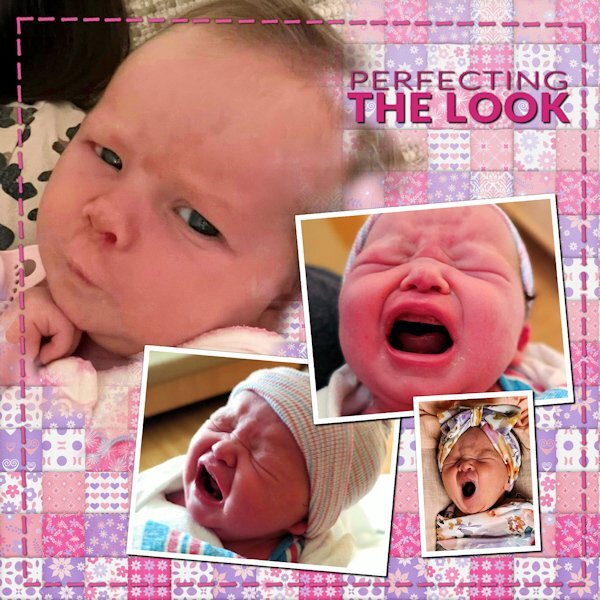
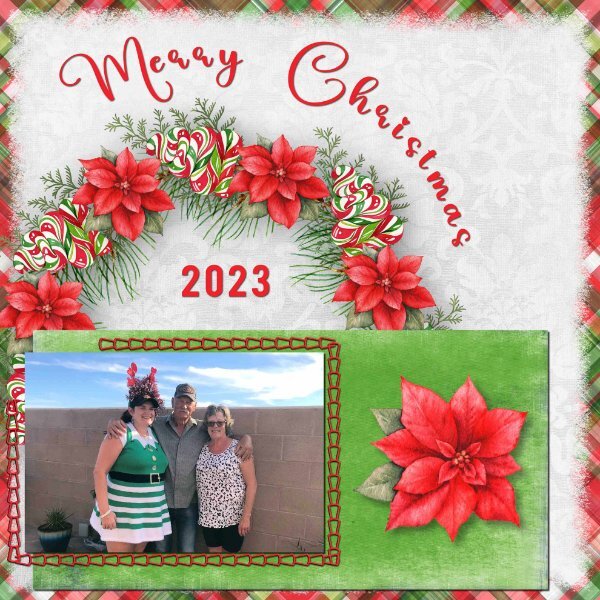
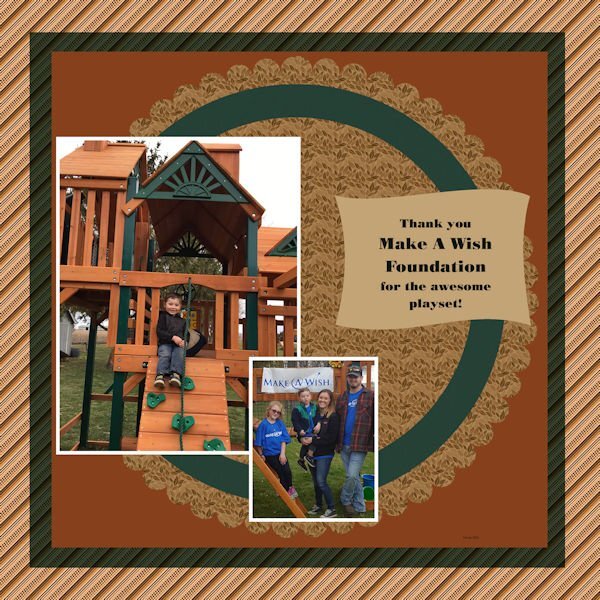
Day 4. Ansley, born in September, is the newest addition to my sister's roster of grandkids. We have one more coming in April and added another one by a recent marriage. The background is from Chantahlia Designs.
8 points
-
This layout could serve a double purpose...workshop and All About Me. I used a purchased kit...Travelogue by Connie Prince. I also rotated the two larger photos. The masked photo is of the State House. The historical markers tell of the burning of Columbia. During the Civil War Columbia was attacked and burned by General Sherman. The bronze stars mark 6 places where artillery hit the State House on February 19, 1865. My high school was about 3 blocks behind the state house. I love my home state!8 points
-
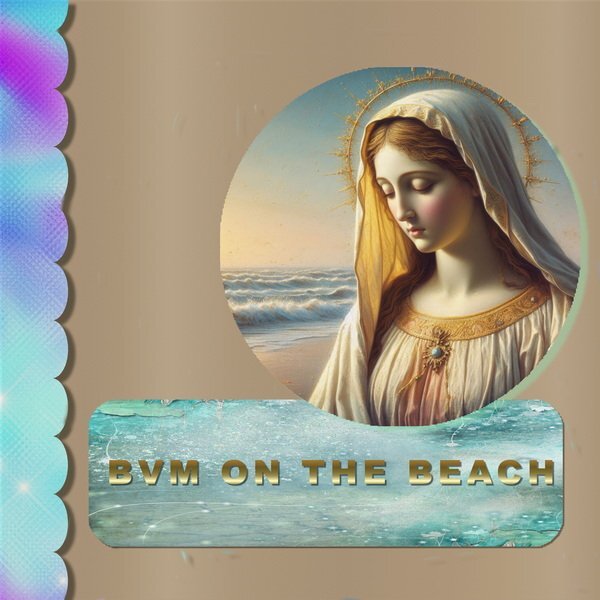
The Virgin Mary was made by AI text to image. Then, I used the day one template in Corel PSP.
8 points
-
I managed to do template 2 and although I have Caroles scripts, I wanted to do this template as instructed and after a few attempts I managed to do it. I learn by getting it wrong first time rather than right and hopefully with good notes I remember how to do it. Anyway,here is my result for template day 2.
8 points
-
graphics myself, you can dl the winter themed mini here8 points
-
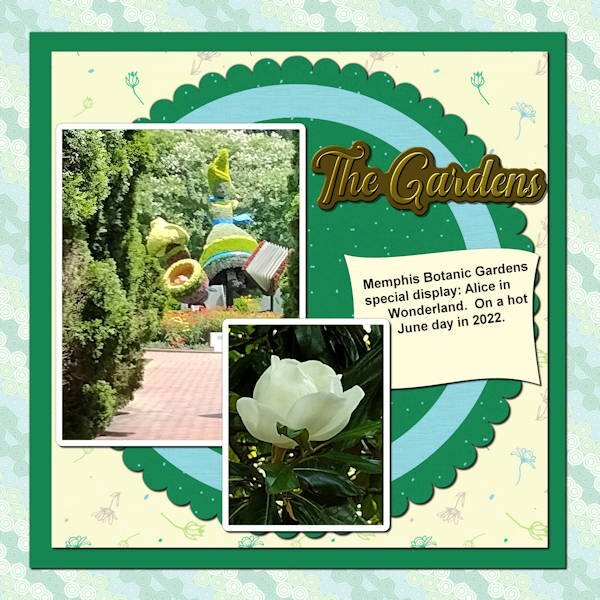
On to template 2. Kit used is PS_Jessica-D-wintertropics-mini – the Background paper (reduced opacity), the scalloped paper and the paper in back of the scalloped paper; the title is a metallic title I made in a lab; the paper above the background was simply colorized as was the circle element which was texturized. I’ve used these pictures before except for the magnolia blossom – it was on a tree in the gardens and was just beautiful – perfectly formed and I’ve been dying to use it. The font is Arial for the journaling.
8 points
-
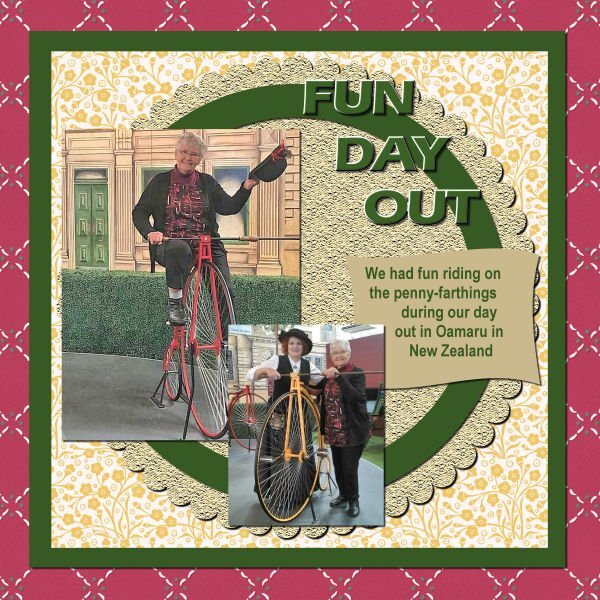
Hi, here is my Day 2. This is me visiting a friend of the family who works at one of our Historic towns, and they are known for the penny-farthing tricycle. It was such a fun day.
8 points
-
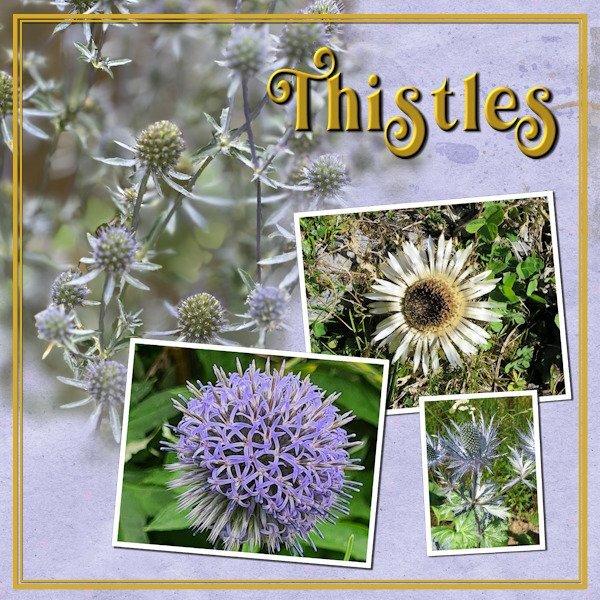
Day 4 I hadn't planed to use flower photos this time but after the photos of my plants in the snow I decided to stay with flowers/plants. So here are a couple of thistles. I like the idea of making the hard edge of the mask softer by using a blur! I must have forgotten that trick..... now I'll hopefully remember. The background paper is again made by using 2 papers from the april 2022 blogtrain with the blendmode lighten and the font is Bilderberg. I haven't put the names of those thistles on the page because I don't know the English names and most if not all belong to the Echinops family.
7 points
-
Day 4 I used stock photos from Pixabay. Font is Magnolia Script. I made the paper. And I added an inner bevel to the title.
7 points
-
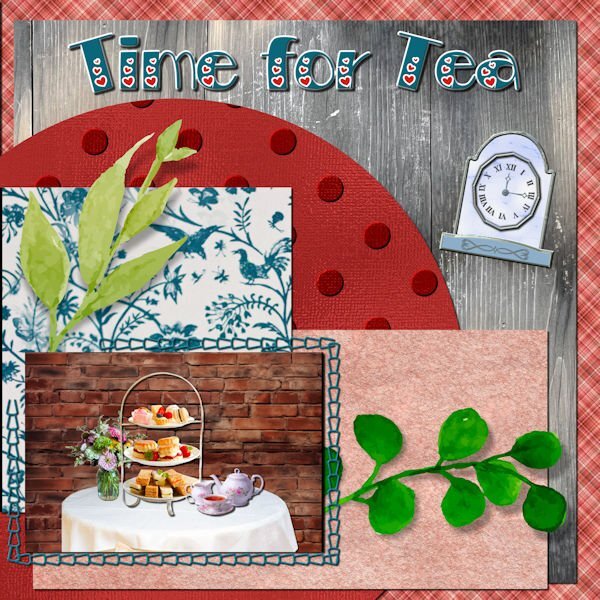
My daughter found an afternoon tea event in Fredericksburg that we will be attending. Since I don't have any good teahouse photos, I created one using Canva for the table, tea tray and tea set. The brick background is from deeezy.com. The bird paper is also from Canva; the polka dot paper is my own, the parchment is from FF, the wood from one of my daughter's photos, the plaid is one of my own and the clock is from my build a kit. The font is Bravo from Creative Fabrica.
7 points
-
day 4
7 points
-
Day 2- We haven't been out and about to much lately so I just went through some old photos. The kids are my son, Dominic, in red, my grandson, Tony, and his sister, Haley, my only granddaughter. When I say old, I mean old. Haley is now 20, Tony is 25, and Dominic is 36. It was a fun day in the preserve in back of our house in Crystal Lake.
7 points
-
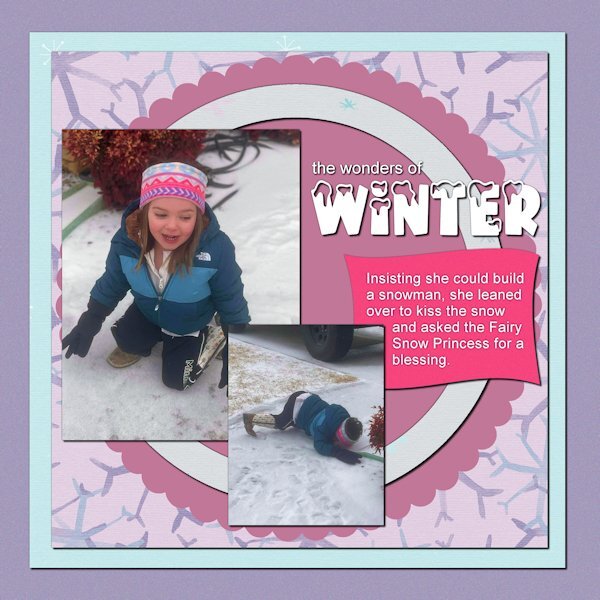
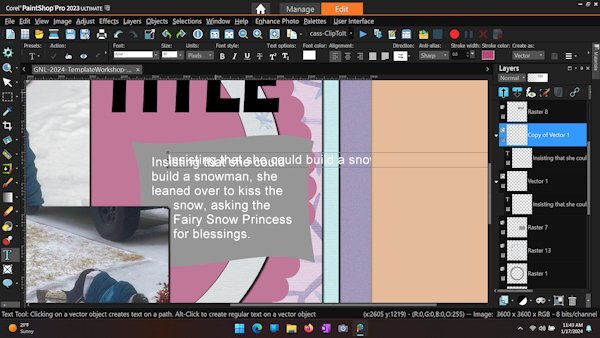
Day 2 - This is my 3-year-old great-niece Amelia. It looks like she borrowed gloves from her dad. The papers are from a collection by Marisa Lerin called Winter Arabesque. The snow-capped font is Winter Vibes from Creative Fabrica. I've also attached screenshot of a recent problem with wrapping text. Even after clicking the checkmark for ACCEPT, any change, e.g., moving, changing size, or duplicating the layer, removes the constraint of the selection. This is a recent phenomenon. My PSP 2023 version is 25.2.0.58 x64.
7 points
-
7 points
-
Day 3 I used a kit from Ilonkas Designs It's Christmas. Font Anime and Bebas. I really like your hand outs with all of the information, Thanks
7 points
-
Day 2: I tried to stick to the template but I couldn’t get it to work for me without some changes. I suspect I could keep on changing my mind about the theme and layout for many days so time to stop and move on… The photos are copyright free from Freepik. The Papers are from a kit called Reach for the Sun by Jessica Dunn. The font is Santa.
7 points
-
Template Lesson 4: cass-Template4.jpg Done with, Green Acres Bundle by Jessica Dunn
6 points
-
Repost of Day 2. I did not put the drop shadows on the first one.
6 points
-
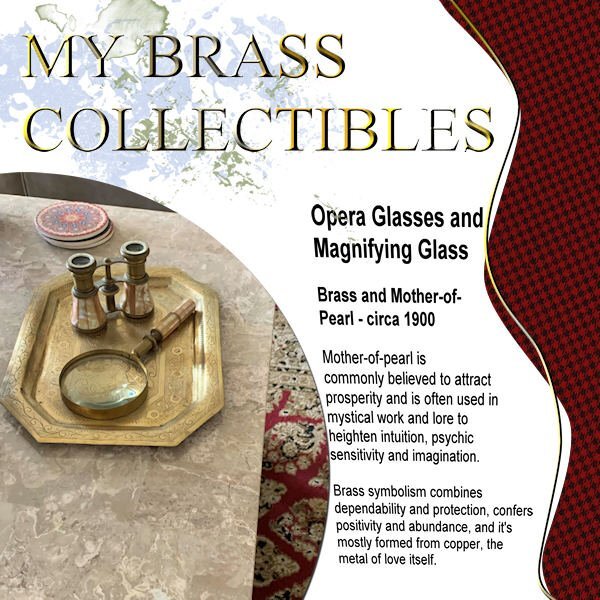
Speaking of text wrapping, I finally fixed my Lesson 2 - Collectibles text. It now looks as planned. I had no problem with the wrapping.
6 points
-
Mary, I went to Effects - Distortion - Wavy and just played with the settings. I wanted something sort of like waves in water for my daughter on the California coast. Here's a screenshot of the settings I used.
6 points
-
6 points
-
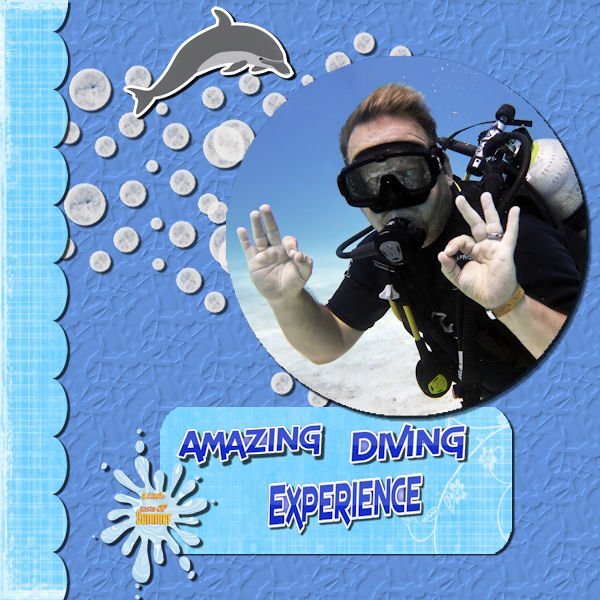
What a nightmare !! My laptop keyboard has decided it will not delete in PSP 23 therefore I could not use the template. There is no other way I could find to delete except to delete the whole layer. I put another keyboard in ..no luck . I used another computer no luck. It would delete in any program but PSP23.So looks like a reinstall. I tried in PSPx8 and hey ho all working again on the same laptop! So I have managed to put something together for day 1.Probably a lot of mistakes but at least I didn't loose the will to live !! It is a shot of my son on one of his diving jaunts .The background was just using a blue from the photo and adding a texture. .The other papers and graphics were from a kit called Dancing with whales.
6 points
-
And using the same picture and my papers - Workshop 1 extra.
6 points
-
Template Workshop #2 At first I thought this is a lot of work to achieve the same thing that I could a different way. But the more I worked with it and thought about it, I do see where using masks like this can have it's benefits. I do have a template that I started setting up with masks to save as a psp image to use later. Thank you for the lesson. 🙂 Oh, I used papers from my own kits.
6 points
-
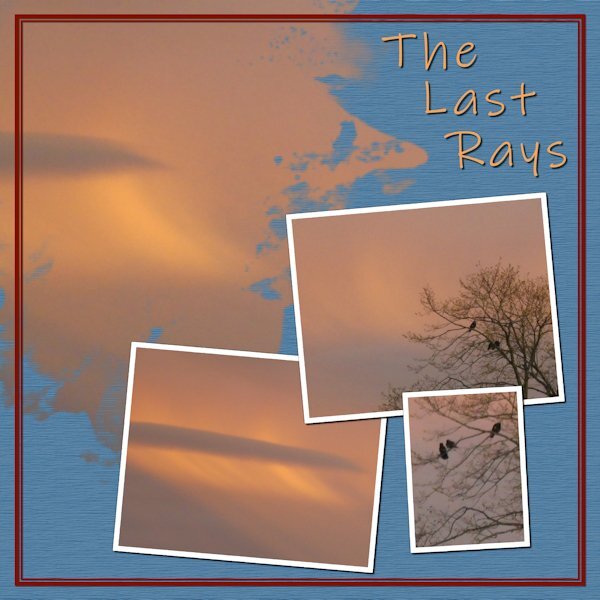
Day Four: Photos I took of a local sunset. The background is a flood fill with added texture. The font is ‘Ink Free’.
5 points
-
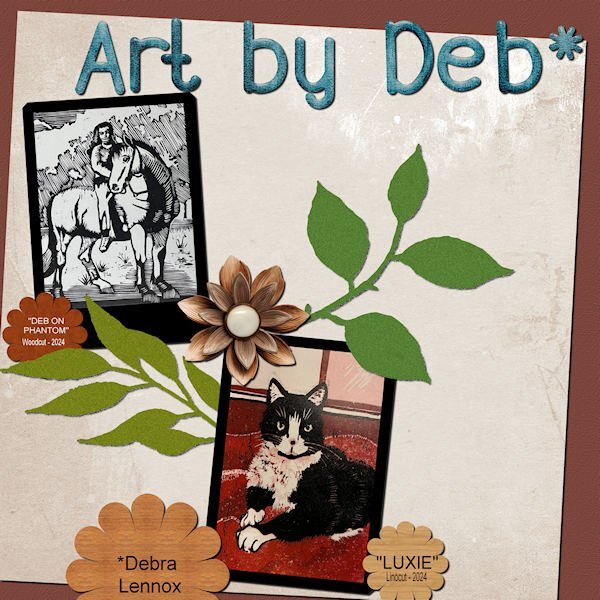
Finished Lesson 3 - I'm getting there! Used the Diamond template this time, featuring some new art from daughter, Deb.
5 points
-
Day 3
5 points
-
DAy 2
5 points
-
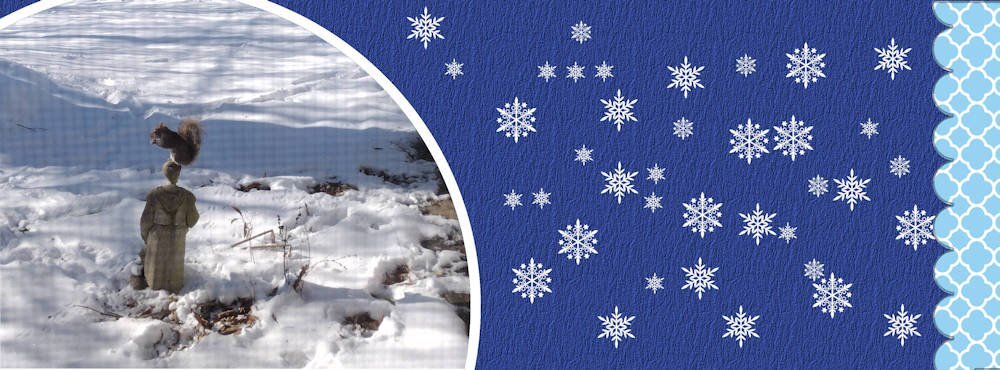
Extra template 1: Kit used: DSAFeb14-MarisaLerin, changed the color of the paper 087 to blue with Hue Saturation Lightness; removed the arrow head element and replaced it with an arrow from the preset shapes; removed the dot element and replaced it with paint brush snowflakes that I created in one of the labs; changed the background paper from the kit with hue saturation lightness also; and the scalloped paper layer in the template I colorized to blend in with the picture; the font is Bambe from CF. The picture was taken outside my window (hence the screen) on Tuesday afternoon. Our snowfall was about 4”. This morning we have 4 degree weather, but it’s nice and cozy inside. We’ve been asked to conserve energy so no lights unnecessarily and we hand wash dishes (shades of my childhood). It was fun watching that squirrel. He would hop on the statue to eat the acorn and then hop down and grab another one from the leaves on the ground near the statue and then hop up on the statue again to eat it. He stayed long enough for me to grab one of the great grands I live with to show them.
5 points
-
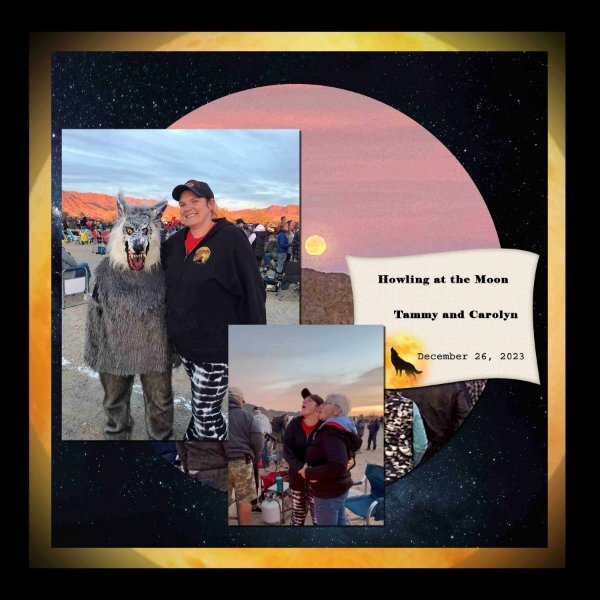
Day 2, Moon and wolf from internet. Star paper from Natali Designs Dream 2022
5 points
-
OMG Ann! I love that whole set up on the tray. What a treasure they are Nice carpet by the way.4 points
-
Hello and thank you @Cassel and to everyone. I'm a wee bit late to the party.... and I hope I can catch up. Wonderful pages here already. 💓Oh and I brought a lil gift for everyone, too. You can dl my winter themed mini here.4 points


Resized.thumb.jpg.d25811db03a63358cedab1e79f527635.jpg)


.jpg.8e51df6b817b521b542679bbaae3bcfb.jpg)