Leaderboard


Popular Content
Showing content with the highest reputation on 10/28/2023 in all areas
-
My recent work with Jacek's recent trip
 7 points
 -
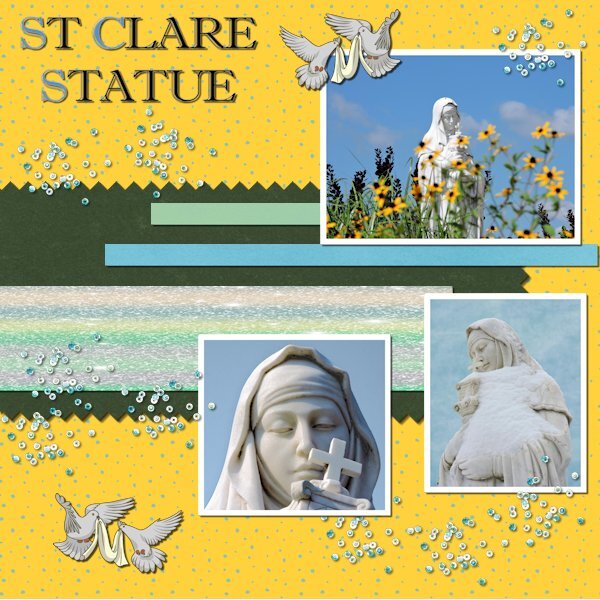
I have got to Day 11 and I certainly have learnt so much and enjoyed doing this. Thank you so much to Carole. This day has been dedicated to my darling dog of 17 years - Bundy. He was our family and was loved by so many. I was so happy to be able to do this page for him.7 points
-
What a learning curve!! . Merge down to keep the squares and then mirror, brilliant . The text was a major headache, my accept icon had gone walkabouts and I couldn't get rid of the box of the long wording ! No way could I get my paper to show in the patterns box to do the heading hence the black text ! I had reverted to PSP X8 from 22 as the pick tool wasn't working on that one! User error I am sure and tomorrow is a new day. This has been an amazing journey with an excellent tutor and amazing new friends. Take care all, until the next time Oh the papers were Mary Frans again from the Nitwits site The bees were Creative Fabrica
4 points
-
Thanks Carole, I really enjoyed the PSP refresher course!!
4 points
-
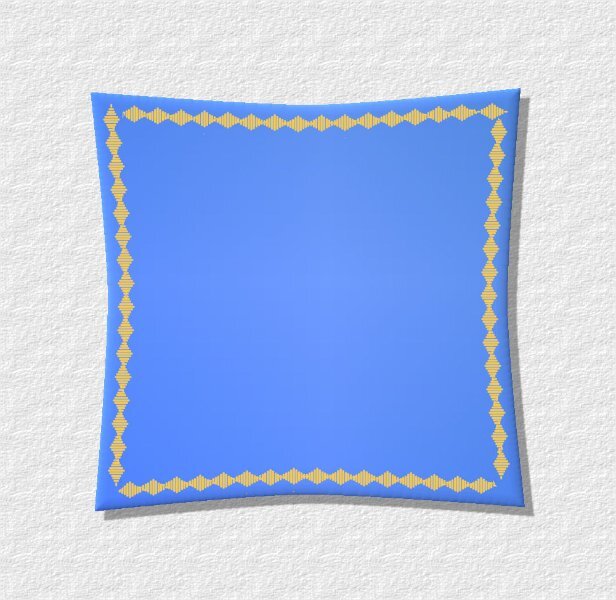
Just fooling around. Made a pillow. Used the Vector Paint script with Cass' embroidery stitch (2 separate layers) and then the eraser tool on each of those layers to achieve the look I wanted. Playing with the inner bevel, the outer bevel, and drop shadow (puffy flower setting given by Cassel in one of our classes, but adjusting it somewhat).
4 points
-
project 4
3 points
-
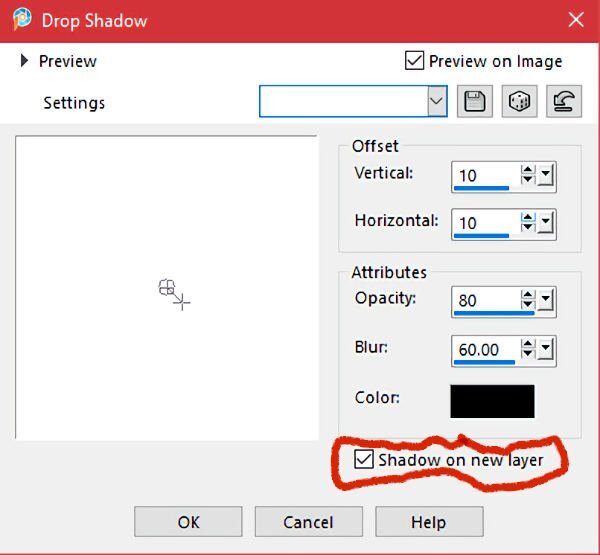
Here's how you do it, Melanie. Under Effects/3D Effects/Drop Shadow on the toolbar.
3 points
-
here is my improved version.
3 points
-
To satisfy my own curiosity, I looked up which masterclass I was referring to. It's called Pop up. I thought it was a Christmas one, but it isn't, Carole uses a Christmas tree, to demonstrate perspective and shadowing.2 points
-
thanks to Carole and all the Members for a great Bootcamp again- it is so inspiring to look what all made with the same instructions , all are so helpful and friendly.2 points
-
I extracted the stork from another photo and saved it as a new image. then inserted into my layout, duplicated and made the duplicate black. like a silhouette. I then adjusted the silhouette using the perspective tool and scaling tool. Reduced the opacity and used Gaussian blur several times2 points
-
The variety of shades men can make is the reason I changed to PSP from my former Photoshop program. After boot camp, I will delve further into shadows.2 points
-
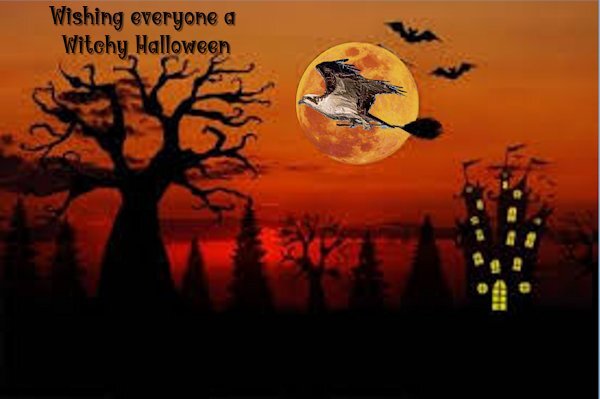
I take it. The next word is WITCH. I did this several years ago for another group's Umbrella challenge. I hope it qualifies for RAIN. 🙂
2 points
-
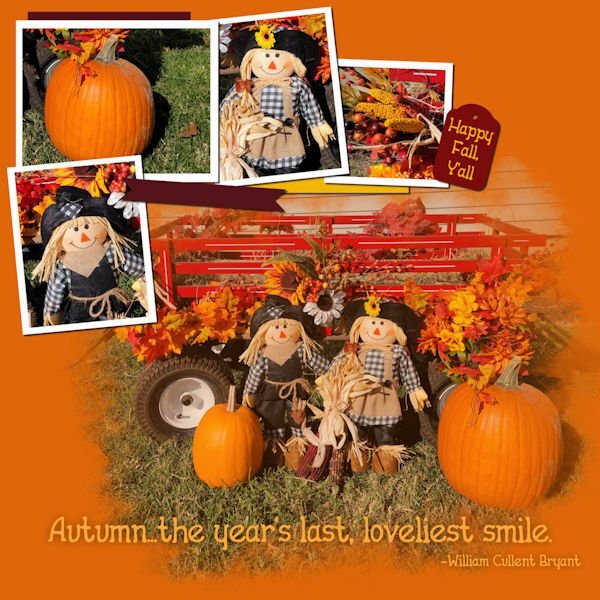
Something a little different, subway art, Autumnal equinox
2 points
-
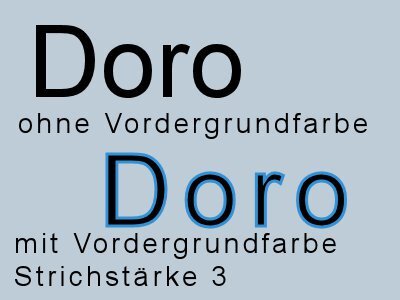
Hello Carole, is it ok if I open a separate topic for each module or should I show all modules in the same thread? Is there another gallery for me where I can post my work and forward it from there to this thread, like with Bootscamp (storage space)? Regarding this module, I still have the question of how to outline text with a color. I didn't find anything in the PSP help, nor did I search for a tutorial in the forum.1 point
-
hallo Doro, wenn du den Text schreibst, dann benutzt du die Hintergrundfarbe und die Vordergrundfarbe ist ausgeschaltet. wenn du diese einschaltest und die Farbe auswähst, dann die Strichstärke ändern so sieht es mit und ohne aus
1 point
-
Hi Carole, I put module 3 right below. Tomorrow I'll take a break. I have implemented all the tips in the videos, they really save time. Fonts: Nouveau Rose JNL, und Oak. The Chrysantheme-Doodle is from Freepik.1 point
-
@Jannette Nieuwboer I find that is much easier to read! @Emerald Jay I am glad you enjoyed the Bootcamp. Don't despair; there is a lot more coming to all in the Campus! @Doska St. We will surely see more of your projects in our regular threads! @Ann Seeber I only put shadows on the same layer in exceptional situations. Otherwise, it is ALWAYS as a separate layer. That offers more flexibility even if I just change my mind! @Melanie Mitchell That book has been quite useful to many of our members here! I am proud of it too! @laurie solaas A refresher is always available in the Campus. At any time, just ask 🙂 @Anja Pelzer Making a silhouette will do the same as a shadow with no blur and no offset. In fact, the shadow will look like a silhouette in one step. If you have not posted your projects, maybe you were just practicing on your own? Remember that if you post 4 of the 5 projects by Monday night, your name will be entered for the random draws. You still have 3 days to catch up if you are still a bit behind.1 point
-
I'm having a similar conversation in the String of words, where I referred to a masterclass called Pop Up, on perspective and shadowing. Which covers how Anja, created a very realistic shadow on the stork. There are other masterclasses covering perspective and shadowing, in varying degrees of advancement, to cater for everyone, from newbies to seasoned PSPers.1 point
-
Of course!!!1 point
-
Thanks for sharing your technique, Anja. Now I've learned something else new!1 point
-
I guessed that is how you created the multiple umbrellas. Carole, uses that technique in many of her tutorials. (eg flower petals) There is also a Xmas masterclass on creating a 3D effect, in it there is mat in the centre of the room demonstrated, similar to your puddle.1 point
-
I take it Witch. I created this several years ago for that Osprey sight I follow so it doesn't have all the shadows etc we usually use The next word is . SCRAMBLE
1 point
-
I didn't know you could put a shadow on a separate layer, but I can really see the possibilities to be able to move it about. Thanks for explaining how that shadow in the photo above was done. Also, for anyone interested, Carole's Tips and Tricks book is listed on Amazon's Kindle Unlimited, for anyone who has that subscription, as is the PSP Manual. l've already downloaded both, as I always have my Kindle nearby. Thanks for letting me know about your book, Carole!1 point
-
I found the original post and my explanation in a comment: I started with one umbrella. Duplicated it and mirrored it vertically. Duplicated twice more and free-rotated each of those. Then I merged all four to a new layer and rotated that one 45 degrees. Merged all eight of the umbrellas. Duplicated that layer and rotated it 22.5 degrees. I enlarged the bottom layer a little bit (don't remember how much). Hence, a total of 16 umbrellas, eight on each layer. Technically one umbrella LOL. ❤ ... Believe it or not, the most frustrating part for me was trying to get the puddle the way I wanted it.1 point
-
A TIP I LEARNED IN BOOTCAMP: Anja posted a layout showing a trip to a zoo and I was struck by the use of a rather, radically offset shadow that really enhanced the image of a stork. It also reminded me to always have the Shadow on Separate Layer box checked, in case I want to adjust a shadow further. Here's the illustration that I saw...
1 point
-
Hello, then I would like to thank you very much, Carole, for the excellent basic course in PSP, the good support and the really easy-to-understand videos, even if you are not fluent in English, but at least understand the basics, after so many years of scrapbooking 😉 We would also like to thank our dear fellow learners and advanced learners for their supportive help. I will then continue with “Basic Scrap Course 1” We'll see each other in the forum. Bye bye, ciao, dag and Tschüß at boot camp Doska1 point
-
Carole, thank you so much for having these classes. I hate to see it end. They really helped me a lot. And what a great bunch of people you all are too. 🙂 Here is my last Lesson 11. Thanks for looking.1 point
-
Carol, thanks for going through boot camp with us again. It was a refresher of the many possibilities that PSP gives us. 🤩1 point
-
We have had our first snowfall, and yes, I have been out shooting snow scenes. I totally agree, it does capture the winter vibe. I have to adjust my camera settings to accommodate the stark contrast of summer colours, to the brilliant white of the snow and browns of winter.1 point
-
Day 11 Thank you, Carole, for a fun bootcamp! You rock! A cat will always find an empty box and then...fill it...as Poppy is demonstrating in this photo...in January, 2012. Fonts are Brush Script MT and Monotype Corsiva. Brad in title: Sheila Reid, Furry Friends Kit, elements. Metal pawprint brad. Digital Scrapbooking. Paw print: Christina C, Cattitude Kit, paw print 1. Digital Scrapbooking.1 point
-
I take it and the next word is Autumn
1 point
-
Ladies you make me so envious; to have all that nature at your doorstep. I live in the Netherlands and we are a small country where it is impossible to find a spot without light pollution. Noise is another issue because we have roads and railways almost everywhere and our nature is more like a big park. Of course it isn't all bad and I can hear the little birds sing early in a spring morning. And the sparrows have their evening coming together for spending the night in the trees. I was born and spend my youth in Rotterdam, a big city. Nowadays I live in a nice enough village with the possibility to go for a walk outside in a bit more rural setting of farmland and a small woodland park. But it isn't advisable to go there on your own as soon as it is getting dark or in the twilight. I have been to visit my family in the States 3 times now and while there we did a couple of short roadtrips that at least have given me a glimpse of the vastness, when you are riding for hours without seeing very few cars, only grassland and some farmbuildings in the distance. Hopefully next year I can go there again and if I come somewhere near one of you it would be great to meet in person. At the moment I don't have concrete plans, it depends on my daughter when it will be a good moment to come over and my home situation must allow it too. In the meantime I enjoy all the stories, the photos and layouts that are posted here.1 point
-
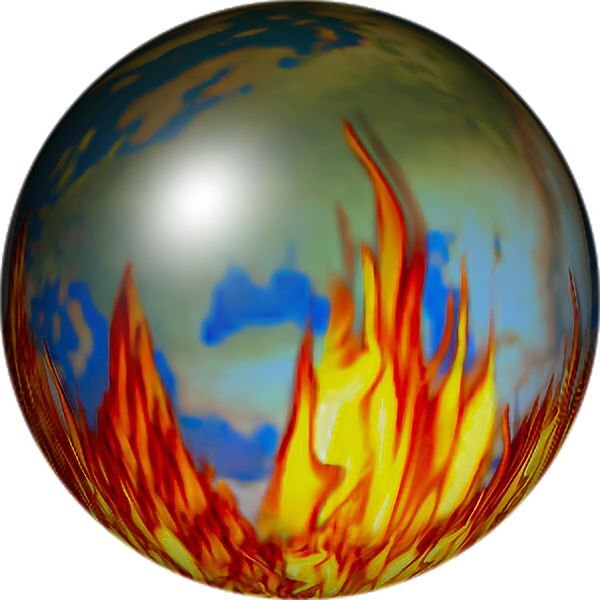
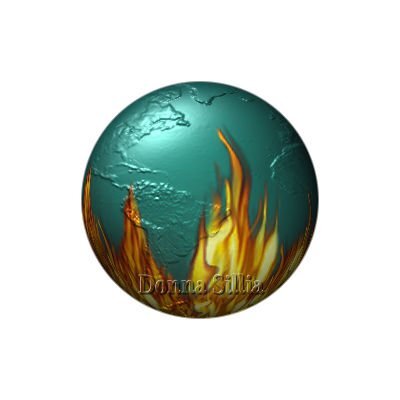
I recently watched a PBS program call "World on Fire" which was about WWII and decided to try to replicate an image that I made several years ago. No matter what I tried, I couldn't remember what I had done, so I made a new one using Balls and Bubbles effect. The earth is from CF Spark. I tried to use it as a Bump map which didn't work and ended up using it for the surface.
1 point
-
"I take it" The next word is Hedgehog. The photo is from greenlandshop, the font is Arial size 30
1 point
-
Melanie, I love the Indigo Bunting. We rarely see them here in Virginia. Doska, my neighbors have a bald eagle nest on their property. Once, I got to go there and watch. I had always wanted to see an eagle in flight...and I did! Here a younger buck wanted to challange an older, larger, more experience buck. The big guy wanted nothing to do with this little one but finally had to stand his ground. It was no contest. The little one was pushed all around. They never fought for real but it was obvious which one would be victorious. Red Stars: Amanda Brown, Digital Scrapbooking, 129333 Stars in text: Brandi White, Digital Scrapbooking, Chromies Stars Font: Cookies and Milk Antlers: CleanPng Day 3, layout 11 point
-
Wonderful layout, Gerry. Can you tell me what fonts you used? They are different and quite interesting.1 point
-
Thank you so much Ann. You or someone else must have mentioned this before, I did do this but then forgot about it ! Thank you for the reminder!! I now have a "post it note" to remind me. So much to learn and remember but so enjoying this workshop and all the help is amazing. At the moment I have 16 tabs for the site open it is no wonder I get lost !!1 point
-
This is NOT a political statement. It is a heartfelt (simplistic?) desire for peace...wherever there is open conflict. I kept thinking of the song and made a layout to clear it out of my head. The message in 1969 is one we can still use today.
1 point
-
This is one I did and then left sitting. No photo, just the words. I need to be reminded to let some things go.
1 point
-
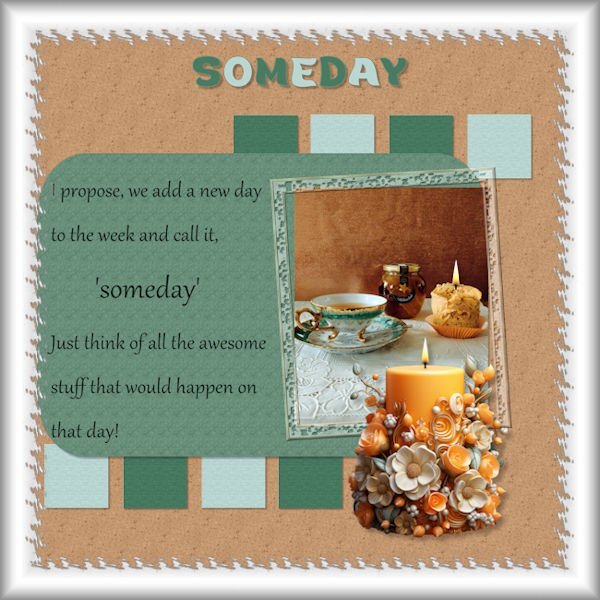
The background was from C F. The candle is extracted from a pic I took years ago.
1 point
-
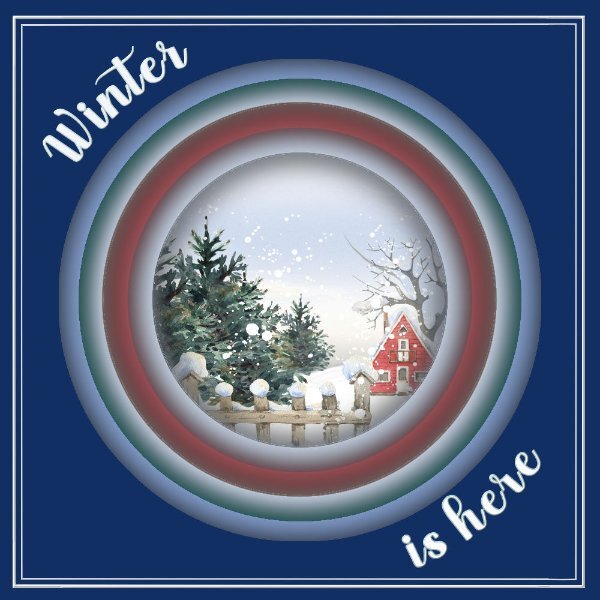
Here is Winter
1 point
-
I purchased this template, Blended Clusters 10_03, by MsFish at Gingerscraps today.
1 point
-
Wow! Amazing layouts! Great work, Everyone! I need more time! Template, XOXO, by KCW (Kimi's Creative World). Font is Apple Butter...from DAFont, I think.
1 point
-
Cross-posting this from the 1-2-3 Challenge which asked for 1 sequin, 2 Polaroid and 3 paperclips. My details are on the 1-2-3 Challenge page and also on Facebook. Introducing my great grandson Jonah James born June 20th.
1 point
-
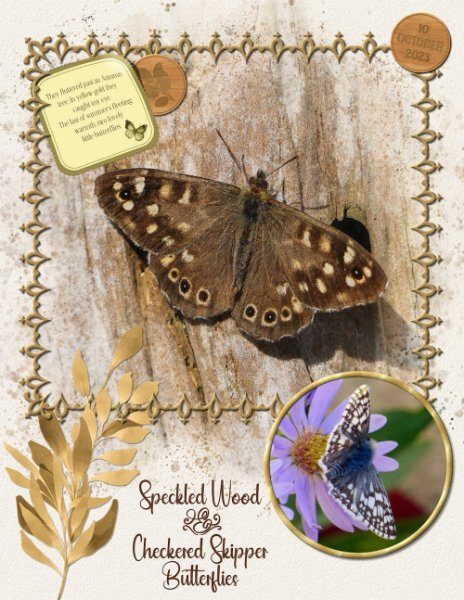
I still have 2 native Aster plants with some flowers on. The little skipper turned up on the 10th October. I was pleasantly surprised to see, and be able to photograph it. Last night I worked on finishing off creating rectangle, and square frames using Carole's frame punches. Now I have all the punches framed, ready for use. I used one them in this page, also used the wood token 2 tutorial to date the page.
1 point
-
Oh, no you don't, you WICKED WITCH!
1 point
-
Matthew is giving it to Lane for her birthday. He will also be having it framed. The site had frames, but we thought it would be better if he could go to someplace like Michael's and pick out his own frame. I made the arrows and the applied a blend mode. I think the glitters are from deeezy.
1 point


Resized.thumb.jpg.d25811db03a63358cedab1e79f527635.jpg)


600.jpg.53817e031d579ac61960346fb753d4dd.jpg)