Leaderboard


Popular Content
Showing content with the highest reputation on 02/15/2023 in all areas
-
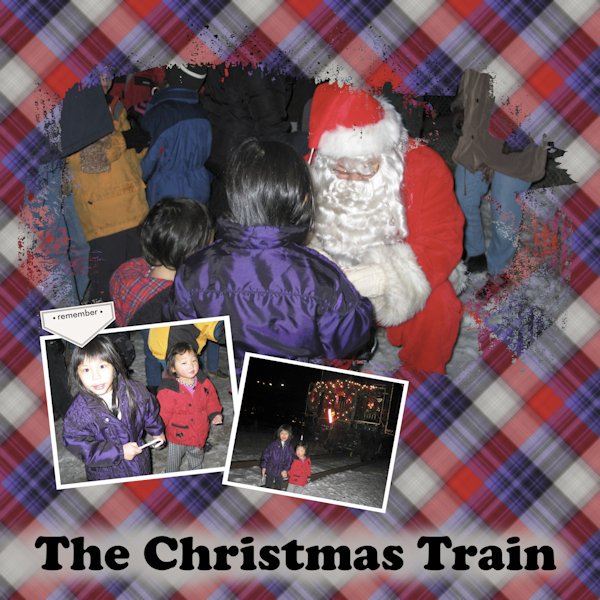
Hi. That plaid trick is wicked cool really neat. (Gah, I've live in Massachusetts too long and I'm picking up the slang over here). I made the plaid from a photo that I decided not to use but I still felt that the plaid I made from it worked. I remembered my shadows this time, too.
 12 points
 -
In between doing laundry and phone calls about a funeral this weekend, I managed to work on some more of the workshop. Day 1 Extra. I flood filled the background then did a blend on it with a texture from Elif Sahlin (#196129) at Digital Scrapbook. For the title, I duplicated the vector layer, changed the color, then rasterized it. I then moved the raster layer below the vector layer and using the pick tool, offset it a little from the vector layer. I also linked the layers so if I moved one, they both moved. For Day 2, I rotated the template 90 degrees to the right. I made the background paper using the Variegated paper tutorial. I made the Corner Cut out using the tutorial from Lab 13, Module 2. I filled the center with the variegated paper. The font is Tracy. I also did a blend on the Variegated paper with a layer of white below it. Day 2 Extra. I flood filled the background then blended it with a texture by Elif Sahlin (#196132) from Digital Scrapbook. Font is Tracy.11 points
-
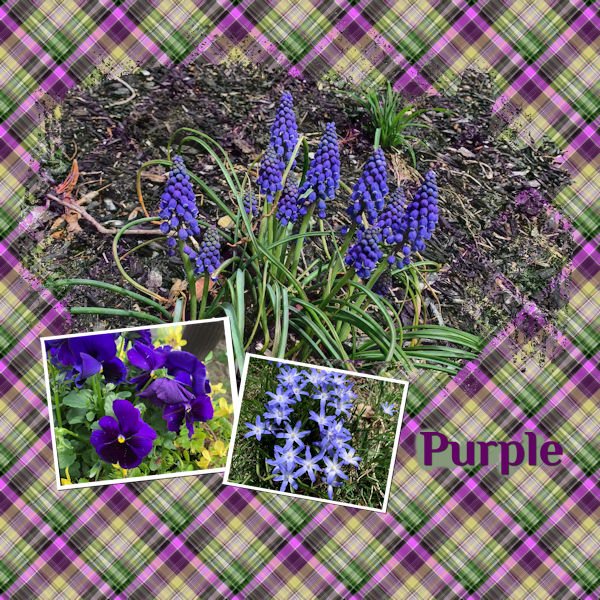
My Lesson Two example. I think my plaid is too strong for the layout in general, but I appreciate learning how to make a plaid. It's something I've wanted to do for a while.
10 points
-
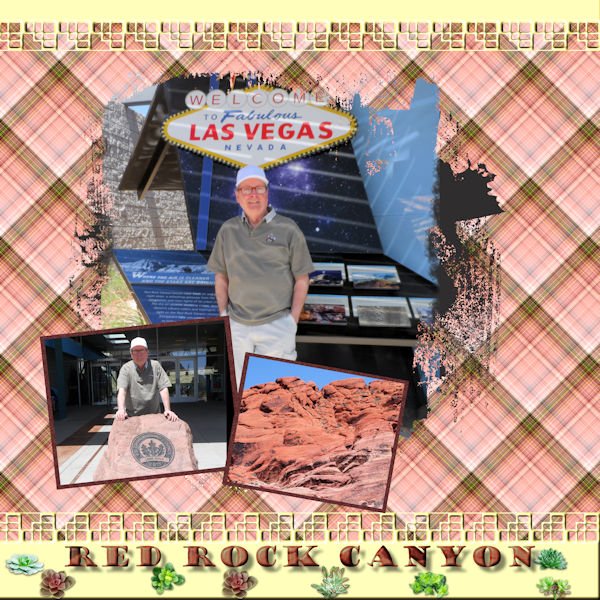
The pictures are of my husband taken at the Red Rock Canyon near Las Vegas. I made the plaid from a desert picture using the workshop on making plain from a picture. I flood filled the white frames with a dark glitter pattern. The font is Gowdy Stout made as a selection on the background of one of my Red Rock pictures. It has an inner and outer bevel and drop shadow. The bottom and top cutouts were made using Carole's edge brushes, then beveled. The succulents are a tube.
10 points
-
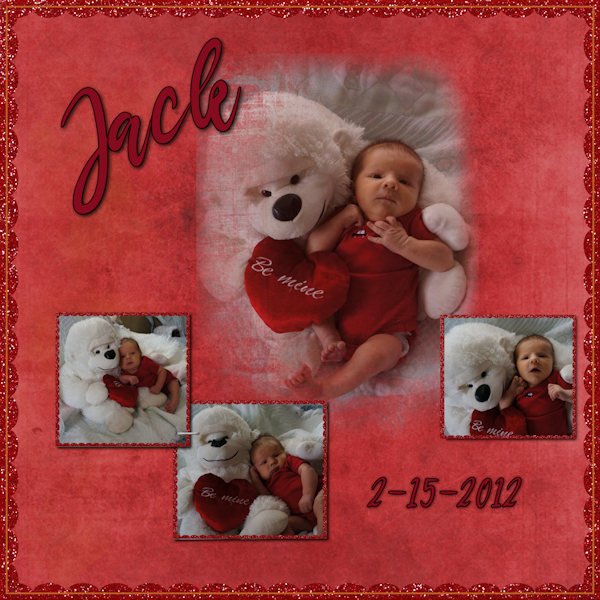
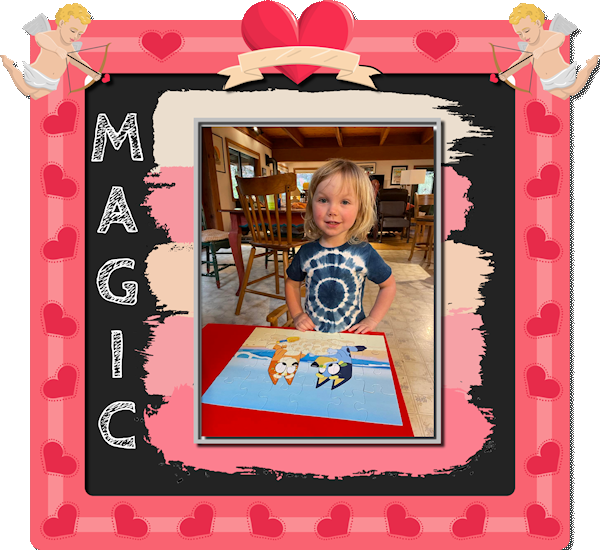
I'm a little behind.....My Grandson Jack.....Tomorrow he will be 11 Years old already ...he was almost a Valentines Baby !!
9 points
-
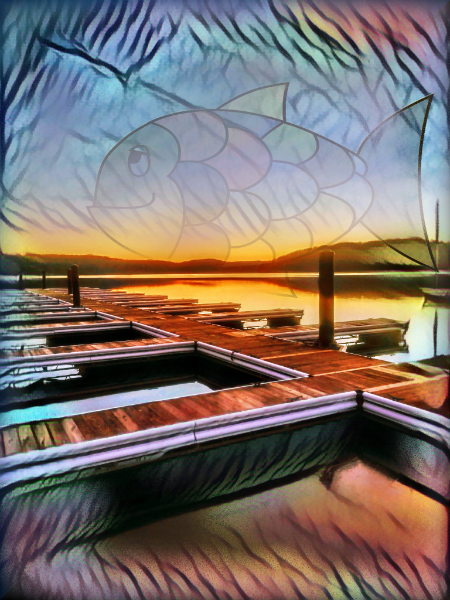
Started with a picture of our docks, added GLOW instant effect, and masked it to show the original beneath. The fish was also added into the mask layer.
8 points
-
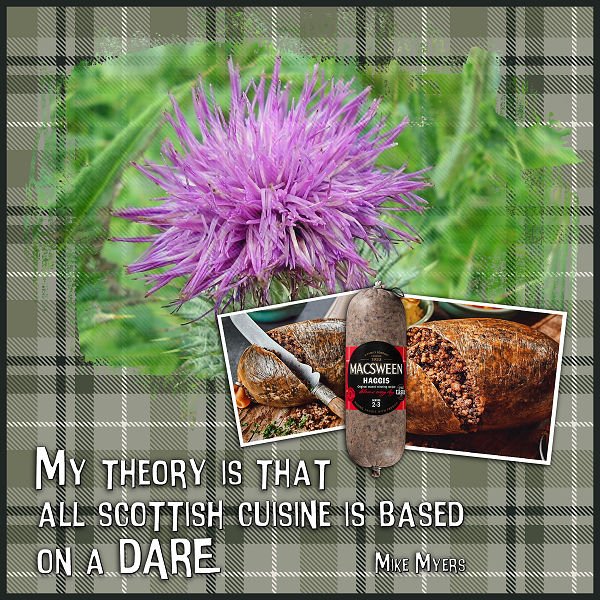
I was working on some Scottish themed tags for friends so though I would continue the same theme here. I found that I have to rename all the template layers before I even start and then renamed them again as I add things.... best way to not get too confused. I snagged the haggis images from internet food sites. The paper is from Aleksander Gusev over at Creative Fabrica. The font is intensa fuente. Sharon
8 points
-
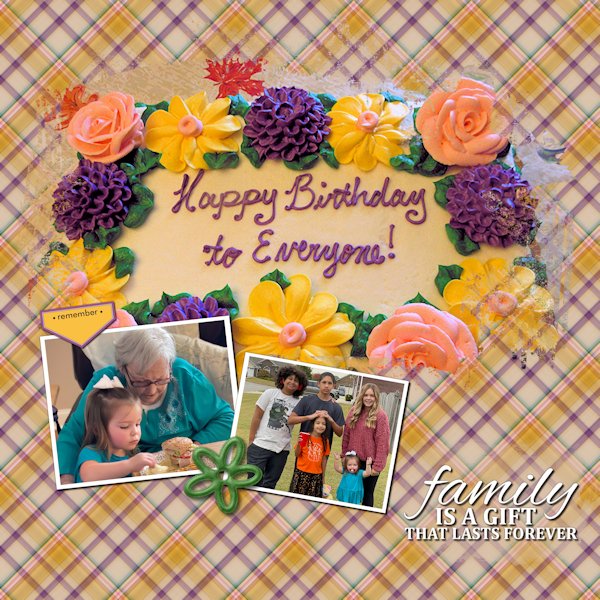
The birthday party was universal for the entire family. We used to get together for each of the kids' birthday, but they got older and would rather go out with friends.
8 points
-
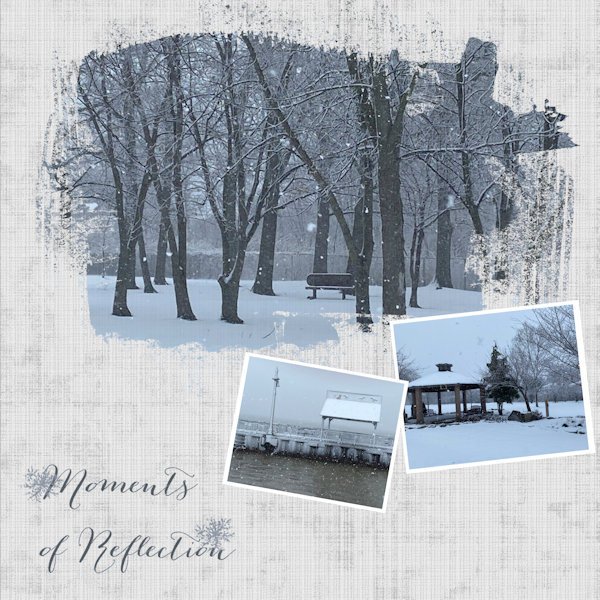
Day 2 mask project: Photos are mine taken on a snowy day we had a couple of weeks ago. We haven't had much all winter, so it was fun to get out (a la Sue Thomas) and get some images. Just a simple background paper with an overlay, some blending, and a bit of text. Voila! C'est fini!
8 points
-
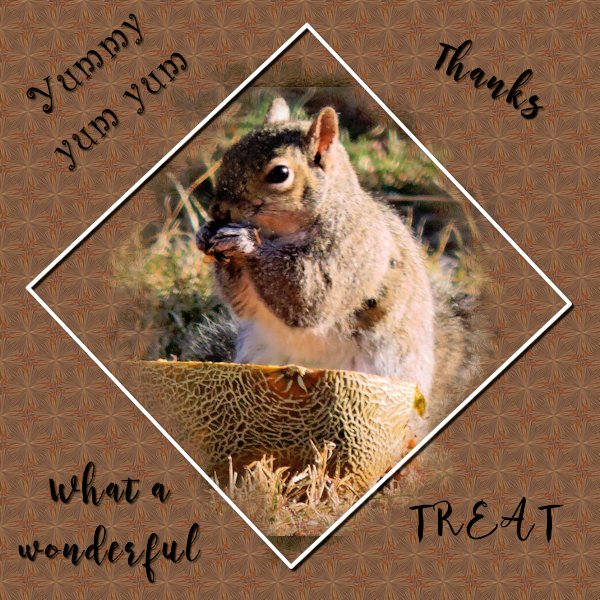
I have to say that using masks is getting ingrained in my brain since I'm doing so many at once. I actually started working through the Mask Workshop in the past workshops in the Diamond area over the weekend. That helped to refresh my memory on doing them. I had not completed last year because of the computer issues so those layouts I did I labeled as 2022. Then started 2023 layouts on Monday. That has really helped me get the steps down. Here is the 2023 extra mask for Day 3. I again blended a texture using burn at 100 (ps_elif-sahin_196131_gold-textures-texture-07-template_pu) with a flood filled layer (color 123-150-67) for the background. This is my 5 year old Havanese, Peyton, enjoying some sunshine on the patio.7 points
-
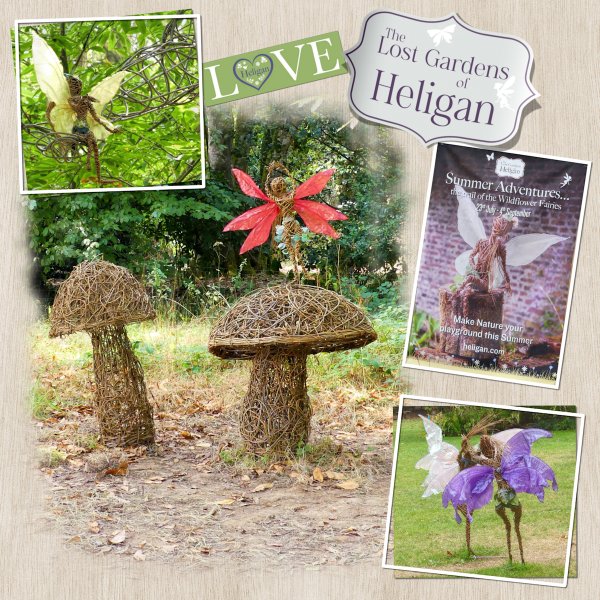
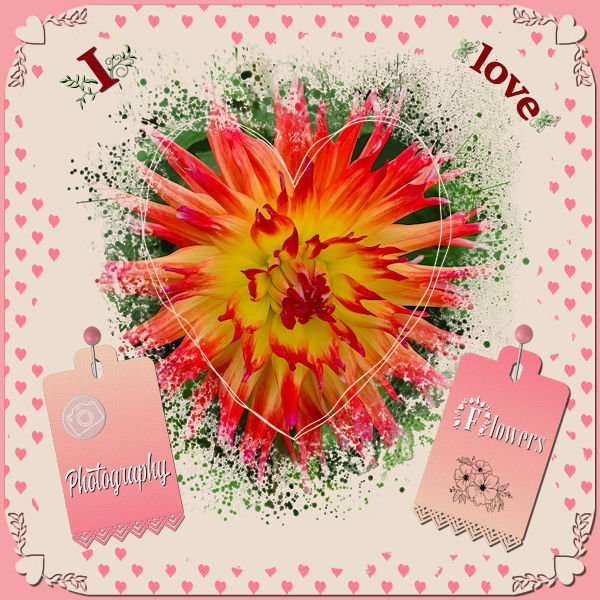
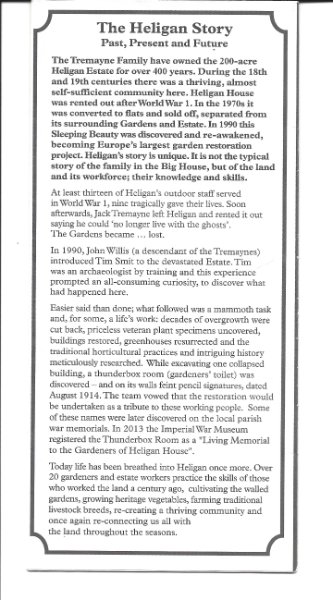
I knew what I was going to do for today's page last night. I had already chosen the photos. I started last night by trying to replicate the label on the poster photo. Using a font bracket, and got as close as I could to replicating the font used. Used a slightly different font, and font dingbats for the Love label. We were frequent visitors to Heligan, which is in Cornwall. The estate owned by the same family for 400 yrs. In the 1970's the house was converted to flats, The gardens were neglected, then in 1990 this sleeping beauty was discovered and re-awakened. Becoming Europe's largest garden restoration. A truly magical place for the young and old.
7 points
-
I just had to resurrect one of my favorite mask layouts from years past.
7 points
-
Day 1 - Diamond Extra. This one is for Ann Seeber. You wanted a photo of me...here is me and my whole family (sibs and parents). ? My parents (Bob and Audrey - represented here by Western Salsify), are lovingly embraced while looking down towards us 4 kids. What? you say, how can that be, surely we kids, with those stunning hair-do's cant be from Western Salsify. You are quite right; we siblings are represented by Clematis Terniflora, which is another way to say, we are all Adopted! In the bigger of the small masks is my oldest brother and my older sister and in the lower smaller mask is my other older brother and lastly me (with the crazy hair). Incidently my older sister and the oldest brother are actually full blood brother and sister, but 2 years apart. Ann, I will try and get a picture up soon, even if it's not a great one, I'm on a mission for you. The important stuff: Font is NS Blackbooks Victorian (Creative Fabrica, I think), and back ground is Brook Gazarek - Crisp Fall Air (Digital Scrapbook) that I darkened and desaturated. Photo's are mine, photographed separately and composited using a blend mode (lighten).
7 points
-
Day 2 Extra. In order to display the photo I wanted to use I had to rotate the page and relocate the little photos a bit too, otherwise they would have obscured the big mask. It was nice to make a plaid from the colors of the photo, I haven't done that for a while. Having scripts makes me lazy! The fonts used are Chocolate Sprinkle and Arial.
7 points
-
Day 1 extra I made the background myself with a photo and effects - artistic effects - contours + blend layers The frame(label) with the text, with cass-FancyFrames script.6 points
-
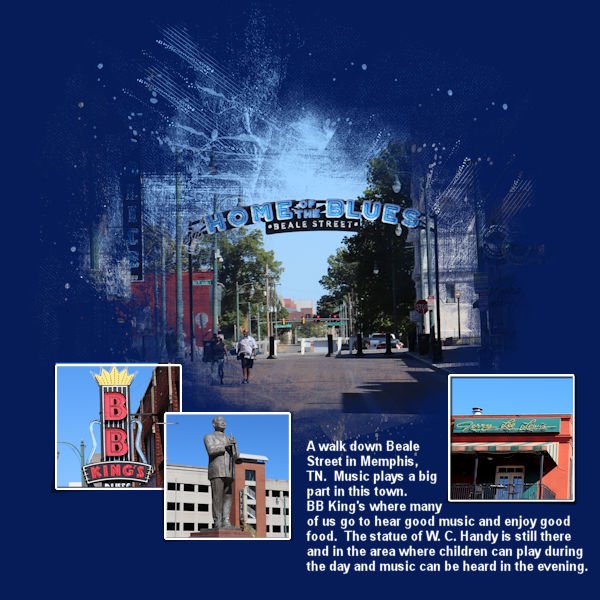
I had forgotten how we had made that plaid for this mask. I kept trying to remember how we had done it with the rotating mirror. So, duh, I listened to the tutorial. Oh, Yeah!!!! So now I will try to remember how to make this plaid. Again I chose Memphis for the theme. The main pic is one I took from a painting on the wall of one of my favorite fast food places here. The other pics: the Big M bridge lit up was taken by my daughter, Anna. I took the St. Jude pic. The brad I used is one I developed to represent the pyramid in Memphis. The font used is Ambrogio.
6 points
-
I also finally finished day 2 also. The larger dog is my Foxy, the small one is my Sisters dog Zoey, and the person is me (Almost 10 years ago)
6 points
-
Like some of the others, I still manage to have trouble doing these masks. Here is day one.
6 points
-
Day 3 - Used a photo of my friend's dog. They have a second home in Hudson, and their pooch loves being in/on the water. Made a kaleidoscope design but didn't take too much time or trouble with it. Added the brush flourish because I thought it looked a little bare.
6 points
-
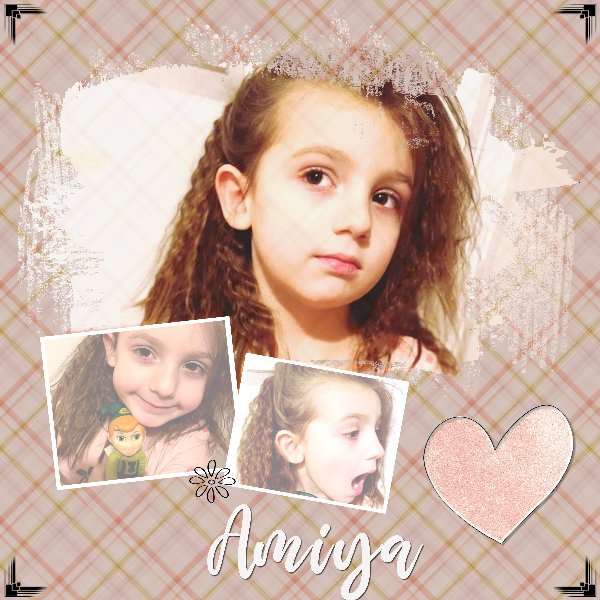
Here's my 6 year old Amiya. She loves her photo taken ? I think I'm doing something wrong ? lol Everything looks kind of see-through ishhhh Going to do the next project and maybe re try this one again BUT! How cool to learn the plaid trick! Amazing Cant wait to see what new backgrounds I can do with that! Thank you ?
6 points
-
Day 1 I used a mini kit from DigitalScrapbook Feb 2023 Blog Train, and the mini kit is from Diane Hiller, on her own blog you can also download a Fan freebie that goes with the mini kit. photos are mine.6 points
-
Here is day 3. I did the kaleidoscope tutorial multiple times with various color selections. The last selection gave me a background I could at least live with. But when I had originally gotten frustrated with the tutorial, I had switched to doing a plaid tutorial. I chose #1. I ended up liking it a lot better with the photo especially after I did a blend mode of multiply at 100 to a flood filled layer with the color 103-40-39 (RGB). This will be the one I print. Now off to do the extra!5 points
-
Another entry for Masks-Day 2 - An exhausted Barred Owl sleeping off a busy night. ? Photos by Dan Tooker. Background pattern Tibetan Grasscloth Spice. Vole from a .png site. I cribbed the staple from Day 1.5 points
-
The results from Lesson One. I already feel more accomplished. Why did I wait so long to learn this?
5 points
-
Here is day 3. I had not made a background like this in a while. I used a freebee from Cassel for the mask etc. (cass-SimpleArtsy-Template01)
4 points
-
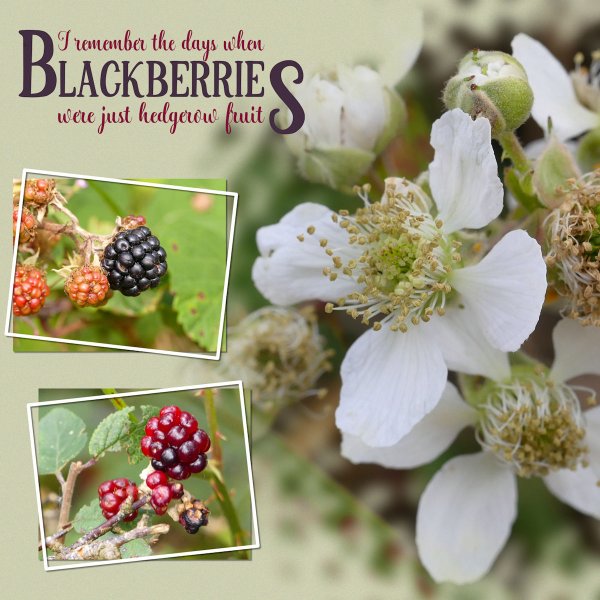
My first recollection of blackberry picking was when I was around 4 with my gran and mum. Then my mum and I. I continued blackberry picking after I got married, introducing my own children, as young as babies in arms. My grandfather and father wouldn't start hedge cutting until after we had finished harvesting the hedgerows. My husband wouldn't start either until I gave him the go ahead. Sloes, Damsons, Rosehips and Elderberries were also gathered for acholic beverages, such as Sloe Gin and tea. When I was home last year, I took my 2 granddaughters blackberry picking several times, what an absolute joy it was. We ate as much as we picked, which was always the norn. I can still smell the blackberry and apple tarts we made, and ate with piping hot custard. I don't half miss the fruit picking season.
4 points
-
Day 1 I made a Valentine's Day card for my husband. It took me a few times to get the hang of this. I kept messing up. I'm going to try again later to see if I get it down. This was amazing to learn! Happy Valentine's Day, everyone!
4 points
-
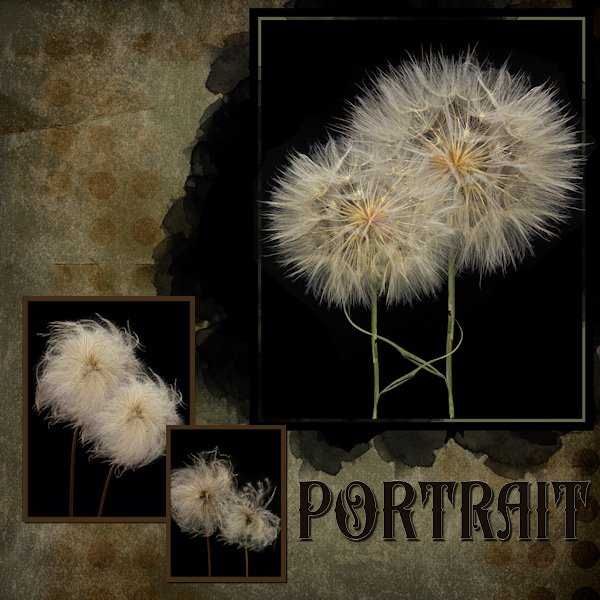
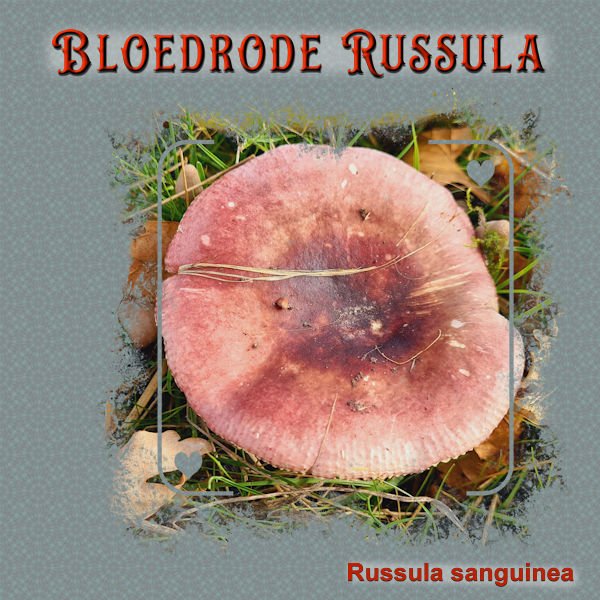
I had already decided that I wanted this photo to use somewhere in this workshop and this is the perfect mask for it. I played too many hours with the kaleidoskop, I forgot how addictive it is as I haven't used it for a while. With all new and exciting things to learn it is easy to forget the older ones. It is a simple layout because when I added some embellishments it didn't work out wel. I think that the photo and the name of the mushroom in bloodred is enough. The name translates in English as Bloodred Russula. To let it stand out I gave it a bevel and the paint behind let it stand out.
3 points
-
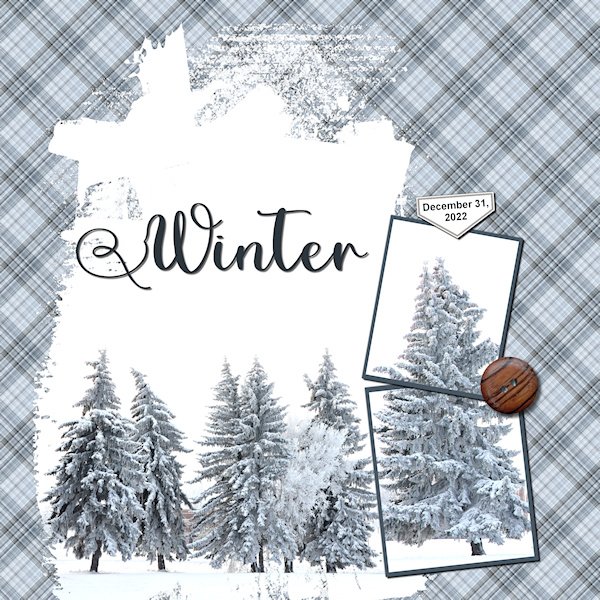
Day 2 Winter theme. Monochromatic with a little button (Janet Scott, Brown Button 2, Digital Scrapbook) to warm it up a bit. I'd forgotten how fun making plaids can be. I changed big mask for quite some time to fit what I wanted. And I had to (on the mask layer) take a brush and blot out (using black) some of the mask that extended beyond the photo edges. I duplicated the image of the bottom square and put it in the upper mask to fit the top of the tree in. Font is Adinda Sayang (Creative Fabrica). Slowly, I'm getting through. Time seems to be elusive right now, and there is no reason for it (except maybe my bad management of it).
3 points
-
Wow, look at all those new projects!!!! I am so glad!! @Susan EwartNo problem in starting late. As a DIAMOND member, you will keep access permanently anyways! ? @Ann SeeberBe careful not to distort the elements! Your Cupidons seem a little stretched. Maybe you used a square frame and applied it to a rectangular image? On your Day 2, did you add shadows on the small images? That owl really looks tired! @kasanyIs there a privacy reason to hide this lady's face? @Corrie KinkelI love your little signature on the card! Yes, using scripts can be a time saver. It is still a good review to do it manually, once in a blue moon. @TonimarieYou will see that it will get easier with each project. Lovely card! @Anja PelzerWonderful layout about your sister. @Carol Anne WallYes, it is something that everyone should know about, but often, they don't know what they don't know. Beware: it can become addictive! ? I think that the plaid is ok. Maybe you can just reduce the scale if you want it less "powerful". @Sue ThomasAs usual, your photos are so crisp!!! @Leslie Jostes Looking forward to your projects. @MoniqueN.I will work on transcription of the videos. @Marie-ClaireI can always know whose layout it is when you show your four-legged model! @Julie MagerkaDid you have shadows on the small images? Sometimes they "disappear" when you resize. @Gerry LandrethYes, as they age, they seem to want to party with others than their family. @sharon thompsonRenaming the layers might be useful, but typically, if you have the thumbnails it is not as essential. What version of PSP do you use? @Rene MarkerThat texture is great on the page. Fun to see those tutorials "in action"! @Donna SilliaThat plaid is perfectly matching your photo, obviously :). Be a little careful with the shadows on the title: it makes it look like it is floating. @Lesley MapleThat plaid fits perfectly. It can get addictive too! Did you add shadows to the little photos? @Gabriela No problem in "starting late. You will catch up for sure! Keep up the great work. If you have not posted yet, we are waiting for you. If you have any issue, just ask.3 points
-
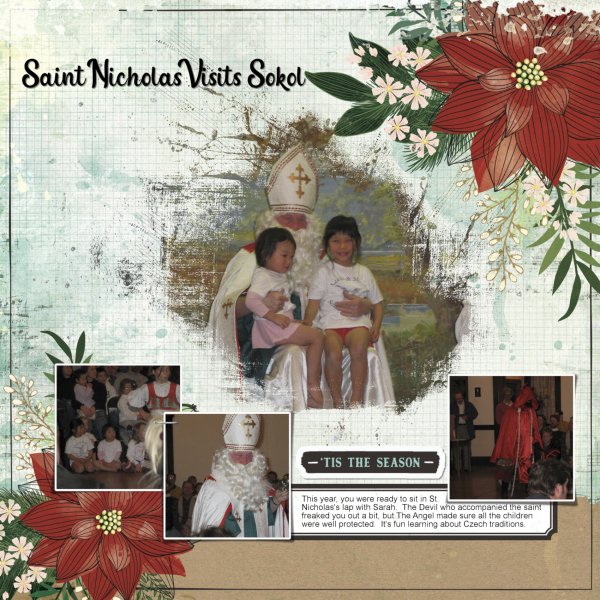
Is that Sokol as in the Czech camps for gymnastics, etc?3 points
-
It took me a long time too. I had to write the instructions down and follow them every time...still do. But I noticed this time it's feeling more familiar. Sue Thomas is right, only LOTS of practice will make this something I can do without refering to instructions. Keep going.3 points
-
I hope you reconsider your preference to use Corel help files and videos. While they can be useful, they are NOT as thorough, well-paced, and easy to follow as what you will get here from the Labs, Tutorials, and Master Classes. They are the best I've used - anywhere!2 points
-
Re-posting this for the challenge. It's one of the extra masks in the workshop. I totally did it over as square to match the frame. I went back and found the colors were restricted to 256 so I upped it.
2 points
-
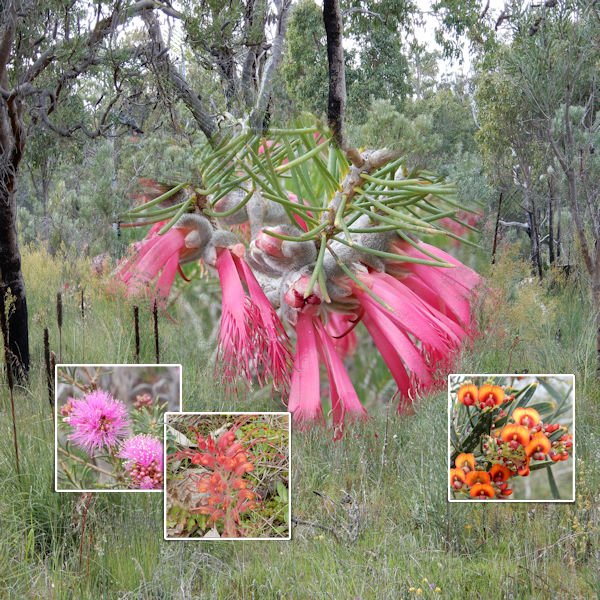
Hope this is being posted in the right place! Day 1 - not yet finalised but it was very frustrating - using 2020 - I watched pixel x pixel load on every selection I made it was unbelievable!! I could have almost grown the wild flowers while I was waiting!! So I changed to 2022 for Day 2 and it was so much faster. Day 2 - I made a few different plaids but all seemed 'too much' so I added a photo as a break but still showing a plaid.
2 points
-
I didn't see any instructions in French. I was referring to the template layers being labeled in French. I actually did use Google Translate to figure them out. LOL2 points
-
@Liz HubbardWhich instructions are confusing you? Which day? To download the supplies or to use the template? There are very few instructions/supplies that are not in English.2 points
-
I like the blue colour a lot! Suits the pics very well!2 points
-
here is again my Sister Claudia back in 2005 buttons ,bow, and datestamp with scripts by cassel plaids selfmade animal silhouette from one of my photos2 points
-
My entry for Day 2 - using the alternative template. My grandson and family's vacation photos from Costa Rica. The title was included on their photo so I copied it and applied the plaid background to match. I did move the small photos to the left.
2 points
-
normally when using templates I am mostly open my old CS2 because of the clipping mask feature. So now I learned it for PSP , thank you Carole for this workshop, here is my 5 year youmger Sister, she died suddenly in October 20222 points
-
I didn't want to make a Valentine page but the colors lend themselves to a love theme so much! Valentine was and still is not a big thing overhere; it mostly, at least with the elderly people, is looked at as very commercial. Just before Valentiine the flowers are much more expensive and they go down in price after that! It is getting bigger this days with cards and offers of chocolate etc. So I decided to make something with the things I love: flowers and photograpgy which must come as no surprise as you know me by now. I used the Heart Mask that came with this theme and 2 papers from Escale Amoureuze and recolored them to go with the palette. The photo of the Dahlia had much of the colors of the palette in it. Heartpunches from from Caole and the freebie tag from this week; I used the black one and colored it with a gradient made with the palette colors.
2 points
-
There was an item on Dutch television about these gardens not so long ago on a programme about gardening that I like to watch!1 point
-
Outstanding work Marie-Claire. When was that script added to the store? I had no idea it existed. The background paper is busy, yet it's subtle, and not overpowering, a great job all round.1 point
-
Thank you so much Susan. I will be doing another page tomorrow on Heligan.
1 point
-
Tonimarie, did you change those layers to black first. If you made it a mask while still grey you will get that haze. Cassel will probably explain it better to you.1 point
-
This is Day 1 Extra and I made a card for an upcoming birthday, so I won't post this on Facebook otherwise the card will maybe seen before the actual birthday date.
1 point
-
So great to now know how to make templates into masks. I usually do not do scrapbook pages as I am more of a tagger for myself, friends, & family. Anyway, I moved the photos around once I figured out what text to use and how much space I would need for it (aging eyes require larger fonts now). The font is Cotton Candies. I also recoloured the photo frames to subdue them. I don't post any people photos on the internet so I used a stock photo from a graphics site to which I have a paid subscription. The background paper is by Anitess at Deviant Art. Since the mask effect erased a bit of the tree drawing on the left side of the paper, I did a cut & paste of the original paper on top of the merged image to correct that. Wonderful lesson. Am eagerly anticipating the next one. Sharon
1 point
-
Memphis, TN is my theme. Fun relearning how to make a shape into a mask. I've been using the ClipToIt script so much of this year and last year (it's so easy and does all the work for you) but it is important to know what the steps are so that is how I shall continue. The journaling font is Arial. The pictures are mine.
1 point
-
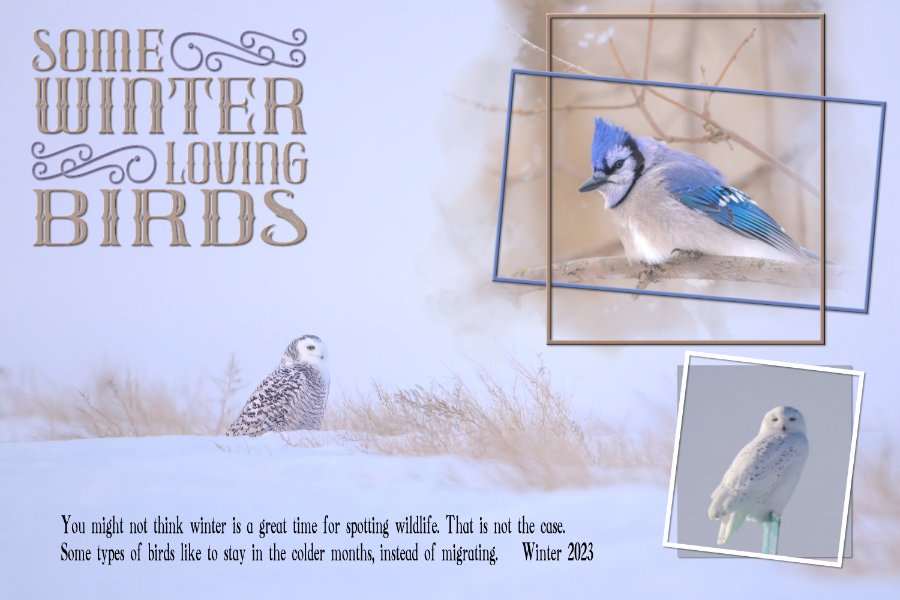
I had already put my mind to using the background photo as the main photo for day 1 of the Mask challenge. We can have clear blue skies, but when the wind blows with such force, visibility is greatly diminished by blowing snow. I used the mask which came with Day 1 of the Love story challenge (Masks) back in 2017. I did have to edit it to accommodate the Blue Jay. The mask suited the layout I had in mind. I placed the blue frame, over and under the brown one. The page itself came together quickly, the word art took a little longer. I didn't use a 12x12 scrap page, I used the size of the photo.
1 point