Leaderboard


Popular Content
Showing content with the highest reputation on 01/25/2023 in all areas
-
Thanks for these. I will have to go back in later to see if I can edit the frame around the images. For now I just used another layer.9 points
-
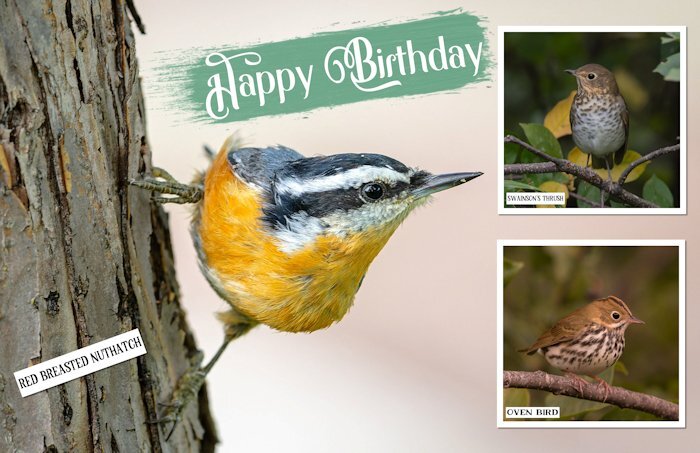
Having fun with Lab13 Lesson 1 for Stencil effects, I decided to turn my disaster cake icing efforts in the kitchen to an advantage by creating a ribbon to go around the cake in an effort to hide the disaster. I created a new star shape image by making a 3D cut out effect* for the contours as in the lesson and then applied cass-enamel script for the metallic contour effect. I made selections for the background and filled them using two of cass-glitters papers, whilst open in my workplace (using the Pattern mode in the Materials palette). I have also used those love fireworks from cass-fireworks Picture Tube, to celebrate the New Year. * I did note that with the Cut Out option under Effects/3D Effects/Cut Out, that there was no option to place the shadow on a new layer. I am using PSP Ultimate 2021.
 7 points
 -
7 points
-
Wonderful lesson! This is my fourth project. Again, this was a lot of fun. Joseph became a big brother a little over three months ago ?
5 points
-
I changed the font to Arial, but it still seems to look like there is a shadow on the journaling. Not sure, but it is when it is resized to 600 that this happens. Could it be because I textured the paper it is on?
5 points
-
Carole, the photos in Project3 have been corrected a bit in PSP9-OneStepPhotoFix. I cannot do anything in JK's cellphone. I'm glad I have shots from his cellphone:)))))) I've corrected a little bit photos in my Project4, but it was impossible to add SUN, sorry. I'm happy it was not snowing when JK has been there.
4 points
-
I have just taken a gander through all the pages, as it is currently snowing. What an array of wonderfully creative pages posted. I thought I'd make a start on general ecards. Here are two that I have started, no doubt before they are destined for their intended recipient, they will be tweaked. Currently working on an Easter card. Many of you will know that I keep my pages simple and minimal. Maintaining focus on the photos. I'd better get back to it.
3 points
-
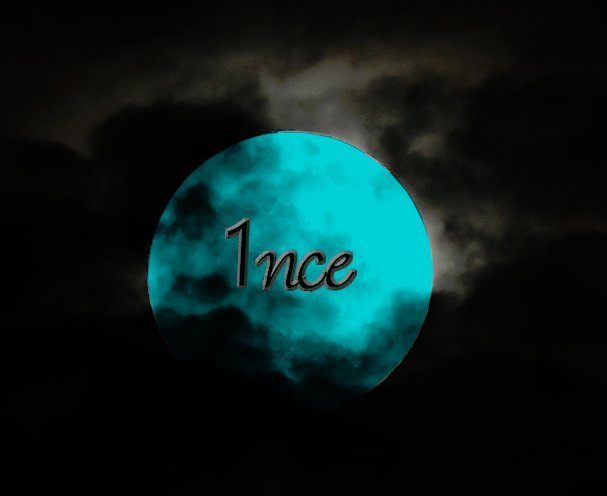
I had this idea in my head and this is what I came up with. We have all heard of something on happening 1nc in a blue moon, well here it is. The photo is one I took several years ago.
3 points
-
January word Challenge in the campus. START. I didn't clock up the miles yesterday, as I had intended to do. The wildlife had other ideas for me. Before I even set off, I encountered a small flock of black capped chickadees close by. I spent more time being inconspicuous than actually hiking the trails. Either way it was a great afternoon to be outdoors. I haven't done a magazine cover for a short while. My very first page to be be added to the campus since the changes. I forgot to add it to the campus, after posting it on facebook on Sunday. Yearling bull moose. Male Snowy Owl. Black-capped Chickadee.
3 points
-
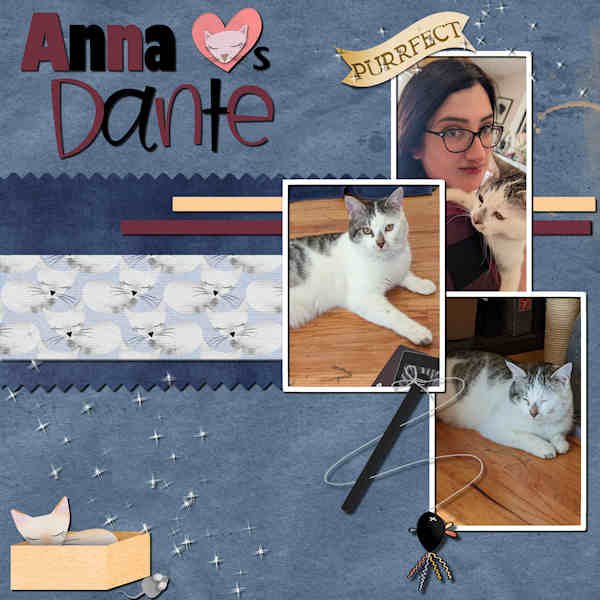
DAY 9 #4: Anna Loves Dante - My granddaughter has a new cat named Dante. I got a kit from Digitalscrapbook.com by Gina Jones called Every Day is Caturday. The plain papers, the heart and the scatters are from my stash. The patterned paper, word art and cat accessories are from the kit. The fonts used are Gill Sans Ultra and Birdy.
3 points
-
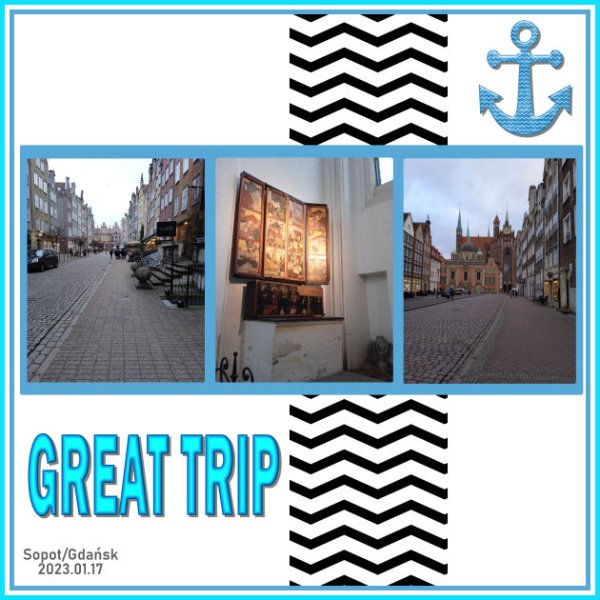
My Project3. With three shots taken during a short, great trip (600 km by train, 20 km by pied-walking) by JK.
2 points
-
I have posted my page in the gallery, but until now I'm the first, so is it all right to post here too? Here it is easier to tell about the layout. For me it wasn't difficult to find something with the word Start because I happened to have read about the "start of the tulp season" in the newspaper of last saterday. A couple of hours later I saw what this week's challenge was about. Then it was just a matter of finding a photo in my collection. Normally I don't use bright colors, but tulips tend to have those, although there pastel ones too. In the flower cornerpunches there is one that has a tulip, so a must to use for this layout! IWAS (InternationalWordArtStudio) has free date labels in many colors.
2 points
-
I can never have overhead lights put into the bedrooms (my office was a bedroom at one time) or living room in this house. When my parents built it in the mid-1960's, they went all electric and chose to use ceiling electric heat. So there are heating wires running all though the ceiling. I can't even put a toggle hook to hang anything from in the ceiling because I can't chance hitting a wire. The 3 rooms that have an overhead light were installed when the house was built. I no longer use the ceiling heat since I have a heat pump but when it gets extremely cold (like 10 degrees F or below), I have to use the ceiling heat as a backup. So I live with floor lamps and table lamps. I do need to look for different floor lamps for my office. The ones I have are old with 3 lamps on each one. One of them has lamps that go out and won't turn back on but maybe a day later works just fine. I do like the triple lamps since I can use just one or two or all 3 to vary the amount of light in the room.1 point
-
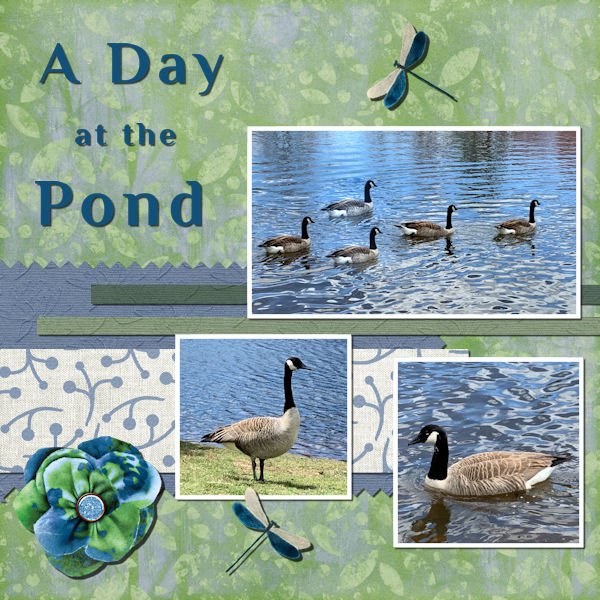
This is my 4th project. No long story for this one. I really didn't come up with any "fun" way to do the title. Papers were from Janet Kemp's Pond Life kit and the elements were from Jessica Dunn's kit Swim with the Fishes. Both kits available at digitalscrapbooking.com. Photos taken at a local pond.
1 point
-
But I knew YOU"D know!!!1 point
-
It is hard to view and remember all the products in the store! There are over 850!1 point
-
When I read how long you waited to install a ceiling light I just laughed out loud. I've had so many projects around the house over the years and waited way too long to get some of them done. When they were done, I couldn't figure out why I had waited so long!!!!! They made such a difference in the general comfort or ease in the house. Years ago, in a smaller house, there was a metal post in front of the laundry sink in the basement. I always worked around it. Then after maybe 15 years or so I had it removed since it wasn't a support of any kind. It was like freedom at last! In this house, I have a few of those types of jobs that need doing. The difference today is how hard it is to get someone to do a small job. Enjoy your new well-lit room!1 point
-
Make sure your photo is on a different layer. And you have that layer selected. Make sure the 'mode' is set to 'replace', and the 'match mode' is set to 'opacity'. Tolerance set to 0. "Use All Layers" has to be unchecked too, as Rene Marker said!1 point
-
Hi Steve - I usually lock the transparency lock at the top of the layers palette so only one item gets selected. See if that helps...1 point
-
Hello. In doing this next project I am not sure why but when I chose the magic wand and click on the photo that I want to place a frame around it selects the entire back ground???1 point
-
Hello, as my supplies were limited at the time I did this project I did not have many elements to choose from. So yes, those were stretched out a little. I have since acquired more kits.1 point
-
I am so sorry for your loss. Remember that the lessons will still be there, and this thread will still be open for you, so take care of yourself and your loved ones first. PSP can wait!1 point
-
Not too happy with this one, it just will not come out right. All the elements of Lab 6 07 are there but it just doesn't look right, but hay ho.
1 point
-
I found the other Mask script that you mentioned Carole, 'Raster to Mask' and it worked perfectly. Tried it out with a different image as an experiment. The script I previously used was Mask Maker that I now realise is for use with vectors and that is presumably why it didn't work as my layer is a raster! Duh!
1 point
-
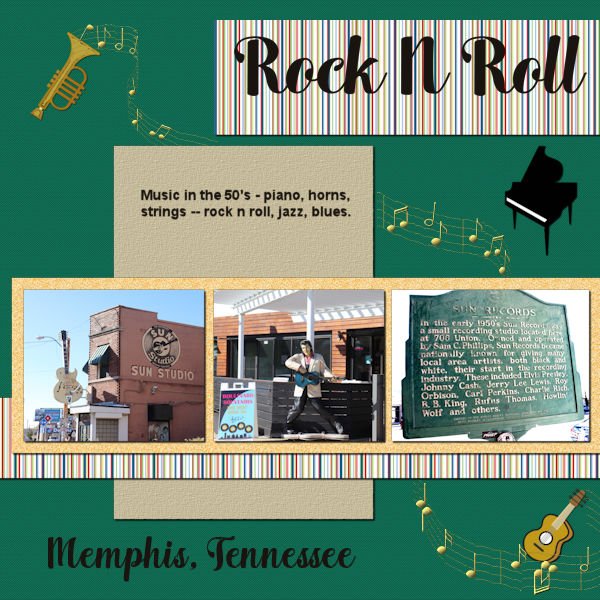
My project 3. This time the papers are mine and the elements are all from different picture tubes. The pictures were taken in Memphis when my daughter and I did a Sunday tour of the sites in Memphis to use for my "M is for Memphis" alphabet book. The font used is Arlington Script. Most of the extra scripts I get are from Creative Fabrica.
1 point
-
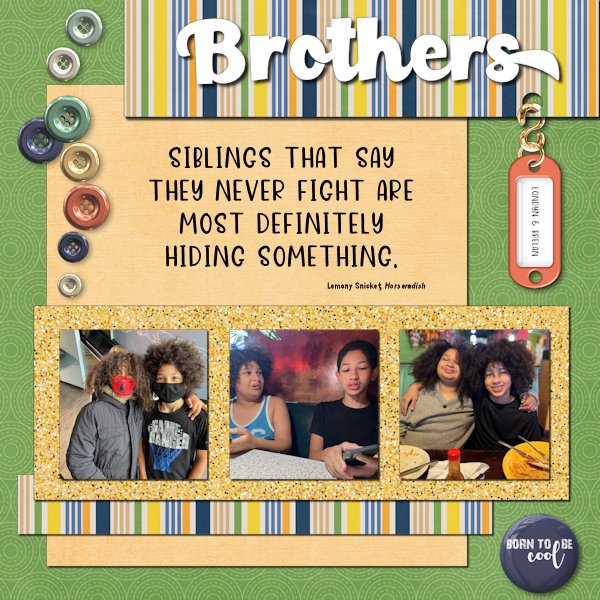
The Boys are now 12 and almost 15. I first met them seven years ago. The elements in the layout are a hodgepodge of stuff. I couldn't decide on what I wanted to do, so I scrolled. And scrolled some more. The fonts are Paladise for the title and Dear Friend for the quote. Both are from Creative Fabrica. The glitters was created using Creation Cassel's script, Glitters-C.
1 point
-
Cindy, you can also easily show the two pages on your screen side by side at the same time regardless of the size of your monitor. With your first page open, PSP for example, click on the multiple pages icon just to the left of the 'X' in the upper right corner. The page will reduce. Grab the sides and adjust as you like. Then open your second page, a Lab tutorial for example, and do the same. Position them side by side. You can use Control + the roller on your mouse to quickly zoom in or out on whichever page you're on.1 point
-
Thank you and yes the book is square, 21x21 cm.1 point
-
I'm not happy this time. I tried to make a folded napkin, but it's not pretty! lol! I am also not really happy with the cutlery as I would really like to make it look like metal not plastic. I am drinking hot chocolate with those tiny marshmallows. I added cheese this time to the sandwich. The placemat is from Rush Ranch- Helpful kit. I like the dark oak table.
1 point
-
 DIY 2023-1 Challenge. My photo's, background was textured with Texture Effects but might be hard to see. The ring, I made lots of them and then used them as a graphic element between the small photo's.1 point
 -
I am so sad, I was looking so forward to doing this and we had 2 family members pass away last week, I can't even get to lesson 2 until next week!!!!!0 points


.jpg.69f184b0ad2cf378cb9a152975bec6b4.jpg)