Leaderboard


Popular Content
Showing content with the highest reputation on 01/19/2023 in all areas
-
here is my project 1 , day 3 ein Besuch in Berlin, I blended the photo into the background6 points
-
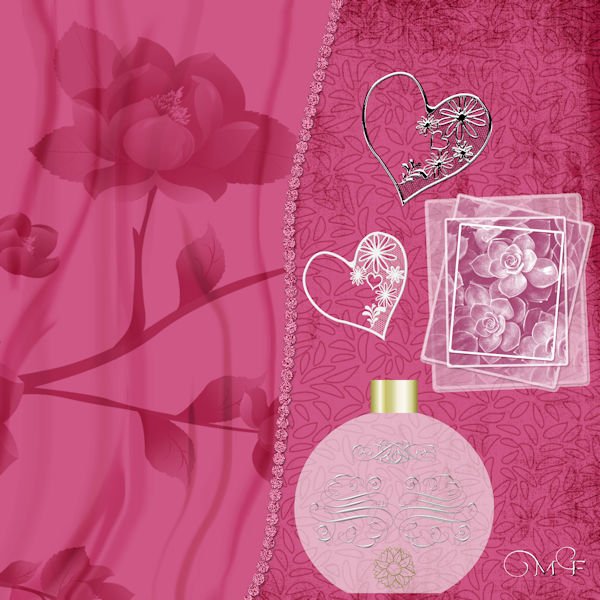
Hi all Stencils : lab 13-01 Background pattern made with font dingbat : Seamless Pattern Various font A Grunge overlays from Pixel Scrapper Drapery made with brush + flower brush + festoon bottle : shapes, brushes, gradient Framed image duplicated 3 times and scattered
 5 points
 -
5 points
-
5 points
-
Project 1. I used the Frosty Fall kit. The drop shadow on the script text looked odd, so I didn't add it.
3 points
-
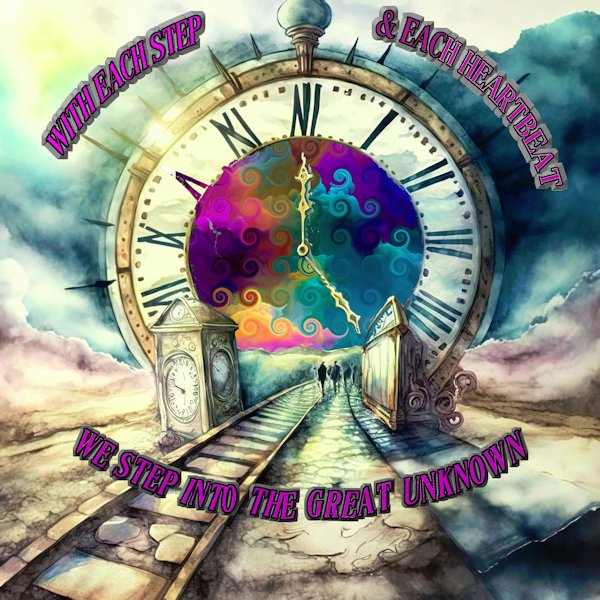
I created this starting with one of the papers from Pixelscrapers freebee today (Watercolor-Time-Travel-Backgrounds-51580778) and cut out the center of the clock and added a background from Fire-in-Wonderland-Backgrounds-54289383 (also from creativefabrica but not a freebee) & I added swirls to it.
3 points
-
Here is my Day 3 Homework - this is my newest tropical fish. With Bettas (Siamese Fighting Fish) you can only do one per aquarium, otherwise they fight to the death. I have one small (5 gal) tank and he has a snail as a tankmate. The snail's name is Roomba. My photo for the background, colorized. It's so busy I didn't want to add much embellishment.
2 points
-
My great-nieces, Corinne (6) and Amelia (2). The papers and elements are from a kit called Autumn Joys designed by Digital Design by Jodi.
2 points
-
This is so cool Bonnie. Did you take the 5 photo's of the same person in different spots then blend the 5 together. Did you use a blend mode?1 point
-
Cindy, you can also easily show the two pages on your screen side by side at the same time regardless of the size of your monitor. With your first page open, PSP for example, click on the multiple pages icon just to the left of the 'X' in the upper right corner. The page will reduce. Grab the sides and adjust as you like. Then open your second page, a Lab tutorial for example, and do the same. Position them side by side. You can use Control + the roller on your mouse to quickly zoom in or out on whichever page you're on.1 point
-
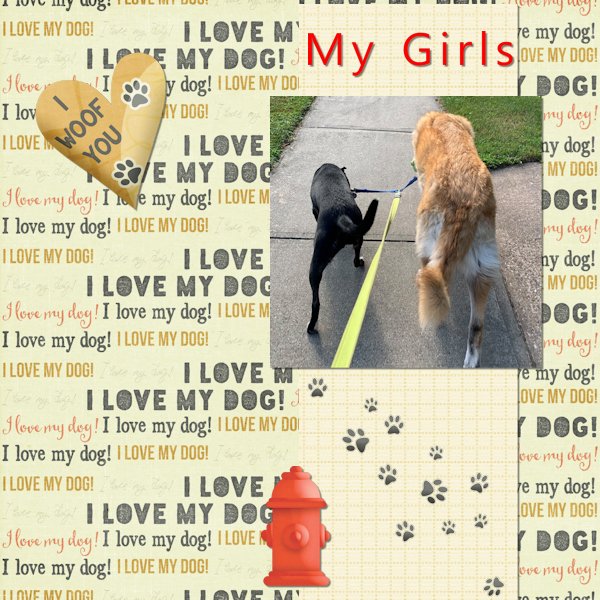
I did another layout recently much like this one. Different person...same fun time. Elements at the bottom of the page were cut from the photos. This is actually 5 photos.
1 point
-
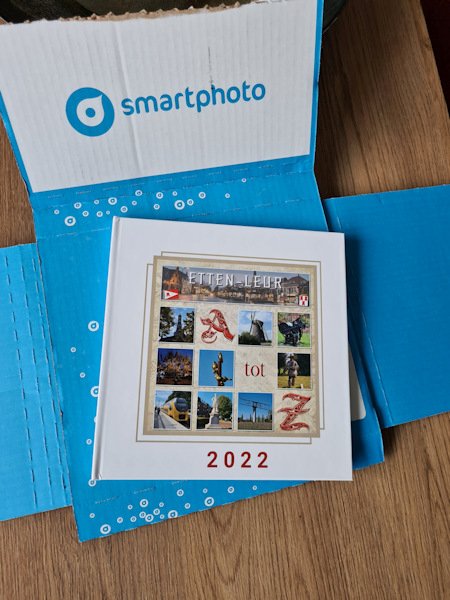
Susan thank you. The book has a good quality and the prints are very sharp indeed. It is on a kind of pearl paper which is very thick and therefor the pages are lying flat when the book is open. But I am sorry it is a Dutch company and I don't think they have an US branch. I make the books (I have more done by them) on line, so I imaging they will send their produce where ever you want, but it will cost you on postage to the US.1 point
-
1 point
-
Mirelle - wow, those sheer curtains look very real. Really nice layout. ?1 point
-
Mireille, that's very pretty. Your curtains are very well done and look real. I like that touch at bottom right with your initials.1 point
-
Project 1. I made the cluster with the elements in the fall kit from PS cpJess frosty fall mini kit offered for this project. Since I decided not to use fall colors in the mini kit, I colorized the fall leaf scatter provided by Cassel with the hue/saturatiion/lightness to green. the gold flower is from the kit also. In making the cluster which I saved as a pspimage, I made shadows on the individual elements - thanks for that tip, Carole - not sure where you mentioned it, but I remembered it.
1 point
-
I just by chance hovered over a name in a forum. Did you know a bunch of stats comes up? For instance, Michele, did you know you are a "Posting Machine". ? You can hover over the badges to see what they mean.1 point
-
Thank you.1 point
-
Being a big Doctor Who fan, I downloaded those time travel backgrounds, too. I love what you did with this one!1 point
-
Thank You right now we had storms here didn't have power its back up me to, thank you so much I had ideas to while reading you.... I am going to do them along with the 3 Ps and everything you hit on totally so right. But now I am starting bootcamp and feel behind on that our weathers crazy here Hope I can get some done on my sandwich I have a good feeling right now I am going to go get it done. Thank You your so nice1 point
-
I had my alphabet printed and this is what it looks like. It arrived saterday and the company we had for my husban's birthday loved to see it, because in the beginning of last year I talked about this undertaking and asked for ideas.
1 point
-
Hi Mirelle, The file is called: ps_jessica-dunn_279398_naturally-curious-nature-paper_pu.jpg - It made me think of Spring, which is a good thing right now. ?1 point
-
I just finished project 1. It's always about my kids.
1 point
-
Day 2....I see I need to up my game and add some personality into my lunch!
1 point
-
here is my sandwich, I love darker bread and meat, I used 3D-cutout on some elements tablecloth - made with psp gradients - 1 layer flipped 90 degrees and blended1 point
-
Hi! Late to Day 1, and realize we're on Day 3 already!
1 point
-
I don't know if it's the colours or the beautiful pooch, but this is just outstanding. Love the little details you added to make it so unified.1 point
-
After repeatedly placing and repositioning the elements, I am finally somewhat satisfied with this result. Paper : Melo Vrijhof on Digital Scrapbook Font: Magneto For the Windy and Rainy I used the script : cass-ShapedText On the circle vector I used the vectorTube script with a raindrop tube (don't remember where it comes from) Photos of my own1 point
-
Corrie, that's cool what you did with the water and sky. I wouldnt have known it was from two photo's. The bridges are very interesting, I love the little old one (Amersfoort) and the lines of Dordrecht one, it's very artsy. Nice when architecture can be please to the eye as well.1 point
-
Hi Cindy, I thought of something that really helped me. When I first started with the Campus I would watch the tutorials (or labs etc) and i would have to go back and forth between PSP and the tutorial. I'd watch the tutorial, stop, maximize PSP (that is open) and try to follow the instruction from memory. That never went well for me, I'd forget the instruction and have to tab back to the tutorial and then tab back to PSP...it took forever! So I started to watch the tutorial and make notes. that also took forever and I found I would miss key things in my notes, like what layer I was supposed to be on, what settings for the tools etc. Learning this way was very slow for me. Here's what I did to change how I was able to follow a tutorial AND work on PSP at the same time. I had an older laptop. I put that on the desk (or even on a chair when my desk was really small) and I'd have the tutorial playing while PSP was open on my desktop computer. I could then watch a step in the tutorial and hit the pause button, then go to my desk top and do the step in PSP, and continue back and forth. Having both the tutorial watchable at the same time as I had PSP open meant I could follow along and do the steps as Carole says them in the tutorials. Sometimes, i find it's more what Carole says that really helps as well, and i had to look very carefully at the steps as she did them, and pay attention to settings and what layer she was on. I did A LOT (and I mean A LOT!) of rewinding and replaying. But I got there in the end. I understand though this requires you to have a desk top and a laptop (or two laptops). Another option is two monitors (which I have now) where I can watch on one monitor and do the instructions in PSP on the other monitor. If you have acces to an extra laptop that can go online this could really help you do the tutorial one step at a time at your own pace. Believe me, some tutorials took me hours to get through. Remember the 3 P's. PRACTICE. PATIENCE. PERSEVERANCE. Hope this helps.1 point
-
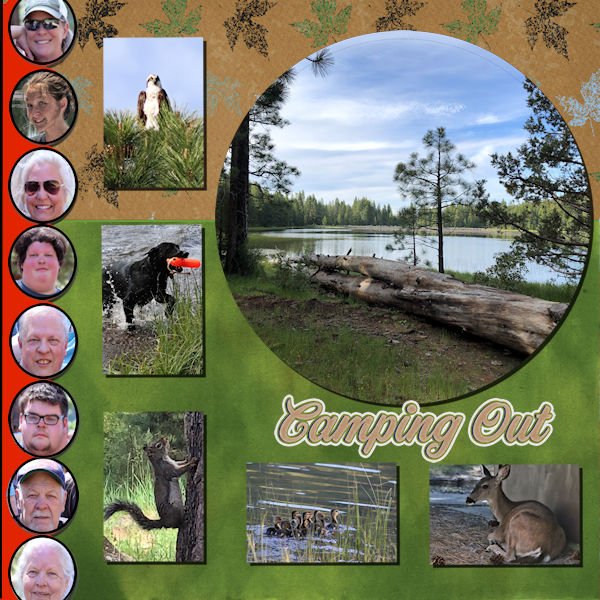
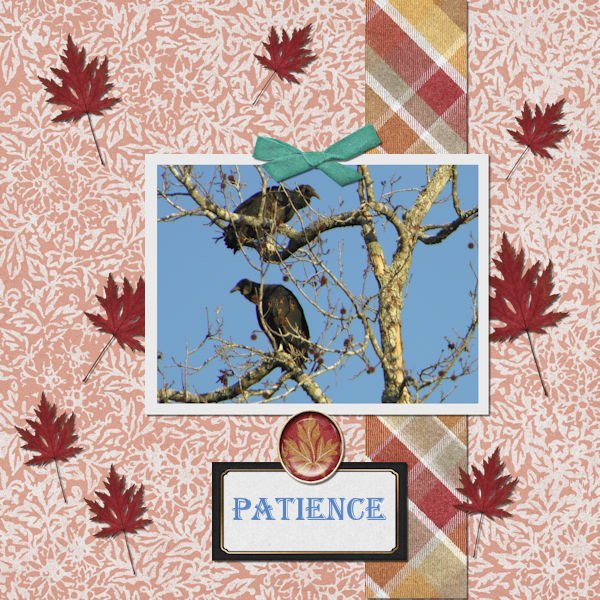
Our favorite group camping site in Northeast California.
1 point


Resized.thumb.jpg.d25811db03a63358cedab1e79f527635.jpg)