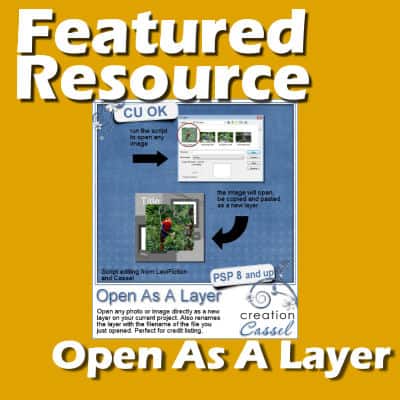
When creating various graphic projects, we often repeat the same steps over and over again. That is when scripts become very helpful tools. Several of those tool scripts are available in the Creation Cassel store, a related site to the Campus. The script we will feature here, is the "Open as a Layer".
PSP
Featured Resource – Selection to Path
Often, a PaintShop Pro user would want to use a vector path. Although some simple shapes are easy enough to draw with the existing tools in PaintShop Pro, sometimes, you need a custom shape. LeviFiction has come up with a script that can convert a selection into a path. This opens up so many possibilities. Having a path available allows you to run some staple scripts, namely, the VectorTube, VectorPaint, and VectorStroke scripts.
How to use EPS files in PaintShop Pro
A lot of resources available online are in EPS (Encapsulated PostScript) format. Those are vector format, but when you open them in PaintShop Pro, you lose the vector feature. Typically, you end up with a flattened jpg image. That is not what you want. One vector format the PaintShop Pro can handle is WMF. Let's see how we can go from EPS to WMF.
Featured Resource – OnlyGFX
Whether we use our PaintShop Pro for scrapbooking, greeting cards, or other graphic projects, we are always looking for new resources. This week, I found one interesting site that offers a wide range of supplies you can use for all those projects.
The Materials Properties in PSP
Until version X5, the Materials Properties dialog window in PaintShop Pro has stayed unchanged. With version X6, Corel introduced a new Materials Properties window with additional functionalities. However, some users didn't like this new palette as they lost some features they liked. In version X8, Corel offered the option to use the older interface. Which one is best? Let's have a look at the pros and cons of each one.
Improve your photos with the Smart Carver
The Smart Carver is one of those tools you can use to remove a part of your photo. The program allows you to choose what to remove and what to keep intact. Then, it will reshape the photo without the section you chose to remove. This tool appeared in PaintShop Pro in version X3.It can be a very useful tool, however, it will only work on specific types of photos.
What are the different Blurs in PSP?
You might already be familiar with the Gaussian Blur that we often use in PaintShop Pro, but there are other types of blurs too. What are they? What can we use them for? Let's explore this command a bit further.
How to add shortcuts in PaintShop Pro
PaintShop Pro comes with a lot of tools, settings, and functions. Although they are all available through the tools palette or the different menus, there are already some shortcuts to access them too. Let's look at the existing shortcuts and how you can even add your own.
How to blend two images together
Since PaintShop Pro allows users to work with layers, we can get some impressive results with a very simple techniques. Let's see how you can blend two images together to get a dreamy effect.
Using frames in digital scrapbook layouts
You can often find scrapbook projects using frames. They can come in a wide variety of shapes, types, and colors. And furthermore, you can use them in many different ways. Although you can use frames from within PaintShop Pro, let's have a look at frames that come in digital kits.


