
Whether you are using Affinity Photo or Affinity Designer, you will notice that both app have a Brush tool. Wouldn't it be nice to be able to use the same brushes in both apps? In fact, you can, with certain limitations.

Whether you are using Affinity Photo or Affinity Designer, you will notice that both app have a Brush tool. Wouldn't it be nice to be able to use the same brushes in both apps? In fact, you can, with certain limitations.

Have you ever come across an image with beautiful handwriting or a delicate design… but it’s just too faint to read or enjoy? That happened recently with a project from Marvin. He had a gorgeous image, but the text was so faded it was hard to make out. Good news — with a few tweaks in PaintShop Pro, you can often recover those faint details!
Let me walk you through what worked in Marvin’s case — and what might work for you too.

There are times when you need to rename files. It could be after taking a lot of photos and you want to "tag" them to an event or a location. Maybe you downloaded a large scrapbook kit, which includes dozens or hundreds of files, and you want to name them differently to keep things organized. Whatever reason you have to rename files, doing it manually, one by one is fine if you have just a few. But as soon as you have more than 20 or so, it can be very tedious and time-consuming. PaintShop Pro has a function to save time: the Batch Rename command.

We know that many scrapbookers love to gather fonts. We like to browse through interesting fonts imagining all the projects we could use them in. Are you still looking for new fonts to collect? Let's have a look at another source of free fonts.

When designing scrapbook pages, titles often play a big role in the visual story. While the photos are the real stars, a well-crafted title can almost steal the show. One fun and eye-catching way to treat your titles is by using a cutout effect—a technique that gives the illusion that the title has been cut through the top layer, revealing what’s underneath.
Let’s explore how to create this effect in PaintShop Pro, and then how to take it even further with a flexible variation that gives you more control.
If you've been using both PaintShop Pro and Affinity, you've likely run into a frustrating roadblock: transferring vector shapes between the two programs used to be difficult or unreliable.
Affinity doesn’t open PSP files. PaintShop Pro might save in PSD format, but doesn’t retain vector properties in that format. Similarly, even though Affinity can export PSD files, PaintShop Pro cannot handle the vector properties, and your file will be rasterized.
But here’s the good news: after some testing, I’ve discovered that both PaintShop Pro and Affinity support the WMF (Windows Metafile) format — and it works in both directions!
With this method, you can carry over your vector shapes, regardless of which program you're using.

If you create elements that you plan on reusing later, it is a good idea to save them. Of course, you can save them to your computer and open them as needed (like scrapbooking kits) but there is a faster way, especially if you plan on using them often enough: saving them as assets.
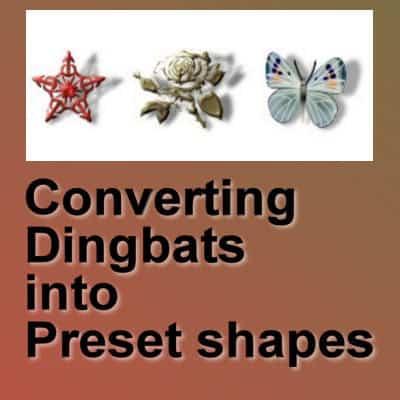
Have you ever found a dingbat font filled with great shapes—hearts, ornaments, dividers, icons—but wished you could use them more easily in PaintShop Pro? Maybe you only need a few from the set, or maybe you want to use them over and over again without remembering which font or keystroke they came from. That’s where converting them into Preset Shapes becomes incredibly useful.
In this tutorial, I’ll show you how to convert fonts and dingbat characters into vector Preset Shapes using a free script by Suz Shook, available in my store. You’ll be able to export multiple shapes at once, organize them into a library, and use them just like any other preset shape in PaintShop Pro.
Using fonts and dingbats directly in your project can be tedious to select just one specific element. However, with Preset Shapes, you can select the one you need, without much browsing. Since dingbats are not identifiable on your keyboard, it is often a guessing game to find the shape you want as a font.
Since Preset Shape are vectors, just like a font, you can select the fill, and stroke colors, and create them in any size you want, without distortion.
To simplify the conversion process, download the free script called Making Preset Shapes from a Dingbat by Suz Shook. You can find it on Creation Cassel’s store, HERE.
Once downloaded, install the script in your Restricted Scripts folder in PaintShop Pro.
Open a blank image in PaintShop Pro.
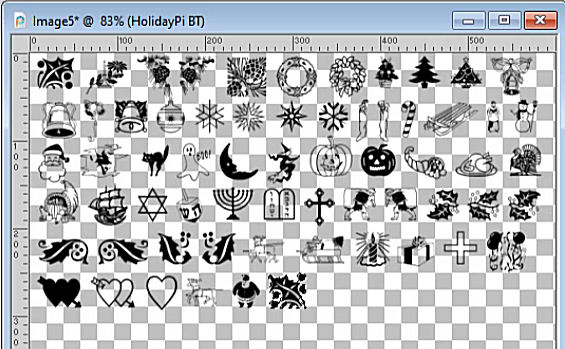
Choose your dingbat font. For best results, use a size of 36 (larger sizes may be harder to preview or result in odd shapes).
Run the script. You can find it in the Scripts toolbar, if you have it open.

Otherwise, you can go to File > Script > Run and navigate to where you saved the SS_MakingPresetShapes_06 script (the “06” refers to the version number).
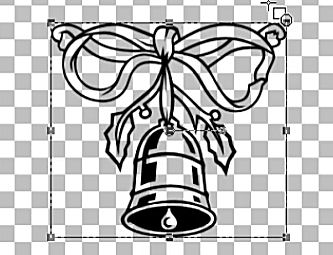
The script will automatically display each character from the font. If some characters don’t have assigned shapes, you’ll see empty rectangles. These can be deleted later.
After the script runs, review the shapes. Delete any unwanted characters by selecting their vector layers and clicking the Delete Layer icon, at the bottom of the Layers palette.
Once you're satisfied with the remaining shapes, run the same script again to export them. You will be prompted to name the shapes. It will prompt you to enter the name of the file you will want to export. Remember that the FILE name is not the same as the SHAPE name, but the script will use the shape name in the Layers palette.

To access your new shapes, activate the Preset Shape tool. In the dropdown list, find your new shapes, which are alphabetically ordered. Hold SHIFT while dragging your cursor to maintain proportions, and draw it on your canvas.
These shapes behave like any preset vector shape in PSP: scalable, editable, and perfect for repeated use. And the edges will always be perfectly clean, which is great.
Dingbat fonts are an often-overlooked resource for unique shapes in digital projects. By converting them into Preset Shapes, you gain more flexibility, organization, and creative control. Whether you're designing cards, scrapbook pages, or digital art, this workflow will save time and keep your favorite elements at your fingertips.
Give it a try with your favorite dingbat font—and don’t forget, the script is completely free!
Some overlays that you will find will not consist of well-defined elements, so they will come in JPG format. Although they will be layered on your photo just like the PNG overlays, they will cover your photo. But they still open up a wide range of effects that you can apply to your photos for unique results. How can you use those JPG overlays on your photos for stunning effects? Read more about using PNG overlays.

Modifiers are those common keys on your keyboard that you use in different programs. Most often, you will use them with keyboard shortcuts, like Ctrl-A to select all, or Shift-D to duplicate an image. A whole list is available inside PaintShop Pro. However, you can also use those modifiers with different tools to add functionalities. Although everything is available inside the program, with your cursor, modifiers will speed up the process. Let's look at different tools that use modifiers and what they do.


