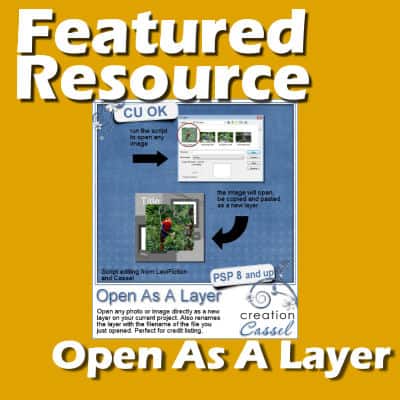
Converting Dingbats into Preset Shapes

Have you ever found a dingbat font filled with great shapes—hearts, ornaments, dividers, icons—but wished you could use them more easily in PaintShop Pro? Maybe you only need a few from the set, or maybe you want to use them over and over again without remembering which font or keystroke they came from. That’s where converting them into Preset Shapes becomes incredibly useful.

In this tutorial, I’ll show you how to convert fonts and dingbat characters into vector Preset Shapes using a free script by Suz Shook, available in my store. You’ll be able to export multiple shapes at once, organize them into a library, and use them just like any other preset shape in PaintShop Pro.

Why Convert Dingbats into Preset Shapes?

Using fonts and dingbats directly in your project can be tedious to select just one specific element. However, with Preset Shapes, you can select the one you need, without much browsing. Since dingbats are not identifiable on your keyboard, it is often a guessing game to find the shape you want as a font.

Since Preset Shape are vectors, just like a font, you can select the fill, and stroke colors, and create them in any size you want, without distortion.

Step 1 – Get the Free Script

To simplify the conversion process, download the free script called Making Preset Shapes from a Dingbat by Suz Shook. You can find it on Creation Cassel’s store, HERE.

Once downloaded, install the script in your Restricted Scripts folder in PaintShop Pro.

Step 2 – Run the Script

Open a blank image in PaintShop Pro.

Choose your dingbat font. For best results, use a size of 36 (larger sizes may be harder to preview or result in odd shapes).

Run the script. You can find it in the Scripts toolbar, if you have it open.

Otherwise, you can go to File > Script > Run and navigate to where you saved the SS_MakingPresetShapes_06 script (the “06” refers to the version number).

The script will automatically display each character from the font. If some characters don’t have assigned shapes, you’ll see empty rectangles. These can be deleted later.

Step 3 – Clean Up the Shapes

After the script runs, review the shapes. Delete any unwanted characters by selecting their vector layers and clicking the Delete Layer icon, at the bottom of the Layers palette.

Step 4 – Export to Preset Shape Library

Once you're satisfied with the remaining shapes, run the same script again to export them. You will be prompted to name the shapes. It will prompt you to enter the name of the file you will want to export. Remember that the FILE name is not the same as the SHAPE name, but the script will use the shape name in the Layers palette.


Step 5 – Use Your New Preset Shapes

To access your new shapes, activate the Preset Shape tool. In the dropdown list, find your new shapes, which are alphabetically ordered. Hold SHIFT while dragging your cursor to maintain proportions, and draw it on your canvas.

These shapes behave like any preset vector shape in PSP: scalable, editable, and perfect for repeated use. And the edges will always be perfectly clean, which is great.


Conclusion

Dingbat fonts are an often-overlooked resource for unique shapes in digital projects. By converting them into Preset Shapes, you gain more flexibility, organization, and creative control. Whether you're designing cards, scrapbook pages, or digital art, this workflow will save time and keep your favorite elements at your fingertips.

Give it a try with your favorite dingbat font—and don’t forget, the script is completely free!

How to use JPG overlays

Some overlays that you will find will not consist of well-defined elements, so they will come in JPG format. Although they will be layered on your photo just like the PNG overlays,  they will cover your photo. But they still open up a wide range of effects that you can apply to your photos for unique results. How can you use those JPG overlays on your photos for stunning effects? Read more about using PNG overlays.

Read more

Using Modifiers in PaintShop Pro

Modifiers are those common keys on your keyboard that you use in different programs. Most often, you will use them with keyboard shortcuts, like Ctrl-A to select all, or Shift-D to duplicate an image. A whole list is available inside PaintShop Pro. However, you can also use those modifiers with different tools to add functionalities. Although everything is available inside the program, with your cursor, modifiers will speed up the process. Let's look at different tools that use modifiers and what they do.

Read more

Text Cutout on Photos in PaintShop Pro

Have you ever wanted to give your photos a unique touch by adding eye-catching text cutouts? It's a fun and surprisingly easy way to add personalized titles, phrases, dates, or even locations directly into your images. Let's dive into how you can achieve this stylish effect with PaintShop Pro!

Read more

Creating a Contact Sheet in PaintShop Pro

Have you ever found yourself overwhelmed by countless photos, scrapbook supplies, masks, brushes, or digital resources on your computer? A contact sheet is a practical and visually appealing solution to quickly preview and organize your digital assets. In this tutorial, you'll learn how easy it is to create contact sheets in PaintShop Pro, enabling you to have a handy printed version of your folders' contents right at your fingertips.

Read more

Register for our next live class, Let it GLOW Again