Leaderboard
Resized.thumb.jpg.d25811db03a63358cedab1e79f527635.jpg)


Popular Content
Showing content with the highest reputation on 01/30/2023 in all areas
-
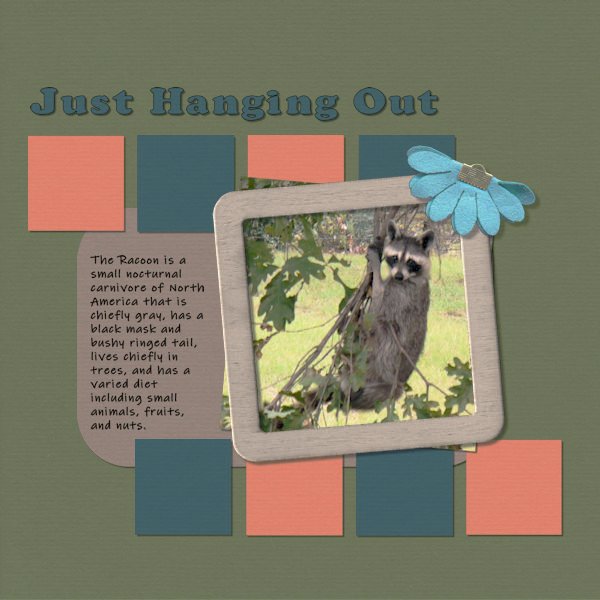
Project 5 -- I'm gonna call it 'done'. It has taken several days, created some frustration. Maybe added a few more gray hairs on my head ? I know there are only 3 small squares. I made 4, but when I began merging them into one layer I realized I had the last one on a layer with something else....and I decided 3 squares were good ? Now that I have thought about it, I suppose I could have used the history to figure out where I messed up and corrected it?
 7 points
 -
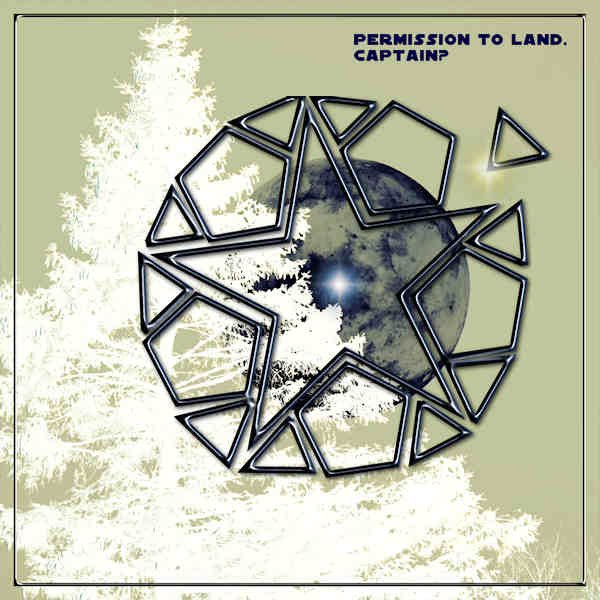
I finally came up with something from the stencil lesson. Actually, inspired by Pirkko's daffodils. The moon photo from Fred Coffey inspired a little science fiction. The font is SF Distant Galaxy. I turned the photo into a negative image. Also added a few flares from my Tube files.
6 points
-
My friend's dog. He love his tennis balls and has a large collection. This is a scraplift. Sadly, I no longer remember whose layout I lifted. Someone at digital scrapper I think.
6 points
-
And, one of my absolute favorites using a large photo was done back in 2008 not long after I started digital scrapping.
6 points
-
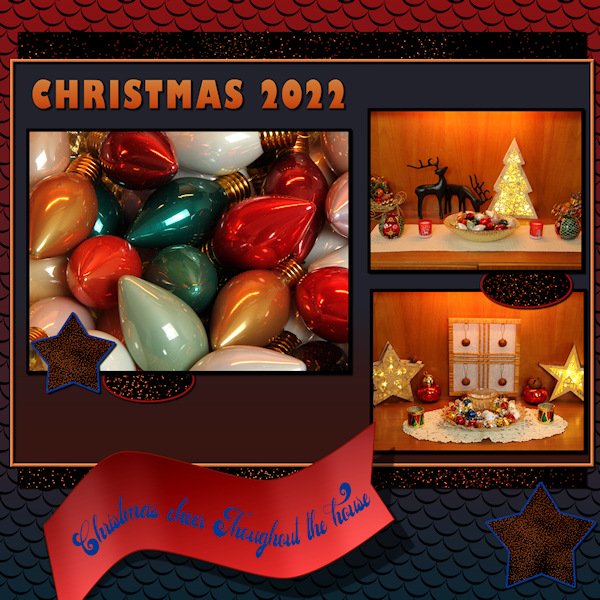
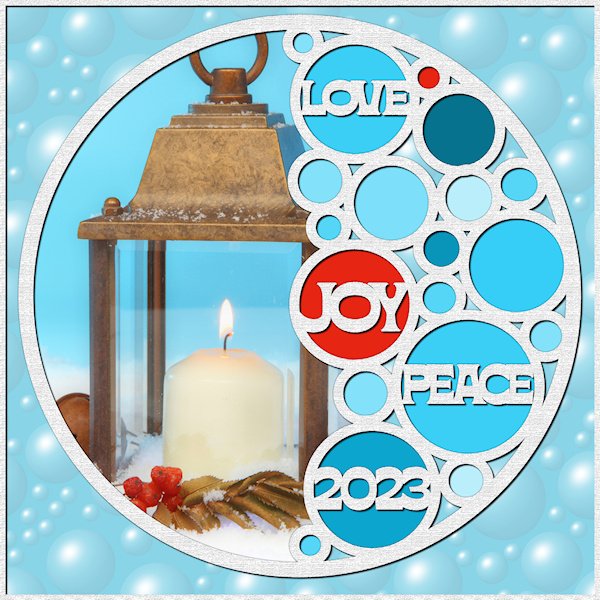
Oh what fun Lab 13-1 is! Two out of one Susans recommend it (I'm a Gemini; 2 peeps in one body). Stencils! I didnt know I needed to know this, to do some of the ideas floating around in my head. I really like this technique. And now I'm ready for next Christmas...except I'll probably forget about this by then. The font is Bornsa (Creative Fabrica I think). I used texture effects on the background and on the stencil itself and the frame around the background. I sure need practice getting my circles lined up when I'm first making them. They seem to build/land not where I'm expecting. Good thing we can move and resize. It wasnt until I finished that I noticed I didnt get one lined up well. Photo is mine from a Christmas card a few years back, BPSPATSC (Before PSP and the Scrapbook Campus). ?
5 points
-
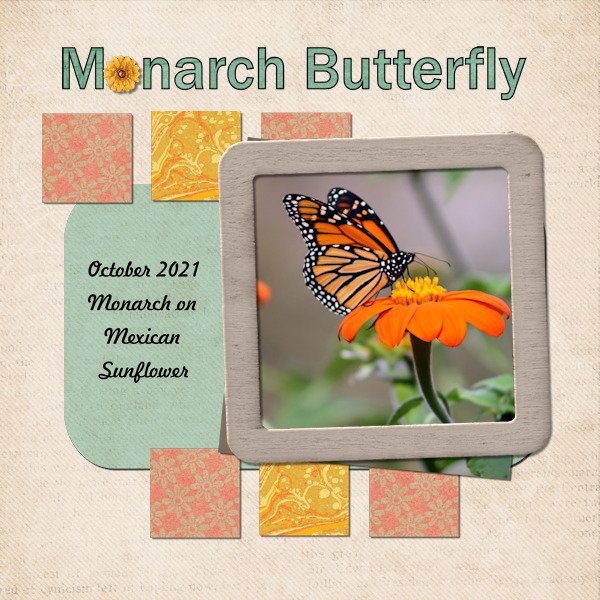
One last January pic. The butterflies are from pictures I took at butterfly house in Florida. The background are two layers I created with the kaleidoscope effect starting with a background from "Christmas-Snowflake-Digital-Paper-Pack-45966505" Also used the Butterfly picturetubeThe font is Anelya.
5 points
-
Another one was from a scrapbooking retreat I went to in 2009 in Lynchburg, VA. The one and only time I had anything from Starbucks. Not a coffee drinker and no stores in my town.
5 points
-
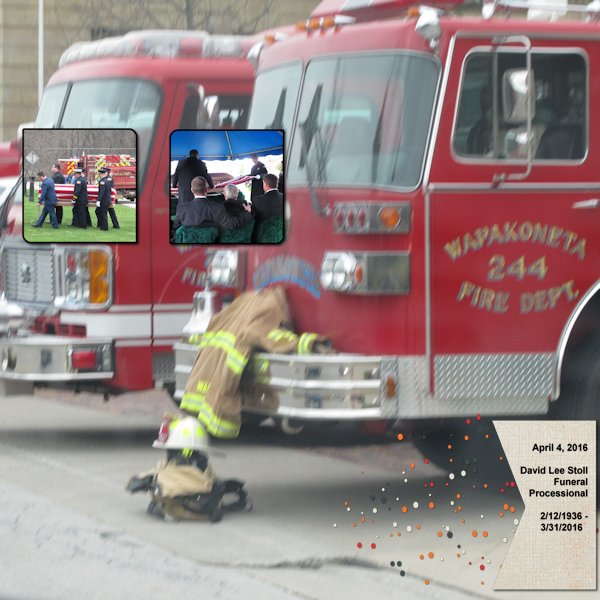
I've used this style several times in the past. This was from my uncle's funeral in 2016. He was a retired firefighter and the procession from the funeral home to the cemetery went by the fire station.
5 points
-
Went all the way back to 2011 for these photos and this day. Fun day. I wish the photos were better...but, I took them so I can't complain too much!
4 points
-
3 points
-
3 points
-
From 2018. My friend and her brother.
3 points
-
A British native woodland and hedgerow flower. This particular layout is one that I do quite often. Adjustment layers.
3 points
-
Project5.Last version. Probably;)
2 points
-
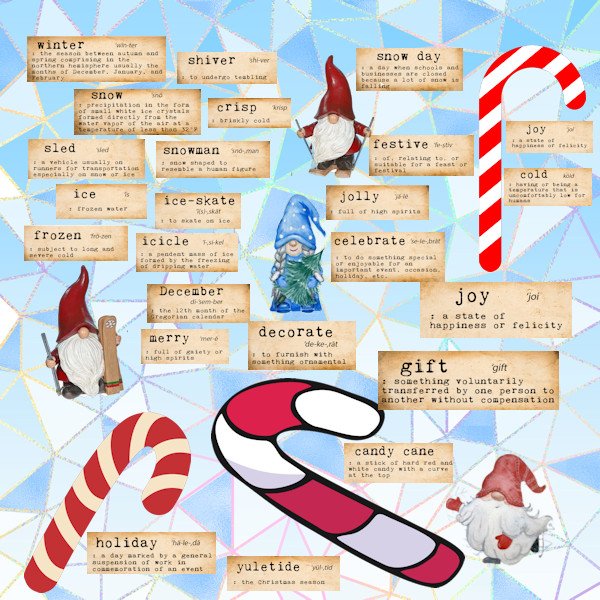
OK the last one for this month, it a gnome word wall. I took the words from a free download from Creative Fabrica the gnomes moved in and set up home in the depths of my computer; they pop up from time to time, I don't remember where I got the candy canes from, I have about 80,000 clip art items mainly on two discs. Keeping track of that lot is a nightmare
2 points
-
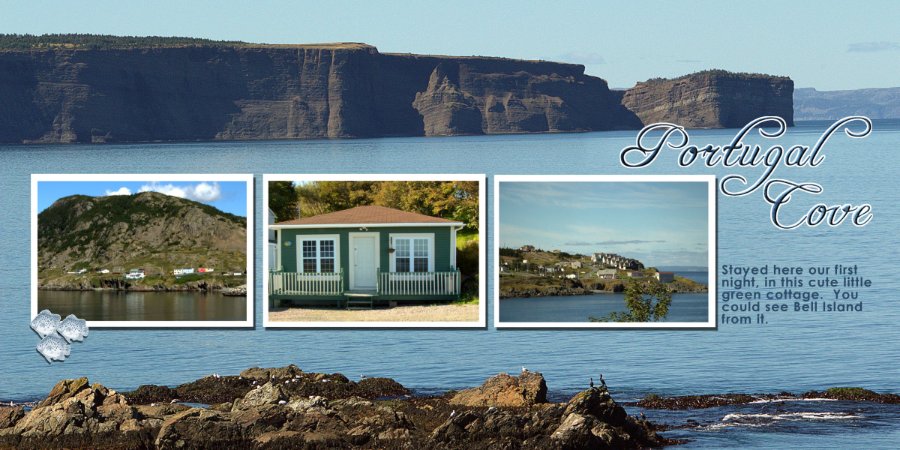
I did this layout for a photobook I made from my trip to Newfoundland.
2 points
-
Inspired by a layout from Promethean Concepts by Laurel Stone in the ALFLT January 2022 Blog Train, Heart Full of Love. The font is Poor Richard; I have a lot of valentine/heart fonts, but I thought the template had enough hearts already lol. In fact, there was another bunch of hearts on the top that I deleted to have room for my titles.2 points
-
It was fun ..so i made another one ...little more simple !! Fonts used : ActionIs------&----Mr.Haviland Kit used: Dainty Spring Butterfly Element are from some years ago ..... Something i learned ....is that Pick tool for resizing !!
2 points
-
Hi all, I know I'm getting a pain in the you know where, but this one is just for Cassel thanks for the window and garland, hope you like what I did with them
2 points
-
Ann, this is awesome. I've done negative image too, it's very interesting isnt it. This is a great concept and I totally get the space reference.1 point
-
 Awesome Ann. it's just it's head peeking out from the flowers. I can only see things in things when I'm not looking for it.1 point
 -
Thanks, Corrie, but as Ann pointed out, they were part of the template. I'll have to try the stencil tutorial!1 point
-
I know, right? isnt that funny. It came out of the back of the toilet when when we had to change the insides. Thomas, I find it fascinating to see what people see. I see a rabbit on the left and an ostrich head on the bottom right (it's in the middle top portion). I am well known for dragging people (at work) to look at splotches on the floor. They roll with it, I'm weird I think.1 point
-
Thank you Ann for your description of your setup. I've been looking for the "Organizer" that I found once, then closed it and then wanted it back - but couldn't figure out how to get it back! Your description helped - Thank you!1 point
-
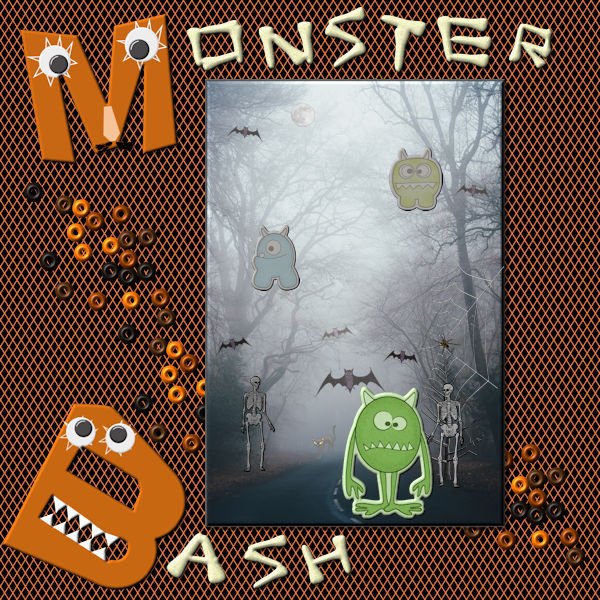
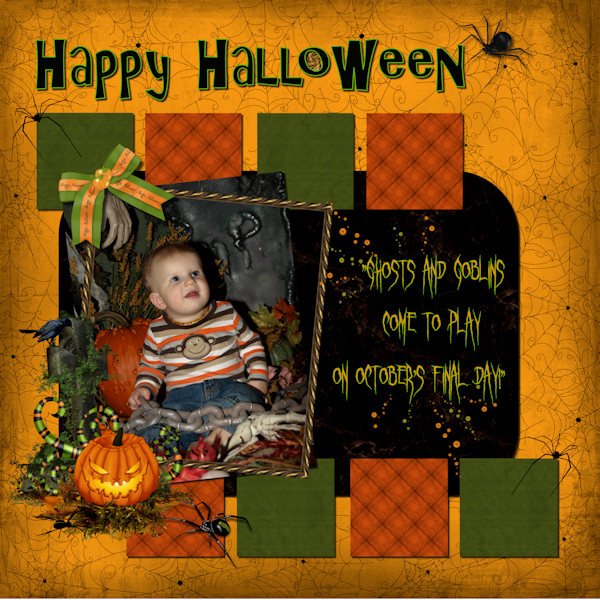
Probably the last for January. This is Lab 10 Mod 11. Requirements: crazy monster letters, googly eyes, beads in a picture tube. All done. I also created letters from a bone that was in one of the Halloween picture tubes (there are several). I also used those tubes for the bats, cat, spider. The spider web is mine from a previous lab. The picture is from Unsplash - by Annie Spratt. The 3 monsters are from PS -- Sheila Reid; The skeletons are from PS - Brooke Gazarak. Think I have credited everyone. The background paper is mine created in another lab.
1 point
-
I found the fifth project a difficult one as far as design goes. I had forgotten the tip that I learned in a different class that if you don't change the text inside a self-wrapping selection that it will disappear on you when you resize. But when my text disappeared, I remembered and didn't panic. The papers and elements are from the May Flowers mini kit at digitalscrapbooking.com This is inside the chapel at Dog Mountain (St. Johnsbury, VT)
1 point
-
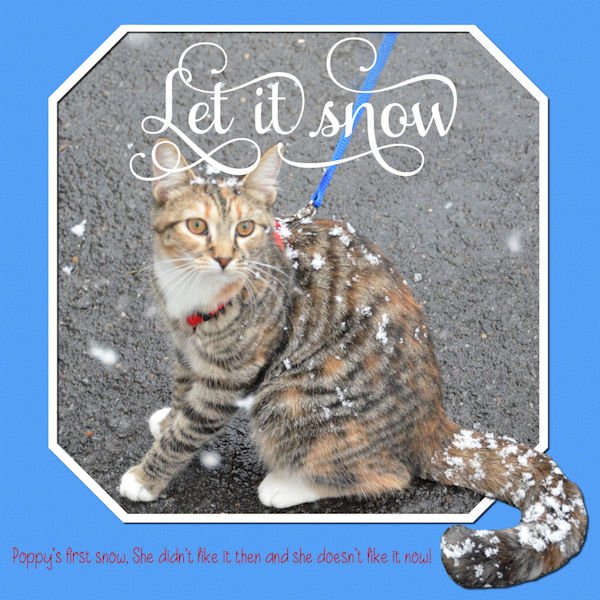
Another IWAS template. Poppy still does not like snow.
1 point
-
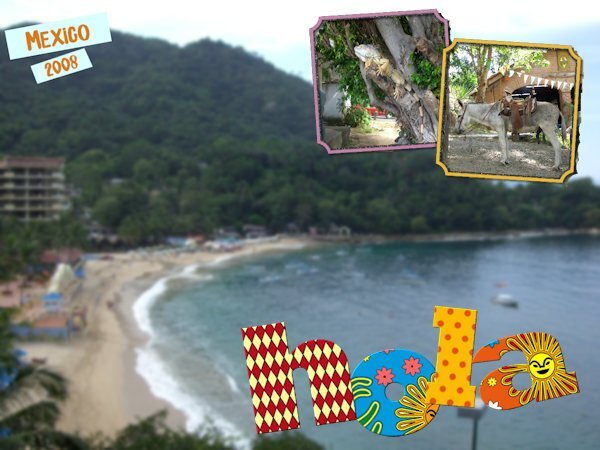
After going through my stash of photos, I realize I could do this challenge for weeks with all the uninteresting or bad pix I have! But it's a great way to use a boring photo. I made the "hola" text using individual images for each letter for the first time! That was fun. (Some edges on frames still a bit ragged....oops!)
1 point
-
here is one of my photos and my selected workspace in paintshop 2023. I'm way behind in these because my life is hectic!!!1 point
-
Project5corrected. My pic is too blue. But I like its blue;)
1 point
-
@Steve KovacsDid you add a shadow on the project 5 text? It is hard to say in the resized version, but remember that text typically has no thickness so it does not need a shadow. But it might also just be an illusion due to the resizing. For your idea of merging layers to move them, sometimes, it is enough to LINK them, since merged layers cannot be unmerged later! @Linda J WalkerRounded corners are automatically created when expanding a selection or using the Select Selection Border with the Outside or Both option checked. @Gerry LandrethInteresting tidbit of information. I heard that somewhere, a big object (maybe not a rocket) was to be moved through a town and to accommodate the space needed, they cut down hundred-year old trees on both sides of the road. At least, for power lines, they can "easily" be replaced! @TonimarieGreat work. I am glad you enjoyed the bootcamp. @Anja PelzerI think that using a part of the image as a fill for your title is a great idea. I would suggest to make the title even larger to accommodate such a busy pattern, otherwise, it is a little harder to read. You have plenty of room to make it larger. @Leslie JostesI feel your frustration about not finding exactly what you want. In fact, that is the whole reason behind the membership where there are hundreds of tutorials to show you how to make your own supplies OR to convert existing supplies to suit what you want. A lot of members started just like you and now, they can create perfectly matching elements and papers. As for your question about "tubes", they are unique features of PaintShop Pro. Here are a couple of articles about them: Picture tubes in PSP and What can you do with Picture Tubes. That might answer at least some questions. Don't hesitate to ask if it is not clear enough. @GabrielaSuch a fun layout for a cute photo. Well done. @Thomas WillisThanks for the cuddos. The issue you are experiencing with the text "disappearing" is due to the fact that the wrapped text stays inside the "selection", yet once the selection is deselected, it has to stay in the program/image memory. The text does not really disappear, but is now outside of the smaller image. To test that, resize back to 3600 pixels (yes it will possibly be pixellated but just to illustrate). The text should still be where it was. I wrote an article about the Text Wrapping feature and at the end, I mention this issue. It should explain it. And as mentioned by others, it might be simpler to resize a jpg version of the full-size project OR to rasterize one copy of the text as the rasters won't be affected by that oddity. @Mary SolaasI don't know if you added a texture to the title but it almost looks like embroidery. Is that just a trick on my eyes? @kasanyNice photo to showcase. I think that the background paper would let the details show up more if it was solid OR even very blurred as it is hard to distinguish what is the background and what is a little square with a cloud since they are so similar in colors. I think you forgot some shadows on the elements (other than the title and the squares). Is that possible? @Susan EwartThe compression will only be set when saving in jpg. In recent versions of PSP, you can adjust that right in the Save as... dialog window. I think it is the same as using the Optimizer. Back a few versions, the Optimizer was the only way to adjust the compression to control the file size. Not anymore. For those who have not yet finished, don't worry, you still have a couple of days to post 4 out of 5 projects to be entered into the random draw, on Monday night.1 point
-
I think I heard that, too, that the optimizer is better at stabilizing the text. It certainly gives you more control over compression. I created shortcuts on my toolbar for both optimizers, .jpg and .png. Very handy. They're right next to Cassel's new Guides script and Open as a New Layer-Rename. Really speeds things up a bit.1 point
-
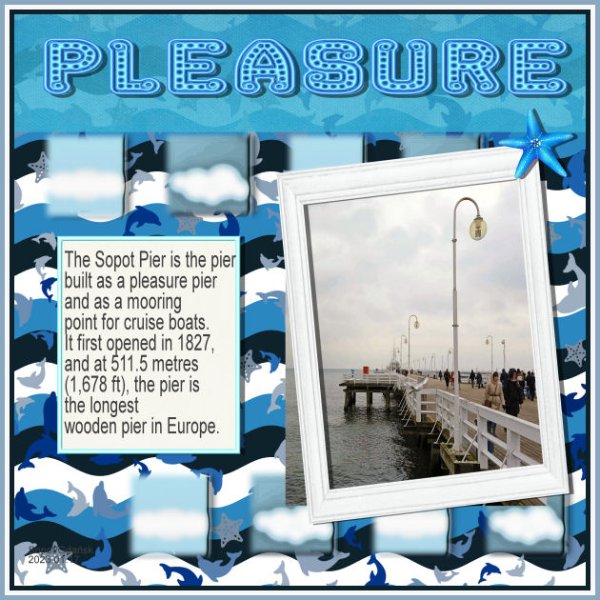
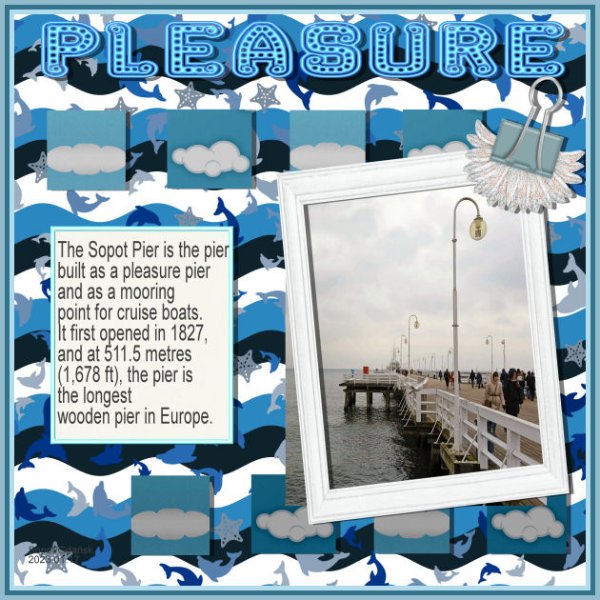
Project5. SopotPier
1 point
-
This month's almost out time to think about Feb which marks the depth of winter. This little piece is Lab 6 08 had some problems getting the push brush size to fit the length of the ribbon a bit of trial and error with that. Yes I remembered the shadows this time ?
1 point
-
For that reason, I now make it a habit to rasterize all text. I found it especially touchy if it's created in a selection area.1 point
-
Well, I did finish the 5th project. Couldn't decide on a subject, but finally decided on this picture that Laurie took last spring up east. I've always liked paths that turn a corner - you never know what lies beyond the curve - I always think it is something wonderful and exciting or maybe just wonderful. The papers and elements are mine - the cluster was developed from elements downloaded from Pixel Scrapper at different times. The frame is also from Pixel Scrapper. The font is Aryadata - I'm sure it came from Creative Fabrica at sometime or other. I changed the background paper and the frame with Hue/Saturation/Lightness.
1 point
-
That happens to me. I usually save the large jpg then close it and open the jpg again and resize it and the text stays intact. There is another way other members do it and Carole will likely chime in to tell you about. It happens to us all.1 point
-
Well I finished all 5 projects. As you can tell this is all new to me but I think I did OK considering. I owe it all to a great teacher. Thank you Cassel! My main interest was to learn PSP. The only trouble I had on this one was the text would disappear when I resized to 600. I had to convert it to raster to make it work. Also when I uploaded it the colors are washed out. It looked much better before. ? an apple for the teacher.
1 point
-
Here's another:
1 point
-
I have used this technique several times. I like it! Here is one:
1 point
-
Corrie, this is very beautiful! the stencil, the colors and the owls. Together a wonderful result1 point
-
Just an example of using this technique, here's part of a double layout I did for my granddaughter's honeymoon in Feb 2022.1 point
-
Fonts used 3 Hour Tour................Ghastly Panic Bottom Paper from ps_brooke-gazarek other Papers were actually Pattern Tiles Elements are from Pixabay,PNGTree and some from years ago Quote i found on the internet and the picture is my Grandson when he was little
1 point
-
I see a rabbit on the left and The Star Trek Enterprise on the top, right.1 point
-
LAB 6-7 Sandbrush Scale Pattern Wavy Flag Inspiration Template W used for this LAB Another fun lab. The scale pattern was my favorite. I played with color combinations for quite some time, it's addictive when you want to see just one more combination...an hour later you are still doing it, and the rice is burning upstairs! I know, it's hard to burn rice when cooking on low. If I can melt a colander making spaghetti, I can burn rice (I have...many times). But you aren't reading this for my cooking advice are you? Back to the Lab at hand. The sandbrush was surprisingly easy to do, yet hard to control it just how you want. I'm thankful for the good instruction on the wavy flag. It took me some time to figure out the "shear" setting on the pick tool I couldnt figure out how to get the middle handle(node?) to change from vertical to horizontal. I got there by mistake and took me time to figure out how to change the directional arrow thing. The background scale pattern (which looks like supermans colors - don't get me started on Henry Cavill doing Supermand and NOT doing The Witcher!) has a gradient background and the pattern has a 14% angle with a scale set at 80. the scales looked best in black. I used the sand brush as a paper and for the stars and ovals. The frame around the whole photo/title area has an inner bevel (#2, width 8, smooth 10, depth 7) to help it stand out. Fonts are Gills Sans Ultra Bold Condensed (title) and Adaniya (Creative Fabrica) on the wavy flag. Photo's are mine.
1 point
-
The next page of our trip to Chattanooga. All papers and elements are mine. The title font is Broadway. The journaling font is Arial.
1 point
-
I see a mouse on the left, a duck on the bottom.1 point
-
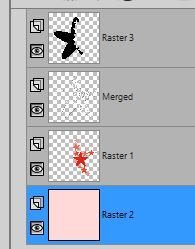
I found the other Mask script that you mentioned Carole, 'Raster to Mask' and it worked perfectly. Tried it out with a different image as an experiment. The script I previously used was Mask Maker that I now realise is for use with vectors and that is presumably why it didn't work as my layer is a raster! Duh!
1 point
-
Check the Mask workshop lesson 1. Or you can use the Raster to Mask script if you happen to have it. It will do the same thing but faster.1 point
-
Lab13-Module1 Hi, I have had a go at a basic shape with stencil effect and I have managed to create a layer in black that I now want to be a Mask layer to be a photo instead of the black. I have now got unstuck despite having watched Masks Master classes so I'm not sure why I can't work it out. Can anyone help me please with how I create this black layer into a mask so that it will appear as a photo? Your projects here look so good but I just want to grasp the concept. Thank you.
1 point


.jpg.340281b235a955ef1516a937e934c034.jpg)