Leaderboard


Popular Content
Showing content with the highest reputation on 06/22/2025 in all areas
-
And here is day 6. I really didn't enjoy the voronoi effect, guess I'll just have to keep playing with it.
 17 points
 -
I did the Veronoi filter but really don't care for it. I did use a radial blur, maybe too much, but it was just too busy for my taste.
17 points
-
Lesson 3. I am not sure why my image is not as vivid as it is on the original. When I bring it into PSP it is colorful and vivid but looks very muted when I bring it into Affinity. I have tried changing my color settings but it's not making a difference 🤔 PS: The image is one I generated in Midjourney so if anyone would like to snag it, feel free.
17 points
-
Day 5. For some reason the brush in this mask was so much easier to use.
16 points
-
Mom came back to pick up her two children. The house became quiet again and I was able to get my computer back. Day 5 (affinity): I think Brian didn't enjoy his first vaccine very much!
16 points
-
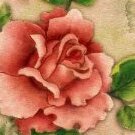
Here is Lesson 6. chose this mask out of my collection of png masks to use on the rose for a different effect. the picture is from a purchased cd . The Voroni filter was a bit of a challenge to get right effect that i wanted but in the end think this filter has possibilities. the sentiment is from a digital stamp by Power Poppy purchased a few years ago. also used another Dot brush TB Dots01-Pack 7 by StuartRc mainly just to give a bit of extra colour around the mask.
15 points
-
Day 3 PSP. Daniel's Birthday. Such a happy time for us all.
14 points
-
Lesson 6 is a small acrylic painting superimposed on the photograph that inspired it. My bubbles look more like rubble! 🤣
14 points
-
Day 5 PSP I love this old place on Dansey's Pass, it is just a facade, yet in a beautiful spot on the roadside. I used some brushes I had, no idea where they came from. I thought a few brushes on the background, hit back a bit so they'd not look too strong. Fonts, again, Weendy Medium and Arial. Affinity Looking towards the road and that facade, from behind. The brush I used was by StuartRc from the Affinity Forum. I added another layer and brushed the edges, then lowered the opacity somewhat. Font Gonestone Signature, and Arial
13 points
-
My Day 6 (PSP and a bit of AI: Stained Glass)
13 points
-
Lesson 4 I played with this way too long, both the photo and the mask. And I thought I could whip this one off fast, 3 hours later...... Background is a texture layer with a plain color blended with a gradient layer. A little bevel on the stroke and a small shadow of the stroke layer (rasterized first). Font is Gil Sans Ultra Bold and photo is mine. I used a cutout around the edge of the layout. Not sure if I like this one or not. My photo didn't quite have enough room to make a nicer mask with the brush. I'll be going into next week with this workshop I think. At least it's the slower week at work. The vase was from my mom, remember in the 80's people were doing ceramics where you pick a piece all ready made and you paint and glaze it. my mom really loved doing that. Too bad about the rose on it that I was going to clone out but forgot, the other side has a huge rose on it. It's probably 40 yrs old now.
13 points
-
Day 5 PSP. Danial loving a day at the Zoo while he was visiting us in Adelaide.
12 points
-
Day 3 Affinity. Daniel having a happy birthday.
12 points
-
Day 5 - My photo and a scatter that I created for another project. I made a black butterfly brush in both PSP and Affinity. I didn't know how to make curved letters in Affinity so I used the mesh warp. The font is call Baltic Nehrung and is an Open Font License. The background is mine from the papers workshop.
12 points
-
They do. 🙂
11 points
-
Day 5 Affinity. Finally finished day 5. I have really learnt so much, particularly with Affinity. Danial definitely enjoyed his day at the Adelaide Zoo. He loves animals.
11 points
-
Day 4 PSP. Trying to catch up. Hoping to get 1 more day today with PSP and Affinity. Our wonderful photo of Daniel showing his teeth.
11 points
-
Day 4 Affinity. Daniel showing his teeth 🙂
11 points
-
Day 7 (Affinity): Grandmother and her grandson
10 points
-
Day 7 A simple background paper to practice the polka dot technique. The mask (Day6 Extra) is larger than the workspace, which is why the polka dot paper is not visible on top. I didn’t adjust the size of the mask or anything else because I didn't have much time to work, so I only focused on the basics for this workshop.
10 points
-
Day 6: Created in Affinity. Once again I enjoyed making the mask but not so much the paper – only because I couldn’t get it like I wanted.
10 points
-
I have them also. They love the Oriole's jelly. They sit and "meow" at the cats! They are quite the mimics. I found an old photo...
10 points
-
And for number 6 another drag queen from last nighy. The font is CelticMDdecorative Wdrop Cap
10 points
-
Here is my Lesson 7 work. This has been lots of fun. I've sure learned a lot.
9 points
-
Day 7: Created in Affinity. I kept it very simple. The polka dots were made as small as possible and I added a blur.
9 points
-
Here's my Lesson 5 layout. Learning new tricks as I play along. I wish PSP would fix their SCALE mode issue! I hate having to constantly go back and change from shear mode to scale mode when I want to resize. Seems to happen often when I use CTRL+V shortcut, but that's not the only time. 🤷🏼♀️ Okay I feel better!
8 points
-
Lesson 7 - Affinity - and we come to the end of the 17 Mile Drive on Monterey Bay in California. On this photo I used a brush from TB Dots01 pack11 after a tip from April Dawn (thanks). I couldn't decide on the color for the dots and therefore made 2 layers for them to give me the opportunity to choose and I ended up by using both with the blendmode Divide. I don't know if it is visible in this reduced version, but there are 2 colors for the dots. The dots have a blur as well. I argued with myself if I should put a layer behind the text with light blue to make it easier to read, but in the end decided that it was ok the way it is when I just used a somewhat darker color for that text. Around my page I used an inked edge from Rachel M Hailey. Carole thank you very much for another great workshop for Affinity which has given me more techniques to use and a better understanding of this program and I consider myself still a newbie here.🤔 I have enjoyed scrolling through all the different layouts for both the programs and the results are fantastic! This is a great community that inspires with all the different ideas and tips. See you in the Campus and/or another Workshop.
8 points
-
Just had to add this church photo the flowers are all crocheted by the ladies of the church.
8 points
-
Day 7 using affinity Photo I followed Caroles instuctions on the video she makes it so easy to follow, I was happy with the result, The photo was taken by someone else there is a flower festival exhibition on at the church it has been on for 3 days, it has been one of the major events in the year long celebration of the 13500th Anniversary of the founding of St Andrews Church . There were 30 exhibits in total and they were all amazing, so beautiful. The font used was Angela. I did a second one using the same photo and I added a dark brown gradient layer to blend in with the stained glass windows the font used was angelina.
8 points
-
Lesson 5 Not my usual colors but I wanted to keep going with it to make it work. It was hard to get the brush imprints the way I wanted. You all make it look so easy, putting them in the right spots. I think I may have overdid it, but it kept looking like there was missing spots so i kept adding. I'm okay with the end result. better than I expected at least. Font is Valentine Soul. I used the Postal Stamp Tutorial in the Campus, And, the background paper is from Gina Jones Barnyard Buddies paper 11 (Digital Scrapbook). the photo is mine, I was going to cull that one because there is a little interloper on one of the petals. I decided the interloper was thanking me for the lovely accommodations at the bug hotel (here he is visiting the gardens of the hotel - there are many amenities - it's 5 star!)
8 points
-
Extra layout using the Day 1 Extra Mask to tell the story of Jackie and Shadow. Title font: GrilledCheese BTN Cn
8 points
-
Here goes with my day 5, I went to a drag show last night. and this act hit me right in the feels as she represented the wall from which the first brick thrown at the Stonewall riots was taken.
8 points
-
Day 6 using Affinity photo I used a photo of the Hexham Morris Dancers from our Midsummer event festival which was held this Thursday in the market square, the weather was glorious and there was a big turn out. i used an acrylic texture brush for the mask and the font is Baby Garland.
8 points
-
These are a few photos of Chicago, Illinois...All photos are mine as well as the cloud background. The state bird is a Cardinal and the flower a violet. If we ever get rid of a certain wana be dictator, I hope you all visit this city. I am not from Illinois so I don't think I'm being partial. I just can't get enough of this beautiful city.
8 points
-
I am so behind ugh, hoping to get caught up today! I wanted to do both PSP and Affinity lessons but I'll just do the Affinity ones so I can get caught up. Finally able to do the second lesson. OMG I loooooove the plaid pattern tutorial and how easy it is to make a whole pattern page in Affinity!!
8 points
-
Day 6 To practice the tutorial, I applied the Voronoi effect to one of the eagle clipart images and the Linoleum effect to the other.
8 points
-
Day 6 - The photos are mine, the bells are from Adobe Express and the gold frame is from FF. I did not have fun with the voronoi effect. Finally after much effort, I imported Filter Forge into Affinity and applied a FF effect. The font is Brovalgin from CF and the effect was created in Adobe Elements using an edge effect style. The large frame is also from PSE.
7 points
-
Lesson 7 - A Fringed Tulip from last spring at the Orange County Arboretum. The font is Things We Said. This workshop was fun! Thank you, Carole.
7 points
-
Lesson 7. I made a mistake with the size of my photo initially so replaced it inside the Mask and then used the Move Tool trick to centre it all. Thanks for that info Carole. I think the flower is a Cornus growing in a pot in my garden.
7 points
-
Great work everyone! @Jeni SimpsonThose are two great pages. I am glad to hear that you are having fun with the brushes and the mask. @Jean NaumannWhenever you have a photo with an edge, it is a bit tricky to get rid of it, especially if you don't have much space around the subject. I guess some photos will be easier to handle that way than others. And that couple in Port Arthur look better without the pattern! @Harmony BirchGlad to see you start this workshop. It is never too late to start. I love that font you used for the first "Beyond Ragnarok" page. If you find that the plaid is overpowering, you can size it down, or lower its opacity while adding a solid color below. Using multiple brushes for a single mask is very common! Boy, you are catching up fast!!! @kasanyIt is interesting how yo used the mask, yet it is not completely blocking the rest of the photo, which still shows in the background. Very creative! @Jannette Nieuwboer Maybe we can have a Zoom session to try to figure out what is happening. Hopefully it is only a simple issue. @Ann SeeberGreat mask for that starling. Those feathers look like they are bordered with gold! Using a monochrome noise with the linoleum effect gives a nice subtle effect. @Jacquessuch a simple yet powerful layout. Simplicity gives all the attention to the photo! Great page. Great use of that "ink" brush on the mask. how did you use AI? Did you use one of the effects in PSP? @Robert GarrettYeah, Mary Ann really does not look thrilled!! I am glad you are enjoying this workshop so far. @ClarineDid you use a mask at all? Your linoleum background looks great! @fiona cookDisplacement maps will yield very different results depending on the image used. You can really have fun with that command. @Bee KellyWith the photo taking much of the page, it is interesting how the kaleidoscope does not look like the typical "circles". It is very subtle all around. Great result. Interesting that you added black frames instead of the typical white one. It is very suitable for those pictures. @Sue ThomasI personally prefer the Linoleum effect to the voronoi one. I find that the voronoi is "too defined", but that is a personal taste. @Corrie KinkelI am not a fan of the voronoi either but I had to find something "somewhat similar" to the other one in PSP. That is the best I found! @SharlaAlthough I personally would not have added a shadow to the masked photo, it did turn out quite nicely! @Hank SobahFollowing the method and then adding your personal touch is exactly what we would expect. Those pages are so colorful! @CristinaThat is an interesting idea to use those textures only on a section. It probably shows more on the full-size project, right? @Sharon MurrayThat plaid is so colorful and surprisingly, since the photo is also very colorful, the plaid does not take over the photos. For your photo that is not as vivid in Affinity, is there a difference in the default blend mode or opacity? @Lynda DiGregorI like how you added a "pattern" or a texture to the frames around the small photos. And yes, someday, we might visit that city! (the further i have been is Detroit) @gwen jewittGreat layout to showcase that dancer! I love the colors! @Gerry LandrethI never thought of adding a large blur to turn the voronoi effect into a grunge texture. Good idea. @Donna SilliaYou can review the Vector Workshop for Affinity if you want directions on how to create text on a curve. @Susan EwartYou are NEVER spending too much time with those layouts. It is a project well worth that time! @Connie CollierThat bubble background looks great! I think it helps showcase your photo beautifully. @Carolyn RyeIs that a mask you made or a ready-made one you used? @Linda RexfordI think the radial blur is actually a great effect to put the focus on the subject. Great choice! See you tomorrow!7 points
-
Day 6 - Londyn is my second-oldest nephew. He's a fun kid. The Voronoi effect is interesting. In this case, I blurred at 100%, resulting in a grunge look. @Carole Thank you for pointing me to the Frame Text Tool for creating the vertical title. It's easy to use. I realized that I skipped the exercise on creating plaids, so I double-backed to get the practice.
7 points
-
Here's my Lesson 6 using PSP2023 - I don't do Affinity. I took this photo when we visited the Orange County Arboretum when Debbie was here 2 weeks ago. This little cutie was almost hidden in the lush greenery. I loved the color! I made the linoleum background based on one of the colors in the flower. I added a PSP frame with a transparent border. In fact, I added a second frame over the mask. It was green but I used a blend mode to fade it out. The fonts are am-intex and curlz.
7 points
-
I'm late, life gets in the way sometimes 🙂 And a long weekend break last week too 😉 Here are my two first projects, made with Affinity. Will have a look later at what you guys and girls have made this week. Pictures are mine, taken at a pond garden in the Netherlands 🙂
6 points
-
Day 7 - The final project features my baby sister, Lori, and her husband with their three daughters and nine grandkids. The paper was created in Affinity using a brush from a Photoshop brush pack called Retro Future, which I found on DeviantArt. The mask is by Andrea Gold from DigitalScrapbook.com. The "Scattered Photos" script by Cassel was used to create the collage in Paintshop Pro.
6 points
-
I don't like the Voronoi effect either but using it with different settings can give a great result! I'll give with one a try as well, maybe on another project.6 points
-
Day 6
6 points
-
Day 5 - a little off the course but followed the methods.
6 points
-
Okay, now I want one! (kidding, wild belongs in the wild). That's cool. Is that the same for the Bluejays/Steller Jays too (they make the weirdest and widely different sounds -they are part of the corvid group aren't they?). I'd love to hear a mocking bird, then when I'm in my backyard I could say, "are you mocking me?" ...because we all talk to the birds, right?5 points
-
The Grey Catbird is a member of the mimidae family. They are vocal mimic songbirds. Like the Brown Thrasher they are mimic birds. They are called catbirds due to their distinctive meow call that they make during breeding season, and over territory . I have them here, along with the brown Thrasher, which I have showcased. I don't get mockingbirds though.5 points
-
I love this bird. "Cat" bird. Someone has a sense of humor to name it that. Beautiful photo and you sure get some awesome visitors.5 points