Leaderboard


Resized.thumb.jpg.d25811db03a63358cedab1e79f527635.jpg)
Popular Content
Showing content with the highest reputation on 04/01/2024 in all areas
-
I passed by, I don't know how many times and I didn't look at the image -- I just found Thank you so much5 points
-
Rene already answered you, but here are some screenshots.
 5 points
 -
I use grouping and linking the same as you. Grouping for resizing and linking for indicating layers that go together. I don't usually rename layers. Because when I drag and drop into the layers palette, the file name is the layer name. When I use the raster-to-mask script for photos, my last step when I'm satisfied with the placement of the photo is to use the "Merge Group Rename" script which keeps the photo file name on the merged group layer. To be honest, the only vector layers I use on my layouts are text layers. I only use the other vector layers for the Build-A-Kit stuff, not on my regular layouts. On my regular layouts I should rename the text layer but I don't since I keep track of kits and fonts used on a spreadsheet.5 points
-
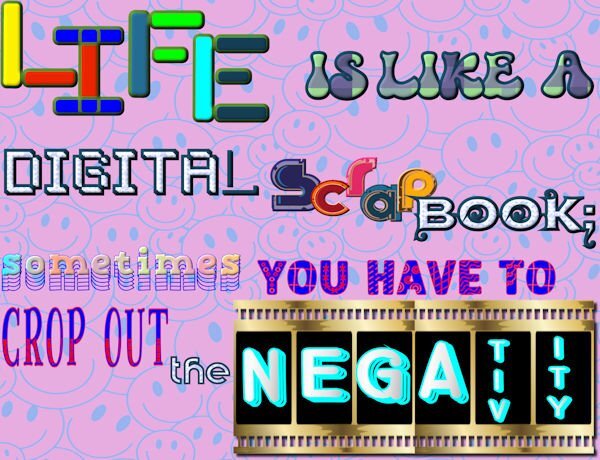
I just made the deadline. I played with a lot of fonts. The gold negative and background are from Canva.
5 points
-
Thank you, Rene and Cristina, 🙂 So easy when you know the trick!4 points
-
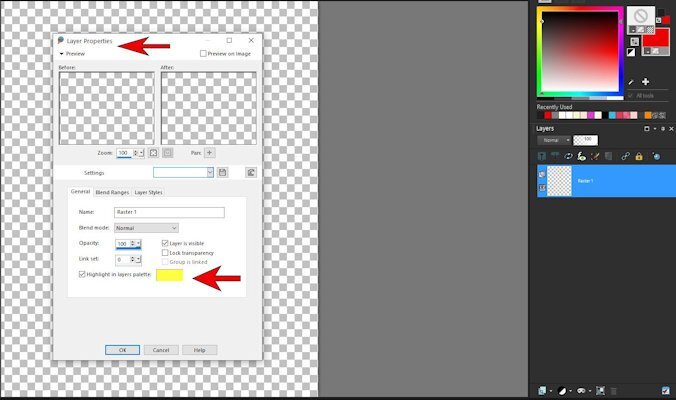
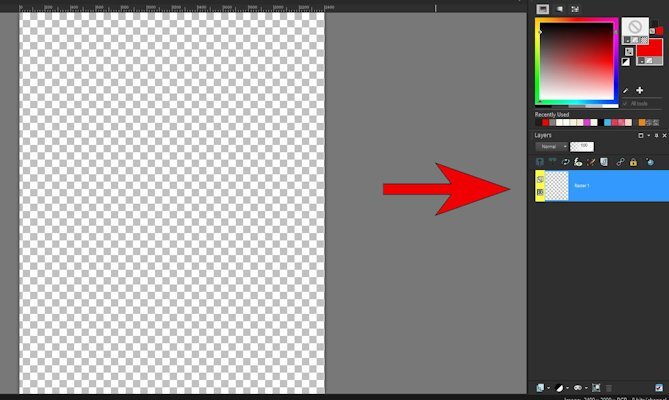
@Ann Seeber In the layers palette double clicking on the layer will open the properties menu. On the bottom of the general tab is a checkbox to "highlight in layers palette". When you click on the checkbox, the colors show up in the box to the right of it. Mine is always yellow. When you click on the color, it brings up the color palette and you can choose any color you want. There is a screenshot of the layer properties that shows what I'm talking about in this blog post about linking and grouping: Linking and Grouping in PSP | Scrapbook Campus4 points
-
I started using more grouping layers last year, and if I remember correctly, it was because of one of your comments. Before, it was only with masks (Clip to It). I also color code the layers, and I have a color for when it's something I created, something from Carole's, or something from kits... The vectors are always white... I don't remember when I started doing this, but the colors were chosen over the years... My old layouts have all sorts of colors!4 points
-
Yesterday I found them all too and send them in. It is always such fun and offering an opportunity to read blogs that I have forgotten about, although I have some of them printed for easy reference. Thank you Carole and happy easter!4 points
-
What about just this: How can I take someone3 points
-
Hi Cristina: Can you explain how to "color-code" a layer? I can't find any way to do it. Thanks!3 points
-
I leave the "raster" or "vector" and add the name. It's easier for me to distinguish as opposed to the icons.3 points
-
I use grouping a lot when I have a bunch of layers that I want to resize proportionately. But it only works when they are all together in the layers palette since all layers in a group have to be next to each other. When I have layers that are separated in the layers palette that I want to move together on the layout (like a cluster that might have layers above and below a paper mat/photo layer) then I use the linking layers options. That works well for that. Another way I use to show what layers are "connected" to each other is to use the color coding in the layers properties.3 points
-
I do this too.3 points
-
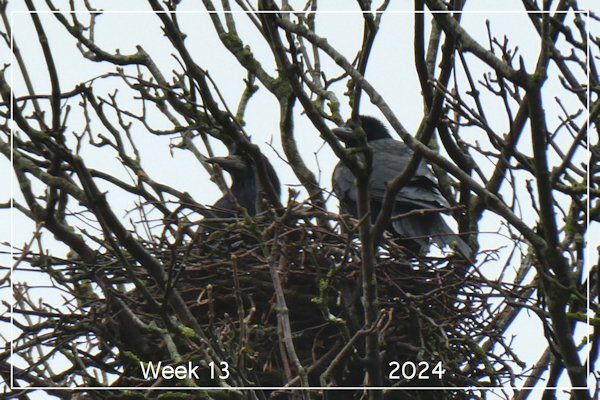
Week 13 Two rooks getting ready in lots of time with nest building
3 points
-
I did...just for fun...3 points
-
I thought about making this (text) a sticker.3 points
-
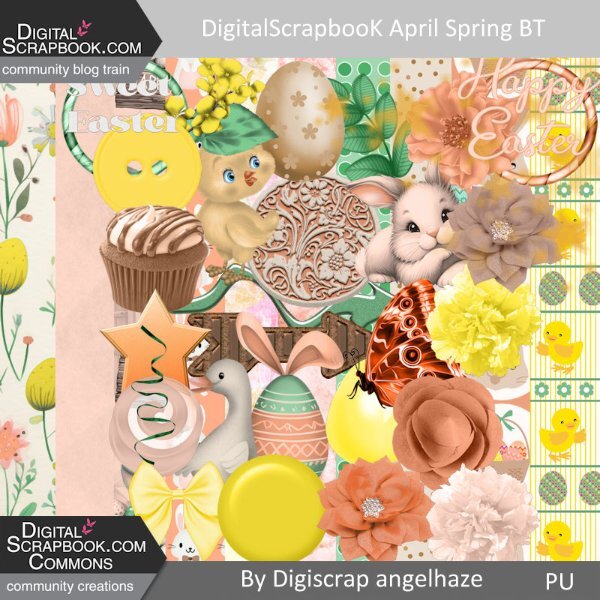
Hello, I have built a mini kit for : https://www.digitalscrapbook.com/forums/digital-scrapbooking/digitalscrapbookcom-blog-trains/apr-2024-blog-train-final-list here is my part, to download it just go on my blog: Digiscrap Angelhaze
2 points
-
This is what happened for me. I re-read articles and some I wasn't familiar with so all good.2 points
-
Same here. I took the opportunity to go over the posts again—some I totally forgot. They are very interesting and useful.2 points
-
Happy April. Here is my monthly Wild Cat Calendar for April 2024. I used the cass-open-book script for the top and a calendar from Gina Jones. The Snow Leopard photo was taken by my granddaughter, Jackie Thorpe, at her Claws 'N' Paws Wild Animal Park in Mt. Ariel, PA. The title font is Fredericka the Great, and the text font is Agency. The background gradient is labeled "Bondi." The "Say No" brad is mine. I will also post this on our Facebook page full size for anyone who would like to print it out at 8.5" x 11" which is what I do.
2 points
-
What deadline? 😉2 points
-
I've been color coding lately too, makes it easier to find stuff, especially if I have a lot of layers or copies of a layer and I want to know which one is the original. I link for moving and use grouping for resizing, even if I have to temporarily move a layer into the group and resize and then ungroup and move it back to where it goes. a question for you. when you rename layers, do you leave the word "raster" or "vector" then add the name you want or just add the name and get rid of the word raster or vector because you can can tell what the layer is by the icon.2 points
-
that gave me goose bumps. Hubby and I used to go sit in the one of the fields at lunch (on a T.B. breeding farm, LOTS of mares and 6 T.B and 1 Standardbred stallion). They always came up to us and then they'd stay close and munch away on the grasses. Good memories for me.2 points
-
I am always happy for the Winners but hoping I win a membership so bad, The best People are right here2 points
-
Thank you Donna and yes I don't know what I should do without the modern appliances! I for certain wouldn't have taken up scrapbooking. Think what we would have missed, all the great people that make this community much more then a scrapbook site!2 points
-
Although let's be honest, the Easter Hunt (just like the Treasure Hunt) is a promotional activity (hoping to attract new people to the site), it is also meant as a way for people to find useful information at the same time. With so many blog posts (633), it is easy to miss some, forget a few, or even not know about others. I am happy that it makes anyone discover something useful!! Happy Easter!2 points
-
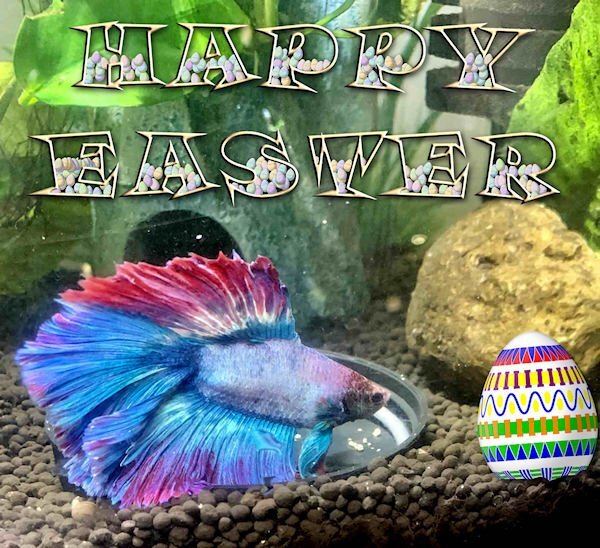
I made this last year when I had Siamese Fighting Fish (Bettas). Wishing all a Happy Easter.
2 points
-
Good going, Cindy! Happy Easter 🐰🌷2 points
-
It is a new month and new projects. Show off what you are working on in April be it a scrapbook page, a collage, a tutorial, or anything else you want. We are curious and want to see, learn, and get inspired. These threads are quickly becoming a fantastic source of inspiration, support, and friendship. Keep them coming! Remember to size down your image to about 600x600 pixels and save it in .jpg format before posting it (if you are creating a double page, you can resize it to 1000 pixels in width if you don't want to post the pages separately). Here are a few guidelines for everyone: when you post a project, give as much information on your sources or techniques used. It will help others who are curious and would like to do the same. if someone uses something that you like on their page, ask where they got it. Sometimes, you can go get it too and it will be better quality than trying to extract it (as it would have been resized to post in the forum anyway). if it is something that they did from scratch, ask how they did it. It would be so helpful to everyone! if you like a photo and would like to “play with it”, ALWAYS ask permission. Sometimes, there are some limitations and the person is not allowed to let others use it. Don’t get them in trouble. Usually, people are happy to say yes (if they can) when you ask politely. And if you get permission, you might get a better-quality image than the resized image anyway.1 point
-
Thank you Carole for the game, I really like doing it. I had trouble with #10. Cristina helped me with an extra word. I had tried everything, I had seen the big X on the intruder, but not the subject in the title (where I was looking). Which will teach me to look at the image as much as the subject lolllll I sent you my canvas full of pretty eggs.1 point
-
633! That much! Wow!🙂1 point
-
It was fun to do. And what a lot of blog posts there are written over the years! 🙂1 point
-
I did it and found some good stuff I'd forgotten or never knew. The piece about layered fonts was news to me. Thanks Carole for the fun.1 point
-
Made this several years ago but I'd like to send my wishes to all who celebrate.1 point
-
Ann I did it and emailed this year you didnt have to help me, I Love You all.1 point
-
me too, this is the one I decided to use other words than I should have.1 point
-
Wishing everyone a wonderful, fun-filled Sunday!1 point
-
I mistakenly called the masterclass paper templates. I have just checked, the masterclass is titled 'using element templates'.1 point
-
I will take a look at this class, too. I don't remember it very well, and it's no wonder, with hundreds of great Masterclasses.1 point
-
What a cute card! Happy Easter, Corrie.1 point
-
Happy Easter, Doska!1 point
-
I got a feeling you will like using paper templates.1 point
-
Sue such a lovely page with those squirrels and you use a lot of techniques. I love those punches and they are on my wishlist. Thanks for reminding me of the masterclass on paper templates. I will have to rewatch that one, maybe when I'm in the States and have some time for myself when everyone else is of to school or work.1 point
-
I too use grouping. It is as easy to group and ungroup, multiple times when needed. keeping many layer together.1 point
-
Thanks, Sue - I like the small details too - they often make the difference between blah and wow.1 point
-
Michelle, thanks for the ideas on grouping and the use of screw heads. And, as is usual, you use many layers. I see smudges on the background of the "poster" also and in different colors. My mojo has been lacking this month and I really appreciate the inspiration you and others have given.1 point
-
Sue - in addition to the information about squirrels, this is a really great layout. I like the cutout frame on the top layer background; the cutout of the top picture, the faded date stamp, each of the journaling strips (I remember that one of the labs (I think) about telling a story in strips). I love everything about this layout! You are an inspiration.1 point
-
It certainly looks as if it has weathered the arrow of time. Also time is change, not only on our planet but in the universe, everything goes through decay and eventaully dies. You have done a superb job in achieveing that in PSP.1 point
-
I sit with then in the stable and outside, when they are sitting down, there isn't a day that goes by when I bury my face in their coats and wrap my arms around them. They are probably the most handled horses in Canada.1 point
-
There are a million ways…. from your own photos. Just a woods with a creek photo, say, then blown up to the smallest side being 3600 pixels (or whatever size you’re after). Backgrounds can be blurry with the resize. Crop to,size. Put your zip line or camping photos on it. a photo of a parking garage wall, a stucco wall, an elevator door…..resize, place on a colored paper and mess with the blending modes, maybe “multiply” then move the transparency slider to 40% and see what it looks like. You can use packing peanuts, a park bench back, old wooden storage barn, peeled paint fence or wall. I used my wood floors, and also a painted wall where you could see the puckers of the paint roller. As long as the “original” is over 12” square, it will work. (I use 16” as my parameter) photo of Kraft paper, waxed paper, butcher paper, florist paper, cardboard box panel, packing paper (even if it’s been crumbled). Then add color. And blend modes, use those sliders! as long as it’s for your own use, these are sometimes popular: scan or take a photo of newspaper, wrapping paper, wallpaper. When you have it, start looking at textures. effects-texture, texture. Add one that is subtle, but not too subtle. I find this the trickiest. Post your results!1 point