Leaderboard

Resized.thumb.jpg.d25811db03a63358cedab1e79f527635.jpg)


Popular Content
Showing content with the highest reputation on 03/02/2024 in all areas
-
I tested some ofmy papers here7 points
-
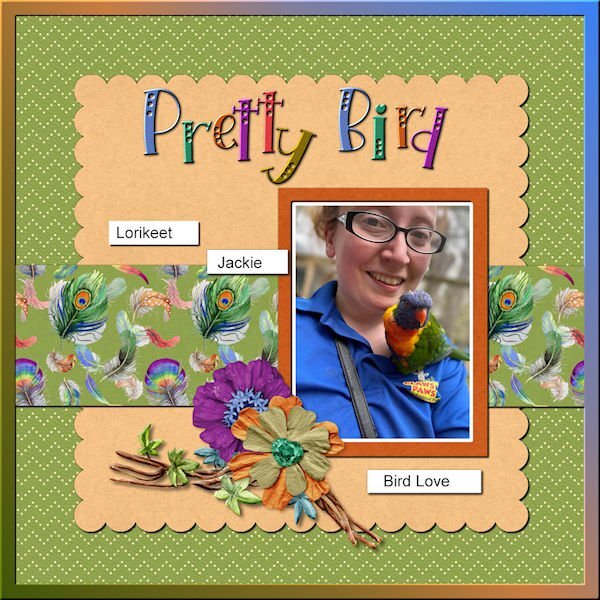
I can't find a specific rainbow project, but I did do this in July '22 and it certainly looks like it qualifies. This is my granddaughter, the zookeeper.
 6 points
 -
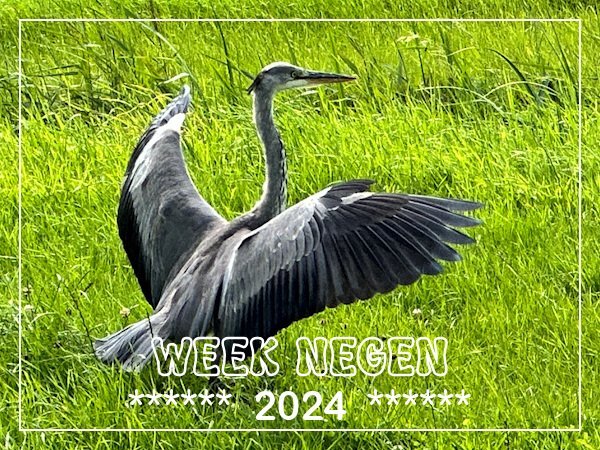
Hurrah, this week on Tuesday we had sunshine! On Tuesdays I go for a walk with a friend and we do so for at least 20 years now. In those days we had a group of about 8 to 10 and over the years the others quitted one by one. The corona years did the rest and now we are just the 2 of us. This week we were on a path we often use and a blue heron decided to land on some grassland next to us. He/she was turned away from us and there was a ditch full of water between the grass and our path, so I couldn't go nearer. Slowly I reached for my phone and was able to take a couple of shots before the heron walked away.
5 points
-
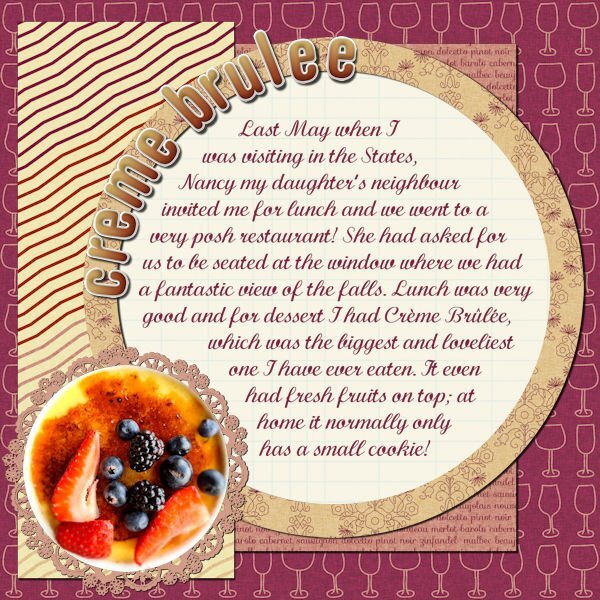
How sweet it is. Of course I waved my magic wand and took away all the calories.
5 points
-
Last day of February! I made a folded tree with rainbow paper. I wish that I could remember where I got the paper. I'm searching.
4 points
-
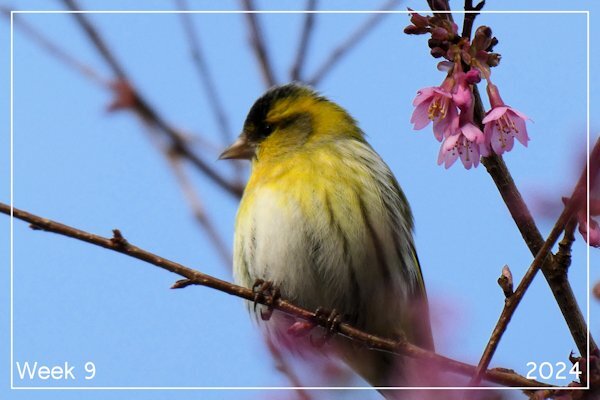
Week 9 A Siskin finch, on route to our bird feeders, kindly posed alongside some early cherry blossom.
2 points
-
BEAUTIFUL! what a great shot Corrie!2 points
-
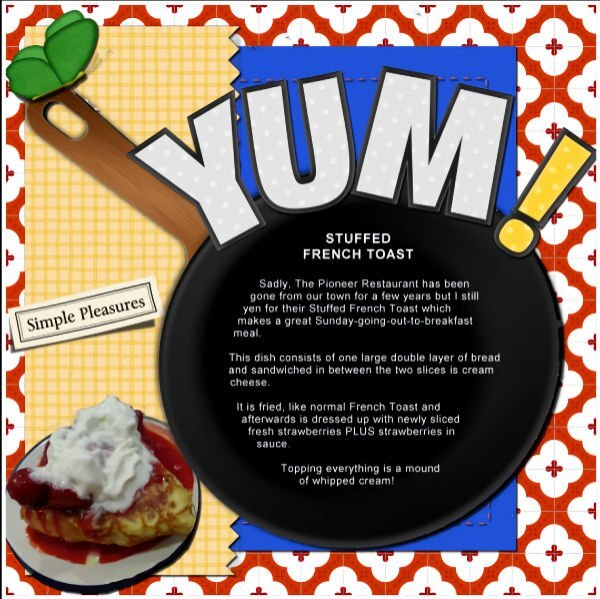
Dessert for breakfast! I had scrapped my famous Stuffed French Toast, and it surely looks like a dessert with all that whipped cream! Behold... Ha ha! I just noticed it is the same layout as Corrie and Bonnie!
2 points
-
Hummingbird Cake ★★★★★4.9 from 88 reviews Author: Sally Prep Time: 30 minutes Cook Time: 28 minutes Total Time: 3 hours, 30 minutes Yield: serves 12-14 PRINT RECIPE SAVE RECIPE Description Homemade hummingbird cake is exceptionally moist and flavorful with 3 delicious layers and silky cream cheese frosting! Ingredients 2 cups (250g) chopped pecans* 3 cups (375g) all-purpose flour (spooned & leveled) 1 teaspoon baking powder 1 teaspoon baking soda 1 and 1/2 teaspoons ground cinnamon 1/2 teaspoon allspice 1/2 teaspoon salt 1 and 1/2 cups (345g) mashed bananas (about 3 large ripe bananas) one 8 ounce can crushed pineapple (do not drain) 3 large eggs, at room temperature 1 cup (240ml) vegetable oil 3/4 cup (150g) packed light or dark brown sugar 3/4 cup (150g) granulated sugar 2 teaspoons pure vanilla extract Cream Cheese Frosting 16 ounces (452g) full-fat brick cream cheese, softened to room temperature 1/2 cup (8 Tbsp; 113g) unsalted butter, softened to room temperature 4 cups (480g) confectioners’ sugar 1 and 1/2 teaspoons pure vanilla extract pinch of salt, to taste Cook Mode Prevent your screen from going dark Instructions Preheat oven to 350°F (177°C). Grease three 8-inch cake pans, line with parchment paper rounds, then grease the parchment paper. Parchment paper helps the cakes seamlessly release from the pans. (If it’s helpful, see this parchment paper rounds for cakes video & post.) Whisk the flour, baking soda, cinnamon, allspice, and salt together in a large bowl. Whisk the rest of the cake ingredients in a medium bowl. Pour wet ingredients into dry ingredients and whisk until completely combined. Fold in 1 and 1/2 cups toasted pecans. (Save the rest for garnish.) You should have about 6 to 7 cups of batter. Spread batter evenly between the 3 prepared cake pans. Bake for 26-29 minutes or until a toothpick inserted in the center comes out clean. Rotate pans halfway through baking. Remove cakes from the oven and allow to cool completely in the pans set on a wire rack. Once completely cooled, remove cakes from pan and level the tops off so they are flat. I simply use a serrated knife. Discard the tops or eat. YUM! Make the frosting: In a large bowl using a handheld or stand mixer fitted with a whisk or paddle attachment, beat the cream cheese and butter together on medium-high speed until smooth, about 2 minutes. Add the confectioners’ sugar, vanilla extract, and a pinch of salt. Beat on low speed for 30 seconds, then increase to high speed and beat for 3 minutes until completely combined and creamy. Add more confectioners’ sugar if frosting is too thin, a little milk if frosting is too thick, or an extra pinch of salt if frosting is too sweet. Frosting should be soft, but not runny. Assemble and frost: First, using a large serrated knife or cake leveler, layer off the tops of the cakes to create a flat surface. Place 1 cake layer on your cake turntable, cake stand, or serving plate. Evenly cover the top with frosting. Top with 2nd layer, more frosting, and then top with the 3rd layer. Spread remaining frosting all over the top and sides. Decorate the sides and top of the cake with the remaining toasted pecans. Refrigerate cake for at least 15-20 minutes before slicing. This helps the cake hold its shape when cutting. Cover leftover frosted cake tightly and store in the refrigerator for up to 5 days. Notes Make Ahead Instructions: Prepare cakes and frosting 1 day in advance. Keep cakes at room temperature, covered tightly. Refrigerate prepared frosting in an airtight container, then bring to room temperature when ready to use. Frosted or unfrosted cakes may be frozen up to 2 months, thaw overnight in the refrigerator and bring to room temperature, if desired, before serving. Special Tools (affiliate links): Baking Sheet | 8-Inch Cake Pans | Parchment Paper | Electric Mixer (Handheld or Stand) | Glass Mixing Bowls | Whisk | Cooling Rack | Cake Turntable | Icing Spatula | Cake Carrier (for storage) Pecans: I’ve gotten several questions about leaving out the pecans due to allergy. You can leave them out without replacing with anything. Stirring in 1 cup of sweetened shredded coconut would be wonderful though! Frozen Bananas: You can use thawed frozen bananas in this recipe. Thawed bananas are extra wet, so drain off as much of the excess liquid as you can before mashing. See How to Freeze & Thaw Bananas for Baking. Cupcakes: This recipe will make at least 32-35 cupcakes. Fill liners 2/3 full and bake 20-22 minutes or until cooked through. You can halve the recipe for less cupcakes, but things get tricky with the eggs. I recommend using 1 egg plus this: crack a 2nd egg in a separate bowl, whisk it, and use about half. Non-Layer Cake: This recipe also fits into a bundt pan, though the bake time will be long– 55-65 minutes. Use a toothpick to test for doneness. Or use my recipe for Hummingbird Bundt Cake. There is too much batter for a 9×13 pan, but a 12×17 sheet pan would be perfect. Bake for about 20-25 minutes, keep a close eye to not over-bake. Update in 2024: After continuous recipe testing, and in an effort to lighten up the crumb, I made a few changes to the recipe including adding baking powder, increasing the oil, and decreasing the banana (so it tastes less like dense banana bread and more like a moist cake). If you prefer the old version, leave out the baking powder, reduce the oil down to 3/4 cup (180ml), and increase the mashed banana to 2 cups. Adapted from Southern Living. https://sallysbakingaddiction.com/hummingbird-cake/2 points
-
Bonnie you reminded me of that workshop and I had done a dessert too, so I recycled it for this month's theme. Over here recycling is a big issue and we are urged to do that if possible!
2 points
-
First of all, come and say HI once you register for this Bootcamp. We want to know who else will be there, on our side to cheer everyone up. Everyone started as a beginner, so don't ever compare yourself to others. You will learn one tool at a time, one concept at a time and you will create one project at a time. Everyone will have different photos and possibly different supplies so every project will be different. Once the Bootcamp is started, on March 11th, 2024, you can post your projects in here. Remember to resize your images to about 600 pixels AND save them in jpg format, before uploading them to the gallery (check this tutorial to upload to the gallery) so it won't slow down the site when we have lots of your masterpieces. Try to follow the tutorials at least enough so that we can recognize what lesson you completed. Now, let's get ready! If you missed the registration link or if you found this thread before I announced it (some people are very observant), HERE it is. Share it around if you want. Although this Bootcamp is mostly meant to help beginners, we won't exclude anyone for "excess experience". Some participants are back for a second (or third) round. You are always welcome. Remember that it will be the exact same tutorials so don't be surprised. I am sure you will now do something slightly different than the previous time. Since anyone can follow the whole Bootcamp using the trial version of PaintShop Pro, this is a perfect opportunity for anyone to give it a try and see how they like the program, so share with your friends who MIGHT consider using PaintShop Pro. The 7 tutorials will be spaced out over almost 2 weeks. This should make it easier for participants to follow without feeling stressed (it should never be stressful!).1 point
-
The theme for March is DESSERTS. Are you a baker? Are you a dessert enthusiast? What is your favorite dessert? Do you have photos of fantastic desserts you had for a family gathering? Or how about your children? Did they ever make a mess of that chocolate cake? There are many ways to showcase desserts. Let's go! Post your project in the gallery.1 point
-
Here is a challenge to do something that might not be repeated in other months. Just an idea that popped like that (and you can also send me suggestions for occasional random challenges too). This week, I want colors. I want you to create a project where various ELEMENTS will create a rainbow effect. You can have tons of buttons creating a rainbow sequence. You can use bits of ribbons. You can use scatters. You can use bits of papers. You can use brush strokes. It is not about showcasing an actual rainbow, or a rainbow gradient, but individual elements. Here are some examples. Paper pieces in the different colors of the rainbow. Brush strokes in the different colors of the rainbow. Colored effects on a photo How will you display all the colors of the rainbow with a series of individual elements/papers? (this challenge was actually presented in July 2022, but in the old forum, we have lost the images so you can resubmit the same ones if you want, or create a new one)1 point
-
I have done the bootcamp before and was wanting to do it again and every time there was something preventing me from doing so. I'm not doing the Build A Kit workshop because I haven't time enough. In April I'm going to California for a visit to my daughter and the grandkids and that takes a lot of time in preparations, but the bootcamp will fit in. It isn't that time consuming and I like to have a smaller project besides all the prep stuff.1 point
-
I'm in! Thank you, Carole!1 point
-
I created this for the 2022 workshop, Storytime.1 point
-
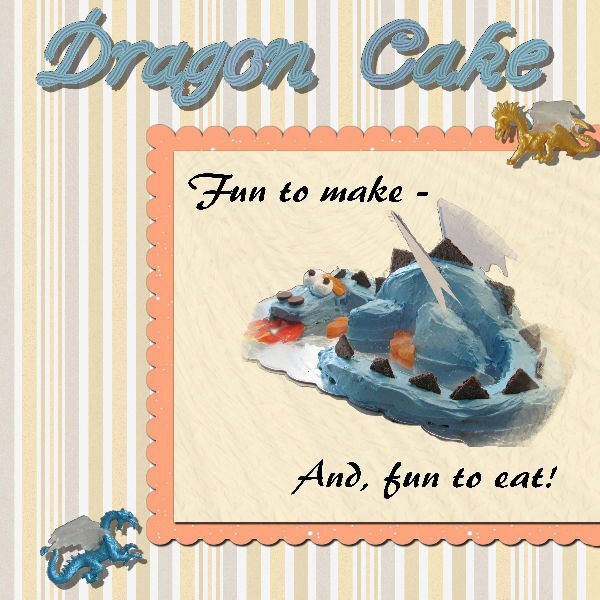
Guess I'll post my Dragon Cake. It was so much fun to make.
1 point
-
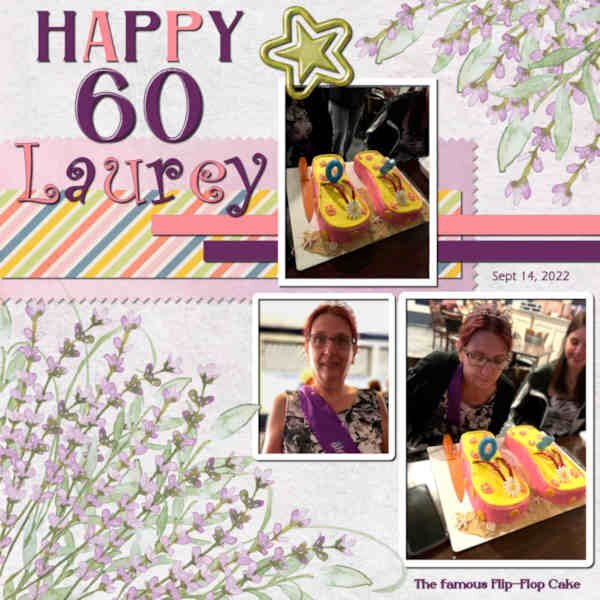
The last dessert that I scrapped was the Flip Flop cake for my daughter, Laurey's, 60th birthday back in Sept 2022.
1 point
-
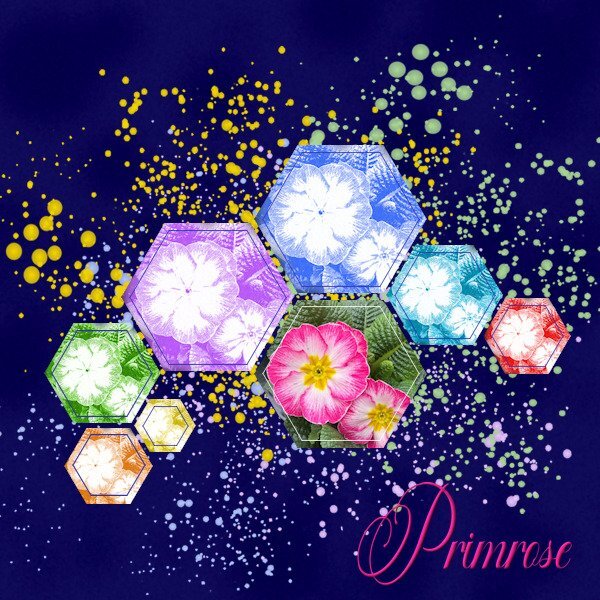
I was playing with the Pencilscript 2 and some photos that I took this week in our local gardencenter where spring has arrived! Of course a pencil drawing doesn't have to be in black and I changed the pencil drawing that the script gave me in the 7 colors of the rainbow. Then I used the Lab template 13-5 to display them alongside the original photo. The font is Fadilla.
1 point
-
Very creative work, Everyone!1 point
-
OK this challenge got me playing with the kaleidoscope using a a multi colored striped picture and then doing another kaleidoscope made from that saved paper. Of course that got me playing with a bunch of other setting and having a blast. Now back to work.
1 point
-
From the album: Bonnie B
1 point -

From the album: Bonnie B
1 point -
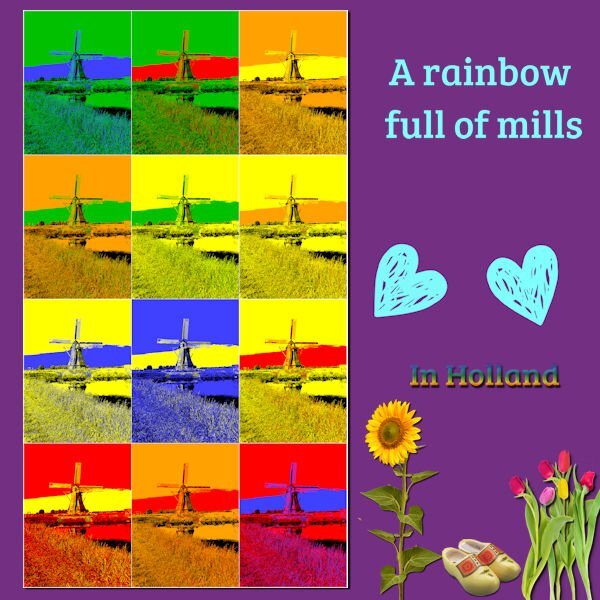
I was fooling around a bit with the Popart script. In rainbow colors..........Not one of my favourites projects but it does have rainbows😉
1 point
-
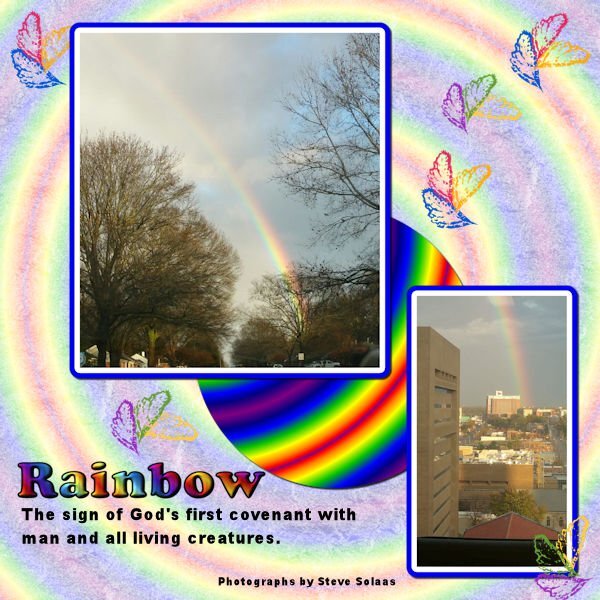
This was mine for the 2022 rainbow challenge
1 point