Leaderboard


Popular Content
Showing content with the highest reputation on 09/17/2024 in all areas
-
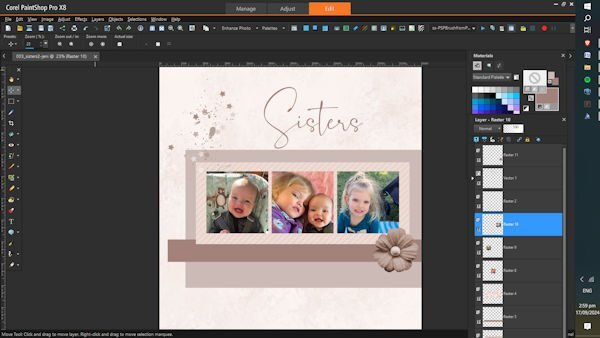
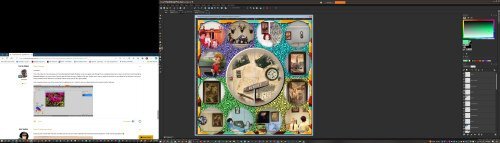
Looking forward to this bootcamp, it all helps me learn more. I've been playing with Paintshop Pro for many years and, since joining Scrapbook Campus, I am learning so much about how this programme works. Below is my workspace, I'm working my way through the beginners' scrapbook projects. I used to use the light grey workspace and, about a year or so ago, I went to dark. I find the images stand out for me on the dark workspace.
 7 points
 -
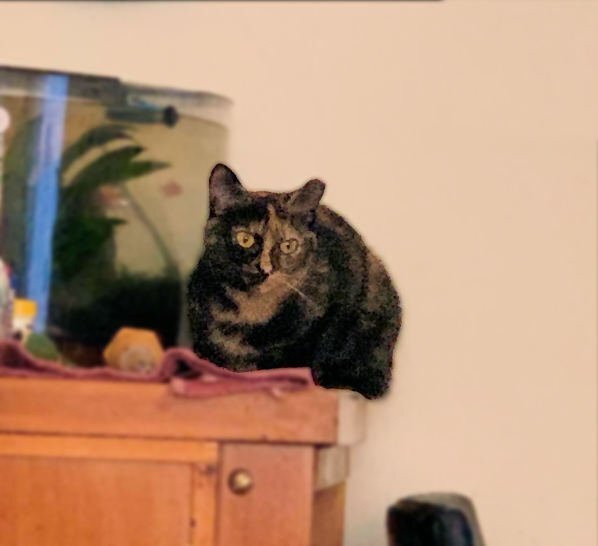
Forgot to post a photo that I may use, not really sure yet. It's just a shot of Brandy when she discovered the aquarium. I think she was guarding it. 😉
6 points
-
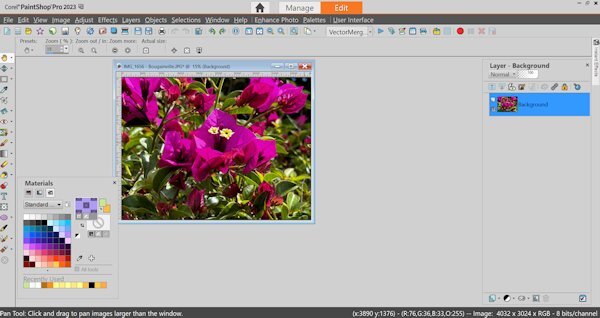
Lesson #1 This is the setup for my workspace and I have the Materials Palette floating. I work on a laptop and although it has a relatively big screen I have to scroll much and by having the Materials floating I can move it out of the way and still have the Layers Palette in full view. Further more I have a couple of shortcuts on my toolbar for the functions I use most, which probably will be different for everybody and the same goes for the Layers palette. This screenshot shows one of the photos that I'm planning to use. I intend to use more flower photos from my last visit to California.
6 points
-
Here's my Lesson #1 - Setting up my Workspace. I opted to not have thumbnails on my Layers display as my layouts get too long and unwieldy with them. I just lay my mouse over the layer and a thumb pops up, which is all I need to see what's what. I also have several shortcuts on my toolbars: On top is Open as a New Layer/Rename; Copy Merged, My Save script and shortcuts to JPG and PNG Optimizers. On the Layer palette I put the Edit Selection, Convert to Raster and the Repeat command.
6 points
-
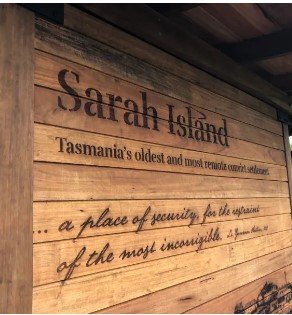
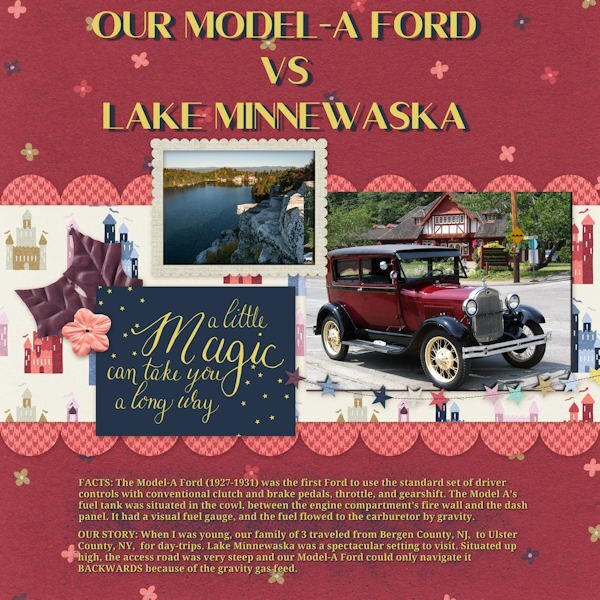
Having just got a new pc - and one that will finally load 2023, (for some reason I was not able to load 2023 on my pc or laptop - and Corel not able to help) so I thought this Boot Camp will be a good way to set it up and play with it, it is also my 5th Boot camp. I was able to get Windows 10 but keep getting messages to upgrade to 11 - not sure how it will work with plugins etc. Being a new PC and program I need to decide what to copy over. I also downloaded 2020 so I can use my plugins/filters. I prefer the dark workspace and have only added a couple of my favourites to the toolbar and the layers pallet so far. I hope to display a Gordon River cruise to Sarah Island in Tasmania. The sign says - Tasmania's oldest and most remote convict settlement. ...a place of security, for the restraint of the most incorrigible ..
5 points
-
Pretty cool. I recently added a second monitor to my set up so here is a current screen shot. It helps alot to be able to watch one of the tutorials or master classes on the left, while working along with it on the right.
5 points
-
I also use a laptop and it means a lot of scrolling. I like this idea of floating the materials palette! Thanks.5 points
-
First I want to say, this is NOT the first time I have done the BootCamp. So I got carried away with a Halloween Theme and have been playing with this off and on all day.
4 points
-
Over the years, I've changed up my workspace. This is my latest. I have a bunch of shortcuts on the top toolbar for things I use often, including scripts. I have a few on the layers palette, too. I use Auto Hide on palettes I want access to without having to take up space. I haven't decided which pics I'll use, but here's one I might.
4 points
-
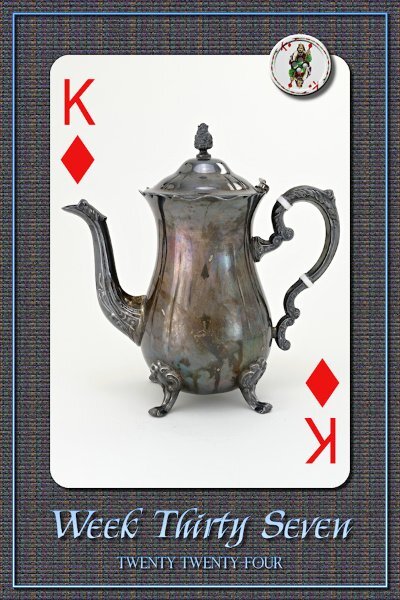
Week 37 Kings = Tall Tea Pots The background started out as the Striped Ribbon (2) tutorial in the latest lab. I added noise, and a gradient layer below and used a blend mode. still wasnt happy with it, so I duplicated the noisy striped paper and used 90 degree angle so it was horizontal and added the same blend mode as the previous. Then grouped the 3 layers, duplicated the group and merged that group. then I could add the blinds texture (it did look like much if added the texture on the layers that were not merged). In the end I was wanting it to resemble fabric. The fonts are Kings and Kingstone Roman from CF I think.
4 points
-
On to Lesson 4,
4 points
-
Well, I'm home. Trying to get back in the groove. Not easy. Back on the shadows. I'm not good at this. Still a lot to learn. Redid the Tutorial 3. Maybe I get a "C" on this. Definitely not more than that. I'll post the 1st take and the 2nd one I just finished. I really don't get the lifted corner thing. I did try the script, but I'm not happy with that either. The white background is done with the script. The top one is the one I did first.
4 points
-
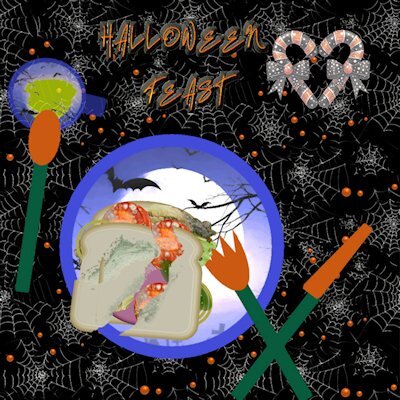
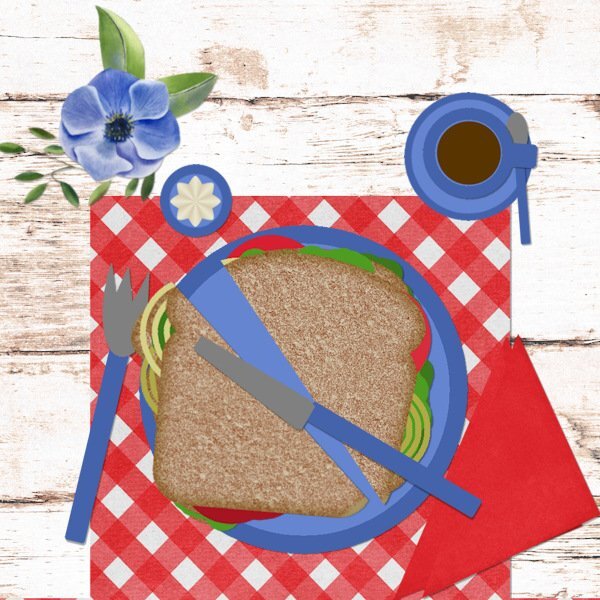
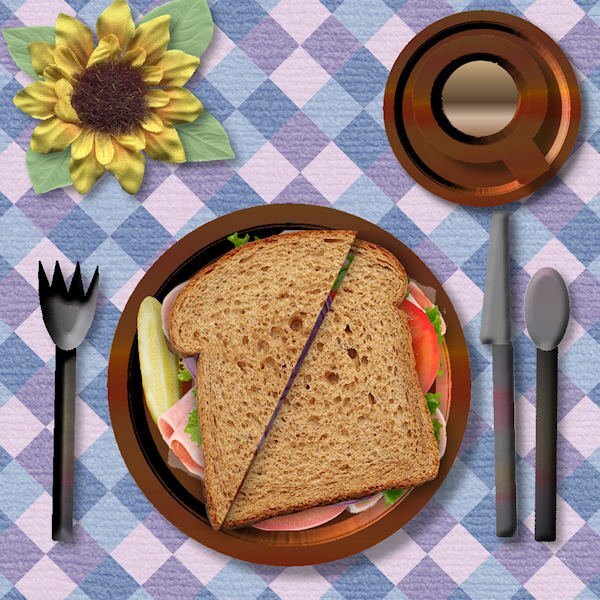
Lesson 2 - Sandwich It is a nice day and I'm eating my sandwich outside, so I use simple plastic crockery, a place mat and a paper napkin. I have a cup of coffee and a small bowl with mayonaise to go with my sandwich. I don't like pickles, so no pickles and no meat as well but extra lettuce, unions and tomato's. Even if I'm eating alone I like to have a flower and greenery for decoration.
3 points
-
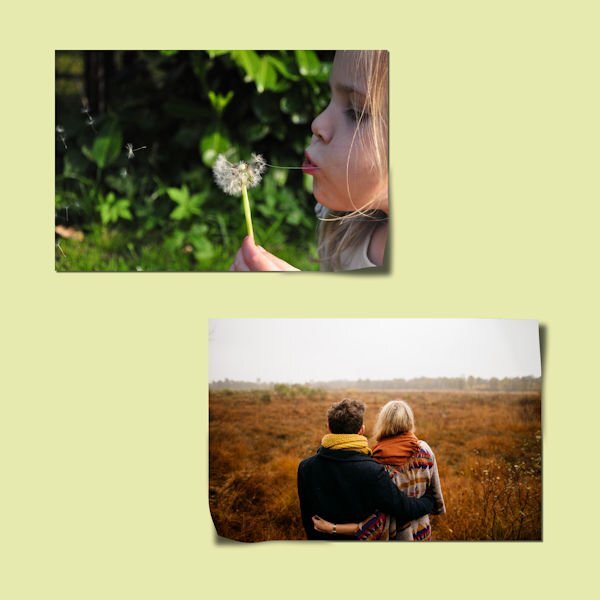
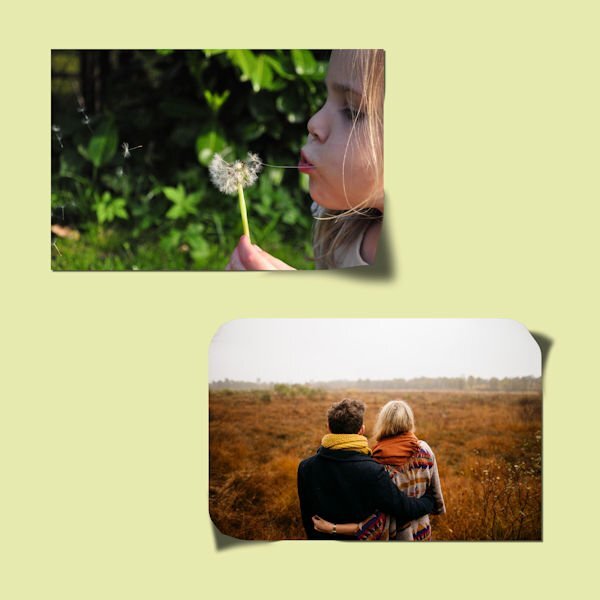
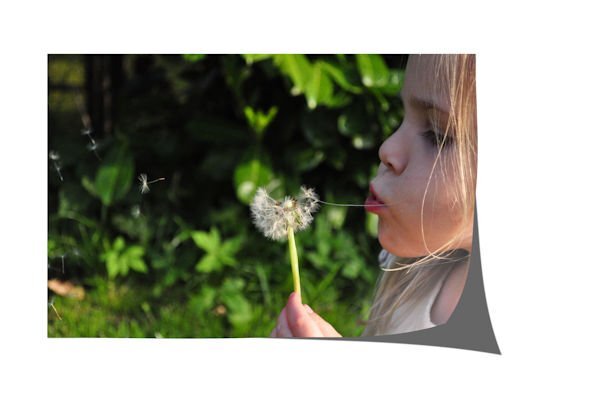
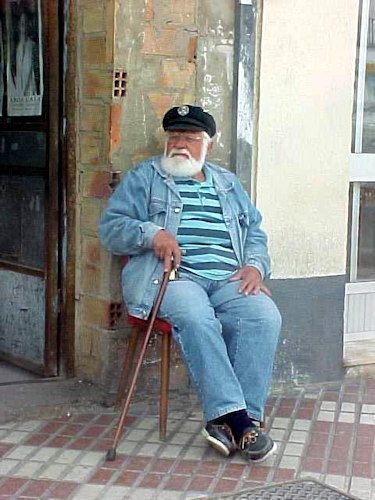
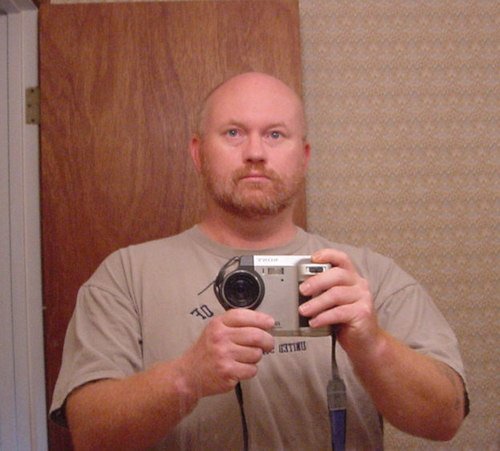
At some time during the bootcamp, I'll probably try to incorporate this photo I took in Santa Maria, Spain of this gentleman. Of course at the time I was using a 0.3 Megapixel Sony Mavica camera that used a 3.5 inch floppy disk as film. I have a ton of photos taken with that camera during my navy days. I've tried amping up some of those photos to 300 dpi (turning them into huge photos) but even hard for PSP's AI resizing capability to overcome some of the resolution difficulties. It doesn't do enough to let some of the other photo fixes to truly do a good job. See the other photo LOL for a look at the camera (and the photographer).
3 points
-
I always save my workspace after I make any changes. Keep in mind that the workspaces only work in the version of PSP they were created for. When I save mine, I always add the version # and date I saved. I learned the hard way.3 points
-
She has such a lovely smile! Then and now.3 points
-
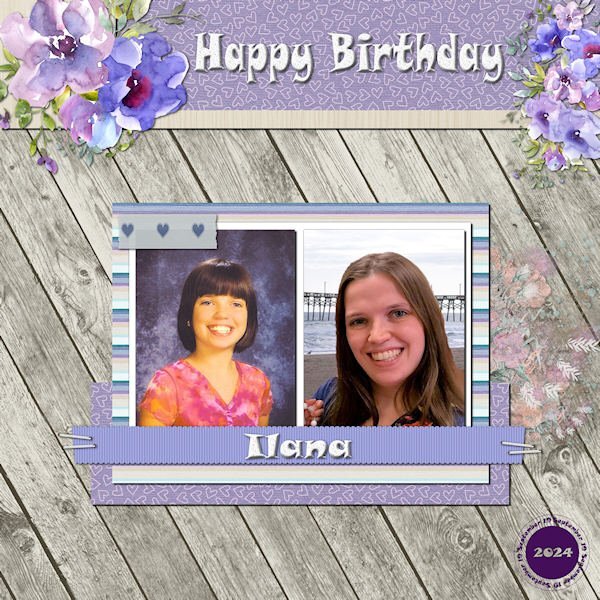
My granddaughter has a birthday Thurs Sept 19 so I made this layout as a birthday card. She's 10 in the photo on the left and 26 this year in the current photo on the right which I treated with PSP's background replacer ai. I used a Marisa Lerin template (ps_marisa-lerin_32814_layout-template-470_pu) and a mini kit called Winter. The font is Snap ITC. The watercolor flowers are from my stash, and I used cass-Datestamp4 script. The splash is ap-cherish-mini-el-paint-transfer.
3 points
-
I thought about all the "stuff" I still have and decided to use this one.
3 points
-
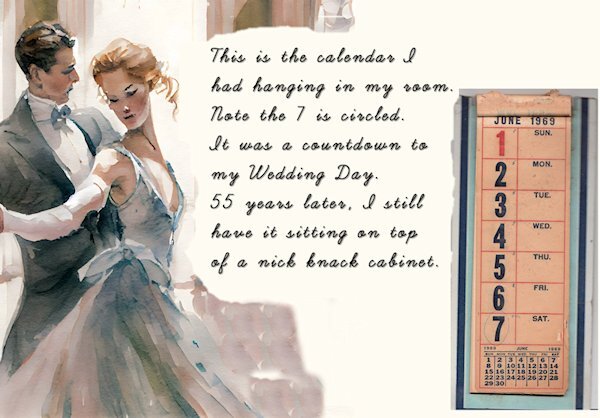
I'm sure this qualifies as vintage!
3 points
-
Shadow Workshop - Lesson 5, Did not do the practice.
2 points
-
Here's my Layers Exercise: Table and Sandwich. I love to dress it up!
2 points
-
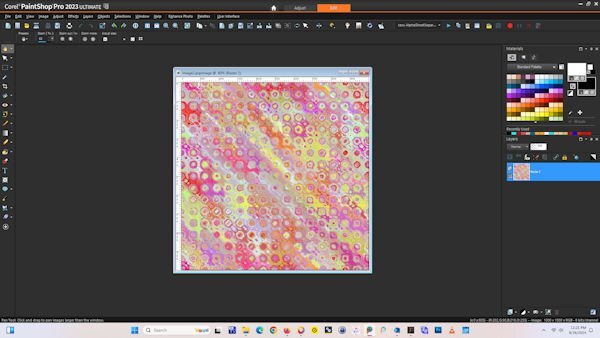
I like to keep my workspace dark. I have a 27 inch screen so I like to have my shortcuts in the middle, along with my scripts palette. Due to my incoordination and eyesight prefer clicking a short cut rather than using keyboard shortcuts except for the "f" to bring up the fill bucket. I learned the hard way to always save my workspace. I have my favorite scripts--directional tubes, open as a layer, clip to it --bound to the task bar. I plan to use the picture sometime during the Bootcamp. It was originally created in kaleidoscope and then treated with a FF effect called "spatter painting."
2 points
-
Awesome. I can't imagine driving backwards for the amount of time it must've taken. What a beautiful car!2 points
-
You are giving me some awesome ideas. I could make that box in PSP and print it, fold it the deck of cards. Such a great idea. I should look into playing-card making companies.2 points
-
Julie I agree, I would like to touch it!2 points
-
If I touched that card, I bet I could feel that background! So realistic.2 points
-
Hope you are feeling better soon!2 points
-
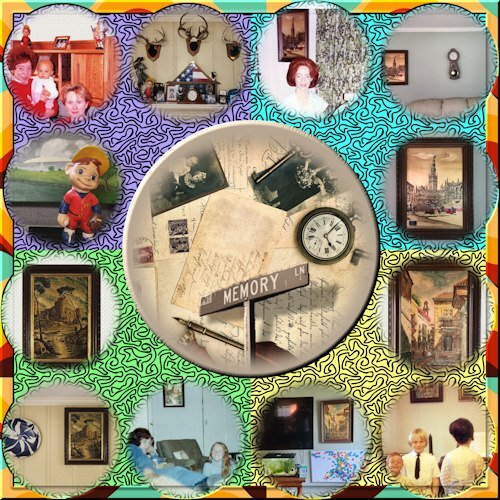
It sort of tells the story itself but there is some additional "back-story". When my siblings and I were VERY young, my mom's sister, Aunt Molly was into ceramics and made each of the three (at that time) kids a figurine. She painted them and made sure the hair color was correct for each kid. Mine was the baseball kid. (PS, my brother Rick's is in one of the pictures, the blond astronaut). After my Mom passed away in 2005, I came back into possession of "my" figurine". Also, I had always loved the three gold leaf paintings they picked up in Spain and I now have them displayed in my home. One item each inner corner with two additional photos, showing the item displayed in my parent's home back in the day, and one showing the item displayed currently in my home. Additional note...with the figurine, when I joined the Navy, my Mom incorporated it into the home decor whereas previously it had always been in my bedroom. Also, my grandmother made each kid a ceramic lamp with the same hair color thing (I think Molly and she were attending a ceramics class/workshop together at the time). Mine was unfortunately broken at some point in the past.
2 points
-
Mary you are on a roll! Nice to see you are continuing this workshop after your trip. You did a great job so far and the lessons can be used in all kinds of projects.1 point
-
Hi Carolyn, welcome to Scrap Bootcamp! When I post any photo here, I always reduce the size to 600 x whatever comes up. That usually works.1 point
-
Hi! I am using PSP 22. My workspace is standard settings with the dark background. I have 80,000 photos on my computer so picking an image won't be difficult. I might use the one below. It depends on the tutorials. I was a member of the now defunct Artistry In Paintshop Pro group so I am a bit rusty. Looking forward to getting started. Ok...so I just tried to attach the image and the file is too big. I screenshotted the photo. Too big. I cropped the photo. Too big. So might not be sharing my finished Scrapbooking. UGGGGGGGG1 point
-
Yes @Daniel Hess, the Bootcamp is different from the Basic Scrap. You might as well register for the bootcamp so you will get the links to the same tutorials everyone else has. It IS in the list of workshops, but it is much easier to get the emails.1 point
-
Welcome to this bootcamp. Hi to our regular "campers", @Ann Seeber, @Corrie Kinkel, @Donna Sillia, @Michele, @Susan Ewart, @Julie Magerka, @Daniel Hess, @Jeni Simpson. I hope to see some newcomers. Don't be shy. Come and say hi! @Ann Seeber Removing the thumbnails is a good way to save space. If you still like it, did you know that you can also have them but change their size? It still would take more room than not having any, though, but it COULD be an option. You say you added Edit selection to the Layers toolbar? That command is there by default already. @Corrie Kinkel I would never consider floating the Materials palette, but if it works for you, that is great. I think that is a great feature of PSP: one can set up their workspace to fit their own style, preferences, and workflow! @Daniel HessMaybe, someday, I'll have a second monitor. In fact, when I was working from home, during the pandemic, I would give classes online, with PowerPoint presentations, and I would connect to my TV as a second monitor. I tried once with my own computer and it didn't work. I THINK the graphic card might be the problem. I am now LOOKING at upgrading... maybe. @Jeni Simpson Images definitely stand out better on a dark background. I don't know if I am the only one but for me, a dark background tires my eyes a lot and I need a few seconds to adjust every time I have to look at something else (not on a dark background). For me, that is the reason that I kept a light grey background. But if it helps you, that is great. @Euka I think you will be able to work with your Windows 10 for quite a while still. Good luck. @Michele I should also use the auto-hide. I keep forgetting it is an option! Keep posting. I want to also hear from newcomers. There are almost 100 registrants so we should have a busy thread in here. Even if you already have your PSP set up, and these lessons are just repeats, come and tell us. You can also comment on others' posts!1 point
-
It looks like a twilly fabric to me. Nice!1 point
-
Interesting tidbit about the having to drive it backward.1 point
-
I great idea to make a background for your cards and maybe that could also be used for the cardstock box where the cards are put into.1 point
-
Been looking forward to doing this again, but I'm not feeling well so it's iffy. Good thing there's no rush.1 point
-
Although I have taken this class several times, it still seems as if I learn something new or am reminded of some clever trick that I had forgotten.❤️1 point
-
Hi, Ann you beat me to the line-up! I have taken this bootcamp a couple of times before and always try to do so once a year. It is a great rehearsal of the basic techniques! I started my scrapbooking journey in 2020 with a bootcamp and I have no regrets whatsoever doing so. A warm welcome to the newcomers and don't be intimidated by us regulars because we vividly remember our first steps into scrapbooking. Who knows maybe you inspire us with your input and it is always nice to welcome new scrapbook enthousiasts! See you soon.1 point
-
First in Line and ready for school. I take this class probably twice a year when offered because it's a familiar friend and the layouts inspire me by their spare design. I think I'm in my 4th year here, since 2021. Now I'm off to see what photos I can feature this go-round. Welcome all newcomers! I love it when you ask questions that I can actually answer! LOL1 point