
We often have photos that are good but could use an additional layer of interest with elements that either were not available at the time the photo was taken or was impossible to photograph. Whether you are talking about snowflakes, flower petals, fog, or sparkles, you can often add them from ready-made overlays.
What are overlays?
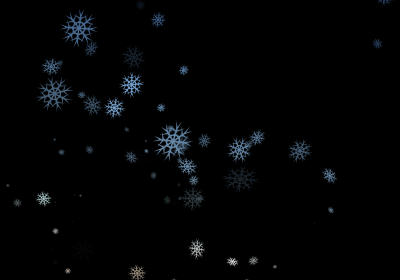
There are two types of overlays that you can find on the market: they can be png format with transparency to show over your photo, or they can be in .jpg format where you would use a blend mode to apply the effect to the project. This is great because whatever overlay you find, they will be usable in PaintShop Pro, even if they are promoted for other programs. Overlays can cover a wide variety of topics. You can have overlays with fog, flames, leaves, butterflies, bats (for those Halloween projects), snowflakes, confetti, etc.
Here are some examples:


Adding an overlay
This is likely the easiest step as each overlay is complete in itself and you just have to paste it as a new layer on top of your photo. Of course, you will need to resize it and align it if needed.
Here is a nice photo:

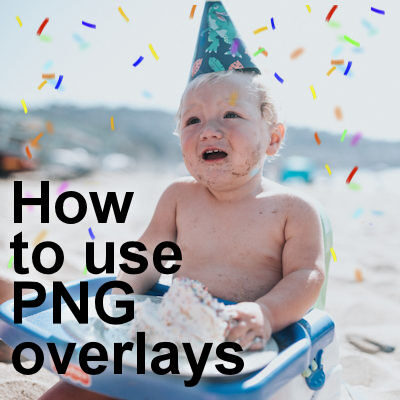
But adding an overlay, this photo gets more interesting.

Adding a png overlay
These are probably the easiest types of overlay you will find. They will often be as easy as adding a simple png element on a project. Copy the overlay and paste it as a new layer. Depending on the size of the overlay and the image, you might have to adjust one or the other. You also have the option to add more than one overlay, on separate layers, or the same one more than once. This is great if you happen to have several overlays of the same type, like confetti, butterflies, or leaves.
Since your photo should still be about your subject, you need to make sure that the overlay elements don't end up on a distracting location. For example, in the example above, here is the unedited overlay on the photo.

Don't you think that the green confetti right in the middle of the face is distracting? Since the confetti are fairly isolated from one another, it is very easy to use the Eraser and simply brush it off.
Adjusting a PNG overlay
Since overlays are on their own layer, you can also tweak them further. Although you might be lucky and the colors are a perfect match with your photo, sometimes, you have to tweak the colors. Let's look at this photo:

We want to add this overlay of flowering branches.

Overlaying both will give this result:

As you can see, the overlay color does not match the flowers around the subject so it will need some tweaking. I will just use the Hue Map, with this setting to shift the pink to red.
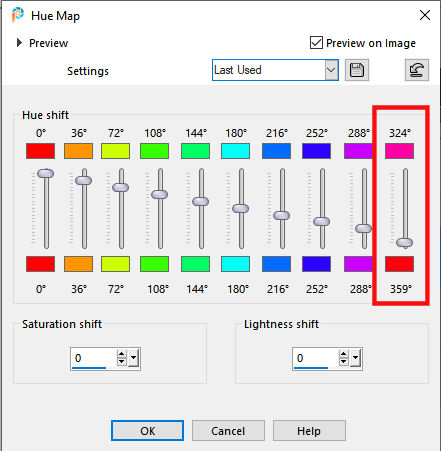
And the result is more in line with the original photo and can even give the impression that it was part of the photoshoot in the first place.

Creating PNG overlays
It is very simple to create your own overlays if you already have some elements or a photo where you can extract them from. Use branches, flowers, leaves, confetti. Create them from photos or if they are already extracted or in Picture tubes format, you can scatter them where you want.
If you want to go deeper into PNG overlays, there is a full-length class on the topic: Over the top.
Where to get PNG overlays
There are various sources for overlays that you can download or purchase.
Some of the overlays in this post were samples downloaded from InkyDeals. they were free and can give you some ideas of what you can do with overlays. HERE is my affiliate link to those free downloads (let me know if this link is no longer free so I can update the information). I also found some great free overlays on MrOverlay, a brand new discovery for me. It is definitely worth a look.
You can also explore 50+ free photoshop overlays from PhotoWhoa (remember that even if they are promoted as for Photoshop, PNG overlays can be used just the same with PaintShop Pro, as is).
Go ahead and search the net for the type of overlay you are looking for (petals, branches, confetti, etc.) and you are sure to find something.
And if you want to learn even more about overlays, including how to use JPG overlays, check out our full-length class on Overlays.


4 thoughts on “How to use PNG overlays”
Hi You Cassel are the BEST Teacher, your so Awesome.
Please don’t retire for 20 yrs Your so great a Teacher and Thank You. Do you have a video of using over lays? thank you Ma am. your awesome.
Thanks Cindy. No, I don’t have a video for that. I might make one in the future though! 🙂
Thank You
Trying to Learn Diamond Membership is so Wonderful. Dont go anywhere for 20 yrs okay Hope it dont take me that long. Videos Help me the Most.
Wow! Good information and some great resource links. Wasn’t too happy having to put in my name and email, but had to take a look at free samples. 😀 Thanks.