Leaderboard


Popular Content
Showing content with the highest reputation on 05/06/2024 in all areas
-
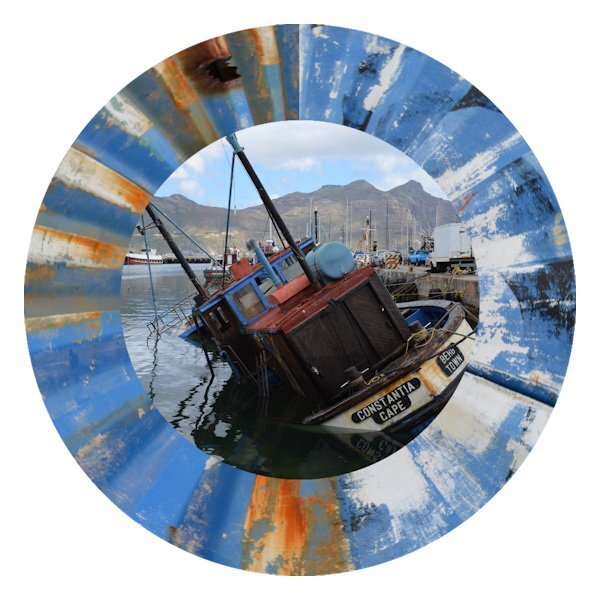
Then my imagination got going so I used a couple of my photos that I took in South Africa a few years back, one being of a painted, dilapidated, corrugated iron wall. The colours caught my attention at the time and it has been useful to use as a neutral background for other images. This time I made a rectangular selection strip from it (like a flat ribbon) and carried out the Circular Elements technique to make a circular frame around another photo that I took not far from the wall. Because of the irregular pattern of the paintwork, the circular elements join up line in the frame is not much of a distraction.
 7 points
 -
Thank you Carole for your OpenHouse. Although I didn't join in the interactive activities, I did manage to get into some of the tutorials. Going over ones I had seen before also helps to refresh techniques I find. It is bank holiday weekend here in UK so lots of other things going on for people but it is good to be able to self indulge with your PSP. The technique that really caught my attention was the Circular Element where you take a flat element like a ribbon and turn it into a circular frame. The first one I made as an exercise was using a ribbon from cass-RibbonFactoryC-Spring from Creation Cassel and made a circular frame to go around the thumbnail image of the ribbon pack.
6 points
-
Now got rid of the corner of the image sticking out of the frame. Didn't notice at first because of the excitement of the technique working!
5 points
-
I haven't been scrapping much lately but took time last night to do a layout for a challenge at The Lily Pad. Main requirement was to use a template by Scrapping with Liz (she gives a free template upon completion). To post the layout in their gallery you need to use a kit sold by a designer in their store (retired kits are OK to use). So all my supplies for the layout are from The Lily Pad: SWL Recyclables 79 template (deleted a photo spot) and Forever Joy's Dog Tails. Instructions for the layout: 1. An odd number of photos (1, 3, 5, etc.) 2. At least one background paper with pink on it 3. At least one other paper/paper piece with yellow on it 4. At least one blue round element (can be button, flower, word art, etc.) 5. At least one orange word (can be title, date, journaling, word art, etc.) If you posted in the thread before the challenge started, you could delete one of the instructions if desired. I deleted #5. The dog was actually a flat paper element as was the word strip. I used an inner bevel on both of them and like the result, especially on the dog. I think it looks like a magnet!
4 points
-
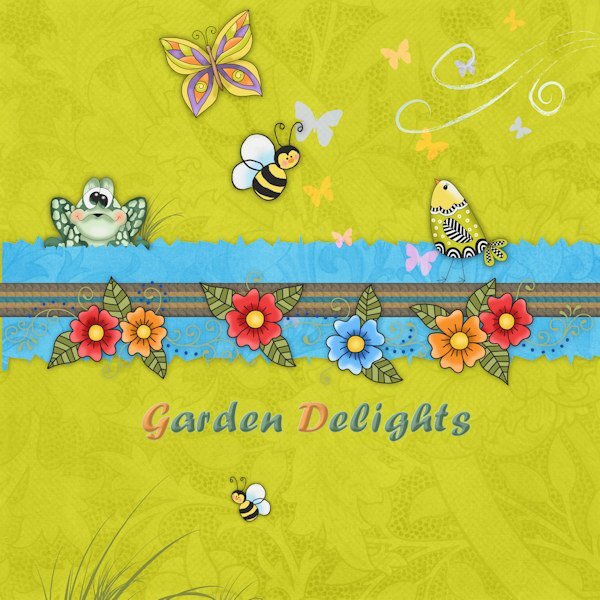
I wanted to try something different (for me at any rate). Used all elements but 2 from Di Hiller kits which tend to be in vibrant colours. This is my take on the "table" layout that Carole highlighted. Just silly, whimsical, and colourful for the month of May when colour comes back.
3 points
-
Week 18...caught up enough to get behind again. 😁 Background paper by RachelLm-seth paper15 (Digitalscrapbook.com). Fonts Emil Love (Wk18) and Emely Love (creative fabrica) and reposted here after posting in April by mistake (even after making a note that it should be in May).
3 points
-
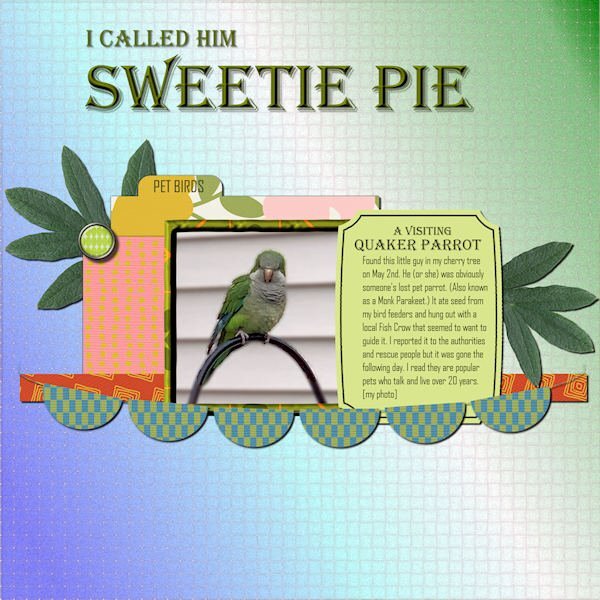
Here's what I've been distracted by recently. I was a bit astounded to find a parrot at my bird feeders! All the supplies came from Marisa Lerin, mostly from her Template 530 and Bolivia Mini-Kit. The title font is Algerian, and the text font is Agency. I'd like to introduce you to the Quaker Parrot "Sweetie Pie".
3 points
-
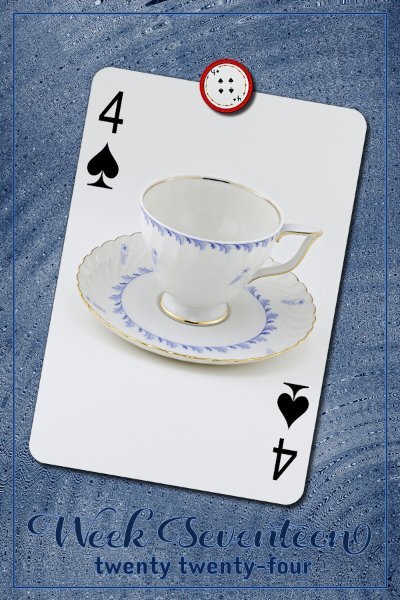
Week 17 I used a background from Janet Scott (digitalscrabook.com); Christmas Memories-blue wood. then added an effect: Effects>distortion>Spiky Halo. Fonts are Daughter (Week 17) and Dangrek from CF or Google
2 points
-
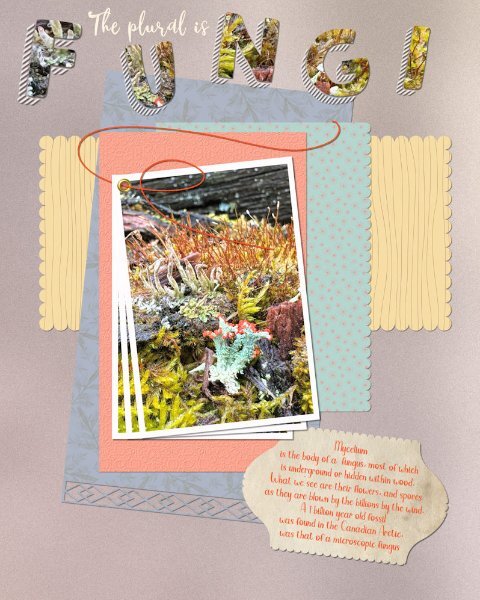
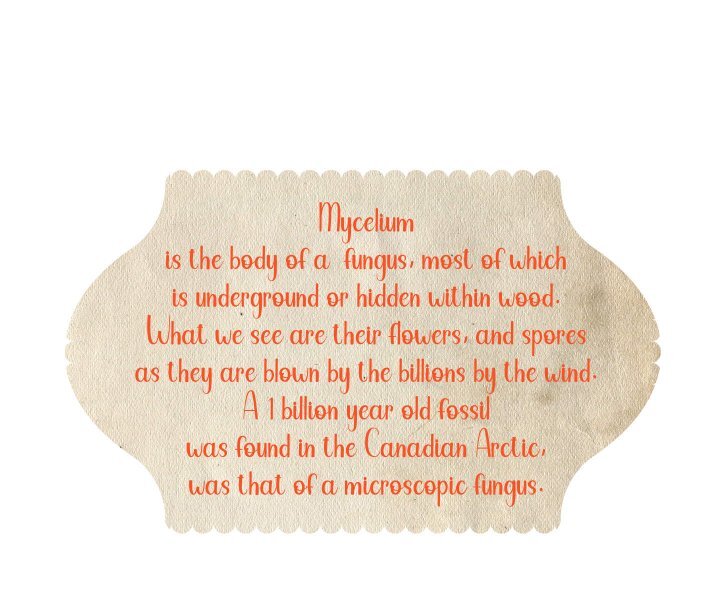
Here is my font challege page. I was in a scallops frfame of mind when I was creating this page. Earlier this week, we had sleet, and a lot of rain, the following day Mother nature's smallest and oldest living organisms exploded into an aray of colour out in the trees. Ok, I had to down on my hands and knees to view the show, but none the less it was spectacular.
2 points
-
I think you have a done a lovely job. I like the split frame effect. If I may, I'm going to make an alternative suggestion using a frame or the split frame technique and I have also posted an example even though it's not the split frame effect, it is still a frame, and I feel it will work equally as well. Duplicate the photo, hide one. Create the frame/frames. Using the magic wand select outside the frame, contract by a few pixels, then invert. Now you can edit the photo not in the frame or frames, reduce the opacity, blur, add a texture, its up to you. I would then place the hearts up in the left corner, with a few words. I added an out of bounds effect, for that I used the hiden photo. You could have the bouquet just out of the frame.
2 points
-
I agree with Rene. All that I have on my C drive are the programs which I am currently using, everything else is stored on one of my two 2TB external hard drives. BY doing so, and keeping the C drive just below half full, maintains the speed of the laptop, and the programs running efficienlty. I'm hoping that by dramatically cleaning out your C drive will resolve your issues. As a full C drive is problematic. To be perfectly honest, even though Corel has told you to install PSP on your D Drive, I wouldn't, as it's not the choice of PSP to be installed there, along with all their files. I know some do, and they haven't had any issues in doing so. Unless you are confident in doing so, I would contact Geek Squad, specify what you'd like them to do, explain the problems you are having, and let them clean the laptop for you. There was a time I used to do that myself, but soon learnt that I was only scratching the surface of a deep major clean up. Now Geek Squad does it for me. I watch what they do, they delve into places that I never did. Bu first I would delete programs and files thay you no longer need. Even though you have deleted stuff, there is always something left behind, which is where the knowledge of Geek Squad comes into play. Should you decide to go down the road of a new laptop, I told Best Buy what my primary use was going to be for the laptop. They recommended a gaming laptop, which is what I went with. I haven't had any cause for regret for the choice I made. They transfered everything from the old laptop to the new one. I gave them PSP serials numbers etc. Once I took it home I could sit down and instantly start creating. They even set up a wifi connection for the camera for me, so I could transfer photos directly from the camera to the laptop.1 point
-
Thanks, Rene. I've been having the problem of the C drive getting full for a while now. I've been moving and uninstalling things, but I guess my luck has run out. One big problem is too many programs don't give the option of installing anywhere but C the drive. And I created a Documents folder on the D drive early on. I'm sure the Geek Squad will be great; they usually are.1 point
-
I like that frame. Have you tried using inner bevel on it? I'm curious as to what that would look like.1 point
-
I have 2 drives on my computer. C is for the operating system. C is also where I install all programs. D was set up for the data. I'm not an expert but I'm guessing that you were just saving everything to the C drive and now it is full. And, again I'm guessing that if you try installing PSP on the D drive, it may have some files that need to be on the C drive. If you save everything to the folders set up by Windows (Documents, Downloads, Videos, Music etc), it is all saved on the C drive. I save all of my PSP creations on my D drive, not on my C drive. In fact, the whole drive is nothing but digi scrapping items! I have about 71% of the drive full. It is time for me to do some housecleaning and move things to an external hard drive. My suggestion is try cleaning up the C drive by moving non program or operating system files to either the D drive or an external hard drive before you go the route of getting a new laptop. However, if you do get a new laptop and it has 2 drives, use that 2nd drive for data. Don't dump everything into the Windows Documents folder. Geek Squad should be able to help you clean up the C drive if you aren't comfortable doing it yourself.1 point
-
Oh thank you, I reposted in May and deleted from April. I even wrote that down that 14-17 was in April and 18 was in May because I thought I'd forget. The weird issue distracted me I think.1 point
-
Ah, Michele, what can I say... when in doubt/throw it out! Oh my. Good luck. That may be your best option. Please keep us updated when possible. 🙃1 point
-
I see what I have done, I selected your reply comment instead of Michele's original by mistake. I'm sure she will spot my comment and realize that it is meant for her.1 point
-
Sue, thank you but I was advising Michele. I do not have any computer or PSP problems at the moment *fingers crossed!1 point
-
Here is the tag, in case it isn't legible in the layout.
1 point
-
I assume you have tried all of the obvious, like uninstalling and reinstalling. Are you able to use another version? I would seriously recommend you contact geek squad, the worst they can say to you is that they are unable to help, yet they just might be able to delve deep into the workings of your computer and fingers crossed possibly find a solution, it can't do any harm.1 point
-
They are ever such a handful, but a delight to be around. They come riding with us, even to the beach, they love the beach.1 point
-
Week 16 All my ducks line up in a row (centered actually). Except the T-cup which I tipped over a bit. Papers from Creative Fabrica: the Dutch Lady -Daphne Populiers - Watercolor Inc Splash Backgrounds, Sandy Shores. Two papers with a blend mode surprise for me that it matched the magnet and the t-cup. Fonts Country Wedding (Week 16) and Couple Heart from either CF or Google.
1 point
-
Week 15 White, Gold, Black is the theme. The fonts are Compress (Week 15) and Cormorant Unicase, I think these are google fonts (my font viewer came with 5K of fonts (some families have 3-7+ fonts in them). Gradient background with a texture added (Texture>texture effects).
1 point
-
If I had a problem I would go to Carole first.1 point
-
I think it's beautiful!1 point
-
My daughter sent me a photo of her three girls. Tot in the middle is the mother of the other two. Smudge and Bramble is the wire haired one. They are Parsons terriers. I started the extraction last night, after watching the advanced extraction masterclass in the campus. It is an older video, but most helpful. It was a tedious, eye staining task. Yet, althouogh it's not perfect, I'm happy with the end result. I've sent it to my daughter, which she will get tomorrow morning. I given her a choice of background colours. Here is one one them.
1 point
-
Week 18 We have bluebells everywhere. Spring has definitely sprung! I didn’t plan on photographing the insect – I was happily snapping away at bluebells but the little fella was so charming I had to choose this photo.
1 point
-
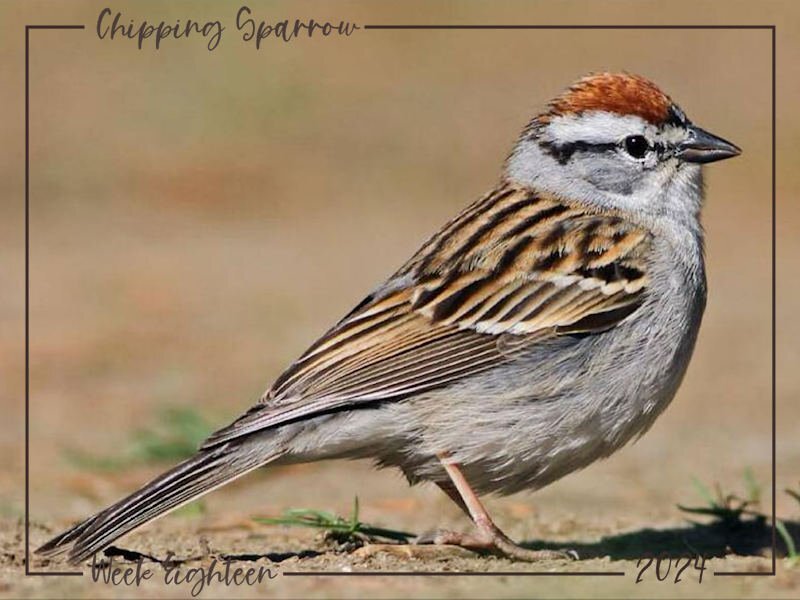
My Week Eighteen - the Chipping Sparrow. They are tiny little birds and I love their rufous caps. They are all over the ground under my feeders. The photo is from Merlin which ID'd it for me.
1 point
-
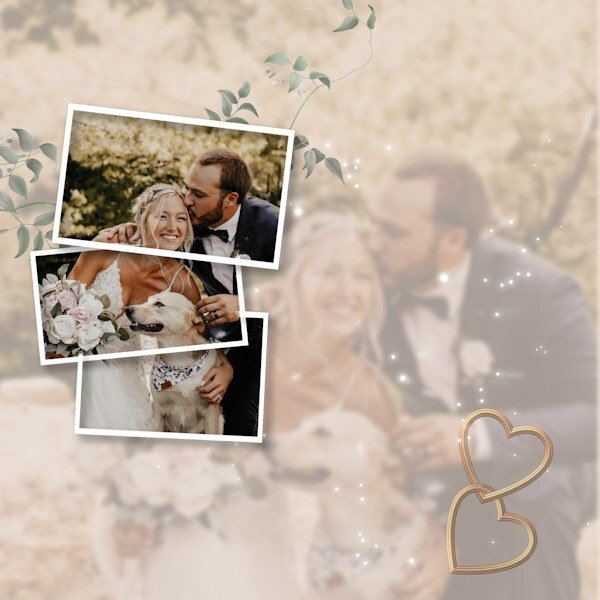
I started this layout in April, but I just couldn't make it work. I don't think it does now, but I wanted to use the Split Photo effect that Sue T. took the time to draw my attention to after seeing her examples. So here it is. Picture is from a friend whose son is the groom.
1 point
-
I started creating this as just one page, and it ended up being a double page. Most of the time, the final layout is completely different from the one I began—different papers, colors... That's why it takes so long for me, but I am happy that at least I'm doing something. Credits: Template by Scrapping with Liz (SwL_LotsofBlocksTemplate5). -- To suit my needs, I usually rotate the template, change the size of the photos, etc. Background paper: #ps_janet-scott_43698_paper-texture-template-068_cu plus a Photo Effects>Sepia Toning ---- I also added a lined paper I created for the Build-A-Kit Workshop, plus a photo of the internet with a Black Pencil filter. From Cassel: Tutorials>Fasteners>Back Brad -- Photo Prongs -- Cross Stitch cass-DateStamp#4 script, which I purchased on the 22nd just for this layout. The arrows are created with a font suggested in the Lab7-Module 08 (KGArrows).
1 point