Sue Thomas
-
Posts
2,652 -
Joined
-
Last visited
-
Days Won
80
Content Type
Profiles
Gallery
Forums
Everything posted by Sue Thomas
-
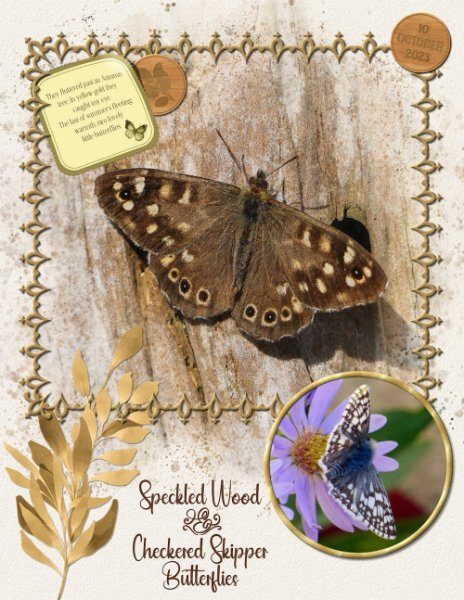
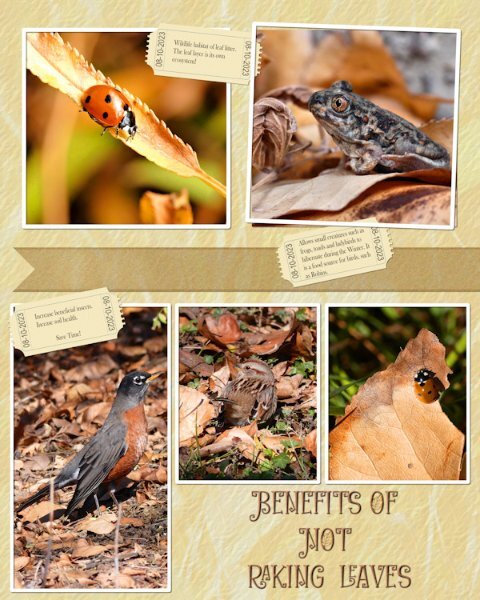
I still have 2 native Aster plants with some flowers on. The little skipper turned up on the 10th October. I was pleasantly surprised to see, and be able to photograph it. Last night I worked on finishing off creating rectangle, and square frames using Carole's frame punches. Now I have all the punches framed, ready for use. I used one them in this page, also used the wood token 2 tutorial to date the page.

-
Oh my goodness me! The first airing of Poldark, was back in the mid 70's, I remember it well. I was a teenager back them. Robin Ellis and Angharad Rees. I idolized them both. As for Endeavour Morse, They chose the prefect actor to play that part, in Shawn Evans. Also a very fitting role for the journalist, is Abigail Thaw, the daughter of John Thaw. There wasn't a detail left out in the production of Endeavour. John Thaw would have been very proud, had he been alive.
-
The series is set in Ireland, produced by BBC Northern Ireland. I'll say no more! Look out for it next Monday evening, once you have watched it, you'll appreciate the title of the drama. Typically Irish.
-
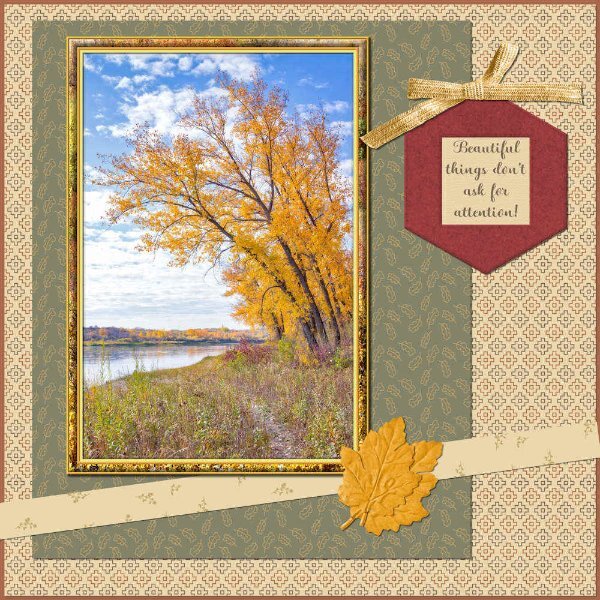
One of my favourite Autumnal shots, take along the shores of Lake Diefenbaker, at Danielson Park. One of my favourite masterclasses is all about paper and element templates. All the papers used were created using those templates. For the frame I used several borders, and a selection of the photo, copied and paste into selection.
-
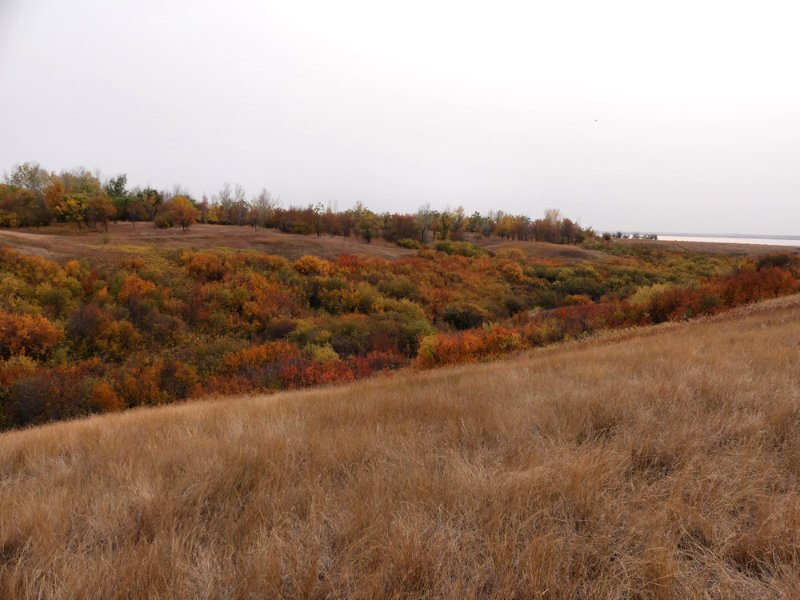
Here on the prairies, for long lasting outstanding Autumnal colours, you need to look down, and not up. These are Native roses, which grow low to the ground.
-
I love the photo, I like that the Mallards are also captured in the shot. I'm going to add my own personal opinion, which my eye was drawn to firstly, and not the layout, or photo. I don't want to come across as being offensive, but my eye was drawn to the black silhouette flying birds up in the right hand corner. Which didn't look right to me. With the direction of the light source, the photographer would have had the sun behind him/her. I would omit those birds, but that is my personal opinion, after all you are the creator.
-
Father Brown is a great all round drama series, you will thoroughly enjoy it. Another classic golden oldie drama series started on Monday night on Vision. Ballykissangel check it out. It was a great hit when it was first aired back in 1995. I ran for 6 or 7 series I believe.
-
Susan I can only repeat what I replied to Cristina's comment. If nothing else, some of my pages may inspire you and others, to do something similar.
-
Cristina, you are always so kind. Although the little details are subtle, they do make the page stand out, which is why I like add them. Of course I have Carole to thank for me being able to do such little things, as without the campus (tutorials etc) my pages wouldn't be as interesting for the viewer.
-
For the most part the prairies is treeless. For the greater part it's a sea of grass. Where native trees do grow, they are low growing, such as the choke cherry, and Buffalo berry, which to me are more like bushes.
-
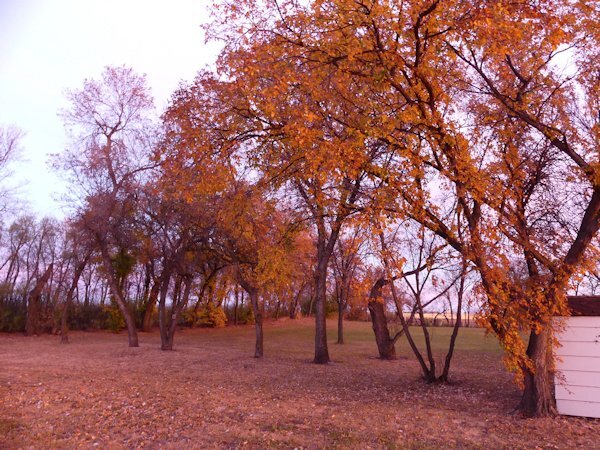
Sunrise sometimes creates a beautiful red hue over the landscape. If you aren't quick, you'll miss it, as it only lasts around 30-90 seconds. My trees out back, and my garden shed.
-
Another shot.
-
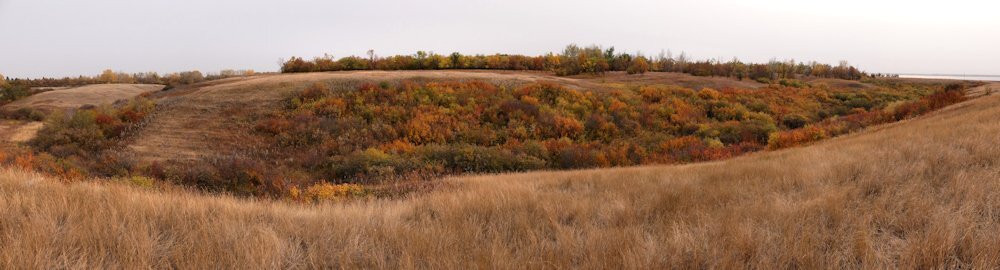
I will start the ball rolling, with a coincidence. I frequent Danielson Provincial Park, to cycle, hike or snow shoe, the trails. The Trans Canada walking trail also runs through the park. Today I went for a bike ride, taking the camera with me to take some colourful shots. Mother Nature didn't disappoint either. The Park is a 20 minute drive away. You can also see Lake Diefenbaker. Where I love to kayak the many isolated bays. This shot is a Panoramic shot.
-
We all have different approaches to starting a page, and seeing it through to its fruition. You and I couldn't be more different in our approach, from start to finish. I always start with a photo or photos, from there the photos determine the colours, and layout of the page. I have very few resources. Probably a dozen kits. I do have a nice small selection of elements. Also a small collection of fonts that I favour, and use repeatedly in projects. I like to create my own elements, and papers. So in a nutshell, my way of working is to select photos, and see where they lead my creativity. My aim is always to focus on showcasing the photos, with a minimalistic, and relevantly plain no fuss papers. That doesn't mean I don't like busy scrapbook pages, on the contrary, I do. It's just not in my nature or my style to create pages like that. You must sometimes have a heck of time deciding what kit etc to use. Only joking! I never started out a scrapbooker, which may have something to do with my style, and approach to showcasing photos.
-
Well Susan! You saw what I was trying to achieve. Movement! I watch the leaves on the trees and on the ground, as the wind blows them in all directions, until they settle in their final resting places. Like myself, you do more than merely look at a page, you interpret what it's trying to saying.
-
You know, I had my doubts about using the font, before I started the page. Putting off doing the heading until last. I'm sure I'm not the only one that, when having doubts, or not overall happy with something, it reflects in ones work, as this one did in my page. Thank you, I have to agree with you. I much prefer this one.
-
I changed the font for the main text Heading. As I didn't like the font used for the font challenge. Although it isn't Halloween themed, it is a very seasonal, appropriate page, for this time of year.
-
Jannette, you did a lovely job. Do you have anything in mind to use it in a project? I suppose you'll have to do the whole alphabet. Also time consuming.
-
I did another word art for the page too. To be in keeping with more my style, with fonts that I like.
-
I have posted the page on facebook, for better viewing, especially to make the tickets legible.
-
This font isn't one I would have chosen myself. I can see that it would appeal to some for a particular Halloween project. Halloween has never appealed to me, probably because it isn't that popular at home, certainly not when I was growing up, as it is in North America. I wanted to participate in the challenge. I edited some of the letters to my liking, added leaves from another font. The letters A and E, I resized, moving the letters before them closer, by changing the text to character shapes. Inner bevel. Photos were taken yesterday. Background paper is a photo, 2 overlays, and a texture.
-
Very nice indeed!
-
Spooky 2 masterclass is my favourite Halloween masterclass.
-
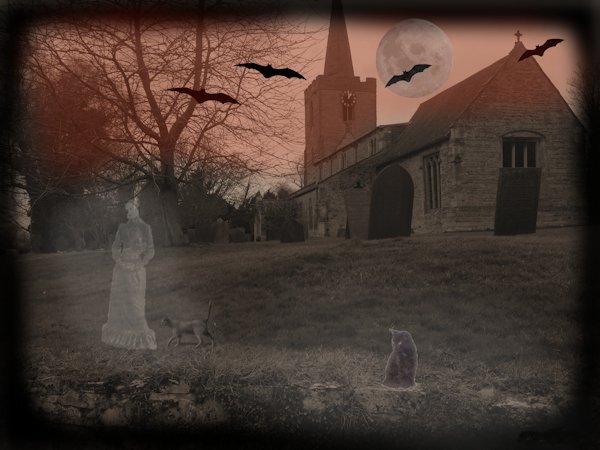
Halloween is something I don't celebrate. It's not new to the British. All hallow's Eve comes from many Pagan traditions. Introduced in to America by the Scots and and the Irish, who then commercialized. I used a photo of a Welsh Church and churchyard, used effects photo effects time machine, added the cats and lady, added glow to them. Bats and a moon.
-
I have never ever watched reality shows, they have never appealed to me. Nor the American drama shows like NCIS, Law and order, Blue Bloods and the list goes on and on. I have Shaw TV provider, with PBS( PBS has 3 channels) and Vision channels (which are part of the Shaw package) are what I watch. I agree with Chris, about the British shows, they are very down to earth. Both channels have an array of classic British programs, most of which I grew up watching, and they never get old. I'm currently watching Shetland, which I haven't watched before. Silent witness, with Amanda Burton playing the pathologist. Death in Paradise, Inspector Morse, and Endeavour. Last of the Summer Wine, Keeping up Appearances, New Tricks. The Sweeney with John Thaw, who also played Inspector Morse. Van Der Valk, Heartbeat. Unforgotten. Meet the Midwife, Agatha Christie murder mysteries. The list goes on. I have watched Murdock Mysteries, which I like, mainly because Thomas Craig plays the inspector. I remember him in his younger days in Inspector Morse, and Coronation street. Plus it's also semi educational. PBS airs NOVA, and many nature documentaries. That's the extent of my TV viewing. I grew up watching Upstairs Downstairs, drama series in black and white, there were three series I think in all. Starring Gordon Jackson. I haven't watched Downton Abbey at all. I watched the first few series of Outlander, which I enjoyed, but then lost in interest in it. I have to say my favourite American detective series is Columbo. Which airs on Vision on a Thursday night.


a.jpg.5688e11375cfd2279d9f52f73f6a5389.jpg)
.jpg.74d3420d2013f8bca83a1d4c0e89cfd8.jpg)
.jpg.7e27adfcd7310495fb84ec42a52d9e2b.jpg)