Build-A-Kit – Ribbons and Bows
Ribbons are pretty common in most kits. That does not mean you HAVE to have some but since they are easy to make and can be versatile, why not include a couple.
STRAIGHT OR NOT
It will be very easy to create a straight ribbon as you can add patterns evenly. Straight ribbons also have the advantage of being usable with scripts to create knots, bows, and other elements, so it will be helpful. Straight ribbons also sit nicely on a project.
Starting with a straight ribbon, you can also create folded ones. Check this tutorial to learn how to “correctly” fold a ribbon.
If you really want to have some not-so-straight ribbons, you can always use the Mesh Warp tool to give them some irregularities.
HOW LONG?
Since a full-size page is 3600 pixels, you would like your ribbon to fit that size. If you have some fancy ends, you might consider making the ribbon shorter than the full-size paper. However, if you want to give the most flexibility to the user, try creating your ribbon at about 4000 pixels in length. This will allow the user to place the ribbon at an angle on their page while reaching both edges.
HOW WIDE?
Ribbons will range in thickness. They can be as thin as 100 pixels, or as thick as 300. Consider how wide a ribbon would be in real life. If you create a ribbon at 300 pixels, it will correspond to a one-inch ribbon (at the common resolution of 300 ppi). You can have very thin ribbons (under 100 pixels) but you can also choose to make some much thicker ones. It depends on your overall style for the kit.
DESIGN AND TEXTURE
Ribbons can be as varied as you want. You can have simple designs. You can keep them in solid colors. You can add edges in different colors. You can keep the center translucent. You can incorporate lace techniques. Make sure you add some texture, whether it is a little bit of noise, one of the existing textures in PSP, or some overlays. You have already used those for papers, so you can do the same for ribbons.
If you don’t want to do everything from scratch, you can easily find some layered templates to get you going.
If you want to create some frayed ribbons, you can check this class.
And to add some “randomness”, you can use the Grunge Texture or the tips in the Perfectly Imperfect class. This will make sure you have a ribbon that does not look flat.
Many other textures can be applied to your ribbons. Check the Textures section in the Creative Scrap Index.
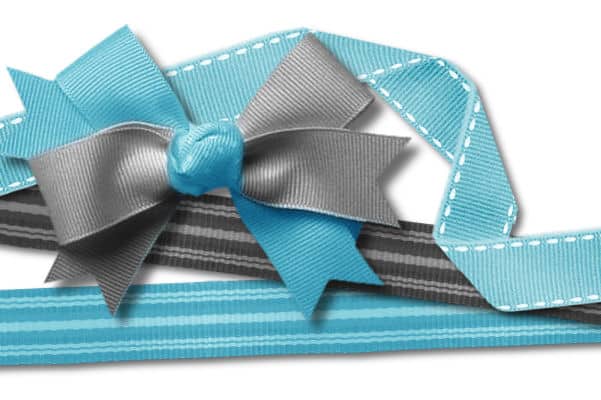
BOWS AND KNOTS
If you are starting with a straight ribbon, you can create bows and knots manually, using one of the tutorials in the Creative Scrap. However, I admit it is a little tedious to do. If you want to go a little simpler, you can use a script from the Creation Cassel store, that can then use the straight ribbon you have created or you can use some greyscale knots/bows and colorize them. You can use this tutorial to colorize the bow if you are using a greyscale element.
Although it is nice to create one’s ribbons and bows from scratch, you might prefer to use ready-made ones, and it is ok since you will know how to make them match YOUR kit!
If you include bows/knots and the matching straight ribbon used to create them, the users will greatly appreciate it.
NON-RIBBON RIBBONS
Think of some “ribbons” that are not exactly “textile”. Measuring tapes come to mind. You can also use paper strips, in the same format as ribbons, or washi tapes. Although those can fall into the Fasteners category, they can fit in with the ribbons too.