Scripts are tools that can execute various steps and apply different commands automatically. Some scripts come with PaintShop Pro and you can also download or purchase some in online stores. Let's look at how you can run scripts to make your life easier.
Why use scripts?
Since scripts can execute steps automatically, they can work faster than you can. They can repeat the same commands hundreds of times in a very short time. They can also perform mathematical calculations for you to apply effects very precisely. Something else that you will find very useful is their ability to incorporate randomness when needed.
How to install scripts?
Scripts can be installed in the Scripts - Restricted folder or the Scripts - Trusted folder. What is the difference? Some scripts will close files, write files on your hard drive or perform other commands that would affect your files. Those files will only run from the Trusted folder. All other scripts should be saved in the Restricted folder.
If you run a script from the Restricted folder and it should be in the Trusted folder, it will fail and you will see a message appear telling you so. In that situation, simply move the script to the correct folder and it should run fine.
How to run the script?
There are two ways to run a script. You can go to File > Script > Run... and navigate to the script you want to run. This can be a bit tedious as you have to navigate through various folders to get to the correct one and if you are not 100% sure where it is, you might search longer.
The other way to run a script is to use the Scripts toolbar. You can make this toolbar appear by going to View > Toolbar > Scripts. This is what the toolbar would look like:

By default, it will be floating, but you can dock it with your other toolbars so it would not cover any of your work.
Using the Scripts toolbar offers you some advantages:
- all the scripts are listed together in the dropdown list, wherever they are.
- you get a button to stop the script if you want to interrupt the running. It is faster than go through File > Scripts > Stop
- other options are also just one click away
The Scripts toolbar
As you can see, there are various buttons available in the scripts toolbar. You will probably not use all of them, so don't panic. Let's have a quick overview.

- Dropdown list where you can select the script to run
- Run Selected Script: to run the script you have selected in the dropdown list
- Run Multiple Scripts: to run more than one script in a single session. You likely won't use this button much at all
- Edit Selected Script: if you need to edit the script. Unless you are writing scripts, you probably won't use this one.
- Toggle Execution Mode: by default, the scripts will run silently, but if you toggle this button, every command will display its dialog window and you will have to click OK. Scripts already have settings in the code so you really don't need to mess with the dialog windows.
- Run script: this will let you navigate through your computer to select the script to run. It will not use the script listed on the dropdown list.
- Stop script: at any point, you can interrupt the script with this button.
- Start Script Recording: which will start to record all the steps you will take on your PaintShop Pro
- Pause Script Recording: if you need to perform some actions that you don't want to include in the recording.
- Cancel Script Recording: if you change your mind and want to start over.
- Save Script Recording: if you have recorded a script, you will want to save it, right?
To run scripts, you will typically use the Dropdown list and the Run Selected Script button. It is nice to know where the Stop button is, but you probably won't need it too often. You can probably ignore most of the other buttons.
How to run scripts?
As you can see in the Scripts toolbar, you will have to select the script you want in the dropdown list, and then click the Run Selected Script button. If you are looking for a script and it is not appearing in the dropdown list, it means that PaintShop Pro does not know about it. It could be in an incorrect folder.
The selected script can work in different ways:
- perform some commands on the active layer or the active image
- use the active layer and do something with it
- create its own blank image to create something from scratch
Often, if you download/purchase a script in an online store, the zip file will come with a txt file. That is usually named with README in the filename. This important file will give you instructions on where to save your script (Restricted or Trusted). It also give some information on how you can run the script effectively. Do you need to have an open image or do you need to start with a blank workspace? If you need an open file, are there specifications on the format or size? Can you run the script with a vector layer or a raster layer? Those can be important details to know so you don't get a surprise. Remember that a script does not "see" what you see, and does not know what you want. It will just execute the steps automatically, no matter what you wanted.
The README file also includes very specific information about other resources that the script will need. Not all scripts need extra supplies (like brushes, patterns, shapes, etc.) but if they do, those missing supplies will cause the script to fail or yield an odd result. Sometimes, the script will give you an error message stating, for example, that it cannot find the necessary shape. Other times, it will use a default brush or pattern and your result will look very wrong. In those cases, the script won't give you any error message, but will use default supplies it has.
So, make sure you read those README files and follow the instructions. It is also a good idea to keep those files so if you need to reinstall the script later or if you upgrade to a new computer, you will have all the information needed to run it effectively again.
Running photo scripts
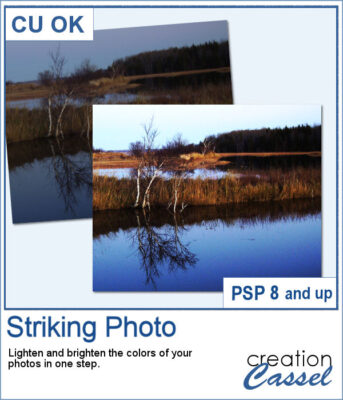
Typically, photo scripts will run on a photo so you need to have your photo open and active. Some scripts will just apply various adjustment effects so they are quite simple. Although some scripts will work on a copy of your photo, they don't all do. For that reason, it is a good idea to duplicate your original before running the script. That way, if you change your mind or don't like the result, your original will be intact. Stricking Photo is an example of such a script.
Some photo scripts will use your single photo and create a particular effect with it. The Jigsaw Puzzle script is a good example. It will require you to have a photo active on your workspace to apply the effect to.

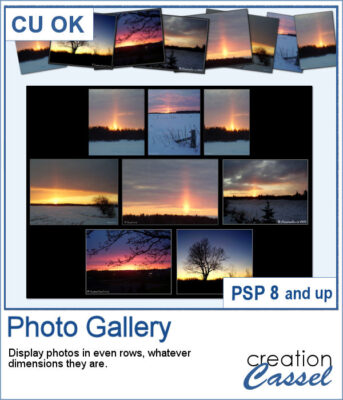
Other photo scripts will go much further and will use multiple photos. Some of them will ask you to open all the photos you want to use (like the Photo Gallery script).
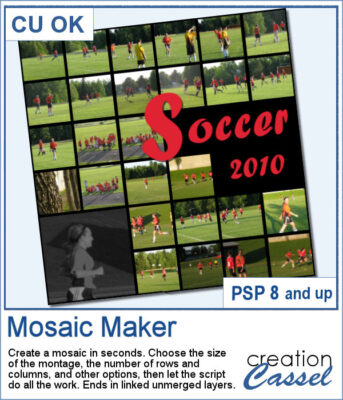
Others scripts will ask you to open only one photo. In that case, the script will figure out where that photo comes from, and will use all the other files in the same folder. The Mosaic Maker script is one of those.
Running element scripts
Some scripts will create elements with various input from the user. Some scripts don't need anything to work on. They would create the necessary images, and will ask different questions to the user. Those prompts could include choices of colors, number of elements, text to spell out, or options for shape, pattern, texture, etc. The Letterpress script is an example of this. The script will ask the user for the text to spell out and the material for the individual letters. In addition, it gives the option to create a support and if the user chooses so, the script will ask the number of rows they want.
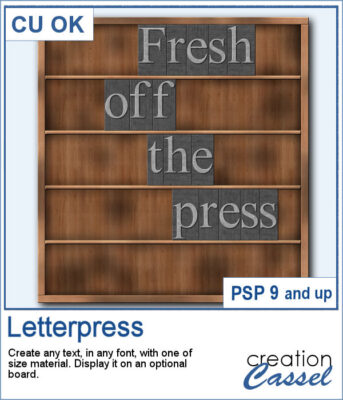
Other scripts will use an open element, like a ribbon, and will work with it. Most bows and knots script work in that manner.
Again, the README file will let you know if you need to start with a particular image open.
Running tool scripts
Tool scripts are meant to perform some commands that won't result in a separate image, or element. The Prefix Renamer script is an example. That particular script will rename files based on the user's input for convenience. The Palette Maker 2 will use an open photo and create a color palette from it and will display those colors with brush strokes.
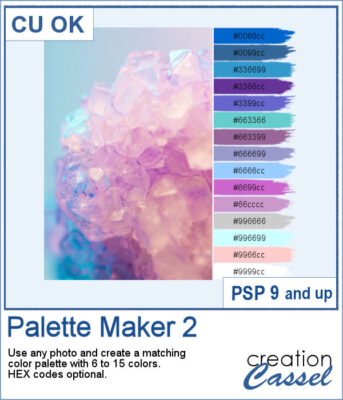
Just like for any other script, check the README file to see how the specific script runs.
What if it does not work?
Occasionally, a script will not work correctly. If the script runs completely but yields an odd result, maybe it is missing some supplies. On the other hand, if it fails, it might give you an error message that should give you a hint as to what is not working.
If you need to troubleshoot why a script is not working, you can check this article on troubleshooting script issues.

