

We have seen, in previous posts, that you can set up your PaintShop Pro in different ways, depending on your needs. You can set it up with larger displays if you have low vision, you can clear the clutter when you first start your program, you can set it up in the same way I do when following the Campus tutorials. But there is still a lot more you can adjust to suit your own style.
Re-arrange your toolbars and palettes
Although it is typical to leave the toolbars and palettes where they appear by default, it is possible that you want to move things around to suit your own workflow.
You can move the Tools toolbar to the bottom instead of on the left side.

To do so, find a faint set of lines on top of the toolbar (it is very faint, but it it there). Grab it and pull from that position onto where you want it.
You can move other palettes in a similar way. Unlike the toolbars, the palettes will give you some options for placement. For example, if you grab the top of the Materials palette, and move it on your workspace, you will see some faint arrows.

Drag the palette until the cursor is on one of those arrows and it will snap the palette in place. Not all positions are possible for the palettes. Check them out and see if you prefer a different arrangement for your toolbars and palettes.
Change your cursor
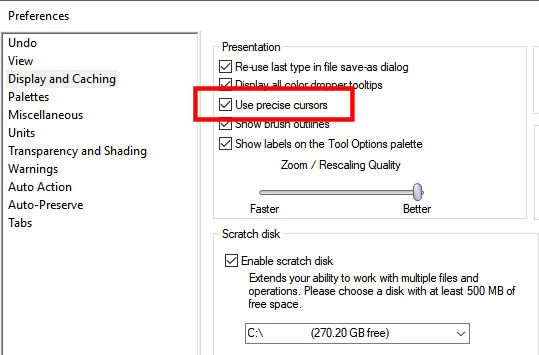
You are probably familiar with the cursor in the shape of an arrow. Depending on the active tool, the cursor will change to a T for the Text tool, to the outline of a brushtip for the Brush or the Eraser tool, a bucket for the Fill tool and so on. It is usually enough to know where you will click. But if you want to be more precise, you can change the setting to use a precise cursor. You can find that setting under File >Preferences > General Program Preferences > Display and Caching.
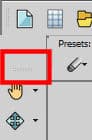
The familiar cursor for the Move tool would look like this, by default:
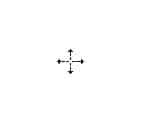
On the other hand, the Precise cursor will look like this:

And it will be included with the other cursor changes like for the Brush, the Eraser and the Text tool. If you need more precision in where you click, you might want to choose that cursor display.
Change the color
You know that you can change the color of your workspace, but other elements in PaintShop Pro can be changed.
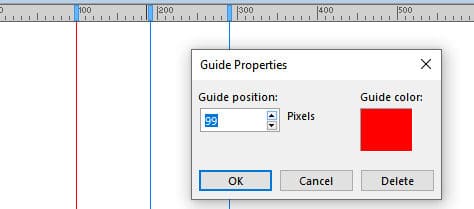
You can change the color of the guides, which are typically blue. This could be very useful if you are working on an image that has a lot of blue and you want a contrasting color. To do so, once you pulled a guide on your image, right-click on the little rectangle in the ruler and you will get the option to choose a precise location and also the color.
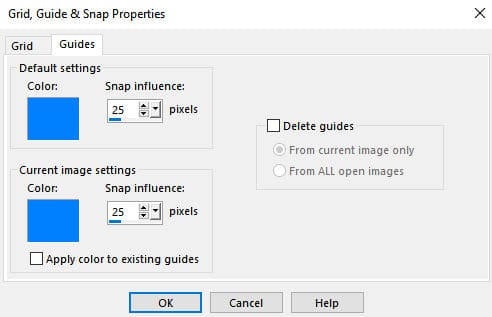
If you want to change the default color for the guides, you can do so with View > Grid, Guides and Snap Properties. Under the Guides tab, you can change the color to anything you want.
Layers palette
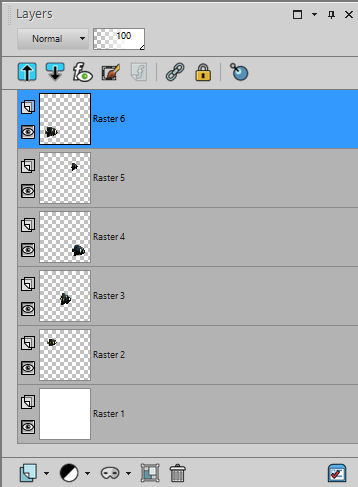
In the JASC versions of PaintShop Pro, the Layers palette included two panes. the left pane included the layer preview, the hide/unhide icons and the layer names while the right pane included the Blend mode, the Opacity and the linking. Starting in version X, those two panes were combined and the settings like the Blend mode, the Opacity and the linking was added to the top of the palette and would change depending on which layer is active.
This is the default setup for the Layers palette, with a single pane:
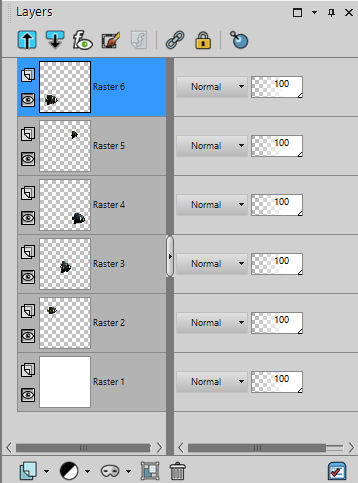
And here is the two-pane palette (notice that the linking is still on top of the palette and not in the right pane like it was in version 9):
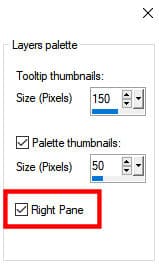
Would you prefer that? If so, you can change this setup under File > Preferences > General Program Preferences > Palettes.
Did you know about all those ways to customize your PaintShop Pro? There are still more ways, and if you browse a little bit more in the General Program Preferences, you might find some details that will suit your own workflow.
What will you change?


