
PaintShop Pro has some great tools to improve underexposed or overexposed photos. However, using a one-click fix over the complete image is not always the most appropriate solution as it will leave previously correct sections, now overexposed or underexposed. Sometimes, you need to fix the exposure only on a partial section of the photo. What can you do?
Using the Levels
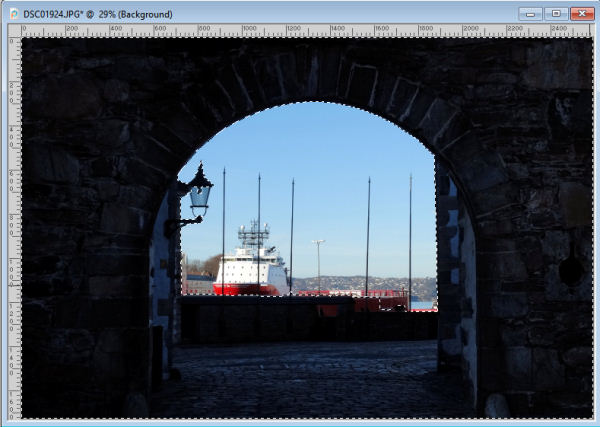
One of my favorite tools to adjust the exposition of a photo is the Levels, which can be found under Adjust > Brightness and Contrast > Levels. However, it does not address the issue of partial photo exposure fix. Let's start with this photo, provided by Mervyn.
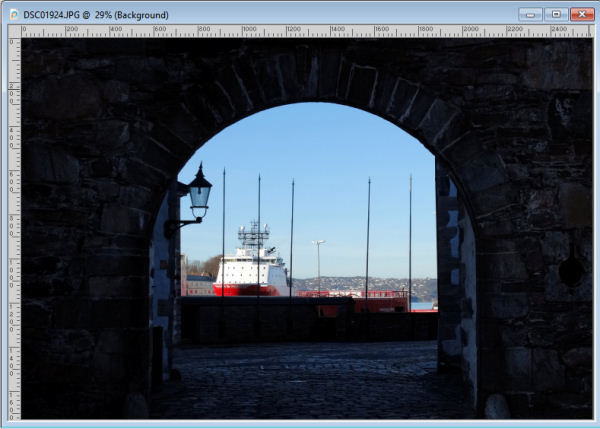
As you can see, a large part of the photo looks great, while another is underexposed. Let's see what happens if we apply some correction using the Levels command. Here are the settings used to improve the underexposed section.
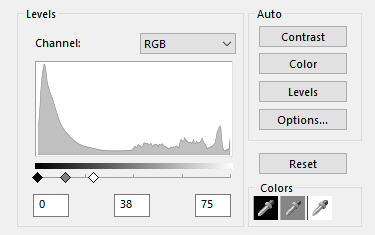
Applying those settings will improve the exposition of the wall, revealing the beautiful stonework.
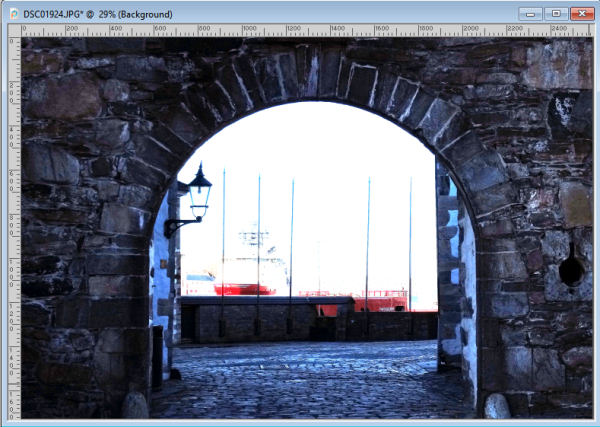
However, it is obvious that the center part, with the boat, is now overexposed. That is definitely not yielding a satisfactory result. So, we need to apply the correction only to a portion of the photo, in this case, the stone part.
Make a selection
Since we want to apply the correction only to a section of the photo, we need to isolate that section to protect the rest. We could use a variety of selection tools, depending on the photo and the section that needs to be isolated. In this example, I used the Selection Brush to select most of the dark sections.
Apply the correction
At this point, we could apply the Levels correction with the same settings we showed earlier, directly on the photo. The result would be good, as we had "tested" the settings before. Here is what we would get:

This might be sufficient for your needs and if that is the case, you can do the same. However, you might want to consider a slightly different approach.
Using the Adjustment layers
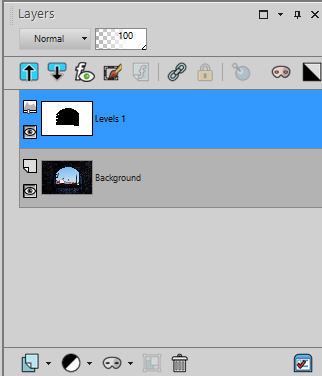
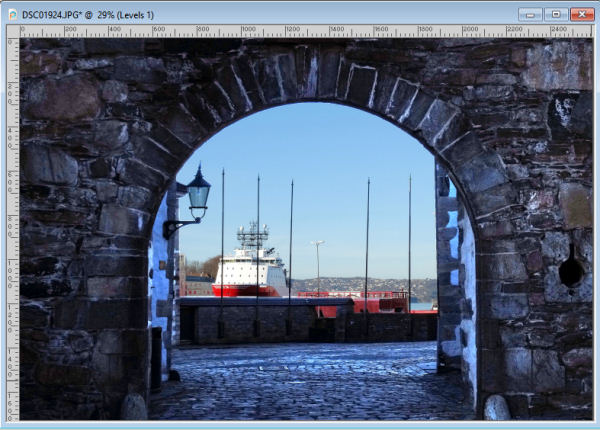
Adjustment layers work like masks and will apply various effects for you on sections of an image but without actually affecting the image itself. In our example, with the selection already made, let's add that adjustment layer with Layers > Adjustment Layers > Levels. This will add this mask in the Layers palette. The white area is where the effect will be applied and the black sections will not get the effect at all.
This will yield the exact same result as if you applied the effect directly to the photo, except for a couple of details.
Here is our photo, with the simplest correction using the Adjustment layer.
Using multiple adjustment layers
The first advantage of using the adjustment layer is that you can change your mind, and adjust the settings later since those are separate from the photo itself. If you later find that one section should have the effect added but was not selected, you can just use the Brush tool and stroke that section in white. On the other hand, if you find that one section should NOT be adjusted, brush over it with a black stroke to remove the effect. But there is another advantage. You can choose to add another adjustment layer for a different section if needed, where you could apply different settings. Here is another example.

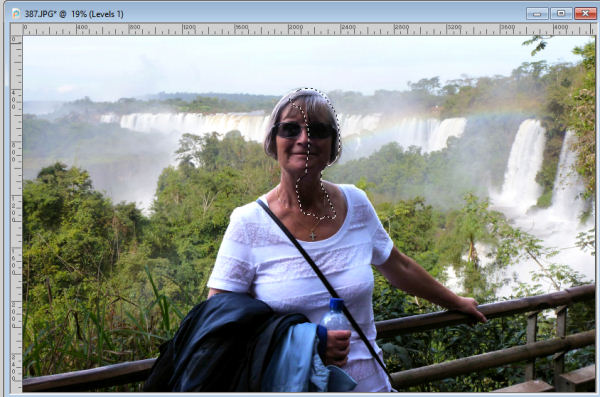
I will be selecting the area I want to brighten.
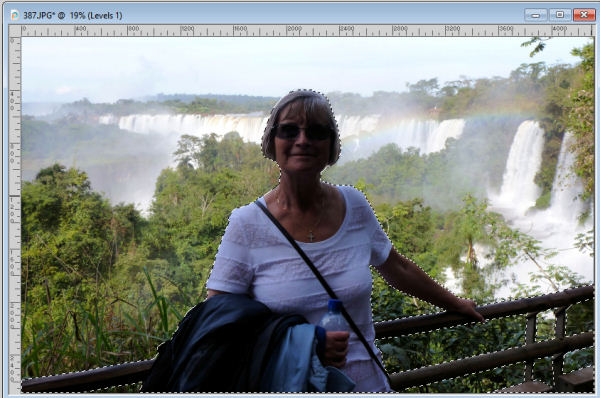
Adding a Levels Adjustment layer, I will brighten that area.

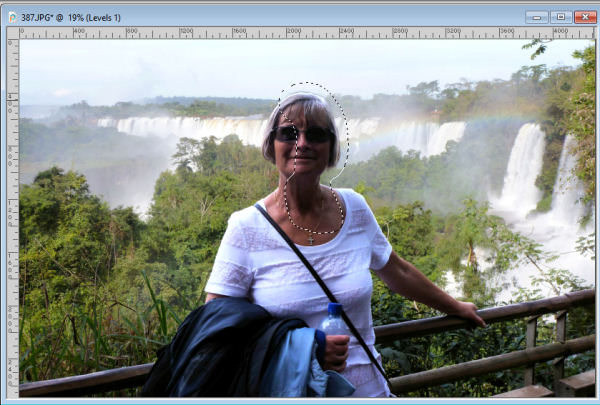
That is already much better, but since I am working with individual layers, I can repeat the process. In this photo, I would like to brighten the half of the face that is still quite dark. I will make a selection using the Freehand Selection tool.
Since I don't want a sharp edge for that adjustment, I will just add some feathering to gradually fade the edges.
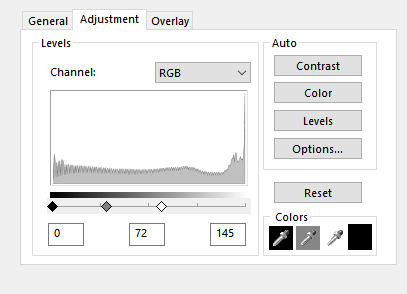
At this point, I can add a separate Levels Adjustment layer.

Since this adjustment layer is separate from the previous one, I can apply different settings to that section, which I did. Here are the settings used for this part of the photo:
And in the Layers palette, I can see the different adjustment layers.

If I need to tweak the settings, I only have to double-click on one of the layers, and the dialog window will pop up, allowing me to make changes.
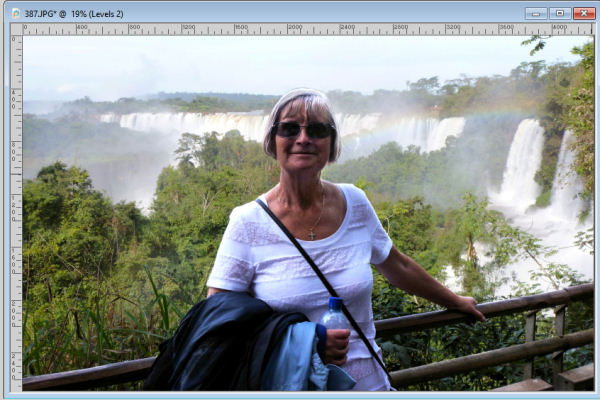
And here is the same photo having used only two adjustment layers.
Although I used the Levels Adjustment layer, there are other types of adjustment that could use. I will not expand on those, but you can explore the Curves adjustment layer if you are familiar with that command too. And of course, you can also mix and match various Adjustment layers to achieve the result that you want.
Do you want to learn a bit more about adjustment layers? Check out this article.


2 thoughts on “Fixing exposure on partial photos in PaintShop Pro”
Thanks for the quick reply. Now all I have to do is print out these instructions, reread and then try it out. This will take me a while as I’m not able to give this powerful program the time it deserves and I mainly use it for quick fixes. Thanks again – Joan
Very useful explanation. thanks for making it possible to download the explanation via pdf file.