

Among the various layers available to PaintShop Pro users, you will find Adjustment Layers. Unlike Vector and Raster layers, the Adjustment layers won't show anything directly but will act as a mask in applying various effects to the layers below.
What is an Adjustment Layer?
An adjustment layer will be a layer in greyscale that is visible in the Layers palette. On their own, Adjustment layers don't show anything, but they are associated with various other settings. For example, you can have a Brightness/Contrast Adjustment Layer or a Channel Mixer Adjustment Layer. Each of the multiple options will behave just like their counterpart (the Brightness/Contrast and Channel Mixer settings) but will not be applied directly onto the active layer. Instead, the effect will be applied through that additional layer, a little like a window letting the light through.
Why use an Adjustment Layer?
Using the various settings on a layer will modify that layer permanently and the adjustments cannot be modified later. On the other hand, applying the same settings through an Adjustment Layer will not affect the original layer itself. This means that the Adjustment Layer can be modified or even deleted if needed, later in the process, without having to undo a dozen or a hundred steps.
How to use an Adjustment Layer?
You can find the various Adjustment Layers under the Layers menu.
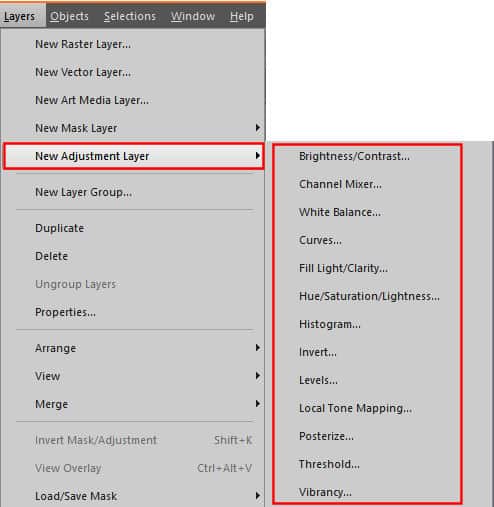
Earlier versions of PaintShop Pro have fewer.
Once you chose an Adjustment Layer from the list, you will get a dialog window that is identical to the similar tool used separately. For example, when adding a Brightness/Contrast Adjustment Layer, you will get this window:
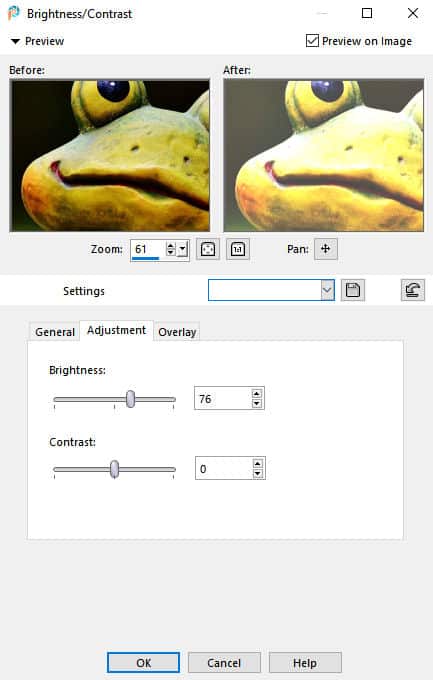
On this window, you can select the levels of Brightness and Contrast that you want. Remember that since it is an Adjustment Layer, you will be able to change those settings later.
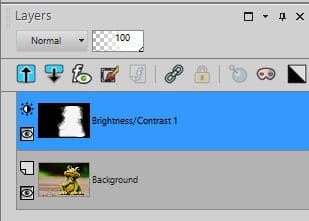
In the Layers palette, you will now see a white layer, by default, meaning that the settings you have just chosen are now applied to the whole surface of the layer. This layer can now be modified with various tools to replace the white with greys and black. On the other hand, you can fill this whole layer with black and gradually add greys and white. Overall, wherever this layer will be black, the effect won't be applied to the layers below. Where there is white, the effect will be applied to the maximum, and then, every grey area will apply the adjustment based on that level of grey.
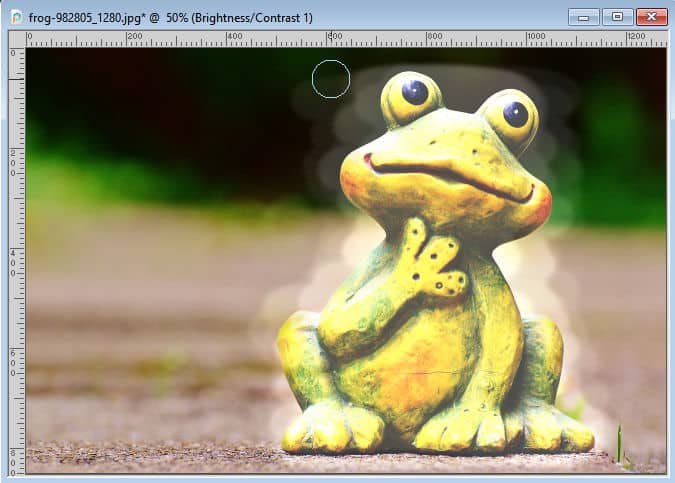
And this Adjustment Layer will give this result:
Adjustment Layers in a group
The effect of the Adjustment Layer will be applied to ALL the layers below its position in the Layers palette. However, sometimes, you want to apply a particular adjustment to only one layer. Maybe you want to adjust its brightness or its color to match the rest of the project. If that is the case, the best option is to add the Adjustment Layer in a group, with only that layer you want to modify.
To add an Adjustment Layer in a group, create a layer group with the target layer, and then add the Adjustment Layer to it. If you have already worked with the Adjustment Layer and changed your mind, you can always create the group and slide the layer in the group.
For more detailed information about Adjustment Layers, you can watch the full-length class called Adjust what?


4 thoughts on “Using Adjustment Layers”
Thank you!
Were suppose to learn one thing new everyday But when I come here I have high hopes and I truly do learn way more than one thing a day when I show up 🙂 Love this Campus.
Thank you very much for this tip!
I didn’t know anything about these. Thanks for the information.
This is great info. I did not know much about adjustment layers or realize they had masking abilities. Thanks so much!!