Cassel
-
Posts
6,018 -
Joined
-
Last visited
-
Days Won
17
Content Type
Profiles
Gallery
Forums
Everything posted by Cassel
-
Have you ever used SuperFinder XT? I have an article about it. I use it extensively to search for things on my computer.
-
Here:

-
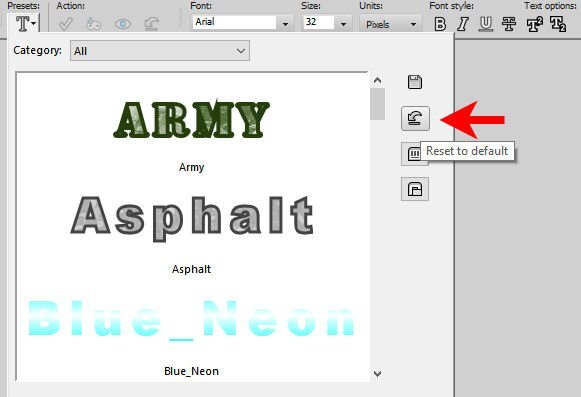
If it is picky, maybe you can go in the presets for the Text tool, and click the Reset button?
-
When you run the script, is the OBJECT active in the layers palette? Sometimes, it becomes deactivated so the script won't work.
-
You could save it as a PNG image. It will lose its layers so if you need to add textures, bevels or shadows, do it before you save it. And yes, you can definitely do alphabets with that. I have done so several times before.
-
Making a Preset shape is in Lesson 2.
-
It must just be caught in cyber-linmbo. Just change the lesson number on any of the URL that work and that should do it.
-
Have you ever used or seen some fun "food names" during a party? Share what you have seen, even if it is not dino-related. Let's chat.
-
Preset shapes are already paths so that is why it will be greyed out. However, picture tubes are not vectors so that cannot be converted to path.
-
Yeah, sometimes, the simplest things are not explained anywhere.
-
Try double-clicking on the tool options. USUALLY, it is enough to snap it back into place.
-
@Dorothy Donn Did you manage to watch the videos in the end? It is quite fun to see you add photos to those cups. That would be a very interesting way to showcase photos. @Susan Ewart The Hue Map can be a great tool to get different colors. @James Brady I am happy that you didn't give up when it was difficult. And yes, I knew that Vectors were challenging for a lot of people since MOST users don't tend to use them, and those who do, often use only the most basic functions. I can think of even more advanced features to explore, but I think this will be enough for a while. @Anja Pelzer Even an "odd" shape can give a great result. Those pearls look so good with those curves. @Jnet Allard Quel beau bouquet de marguerites! @fiona cook As you might have noticed in the lesson, I was "testing" the size of the rope tube. That is exactly because the script will use those last settings. @Mary Solaas Line Styles have been addressed in the June Q&A. Have a look and you can use the round shape to make the line. @Linda J Walker I am glad that I was able to scare your PSP into obedience! That is my super-power. @MoniqueN. On the rainbow, you could also hide the path so it would only keep the colors and no black. @Michele I hope to see those techniques applied to future projects, even for your gaming group! @Donna Sillia I am really happy to see so many participants start, but mostly, NOT give up when it was difficult. @Bobby Yeater That sailboat looks like a handmade craft collage with ropes. When you add some shadow to the rope, it will really pop out. @Anne Lamp Don't worry. I have added all the lessons to the Workshops section of the DIAMOND members. @Cristina That fish is so cute! @Lynda DiGregor So much gold! That was an expensive lesson ? @Marie-Claire Nice to see Poncho! Can we choose him as our Campus mascot? @Natalie Spooner You can also turn your logo into a picture tube. @Cindy Lawrence The process is the important part of this workshop. The details will be refined later. @Connie Collier What PSP version are you using? Did you download the Creative Content? It would have additional picture tubes. On the other hand, there are lots in my store (but they are not free), HERE. @Leslie Gifford Cook You are catching up nicely! Keep it up. You are almost done. @Anita Wyatt Yes, it is fun to twist those nodes as it creates very interesting effects.
-
You are likely using the properties from the LAYER, but you need to double-click on the OBJECT (that is inside the layer). Make sure you click the little triangle on the left, to list all the OBJECTS inside the vector LAYER, even if it is only one. Yes, when there are not control arms, that is when changing to Symmetric or Assymetric will make them appear.
-
I could do an article but I find that the current format is quite convoluted to use. However, you can check the June Q&A where I show how they work. As for the cutout CRAC-Past (not CRAP). it does not matter if you have a stroke or not.
-
When I do directional tubes, especially for ropes and such, I have to carefully measure exactly the step that will give the best result (to the pixel). In your case, you might have just used a longer step. Try to reduce the step when you apply it and see where it works best. It also will depend on the starting size of the tube image.
-
@Jannette Nieuwboer Are you trying to fill with the selection and the fill tool? If so, that would explain the gaps on the edges. You just need to use a FILL from the Vector Properties dialog window. Next, I don't understand your question about the Bezier curve. Can you phrase it differently?
-
Gremlins, right? ?
-
Just to test, do you get the same thing if you open a different image?
-
How did you get to that dialog window?
-
Could you make a screenshot of JUST that popup? it would be a little larger on my screen so I can see better.
-
It is a curved path, with a node and cursor pushing it. I am still wondering that myself!
-
Make sure the Mode didn't change. Often, if you "miss" the right point, it will change Mode thinking you want to draw some more. Make sure it is still in Edit mode.
-
This thread will stay open so you can continue to post your assignments in this thread.
-
Yes, that is correct. Once you set the Picture tube to the scale you want, and maybe the step you want, those are the settings the script will use.