Cassel
-
Posts
5,996 -
Joined
-
Last visited
-
Days Won
17
Content Type
Profiles
Gallery
Forums
Everything posted by Cassel
-
Did you ever take a picture of something unexpected? If so, share it with us. I am sure there are many situations where we wished we had a camera but didn't but now, our phones are often close enough to grab and snap a pic.
-
Tu as tout compris 😂
-
To clarify something, the link to the survey was "accidentally" requesting permission to fill out from some participants. This was a glitch and I changed the settings so if you were asked for a special permission, can you try it again? It should be fixed now. @JacquesThanks for confirming. Pic-to-Painting was integrated in recent versions of PSP. Simple polkadots' very effective effect. @Carolyn RyeNice smile from Daniel. You managed to get those mask effects very nicely. It is great to see those silhouettes as part of the mask. @AprilDawnThat is a very interesting use of the mask on only part of the photo. I might try this effect! @Jeni SimpsonIf you want to use brushes away from the center, you can always use light grey and go darker as you go further. That is a way to fade the brush imprints of the mask. The issue you have around the ellipse, is possibly because there seems to be another layer under the image/mask (a solid color) so the edges don't blend into the background. @SharlaDid you try the Voronoi with different size tiles? Maybe a smaller one would please you better? For the polkadot, just note that not only you can have smaller/larger scale, you can also use a smaller dot on a larger "tile" and that would give dots that are spaced out differently. @CristinaEven with a larger mask, the polkadots are still visible and you get your assignment is in! @Robert GarrettI am glad you enjoyed this workshop. I hope you will stick around for upcoming workshops and classes too! @Susan EwartI think that those hearts work fine with the mask. If you want to create a transition from the "faded" central part and the "defined" hearts, you could use go in steps: create a slightly faded central part, add some "sharp" hearts on the same layer, add a blur to that layer, add more "sharp" hearts around. Repeat as needed. @fiona cookGreat end result with that polkadot and mask. @gwen jewittTwo delicate layouts. Polkadots can be bold or delicate. Isn't it nice to have such flexibility? @Ann SeeberIt is nice to see how a small-scale polkadot can be subtle without overpowering the project. @Corrie KinkelDid you use the same scale for the two colors of polkadots? I do see different colors, but wondering how it could show different colors if the two patterns align with each other? @Karen BorgmannI also hate that the Scale mode is inaccurate too. At least, we see when it is NOT scaled correctly. Unfortunately, some people don't notice 😞 It seems that if you use Ctrl for something right before, it is like that modifier is "stuck" in the settings. On the James layout, did you add shadows to the ribbons at the bottom? @Donna SilliaAnother non-fan of voronoi. However, if anyone can find something more similar to the linoleum effect, let me know! @Gerry LandrethIt is nice to see how you use those different resources, including the Scattered Photos script! @MoniqueN.Great layouts. For the second layout, may I suggest adjusting the color of the title to make it a bit more contrasting? @Connie CollierThis is such a great way to showcase those paintings of yours! no more "boring" white frames only! 🙂 @Linda RexfordYou show a great application of the polkadot technique with a different shape from the "dot". As you see, the possibilities are endless. @Jean NaumannThroughout different workshops and classes, we often reuse similar tools and effects. After all, there are only a limited number of them. Just like the alphabet includes only 26 letters, we can combine them to create an almost infinite number of words and sentences. Isn't it amazing when you consider that? @Cindy SheetsThat plaid is bold and matches the vibe of the photo very well. Although you don't have any more lessons to come, you still have some time to catch up if you encountered any obstacles. The videos will stay up and available for another 7 days. After that, they will only be available to our DIAMOND members. Of course, you can join any time! And remember to fill out the survey when you have a chance!
-
Great work everyone! @Jeni SimpsonThose are two great pages. I am glad to hear that you are having fun with the brushes and the mask. @Jean NaumannWhenever you have a photo with an edge, it is a bit tricky to get rid of it, especially if you don't have much space around the subject. I guess some photos will be easier to handle that way than others. And that couple in Port Arthur look better without the pattern! @Harmony BirchGlad to see you start this workshop. It is never too late to start. I love that font you used for the first "Beyond Ragnarok" page. If you find that the plaid is overpowering, you can size it down, or lower its opacity while adding a solid color below. Using multiple brushes for a single mask is very common! Boy, you are catching up fast!!! @kasanyIt is interesting how yo used the mask, yet it is not completely blocking the rest of the photo, which still shows in the background. Very creative! @Jannette Nieuwboer Maybe we can have a Zoom session to try to figure out what is happening. Hopefully it is only a simple issue. @Ann SeeberGreat mask for that starling. Those feathers look like they are bordered with gold! Using a monochrome noise with the linoleum effect gives a nice subtle effect. @Jacquessuch a simple yet powerful layout. Simplicity gives all the attention to the photo! Great page. Great use of that "ink" brush on the mask. how did you use AI? Did you use one of the effects in PSP? @Robert GarrettYeah, Mary Ann really does not look thrilled!! I am glad you are enjoying this workshop so far. @ClarineDid you use a mask at all? Your linoleum background looks great! @fiona cookDisplacement maps will yield very different results depending on the image used. You can really have fun with that command. @Bee KellyWith the photo taking much of the page, it is interesting how the kaleidoscope does not look like the typical "circles". It is very subtle all around. Great result. Interesting that you added black frames instead of the typical white one. It is very suitable for those pictures. @Sue ThomasI personally prefer the Linoleum effect to the voronoi one. I find that the voronoi is "too defined", but that is a personal taste. @Corrie KinkelI am not a fan of the voronoi either but I had to find something "somewhat similar" to the other one in PSP. That is the best I found! @SharlaAlthough I personally would not have added a shadow to the masked photo, it did turn out quite nicely! @Hank SobahFollowing the method and then adding your personal touch is exactly what we would expect. Those pages are so colorful! @CristinaThat is an interesting idea to use those textures only on a section. It probably shows more on the full-size project, right? @Sharon MurrayThat plaid is so colorful and surprisingly, since the photo is also very colorful, the plaid does not take over the photos. For your photo that is not as vivid in Affinity, is there a difference in the default blend mode or opacity? @Lynda DiGregorI like how you added a "pattern" or a texture to the frames around the small photos. And yes, someday, we might visit that city! (the further i have been is Detroit) @gwen jewittGreat layout to showcase that dancer! I love the colors! @Gerry LandrethI never thought of adding a large blur to turn the voronoi effect into a grunge texture. Good idea. @Donna SilliaYou can review the Vector Workshop for Affinity if you want directions on how to create text on a curve. @Susan EwartYou are NEVER spending too much time with those layouts. It is a project well worth that time! @Connie CollierThat bubble background looks great! I think it helps showcase your photo beautifully. @Carolyn RyeIs that a mask you made or a ready-made one you used? @Linda RexfordI think the radial blur is actually a great effect to put the focus on the subject. Great choice! See you tomorrow!
-
This is spring time and I am suggesting to you, a set of THREE fonts: a large uppercase font, a small cursive font, and a spring-related dingbat! Yes, you get all three at the same place. Of course, you can use them separately but they go very well together. You can get these free fonts HERE. What will you write?

-
The idea of one photo a week was quite popular in 2024, and it encouraged participants to take photos and showcase them without having to create a whole layout for them. In 2025, I will offer you a little twist on this. Again, the idea is only to showcase a single photo at a time. You can showcase them as a flashcard, emphasizing the letter (you can use these free cards as a basis to create your own). Of course, if you want a different format, you can use a polaroid frame, a slide, or a playing card (like Susan was doing in 2024). Choose the format you want, and keep it throughout the year. But just make sure to emphasize the first letter! Every 2 weeks, you will be asked to take a picture of something, at home (or around your home) that starts with a specific letter of the alphabet. The goal is just to be on the lookout for ANYTHING that can be photographed. You can stage the object however you want, or just take a picture of it in its natural environment. For example, you can showcase your favorite Mug, or your Pillow, or your Fireplace. You can practice your photography skills if you want, but you can just capture things as they are. Let's just encourage each other. This is a no-pressure thread. And if you skip a letter or two, you can always come back. You know your alphabet, so you can easily catch up whenever you need to. Let's continue with the letter M. It could be your favorite Mug, a Magnetic memo board, the Microwave in the kitchen, or that cozy Mattress you never want to leave! What will you showcase?
-
@Linda RexfordAlthough we won't touch on photo editing with masks, once you get comfortable with them, you will see many other applications. I don't see any problem with the shape of the mask in the last layout. It follows the subject. Maybe it is just different than what you had in mind? @Jenny MacKayThat is such a cutie! So photogenic! Great start. Did you add shadows on the small images of the second layout? Sometimes, they seem to "disappear" when you resize the layout. @Susan Ewartif you want to simulate graffiti on the brick, I think that the paint on the title should not have shadows! I love that quote! @Ann SeeberOccasionally, I might comment only on one layout if someone posted more than one. But I don't know why this one was not commented on. And yes, I was referring to the layout "Iba N’diaye ". I use the "Love" reaction once I see/comment on a layout (so I can know where I am). I guess I got distracted. That kaleidoscope pattern is so delicate that I had to look twice to see it. I bet it shows more at full size. @SharlaThat grey background with noise is matching so well with your photo. It really showcases that robin. @Sue ThomasThe rotation setting should be the same in Affinity but you also have to adjust how much of randomness. It is a bit like in PSP where you can choose Random, but you still have to set the % of jitter. What is it that makes you not overly happy with the oriole layout? The only thing I can think of is that you usually add a few more choice elements to your layouts. Could that be it? @AprilDawnThose are great pages! I am glad you didn't give up when you struggled with the downloads. Your work is fabulous and those photos are great. Kuddos to your cousin! That kittie made me smile. @CristinaThere are so many default brushes in Affinity that you have many choices to start. Great story about the chick's names. Those spray brushes can give very interesting edges, even if it is not on masks! @fiona cookYou can always clone some of the space around your subject to make a "larger" image. @Jannette NieuwboerIf you use PSP, the mask might have been slightly grey. That makes it a bit transparent. If it is using Affinity, it could be the opacity level of the mask layer that is less than 100%. What command is not present in your case? With which program? @Robert GarrettIs Thurston a Siamese? We had a Siamese when my daughter was a baby and that cat was very aggressive toward her. We had to rehome him. 😞 You are doing very well with those masks! @Gerry LandrethThose spectres give a real ghostie feel to that mask. Very relevant to the story! @Art KuiperI have seen that kind of picture with a caption "Why women live longer than men". It makes me smile. I bet those guys are still able to get the job done! And yes, once you get the hang of masks, the possibilities are endless. @Donna SilliaOnce you will know all the settings for the brush tool, you will find that both PSP and Affinity are pretty similar. You'll become an expert in both over time. @Connie CollierYour choice of not feathering the edges of the mask was the right one. As much as we might like soft edges, when you have a specific design in mind and you want to see it, your approach was the perfect one. I love that effect. @gwen jewittI would suggest that you soften the shadow on the masked image. Since the splatters are small, a fainter shadow might be matching more. @JacquesIf you merge the photo and the frame/mat, you could add some shadows to give them some volume. I love the colorful plaid. Did you use a segment of one photo? Now we have the proof that the baby is sleeping for you to work on the page! 🙂 @Corrie KinkelYes, you can definitely use different brushes on the same mask. You can use different textures, and different shapes. If you look closely at masks that you can find in some kits, some of them likely use half a dozen different brushes! @ClarineWith so many people with the same name, that should become the title of that layout! @Lynda DiGregorIs it just an illusion or did you squish the large photo horizontally? The people seem a bit tall/thin, unlike the lady with the yellow hat. @Julie MagerkaThat mask is perfect for the photo. It gives that "water" feel all around it. @Jean NaumannYes, Affinity makes using templates/masks much easier. On your first page, did you hide the shadow on the bottom right photo? On the second, if you were using Affinity, was it slightly translucent? If anything, you could brush some white where the people are so we don't see the pattern through. As someone mentioned in this thread, you are giving me a lot of work going through all those wonderful pages. They are all so unique and inspiring. Keep them coming!
-
@Connie CollierSimple is beautiful, and it helps showcase your photos and your skill. @Jeni SimpsonBeautiful layouts. Yourfirst kaleidoscope pattern, I had to look at it twice to realize it was done with that technique. It looks so delicate! @kasanyDoes the rose have a black background or is that the shape of the mask? If it is the actual background, I think it would work better if the paper is also dark, otherwise, the contrast does not give a smooth transition. Your latest project is stunning with the black background! @Sharla I think that this pattern looks good. Right now, you are "very close" to your design so it might become "boring" to you, but for us, viewing it in a project, we just see the overall effect and it looks great. @fiona cookThat is a great end result. And you are totally allowed to play with all those effects. That is how you can discover something new or something you didn't think you would like. @CristinaUsing the pattern only on the edges is a great way to use it without overpowering. And with that light-colored photo, it was a smart choice. @Jen Brown Great to see you! Your first layout is wonderful. Looking forward to your other projects. @Robert GarrettThe effect is much more striking with the resized mask/photo. @Donna SilliaYour use of the nested frames in your PSP project is puzzling me. It looks like some sections have a bevel but not all. It LOOKS like what is overlapping the mask has no bevel but the rest does. I think you COULD consider erasing some parts that overlap the mask and it would even show off your photo more. @Karen BorgmannThose Those boards are great! Did you make them from scratch or were they part of a kit? @Corrie KinkelYes, some things are harder or just not possible in Affinity. You will see that on Saturday!!! 😞 @Julie MagerkaYou might not think much of those kaleidoscope patterns, but I definitely think that they have great potential. Once you don't have them right "in your face", you might appreciate them more. @Gerry LandrethYour pages are wonderful. I think that Affinity is just like PSP: it can get finicky with closing and it is inconsistent. It is annoying, and usually, there is no specific solution unless it can be reproducible on demand. @gwen jewittthe bird layout made me smile! That is a great way to combine different layers in a single "story". @Hank SobahAre we invited to those festivals? They look great. @Ann SeeberIt is interesting how that shadow was essential for the text, and it looks good, making the text legible. @Clarineare you planning on printing an album about your grandfather? With all those layouts (and more that you can add), it would be great!
-
What a feast for the eyes! @Carolyn Rye Great layout to feature all those connections for Daniel! You might want to add some shadows on the seashells to give them volume. @Susan EwartDid you happen to forget to add some drop shadows on the small photos? With the embossed effect of the background paper, I would be expecting some thickness for those images. Or is it disappearing with the resizing? @Connie CollierGreat page. We can really see the stormy skies. And the plaid is not overpowering either. @AprilDawnYes, creating a plaid from a photo is the perfect way to have matching colors. @Ann SeeberIt is so great to see Magic grow. We have been following her since she was a baby! @CristinaI think I have seen the picture of Jackie in the snow in the news. That looks familiar! @Jeni SimpsonI love that Wendy Medium font. I will have to look for it! That plaid is great and allows to showcase the photos. @Julie MagerkaUsing a dark color is very suitable for this dog. Afterall, he is black and white! Maybe you could consider increasing the intensity of the white in the mask as it looks like it is a light grey (since we see the plaid through the photo). @fiona cookBe careful: the kaleidoscope can be addictive! I love the randomization available in PSP for that. You never know what you will get! @Robert Garrett On your page, we don't really see the "mask" effect. I suspect that the mask was much wider than the photo, so the outside part of the mask didn't have any photo to show. What would you get if you were to size down the mask so we wouldn't see the hard edges of the photo? @Sue ThomasI would not have known that it was a robin if you hadn't labelled it! @Karen BorgmannThat blue paper is perfect for the underwater theme! @Jannette NieuwboerBeautiful flowers! A great colorful montage to showcase the photo! @Corrie KinkelThat is a great background paper. Very subtle but still visible. @gwen jewittSimplicity is so effective! Great composition. @Art KuiperYou chose really great colors to create that plaid. It is a perfect match! @Linda RexfordIt is a great idea to use the same mask more than once. If you want to give them custom looks, you can always flip/mirror them, or add a few white brush strokes along the edges. You will see that in an upcoming lesson. @Donna SilliaEven with similar colors, you managed to get a great plaid! @ClarineIf the mask is much larger than the photo, it loses its "look" so to speak. It is hard when your photo does not have much extra space around the subject, but what would you get if you reduced the size of the mask to fit "inside" of the photo? @Gerry LandrethIf I remember correctly, to get the text to display one letter under each other, you would have to use the Framed Text, inside of a thin rectangular shape. That way, with larger text, only one letter will fit per line. Isn't this thread a fantastic place to share and be inspired? Keep them coming!
-
Although it looks complicated (and some are), many dances are around 30-40 counts, and then, it is just a repeat. What looks complicated is that it is often starting on a different wall. And if you were looking for me, I am way in the back, on the first line on the left. I just happened to be behind a taller lady!
-
Surprisingly, a lot of video tutorials, online, show young Korean women dancing, and they don't look "cowboy" at all!
-
I guess it is like PSP: once you have done it a few times, it becomes easier and easier. And each step has a name so you can recite them in your head as you go along. At least, that is how I do it!
-
Wow, this was a productive day for you all! @Linda Rexford You must be very fast to capture those hummingbirds. I find that the hummingbirds here come and go so quickly, I would not even have time to lift my camera! If you find any pattern too overpowering, you can always put a solid color layer underneath and reduce the opacity of the pattern. That gives you control on how much of it shows. @Gerry LandrethThat little girl is so photogenic! This is a perfect way to showcase her. I think you are making a whole family album now! @AprilDawnYou had a great idea to color the photo frames to match the flowers. @Cristina Are those birds attracted to the camera? It is amazing how they stare directly into the camera! Back to the plaid "cheat" from Corrie, the reason you need only 1 pixel is that if you have 2 pixels in height and you stretch it, the top half will be one color and the bottom will be another color. That might lead to a mismatch if you want a seamless edge. @kasanyYour cat is modeling? That is such a cute idea. That frame around the Autumn Park layout is quite effective. @Sue ThomasIf you find that plaids are overpowering, you can always choose some sections of your image with less contrast to make a more subtle pattern in the end. @Jannette NieuwboerYou will find out that templates often use layers as masks so you will likely use them in a similar way. @fiona cookThe technique of floating/defloating to create a mask is something I learned after having used PSP for many years. It was actually someone more knowledgeable than me, in the beta-testing group who told me how to do that, when I was suggesting a way to "turn a raster layer into a mask" (similar to how you can convert a vector into a raster). That was a real discovery and now something I teach too! @Robert GarrettIt is good to read that you tweaked the mask layer to match what you wanted to get. Sometimes (especially if a photo is not that great), we might want to mask to give a faded look. Other times, we want to showcase the photo in all its glory! Great work. @Corrie KinkelYes, some settings might be missing if you use a smaller monitor, but sometimes, they just play hide and seek for no reason. I often answer this question on the FB group too. As for the plaid, the way you cheated is perfect. It shows that you understand the steps and you understand how the program works enough to get to the same point with a workaround. @Karen BorgmannYes, the process becomes easier over time. But if you are REALLY struggling, there is a script in the store that can do it automatically for you. I still prefer to teach how to do it manually instead of promoting an automation. It gives you a better understanding of the process and it will be useful in future lessons. @Donna SilliaYou are ahead of the workshop as we will use "outside" masks in lesson 3, but it is ok. It means you are already comfortable with masks. @ClarineI think you squished your grandpa again. Be careful when you resize an image and ALWAYS use a corner handle. Even then, make sure it resized proportionally as sometimes, it might still distort (I am not sure why). @Hank SobahDid you take those pictures? They are fantastic. @SharlaUsually, making just a stretched line instead of a plaid might not work, but in your layout, it works fantastically! @gwen jewittYour plaid works well with the photo and is not overpowering, even if it is dark. It helps show off the pictures. @Carolyn RyeBeautiful layout. If I could offer a little suggestion, I would brush a bit of white on the mask to show the baby's face better. @Art KuiperI didn't know you spoke French!!! I am glad to hear that you now have more uses for all those templates. And templates can be such a time-saver! Time for bed for me, but I am sure others will keep working and tomorrow, we will have even more masterpieces!
-
Here is the link to our group dancing the first dance (good luck if you try to find me!): And here is the second one (that one was a workout!!). Fewer dancers were comfortable with it so some stepped out: And if you want to see more groups dancing the same dances: https://www.facebook.com/linedanceflashmob Are you aware of any participating groups in your area? Share their information if you have it.
-
Wierd! Microsoft is not very friendly!!
-
Go to the top of the forum, where there is a Follow button. Then, choose the option you want, including "Do not send me any notifications" if you prefer. You do that on top of the thread you want to follow/unfollow so if the Masks Workshop is overwhelming you, you can unfollow it while following the rest if you prefer.
-
Welcome, everyone, to this workshop. Some of you are new to it, others are returning participants. Either way, we all look forward to your projects. We also welcome any questions you have to address any issues you might encounter. Everyone is here to help you succeed! @Jannette NieuwboerDid you create your papers for the card or were you using a kit? @fiona cookLet us know how easier/faster it is, once you do this workshop a second time. @Sue ThomasYes, Affinity is soooo much simpler to use for masks and templates! I totally agree with you on that. @JacquesGreat layout. Since those projects are so fast to complete, maybe you'll find a few minutes, every day to give it a try. But if you don't, we understand, and you will have next week to complete them. @SharlaGreat choice for the paper. The "plain" color help emphasize the colors of the bird!\ @Corrie KinkelUsing the same font for a themed series is a great way to tie everything together. @ClarineGreat hommage to your grandpa. Did you resize his photo to fit in the rectangle? It "looks" like he is a little squished. If the photo does not fit well in the rectangle, it is better to adjust the rectangle than adjusting the photo. @Robert GarrettWelcome to the Campus and to this workshop. Are you going to follow the workshop with PSP or Affinity? With those two cats, you are in good company here with many participants who are pet parents. You will see lots of cats and dogs! Your first project is looking great! @gwen jewittIt is such a great idea to reframe each of the three children! And yes, using masks in Affinity is simple but you will see tutorials for other techniques too, along the way. @Ann SeeberDid they climb that structure? If I ever did, I would want an elevator (or a slide) to come down afterward! @Sharon MurrayAre you planning an album? Those three pages would look fantastic together! For the layout with the parrot, you could tweak the mask by brushing some white where the head of the bird is. It is a little faded in the background. @Julie MagerkaMasks are fun and definitely allow so much more creative results than manipulating the photos directly. And really, any template can be used as if they had masks, which ends up being non-destructive. @Jeni SimpsonGreat layouts. I hope you won't get confused by doing the projects in both programs! I guess, by now, you are already comfortable enough with PSP to not mix things up. Keep those projects coming. If you take a little bit more time to complete your projects, don't worry. There is no real deadline so you can post them a bit later when you catch up. See you again tomorrow with more masterpieces.
-
You could share that in the Scripting section if you want to discuss the process and such. If you have a finished script you want to share, you can post it in the "Let's share" section, here: https://scrapbookcampus.com/invision/forums/forum/17-lets-share/
-
Great! So you can now watch any of the other tutorials in the Campus (element creation, workshop, class, etc.) in your language! Isn't it great how technology can help us now?
-
As you can see in the samples on the registration page, larger photos would be featured, one per page in most cases. And the pages will be 3600x3600, as usual.
-
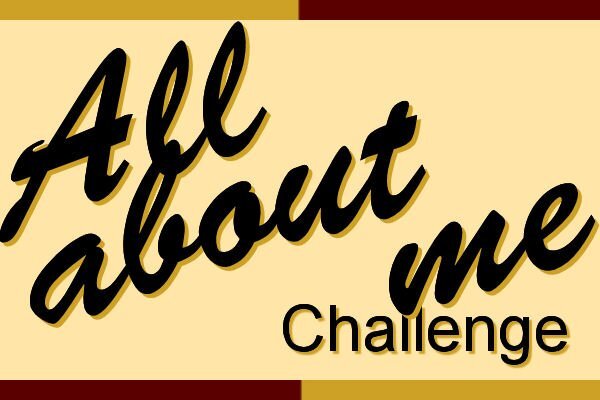
Let's continue this challenge for another year. We might be the ones taking pictures but we are not the feature of our layouts, so let's change that since we ARE important and have lots to say. Every month or so, the layout will be about YOU, and a prompt will be given. If you have taken the Story Week Challenge, you will find some similarities but it won't be the same. For the June layout, tell us about the the various hair styles you had. This is something that is often noticed in photos. Don't we remember all those different hairdos? Aren't we wondering how we could ever walk around with these hair? Remember that if you want to create pages for previous prompts, those threads will stay open. There is no right or wrong order to share about YOU.
-
It can always come in handy! I started a quilling project when I was in my teens, and I never finished it. When I moved out on my own, I brought the little box of half-completed quilling flower pots. It turned out that I was able to use those pots and plants when I did my daughter's miniature green room. It was just 45 years later! 😂
-
Karen, I will jump in to point to the Resource page: https://scrapbookcampus.com/resources/ You will find a link to the PSP Thumbnail Handler in the Utility section.
-
Oh, that is interesting!! Thanks for sharing. However, this is specifically a Windows 11 feature. But it is great to know!
-
I am not particularly attracted to take pictures of "bugs", but butterflies and moths are a different story. I have had the chance to encounter Luna Moths a few times, and now, this one. Do you have encounters with fascinating "bugs"?