
Once you create scrapbook pages or other digital projects, you might want to share them in galleries. Typically, there are some limitations so there is a way to save them for best results. Let's look at the process.
Work normally
The process of saving for galleries is something you will only consider once you have finished creating your project. If you are working on scrapbook pages, you are likely going to work on a canvas that is 3600x3600 pixels for a standard square format. If you scrap in a rectangular format, it will likely be 2550x3300 pixels for a typical 8.5x11 inch size. Once you are done your project, save it as a .pspimage format. This will ensure that you keep all the layers intact, in case you need to change something later.
Save for printing
If you plan on printing your page, you will need to save it in .jpg format. Remember that print shops will not be able to open and use your .pspimage pages, so you need a .jpg version.
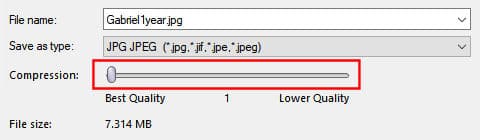
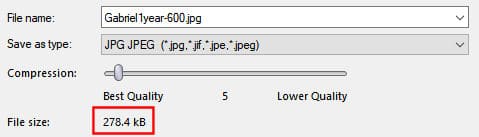
With version X8 and up, you can choose the compression level directly on the Save as... dialog window. If you choose a lower value for the compression (like 1), the quality is the best, but notice that the file will also be quite large.
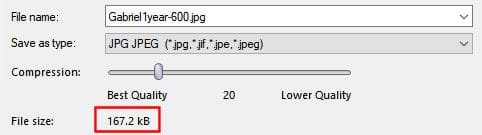
On the other hand, if you save with a slightly higher compression value (like 20), the size will be considerably less.
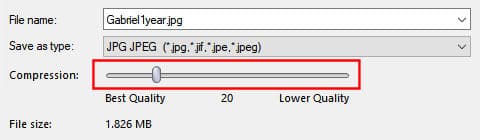
By default, the compression level will be set to 20, and unless you need to print your image on a very large canvas, the quality will still be very good for a print. For more information about Compression, check this article.
Saving for galleries
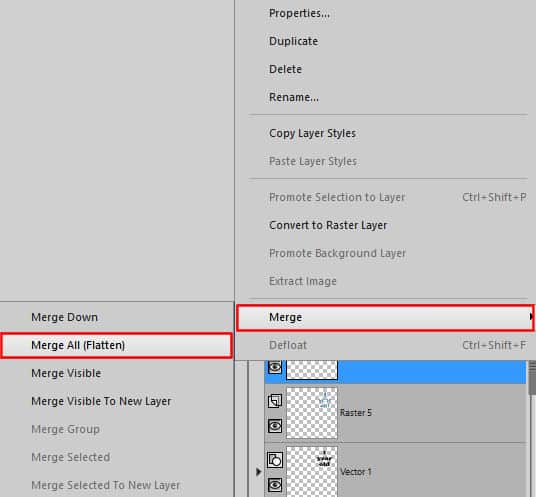
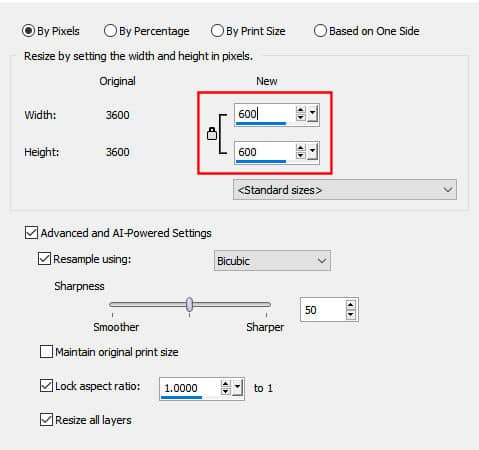
Whether you want to post your project in a gallery or in a forum, you cannot use a full-size format. Depending on the site where you will upload, there might be different requirements. In the Campus forum and gallery, the maximum recommended size is 600x600 pixels. This means that the first step will be to resize your project. You can resize your layered image, but if you do, beware of any text wrapped inside a shape. The simplest way will be to temporarily flatten your image, by right-clicking on any layer in the Layers palette, and select Merge all (Flatten).
Now that you have a single raster layer, you can resize your image to fit the requirement. Go to Image > Resize and select By Pixels since that is the requirement needed, and enter 600. If you are using a rectangular format, enter 600 on the longer side, and the other dimension will automatically adjust.
At this point, you are ready to save as a "new" jpg format. I say "new" because you want to make sure you won't overwrite the previous jpg format you saved for printing. For that reason, it is a good idea to add -600 to the filename. It will save as a new image and let you know which one is resized when you will want to upload it to the forum or the gallery.

Before you click the Save button, there is one last setting you have to check: the File size. Depending on the Compression setting you have, the file size might be bigger than the maximum allowed in a forum or a gallery. For example, in the Campus, the gallery will allow only images under 300kB.

If your File size is higher than that, adjust the Compression until the File size shows a value under 300. The exact value for compression that you need will vary from project to project.
Typically, if you keep the Compression at the default value of 20, you are almost certain that it will be sufficient for the gallery.
PSP X7 and earlier
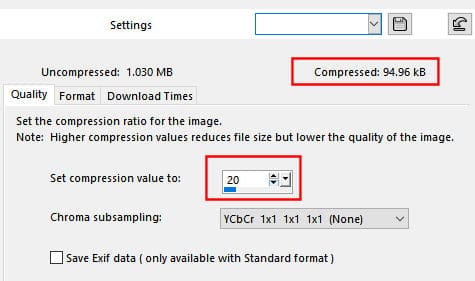
If you are using an older version of PaintShop Pro, you will notice that the Save as... dialog window does not have that compression setting. Don't worry. You can still achieve the same result, using File > Export > JPEG Optimizer. That command will bring up this window where you still have similar options:


2 thoughts on “Saving projects for online galleries”
Thank You Carole,
I love being a Diamond going to try to stay one 🙂
Thank you for these good advices!