

When you save files, in PaintShop Pro or other programs, it has a certain "size". If a file is too big, we often mention "zipping" the file to make it smaller and easier to store or send by email. In the case of a JPG image, there is another type of "compression" that can be set in PaintShop Pro to make your image file smaller if needed. Let's have a look at that.
Where is that?
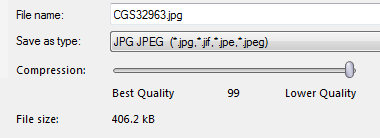
The compression is a way for the graphic program to remove some image information at the pixel level. Starting with version X8, the compression setting when saving a .jpg image appears at the bottom of the Save As ... dialogue window.
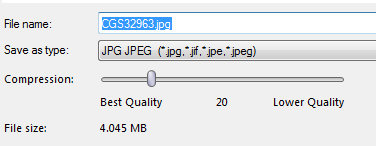
The scale ranges from 1 to 99. In the example above, it is set to 20.
What does it change?
Changing the compression value will have two direct effects: the file size will change and the quality of the image will also change. The lower the compression means that the quality will be better, but also, the file will be larger. On the other hand, a higher compression setting will give a lower quality of image but also a smaller file. Let's see this in actual numbers.
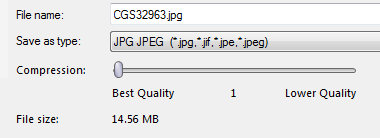
If I use the smallest compression level (set to 1), my image will have a file size of 14 MB. That is fairly large if you want to send this by email!
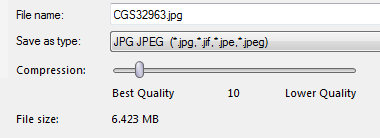
Changing the compression to 10 already reduces the file size to 6 MB, which is already less than half the size of the previous setting.
By increasing the compression to 20, the file is now just over 4 MB. Notice that the increase of the compression setting is not proportional to the file size; if you double the compression, it won't reduce the file size by half.

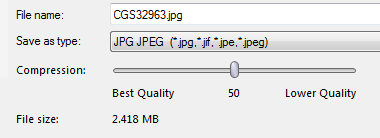
This example shows a compression of 50, giving a file size of 2 MB.
Finally, with the highest compression setting (of 99), the file size is now down to 406 kB, which is a lot smaller than the starting image.
So, why not always use the compression setting of 99? Because, as indicated on under the slider, that will generate a lower quality of image. Ideally, you want the highest quality for the use you will have of that image.
What difference is there in the quality?
The qualification of "best quality" or "lower quality" is somewhat subjective. What I find to be a good enough quality for my project might be insufficient for you. Or a good quality for you might be an overkill for me. Despite that subjectivity, there is some obvious change that will happen to your image if you change the compression value for saving it. Let's see.
With a compression setting of 1, it is minimal and the quality should be the best you can get (of course, with a file size of 14 MB). Here is a sample, zoomed in at 600%.

Of course, you will see the pixels since the zooming is to close, but you also see as smooth a transition from one color to the other, and you can see the edges of each grass blade. How about a compression of 10?

The difference is slight but if you look closely, you can see some variations that are slightly less smooth, but at first glance, it might look quite similar. How about a compression of 20?

Again, a slight change can be seen but if you don't have a trained eye, you might still not see too much of a difference. How about 50?

Now you can start seeing more obvious changes. The colors are not as smooth, and the edges either. Let's see what we get at a compression level of 99.
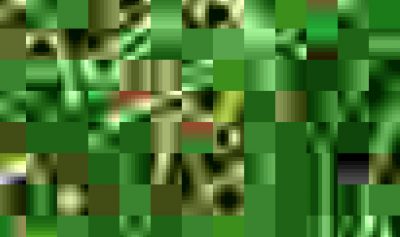
This is really obvious; you don't even recognize the starting image. This is DEFINITELY too high a compression level to be useful (unless you want to be artsy, and don't care about the original image).
I don't have that setting on my PSP
Since this option only appeared in version X8, you might be using an older version. But don't worry, the same function is still available, but just somewhere else. Instead of going to File > Save As ... you can go to File > Export > JPG Optimizer, and you will have the same slider to adjust the compression level. Furthermore, you will even have a preview of what the image will look like as you change the compression level, so you can decide if the increased compression will alter your image too much. And even if you have a newer version of PSP, you can still use the JPG Optimizer if you want. It is also available as a one click process if you dispay the Web toolbar (accessible under View > Toolbar > Web) and place it on your workspace.
So what is the best compression setting?
It depends on what you will be doing with your image. Imagine that you need to print your image on a very large canvas. Then, you will want as good a quality as you can. On the other hand, if you want to post the image on Facebook, it will be sized down and details will be reduced anyways. If you are posting your image in a gallery, there might be a limit to the file size, in which case, you need to adjust the compression to match that limit. If you are adding images to a blog post or a website, remember that larger files make a page load slower. It might not be too bad if you have only a handful of "large" images, but if all your images are several MB in size, over time, the site will load much slower. Also, remember that what will be seen on a monitor displays with lower quality than if you are to print out your image.
If you plan on using your image for multiple purposes, you can always save different versions with a different compression level. And to make sure that you know which one is which, add the compression level in the filename, like Image1-20.jpg if you chose a compression level of 20.
Remember that the compression level is not an actual measure of something but it is relative, which means that if you read a tutorial for another graphic program and they state that you have to save at a certain compression level, it does not transfer directly to your program. Choose your own favorite setting for what you need.


