

Creating picture tubes using a series of images can be tedious, especially if you have many of them to copy, paste, and arrange. PaintShop Pro added scripting capabilities with version 8. In that first version, the installation included a series of default scripts. Among those, you could find Auto-Tuber.
Do you have this script?
Although you could find the Auto-tuber in versions 8 and 9, that script was "missing" in versions X to 2020. It was reintroduced with PaintShop Pro 2021 and all subsequent versions. To see if you have that script, simply display the Scripts Toolbar, and see if it appears in the dropdown menu.

If you don't see that script in the drop-down list, it is possible that you just don't have it. If that is your situation, you can download it HERE. Make sure you save it in the Scripts-Trusted folder.
How to run the script
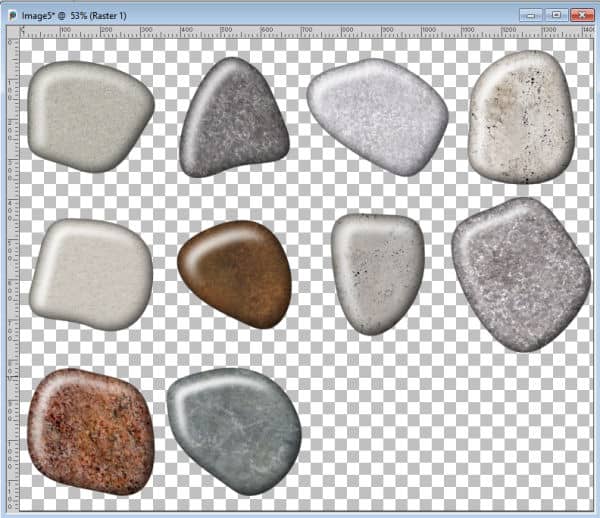
Since the script will use every image that you have, opened on your workspace, make sure you close any image that you don't want to include in the set. In our example, I will open images of rocks and pebbles.

Make sure that every image is a single layer in PNG format. Depending on the elements you want to use, make sure they are also of similar size before going further. For example, all the images above are around 300 pixels. The script will base the rest of the process on the dimensions of the largest image. Although, in itself, it doesn't cause any issue in creating the picture tube set, it might look odd if you have one or two images that are much different in size.
Run the script
Once you have opened all the images you want to use, simply run the script. Identify the Auto-Tuber script in the drop-down list and click the arrow to run it.

The script will count and calculate the dimensions of all the images to create a grid. It will suggest the arrangement of the grid. In my example, I had 10 images, yet it will offer a 4 by 3 arrangement.
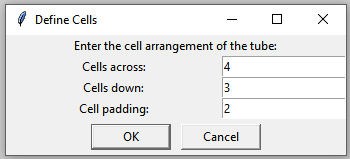
In addition, by default, the Cell padding will show as 2. At this point, let's leave things as suggested. The script will create a blank canvas, and then copy and paste each image within a grid format.
Once the elements are all pasted, you will get the dialog window.
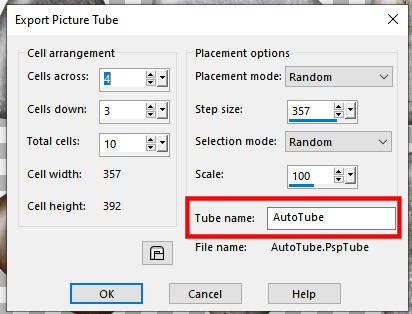
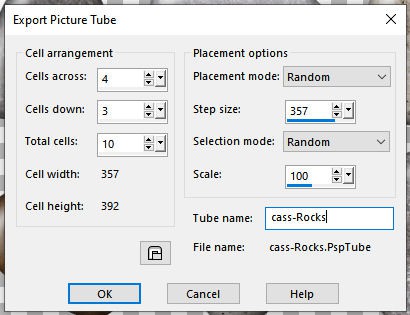
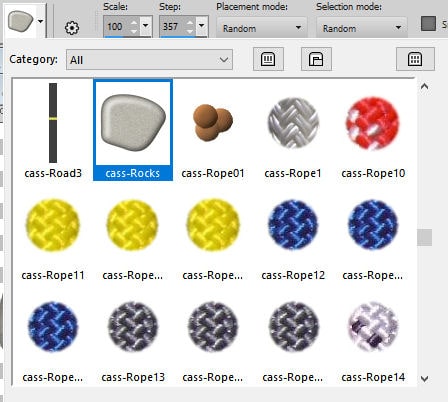
This is where you will get the option to change the default settings. The most important field to edit is the Tube name since it will always show as AutoTube. Use a name that will be meaningful to you so you can recognize it in the Picture Tubes list. Of course, one image will show as a thumbnail, but depending on what the images are, it might or might not be obvious.
Settings to adjust
In addition to the Tube name, you can change other settings, depending on the type of Picture tubes that you want to create.
The Placement mode can be set to Random or Continuous. If you select Continuous, the Step size will be exact if you drag the cursor to place a series of picture tubes. On the other hand, if you select Random, the Step size will vary from one placement to the next one.
The Step size is determined by the dimensions of the largest image in the set. Do you want the elements to overlap each other when you place them in a series? Then, reduce the value in that field accordingly.
The Selection mode has 4 options: Random, Incremental, Angular, Pressure, and Velocity. By default, it will be set to Random, but again, depending on the type of picture tubes, you might want to change this.
For more information on the different types of picture tubes, check the article Picture Tubes in PaintShop Pro.
Once you have finished running the script, the new picture tube should be available in the drop-down list:
And now, you will be able to use that newly created picture tube in your next project.
Now, will you use the Auto-tuber script to create your own Picture tubes?


2 thoughts on “Featured Resource – Auto-Tuber script”
I don’t think I’ve ever used this script, but it sure looks useful. Just one question … what is cell padding?
The Cell padding is the gap between the cells. If you need the individual elements to have some space around them (ex: to add a drop shadow before exporting), you would increase the Cell padding. I used that setting in the class Button up, if you want to check it out.