
Many templates you will find online are in .psd format. Most often they only show individual layers for papers, photos, and placeholders for decorative elements. If you are lucky to find templates in .pspimage format, they will include a mask group. How will you use that?
Where to find .pspimage templates?
In recent versions of PaintShop Pro, there is the New from template option to get some templates. Although they are mostly paid for, a handful are free. Those templates will include a mask group although the top layer will be already decorated.
If you follow the Creation Cassel store, several free samplers could also be in .pspimage format. They allow you to insert your photos very quickly.
What is in a .pspimage template?
The most basic form of those .pspimage templates will include only a mask group, sometimes a background and that is all. In the Layers palette, you can see something as minimal as this:
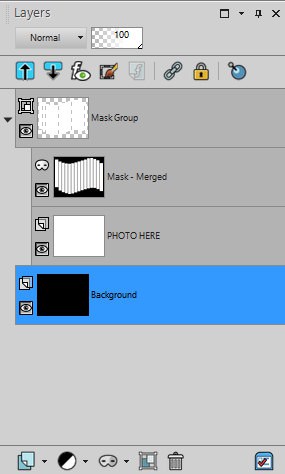
You will see one layer that typically has "Mask" in the name and one, right below it that can have "PHOTO HERE", "Photo", or maybe just "Raster". Whatever name is on the layer below the mask is only a placeholder. The two layers are the basis of the group. The top layer will serve as a window to show the layer below.
How to add your photo?
As its name indicates, the layer PHOTO HERE is where you will place your photo. Since you cannot directly replace that layer with your image, the simplest way is to activate the PHOTO HERE layer and add your photo as a new layer. It will automatically appear on top of that PHOTO HERE layer, which serves only as a placeholder.
Open your photo on your workspace and copy it (Ctrl-C). Then, activate the mask template image, and paste as a new layer (Ctrl-L).
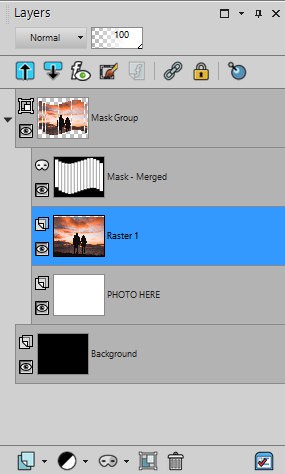
As you can see, the "Mask-Merged" layer is in black and white and it serves as a window. On the very top of the group, you can see how much of the photo is visible.
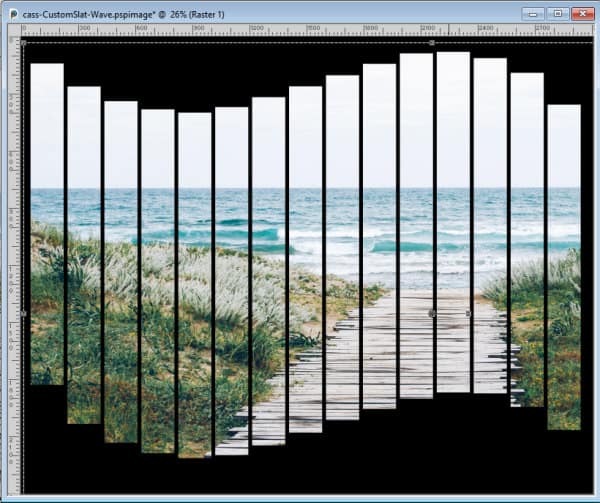
It is a good idea to roughly resize the photo before adding it to the mask group, especially if that mask takes up the major part of the image. But if it is not sized properly, you can still adjust that, as needed.
Adjusting the photo
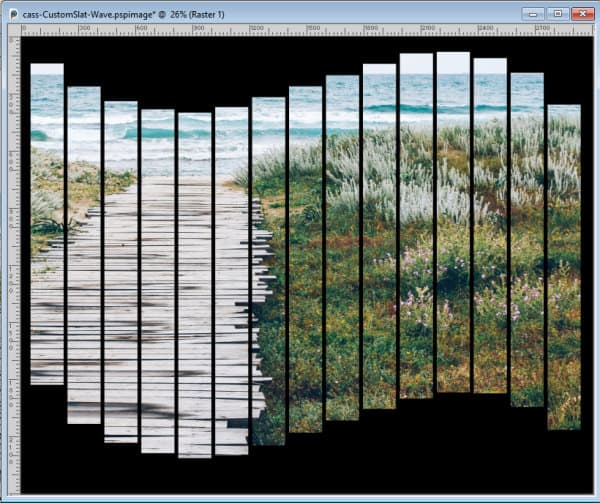
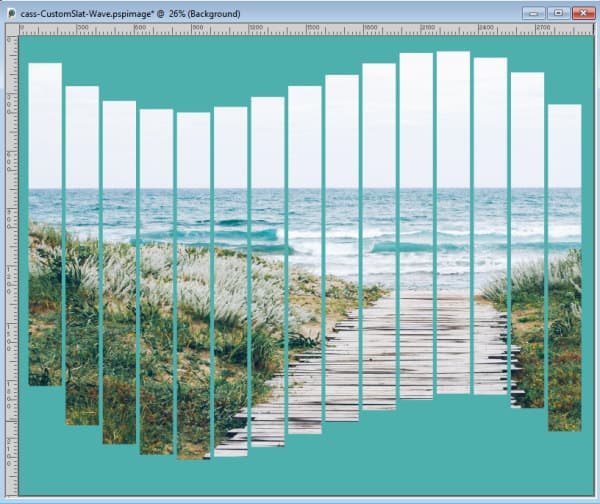
Since the photo is displayed through a mask and is not trimmed, you still have the option to tweak it. You can resize it, rotate it, or move it to focus on one part of the photo. Whatever you do, you need to use the Pick tool. Since the photo is part of a group, using the Move tool will move everything together. This would defeat the idea of adjusting it based on the mask. On the other hand, the Pick tool overrides that "grouping", which allows you to adjust one layer without modifying the mask.
This functionality allows you to display the same image in different ways, depending on your preference and the focus you want for that photo. Here are two ways to display the same photo.
What to do with the mask group now?
Once you have determined what you want to showcase through the mask, and are happy with the placement, you have a few options. If the overall size of the image suits you and you want to use it as-is, you can just add some color to the background layer to match your photo.
And if you want to add a title, a quote, or any other text, you can do so.
What if you only want the cutout?
These mask templates are great to "cut out" images in a fancy way, and sometimes, that is exactly what you are looking for. You don't really care for the overall size or format of the image, but you like the way the image seems cut. If that is all you are looking for, once the photo is part of the group, and placed the way you want, you can just right-click on the top layer of the group > Merge > Merge group.
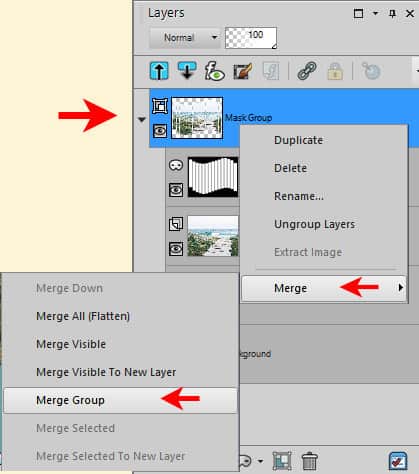
Then, you will end up with only the trimmed section of the photo, which can then be added to any other project.

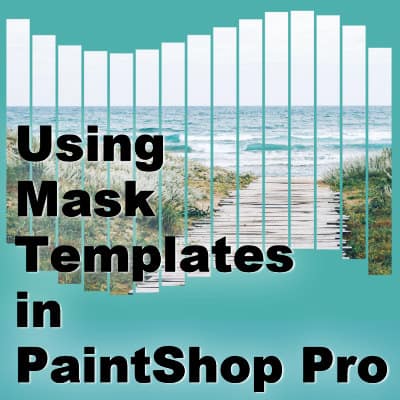
How will you use your mask templates?
If you want the Mask Template used in this article, you can get it HERE.


1 thought on “Using Mask Templates in PaintShop Pro”
Thank you!