
Whether it is a photo or a quote, there are situations where you want to add a border. Although there is an Add Border command in PaintShop Pro, there are other ways to add something around your image. Let's have a look at some of those.
Add Border command
As you know, you can add a border with the command of the same name, under Image > Add Borders.
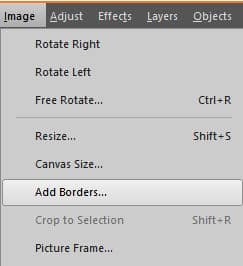
This command is quick and offers some options for you, like the color and the size of the borders.
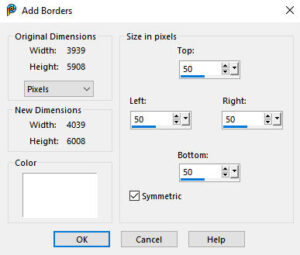
Although this is a quick method, it has a major inconvenience: it will merge everything on your project and apply the border to the outside. This means that you will lose all the layers if you are working on a project, and you can't keep a layered version for later use. If you want to keep your layers, you will have to use a different method.
Another limitation is the fact that you can only choose a solid color. You are not allowed to use a gradient or pattern for that border.
Resizing the canvas
If you are working on a photo and want to add a border, you can resize the canvas. This will work well if the project is the size of the photo. Maybe you have made a photo composition and you want the border on the outside of your canvas. In that case, you can go with Image > Canvas Resize.

This will allow you to select the new dimensions for your image. If the bottom layer is still a background, it will automatically fill with the background color in the Materials palette.
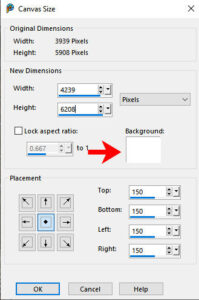
On the other hand, if you have no Background layer on your project, it will leave the space empty.
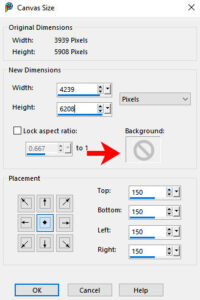
It will be up to you to add a new raster layer and fill it with whatever color, gradient, or pattern you want to use for the frame.
Simple selection
If you have a photo or an element already on a project, and it is not the full size, you will need another approach as the previous two will only apply the border to the whole image. Let's illustrate this with a photo on a background.

I can use the Selection tool, set to draw a rectangle, and simply make a selection around my photo, with as much or as little margin as I want. This allows me to then add a new raster layer and fill that area with the color of my choice.
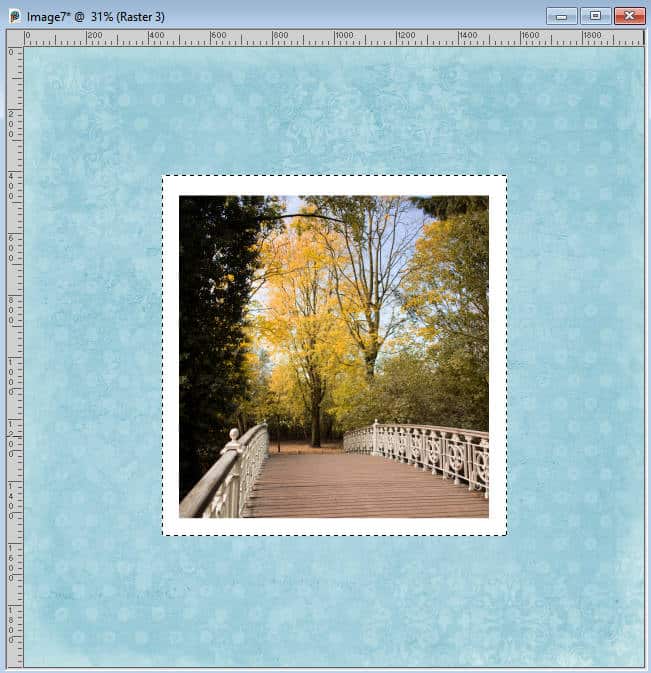
This is a simple method but it requires you to be precise in the selection (although you can always move the bottom layer later).
Expand selection
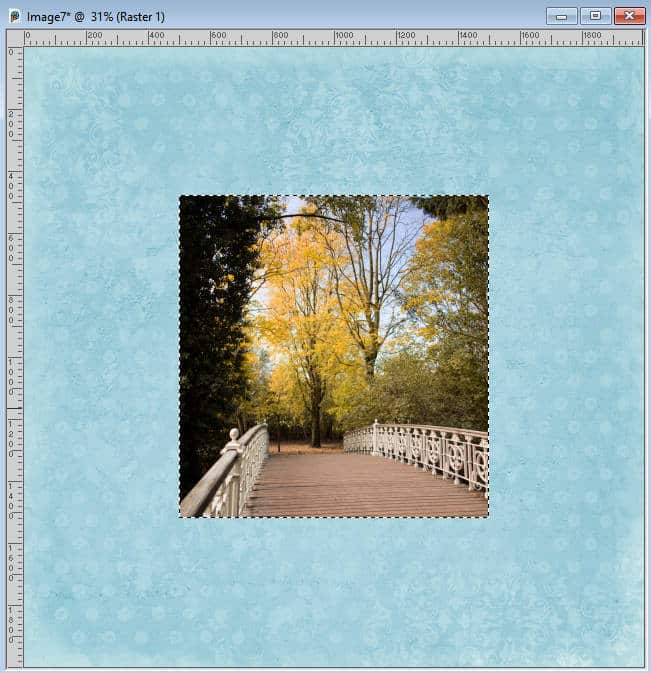
If you want a more precise width for the border, you can use a different approach. The first step would be to select the exact area of the image, using the Magic Wand, set to a match mode of Opacity.
![]()
Then, you can click on the image itself and it will be all selected.
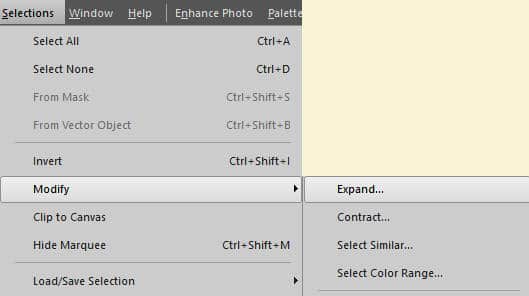
At this point, you will use the command Selections > Modify > Expand and choose how wide you want the border.
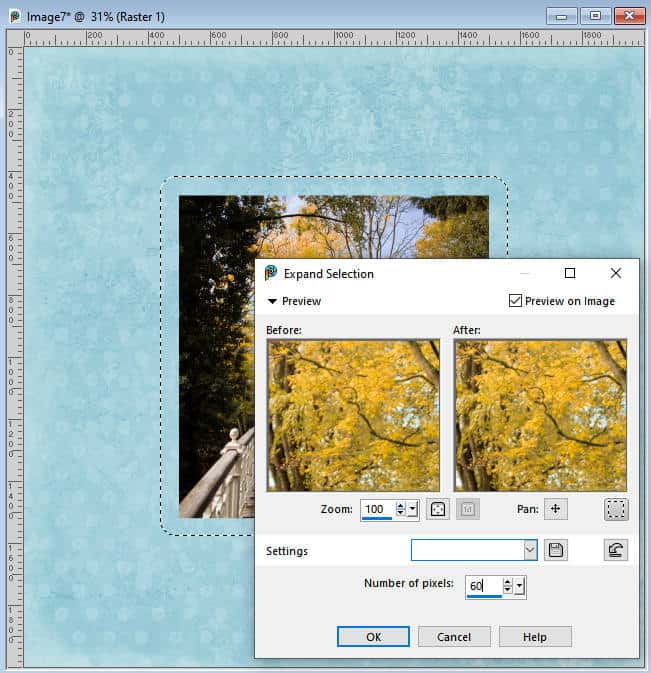
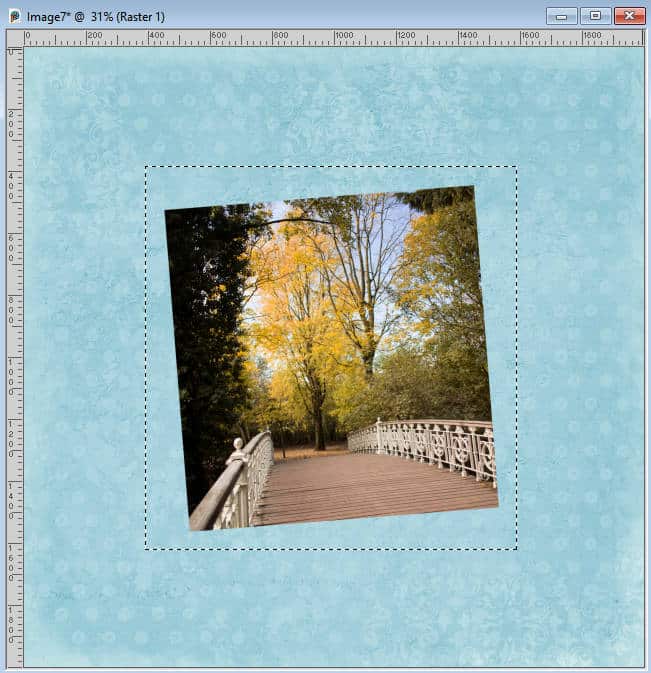
And this is what you can get as a result.

And then, on a separate layer, you can fill it with the color of your choice.

Notice that the corners are rounded. If that is something you like, that is perfect. However, if you don't want rounded corners, you can still "recover" them. Undo the fill command, and activate the Selection tool and in the Create Selection from: you get three icons. The first one will create a rectangular selection from the existing selection.
![]()
Clicking on the first one will convert your existing selection (no matter its shape) into a perfectly rectangular selection that will encompass what was the previous selection.

And you can fill it with the color of your choice, on a separate layer.

Although this method seems like the ideal option, it will only work on images that are perfectly vertical and horizontal. If your image has a different shape or is rotated, this will not yield the result you want. Here is the selection you will get if you use the same steps on a rotated image:
Not exactly what you want, right?
Edit Selection
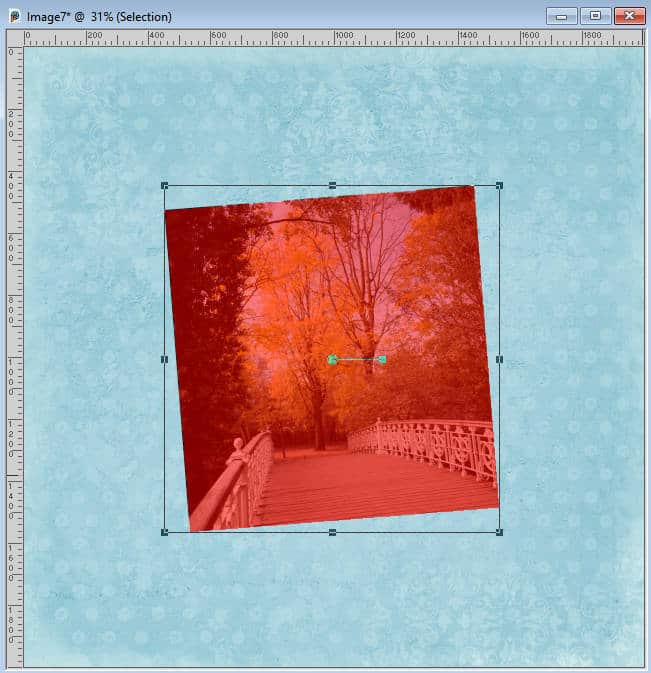
If your photo is not horizontal or vertical, you can still add a border using a different approach. First, you need to select the area of the photo, using the Magic Wand. Then, find the Edit Selection icon on the top of the Layers palette.
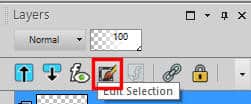
Click on it and the selected area will turn pink.
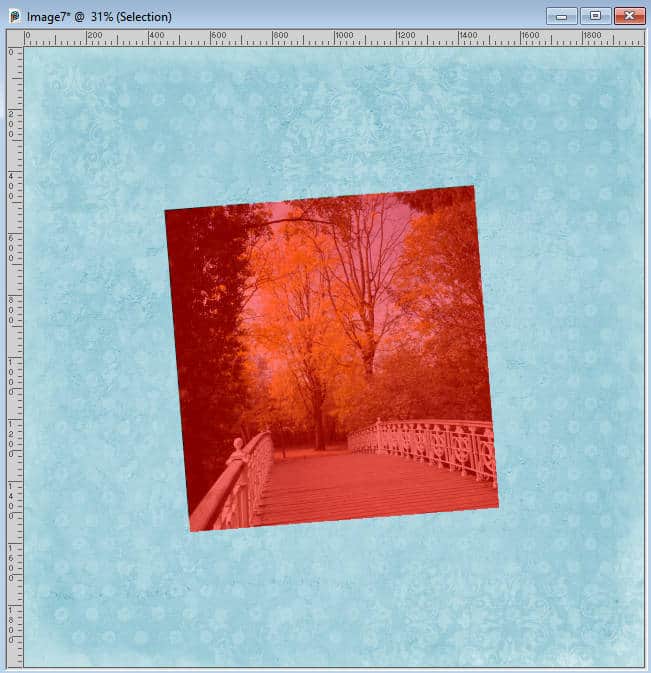
You can now manipulate this layer as you would with any other layer, so activate the Pick tool.
With the Mode set to Scale, move the corner handles until it reaches the size you want.
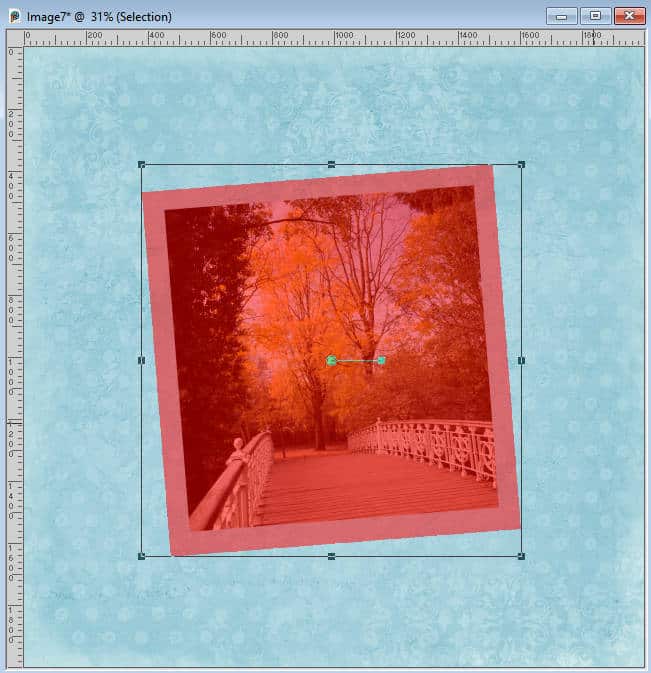
Once you are happy with the dimensions of the pink area, click on the Edit Selection icon to toggle it. Now, you have a selection that is perfectly sized and with square corners.
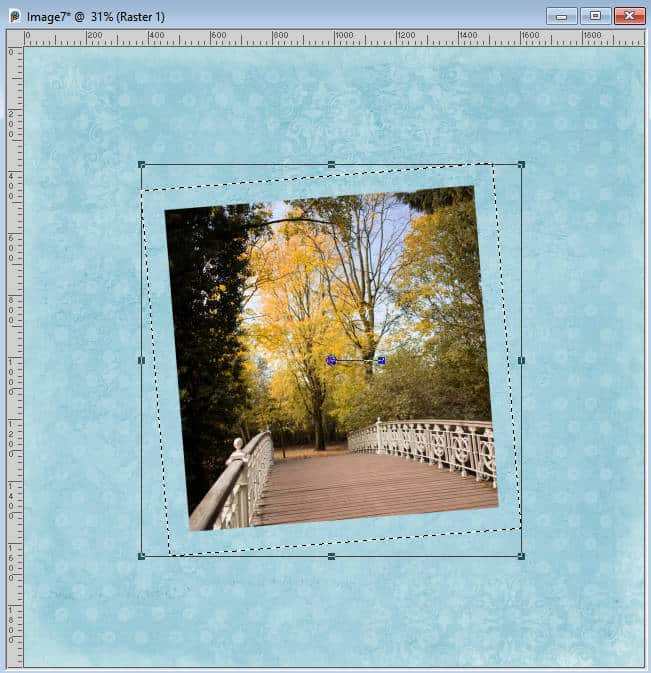
Then, you can add a new layer and fill it with whatever you want, as far as color, gradient, or pattern.
Select Selection Borders
There is still another way for you to add a border to an image, no matter its shape or orientation. Once you have selected the area of your photo or element, go to Selections > Modify > Select Selection Borders...
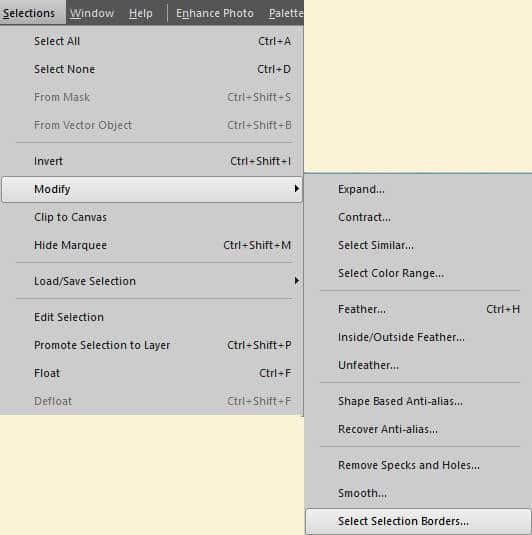
The dialog box will offer you some options. If you choose the Inside, it will overlap your photo, however, it will keep the square corners you had.
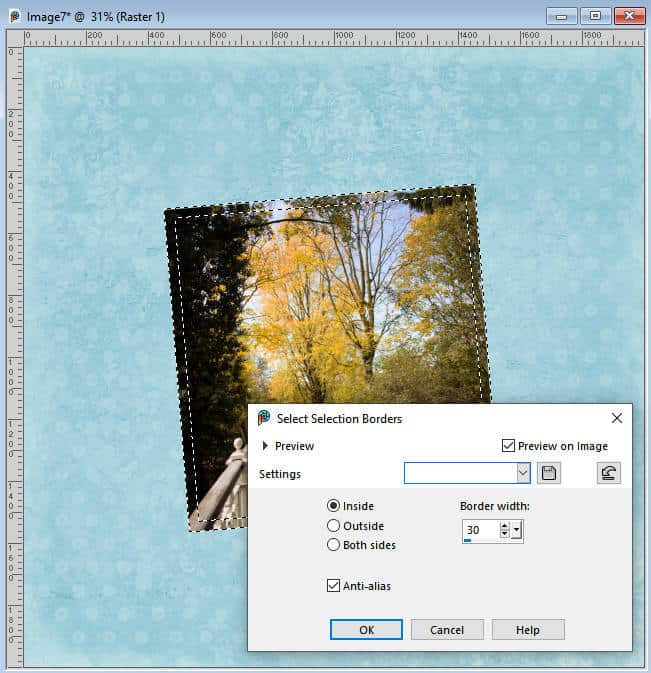
If you choose Outside or Both sides, it will behave like the Expand selection and you will have a rounded corner on the outside.

When you have selected the selection you prefer, just add a new raster layer and fill that selection with the color of your choice.
There are many options to add a border to your photo. Each one has its pros and cons, and some projects will require one method over the others.
If you want more than a simple border, you can check out our Bordermania Master Class.


4 thoughts on “6 ways to add borders with PaintShop Pro”
Thank you so much for this!
This is fabulous, especially what to do with a tilted photo. So simple to do with edit selection, but I would have never thought of that.
Thanks Marie-Claire for pointing me to this blog post. Something I really needed.
I didn’t know about how to create a border around a rotated photo with the Edit Selection.
And I forgot how to straighten rounded corners.
So my memory has been refreshed and I have also learned something new.
Thank you for this article.