When working on graphic projects, it is common that you would need some clipart or other images with a transparent background. That is when you need PNG format. How do you create or save files in that format? Let's have a look at the process.
Downloading from the net
Many PNG images are available online but you have to be careful how you download them because the method you use will affect the result you get.
Let's assume you are visiting a site that specializes in distributing PNG files. When browsing the site, you will likely see various images and see this bicycle you want to use in your next project.

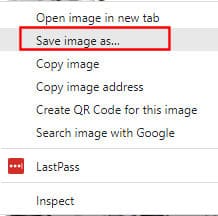
You might be tempted to right-click and Save image as... selecting the .png format.

Sometimes, it will work and you will end up with an image with a transparent background. However, other times, you might want to go faster and select Copy and simply paste it as a new image on your workspace or as a new layer on your project. This is what you might get:

So if you want to download a PNG image, make sure you find the correct download button.
Check this article for more details on downloading files from the net.
Saving your own PNG file
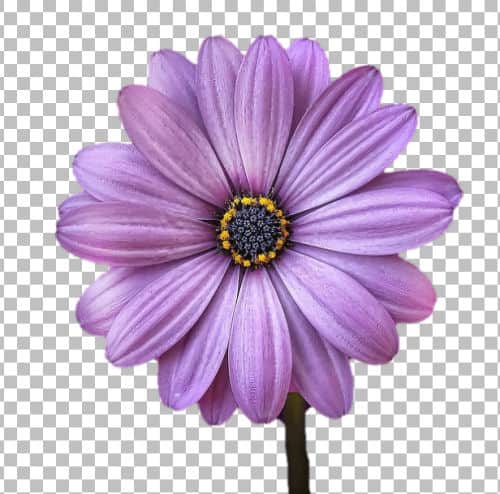
You might be creating your own image with a transparent background, to use later or to share with others. Let's look at this image (from Pixabay) where we would like to isolate the flower.

Once the flower is extracted, the background is transparent.

At this point, you need to save as a .png file to retain the transparency. Beware that if you have more than one layer on your image, everything will be merged into a single layer, while retaining the transparent areas.
Saving for the web
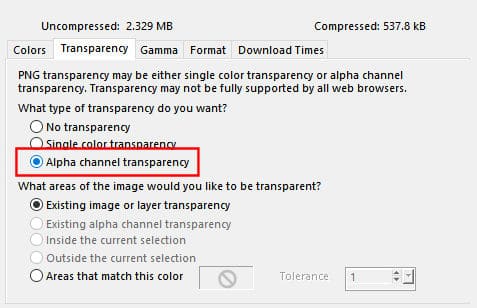
Although you might just need a png file to layer on your own project, if you want to create a png file for a website, you have more options to consider. If that is what you need, you will go to File > Export > PNG Optimizer. By default, if you don't change any of the settings, you will have a bad surprise as it will remove the transparency! So, the first time you use the PNG Optimizer, make sure that you check the Transparency tab, and choose Alpha channel transparency.

For subsequent saves, the settings will remain so you will be able to keep the transparency as you wish without any additional clicks.
Saving images without transparency
One particularity of .png saving is that it is lossless, unlike saving in .jpg format. For that reason, some PaintShop Pro users will choose to save their project in .png format where there is no transparency involved. Why do that? Some users will need the highest quality image and they might not be able to save in .pspimage for sharing; maybe the recipient does not use PaintShop Pro. Then, saving in .png format will be one option.
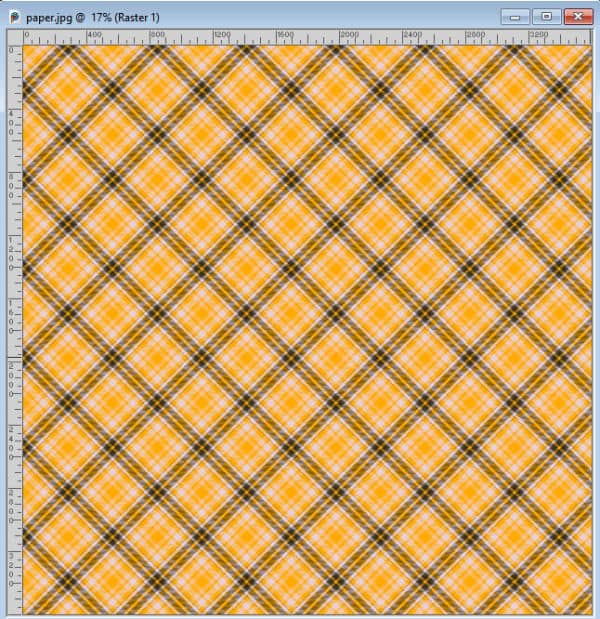
It is important to remember that .png files are much large in size than .jpg. For example, let's look at this 3600x3600 pixel paper.

The .jpg version is 5Mb (and could be less if compressed), while the .png version is over 11Mb. This might be a consideration if you need to create several similar images and host them. Then, those who will download them might also have issues depending on their internet speed.


4 thoughts on “Saving files in PNG format in PaintShop Pro”
Thank you for this post and also the January 3rd, saving file from the internet, they are helpful for what to watch out for. I am starting to use TIFF files more for when I want lossless compression for printing. I read that no matter how many times you open and close the TIFF or PNG files it doesnt lose any data like jpgs do.
Susan, If you only open and close a .jpg file, you do not lose any data. If you open it, edit, make changes and then resave it, THEN you lose data. But simply opening and closing a .jpg does not lose data–I just wanted to clarify that point.
Linda
If you are taking photos using a JPG format and save them to a memory card, there is a loss of quality that is caused by the processing of the image. Just a bit more info if you do photography. 😀
Very helpful explanation, thank you Cassel.