
PaintShop Pro offers many ways to customize your workspace to match your own workflow. Various palettes and toolbars are available and they can be selected and arranged in various ways. Let's see how you can customize your palettes so they don't move all the time.
Various palettes
There are a total of 12 different palettes in PaintShop Pro. You typically only need a few of them. Remember that each palette will take up space on your screen, leaving less space for you to work.
At the minimum, you will need the Tool option palette, the Layers palette, and the Materials palette. Some users like to have the Learning Center and the Organizer also open. Other palettes, like the Brush variance, the Script output, and the History palette will often be used at specific times, so they can be opened when needed and closed afterward.
If you want to open a palette that is not on your workspace, you can do so with View > Palette and select the one you want. If you are familiar enough, you can also use the keyboard shortcut for them.
Options for palettes
Once a palette is open, it can display in one of three formats: floating, docked, and auto-hide.
A floating palette will not be anchored to anything, and can even overlap other palettes or toolbars. It is convenient for a short period of time.
Docked palettes will be available all the time and as its name implies, is docked to an edge or to other palettes without any overlap.
Auto-hide will allow you to keep the palette at your fingertips, but when it is not used, it will hide on the edge where only a little tab will be visible for you to access it again next time.
How to dock a palette?
In very old versions of PaintShop Pro, the simple fact of double-clicking on the top bar of a palette would automatically get it docked where it was last docked. Otherwise, you would just drag the palette near the area you wanted it, and it would automatically dock into place.
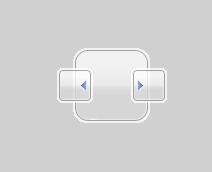
Starting with version X4, a new process was added where you would drag the palette and see some arrows appear in the workspace. It could look like this:
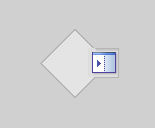
or starting with version X6 the arrows look like this:
You will see those arrows only appear once you are dragging a palette. At that point, drag the palette onto the arrow that indicates where you want it. At the same time, a "shadow" will appear to indicate where the palette will be docked.

Once you let go of the cursor, the palette will be docked.

If you want to dock the palette further, like below the Materials palette, drag the palette over the current palette in position. At that point, you will see some different arrows appear.
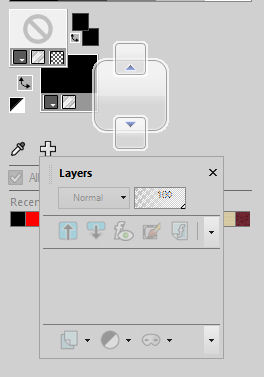
This will indicate if the palette will be docked on the top or on the bottom. Just like in the previous example, drag the palette until the cursor is on top of the arrow that you want to use for the location. Let go and it will be docked there.

Can I put the palette anywhere?
There seems to be some limitations for where you can dock various palettes. In fact, you will likely just see arrows to place the palettes to the left or the right of your workspace.
What about auto-hide?
Once your palette is docked, notice the icons on the top right of it.
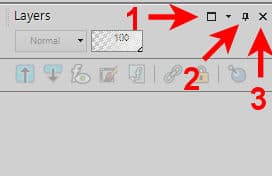
The first icon (1) will maximize the palette to the full height if it is not already.
The pushpin icon (2) will set the palette to auto-hide.
The last icon (3) is the familiar "close" icon to hide the palette from your workspace.
The little arrow will pull down a list of options.

If you choose to auto-hide your palette, it will appear as a small tab on the edge of your workspace.
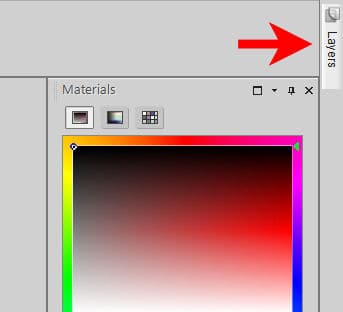
You can then just hover your cursor over that tab to make the palette reappear so you can use it.
Now, it is time to customize your workspace the way you want, and dock palettes where you want them.


