

Vectors have some advantages over rasters because you can resize them without distortion and modify them in many ways. If you are not familiar with working with vectors, let's have a look at the basics.
Vector tools
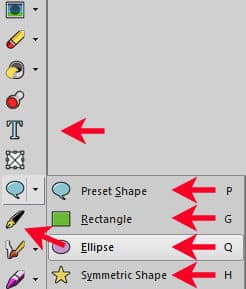
There are six different tools that will generate vectors: Rectangle, Ellipse, Symmetric Shape, Preset Shape, Text, and Pen.
Drawing shapes
The Rectangle, Ellipse, Symmetric Shape, and Preset Shape tools will work just like a selection tool and you will create those shapes by simply clicking one "corner" and dragging to the opposite corner.
Stroke and Fill
In the Materials palette, you will see that the Background and Foreground colors will be used differently when you activate a vector tool. The background color will be used as the Fill of the shape, and the foreground color will be used for the stroke, around the shape. You can have a stroke only, a fill only, or a fill and a stroke. They can be solid colors, gradients, or patterns.
Layers and Objects
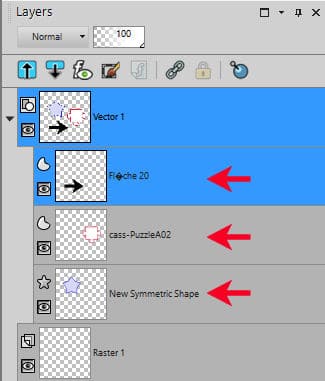
Once you click on your image with a vector tool active, you will notice that a Vector layer will be created in the Layers palette. By default, it will be called "Vector 1", or "Vector 2". On the left of that layer, you will see a tiny triangle, which is, in fact, an arrow.
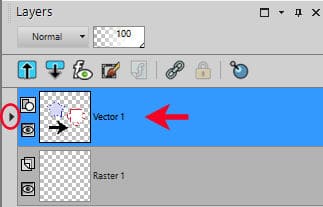
Clicking on that arrow will pull down a list of Objects. Each Vector layer can have one or more Objects. Each one is separate from the others, even if they are part of the same Layer.
Editing stroke and fill
When creating the shape or text, PaintShop Pro will use the colors in the Materials palette. In the Preset Shape toolbar, however, there is one option called "Retain style" that will keep the exact colors and settings from the specific shape you selected. In order to use the colors from the Materials palette, you need to uncheck that option.
![]()
If you want to change some settings for your shape, like the colors, the stroke width, and the style of the outline, double-click on the Object you want to edit.
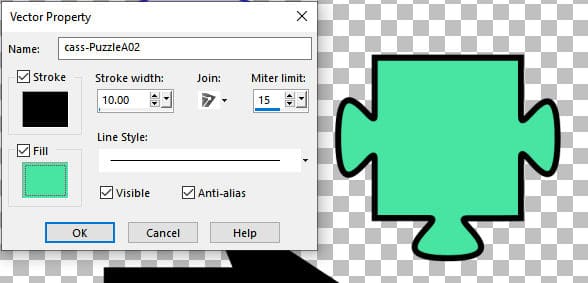
This will bring up the Vector Property dialog window where you can tweak those settings. The effect is instantaneous on your object so you can adjust those settings live.
Resizing and rotating an Object
As mentioned in the beginning, vectors can be resized without distortion. The same is true for any distortion like rotation or reshaping. Once you have activated the Object you want to edit, you should see the bounding box around the shape like this:
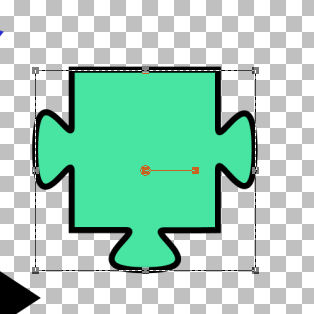
You can then manipulate this shape however you want with those nodes, including the center handle that will rotate the object.

Those are the basics of editing vector objects with PaintShop Pro. Of course, there is still a lot more that you can do, like playing with the line style, editing nodes, and more but this should give you enough information to look at vectors in a whole new light.
If you want more in-depth tutorials about using vectors, there are a few full-length classes available inside:


