
Among the most common tasks that PaintShop Pro owners use their program for are to fix and crop their photos. Although there are different ways one can crop photos, the most obvious one would be to use the Crop tool.
Why crop?
There are different reasons to crop photos. Maybe you want to remove an element that is distracting from the main subject. In other situations, you might want to crop extra spaces so you could really focus on the main element.
How to crop?
There are two main ways to crop an image. The Crop tool is the most logical tool to use, although, if you have a selection, there is also the Crop to selection command which you can find under the Image menu.
The Crop tool
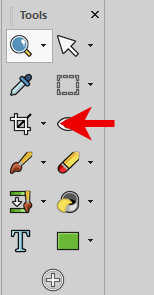
You will find the Crop tool in the Tools toolbar.

If you are using the Essential workspace, it will also appear in the default Tools.
Although cropping seems like a simple task, the Crop tool, once activated, displays many settings. Let's look at them.
The Crop rectangle
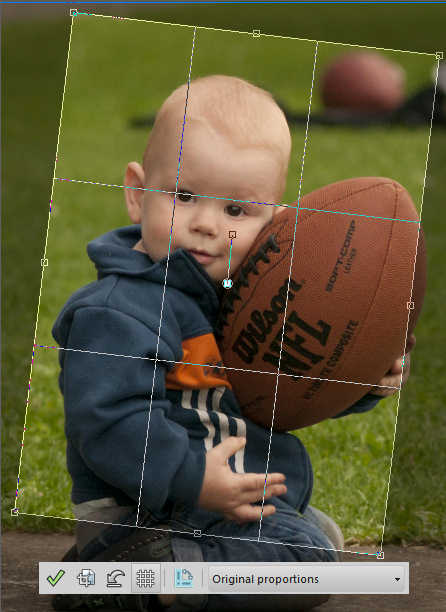
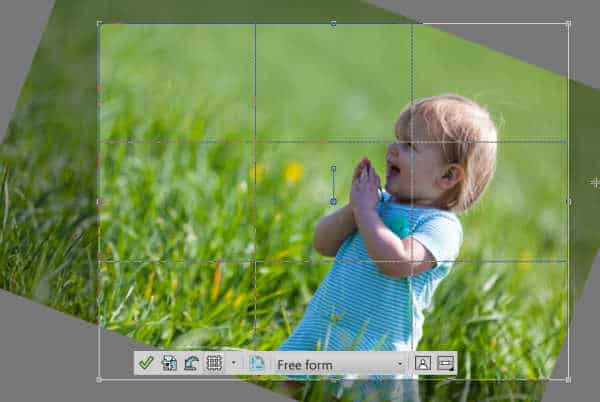
As soon as you click the Crop tool, you will see a rectangle appear along with a floating toolbar underneath (this floating toolbar appeared on version X1).

Since version X5, the Crop rectangle includes guides illustrating the rule of thirds. This should help you place your subject in one of those focus points if you choose to do so. You can move the rectangle where your subject is and you can resize it using one of the nodes around it.

By default, the rectangle will not be resized proportionally, but you can change that in the Tools options. You can check the Maintain aspect ratio checkbox.

We'll look more at the Tools options, a little later.
Another feature of the Crop rectangle is the ability to rotate it. You can rotate the selection either by hovering close to a corner node or by using the node attached to the center of the rectangle.
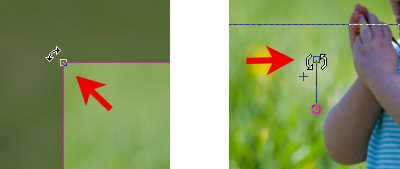
Up to version X9, the rotation would apply to the Crop rectangle itself.
Since version 2018, however, the rotation will affect the photo itself, while the Crop rectangle will stay in the same position.
The floating toolbar
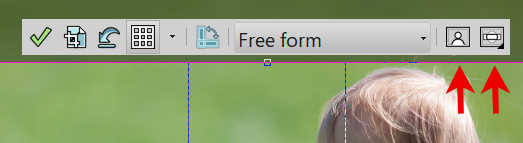
The Floating toolbar includes a few more options for you to adjust your photos. Starting with version X5, the guides for the Rules of thirds were added. You can toggle those guides on and off by clicking the icon.

With version 2018, new guides were added.

This gives you more options to place your subject based on common composition principles. We won't go into those, but you can definitely explore those guides.
The next button allows you to quickly switch back and forth between landscape to portrait orientation of the Crop rectangle.

By default, the format of the crop rectangle will be set to "Free form" (which allows you any dimensions and proportions), you can also use one of the presets available.

Finally, the Floating toolbar has additional icons and those options will vary depending on your version. In the PSP2021, you can find the One step photo fix and the Depth of field options.
In order to activate the Depth of field option, click and hold your cursor on the last icon for a few seconds, and you will see a grid appear. You can choose which area you want as a focus point (if the Floating toolbar is on top, it is harder to see the result on the image). And use the sliders to adjust the blur of the Depth of field and the size of the area in focus.

Of course, you would have more options if you used the Adjust > Depth of field, but it is a nice touch to have it handy with the Crop tool.
Saving your crop
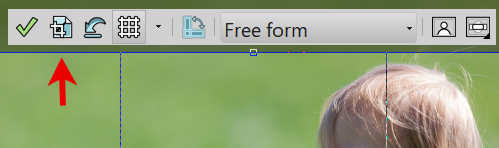
Once you are happy with the way your photo is "framed" with the Crop rectangle, you can apply by clicking on the green checkmark, to crop the photo itself, or you can click the second button, which will crop your photo as a new image, leaving the original intact.
You can find the same icons on the Tools options toolbar (although they are not colored).

The Tool options toolbar
In the Tool options toolbar, you will find more settings to play with. You can set some precise dimensions by entering either the number of pixels or the size in inches/centimeter based on the resolution of that image.

Then, you have more settings related to the rotation Angle and the Pivot point. This means that you can move the pivot somewhere else than the center of your Crop rectangle. I found out that once you have changed the settings for the pivot point, it will not move to that specific location until you touch it, on the Crop rectangle itself.

Finally, the last three icons will allow you to crop based on the content of the layers and not the Crop rectangle itself.
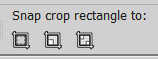
The first one will crop based on the current selection you have (if you have one). The second will crop based on what is opaque on the active layer. Finally, the third option (my favorite) will crop based on the opacity area of ALL the layers combined.
History of the Crop tool
In case you might be interested to see when each feature was added or changed, here is a list as far back as JASC PSP8.
PSP8 - No floating toolbar. You need to select the area as you would use the Selection tool.
PSPX1 - Floating toolbar appears with basic functions.
PSPX2 - You can Save as a new image to leave your original image intact.
PSPX4 - Grid for the Rule of Thirds is now available (you can toggle it as needed).
PSPX5 - You can change the rotation angle and the location of the Pivot point inside the Tool options.
PSP2018 - New guides are added to the Rule of Thirds. In this version, the rotation will affect the photo and not the Crop rectangle.
PSP2019 - You can now quickly edit the photo while cropping with a few extra icons
Now that you know more about the Crop tool, don't hesitate to use it to make your photos stand out. Eliminate extra elements. Remove wasted space.


2 thoughts on “The Crop Tool in PaintShop Pro”
I have been cropping away for years through several versions of PSP, as well as another program. I had no idea about some of the options available, I will have to go play with some of them now. Thanks as always.
This is a fabulous post. I tried the Crop tool, before taking any of your classes, and could not make it work ( I didnt know you had to “apply” the action) . I was happy to learn about Crop to Selection when I started with the Scrapbook Campus, but also wanted to learn how to use the crop tool. This is just what I needed. Thank you.