

When you work with raster layers and draw or extract elements or shapes, you might end up with some pixellated edges. You likely want something smoother for a better finish. Let's look at a few tips and tricks to help you achieve that.
The larger the better
Pixels are always square, even if you want to draw a circle or a triangle. Whenever you draw a shape that is not square or rectangular, there will be some degree of pixelation. However, the larger your project is, the less obvious those pixels will be. It is like drawing a circle with Lego blocks; the larger the circle, the less obvious the "corners" will show.
As an example, look at these two circles; one was selected and filled from a 50x50 pixels image, while the other was done on a 200x200 pixels image.
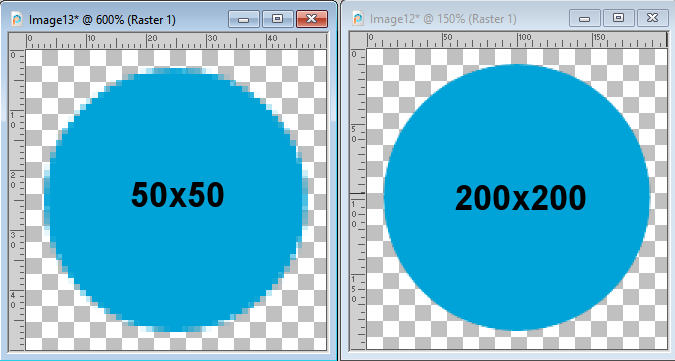
So if you want the best edges on your work, start with something larger, even if you need to size down later.
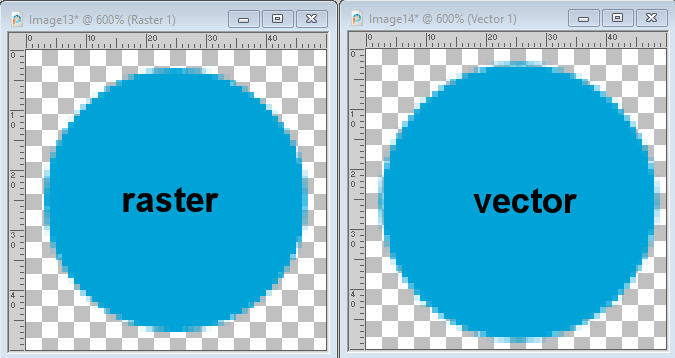
Vectors are smoother than raster
Vector shapes are made of a mathematical formula that is translated into a drawing. They don't rely on the pixels like rasters do, so their representation will be very smooth. You might not be able or want to draw everything in vectors (that is where other programs like CorelDRAW will shine), but if you do, the result will be much better.
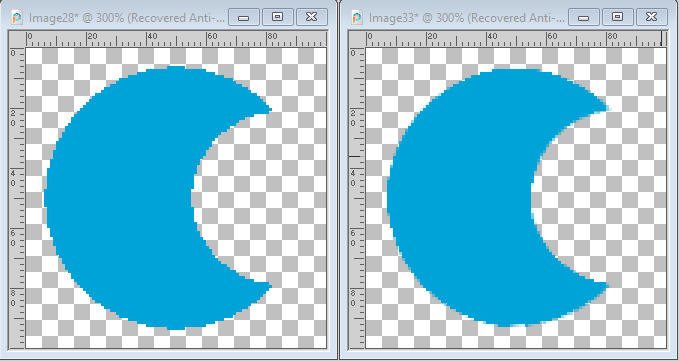
When making a round selection or drawing a vector circle, the initial result is the same:
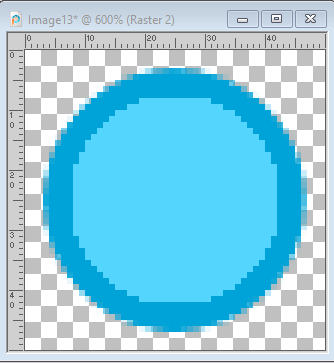
However, the next steps will give a different result. What if you need to select this shape later in your project? Let's say you want to create a smaller circle inside that one circle. You will likely use the Magic Wand, and select the circle, then contract (say by 5 pixels), add a new raster layer, and fill it with a different color. This is what you will get with the Raster shape. Notice that there is no more faint pixels on the edge of the new shape.
However, with the Vector shape, you can use another tool than the Magic Wand. You can go to Selections > From Vector Object. This will maintain those "faint pixels" on the edges, and after you contract the selection and fill it, you will still see them.
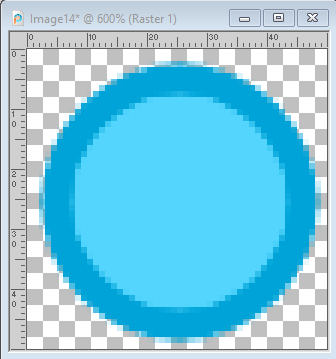
Of course, we can still see some pixelation but notice that both images are zoomed in at 600%.
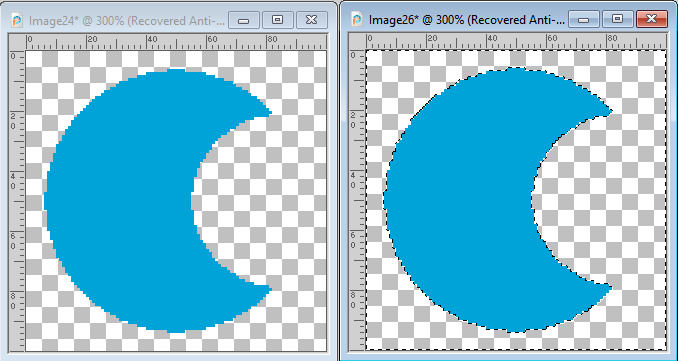
Anti-alias
Whenever you make a selection, on a raster layer, make sure that you have the Anti-alias option checked. This will let the program know that you are looking for those "faint" edges. If this is unchecked, each pixel will be either "full" or "empty", giving a very pixelated result.
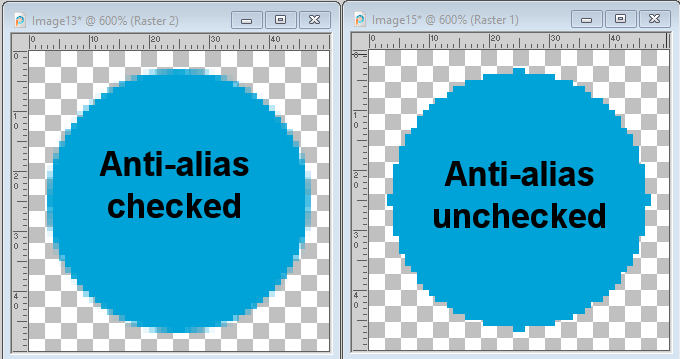
Yikes!! That is far from smooth, isn't it? There might be times when you want such rough edges, but if you need something smooth, make sure the Anti-alias option is checked.
Feathering
When you create a selection on a raster layer, you have the option to add some Feathering. This is a setting in the Toolbar.
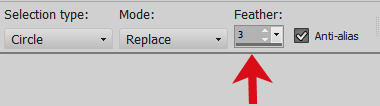
Adding some feathering at the time of the selection might be a good idea since the result will definitely be smoother.

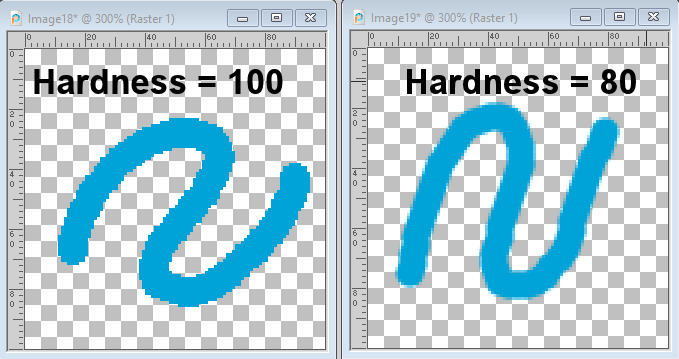
And if you want to draw something using the Brush tool, the Hardness will be the setting you will want to lower to get a softer edge.
If you already have an element that is pixellated and you want to remove those rough edges (1), you can also use Feathering. In this case, you would use the Magic Wand, on the outside of the element (2), go to Selections > Modify > Feather and choose a value that will match the size of your project (3). Then, you can delete that selection and deselect (4). You might want to hit the Delete key a few times for better results.
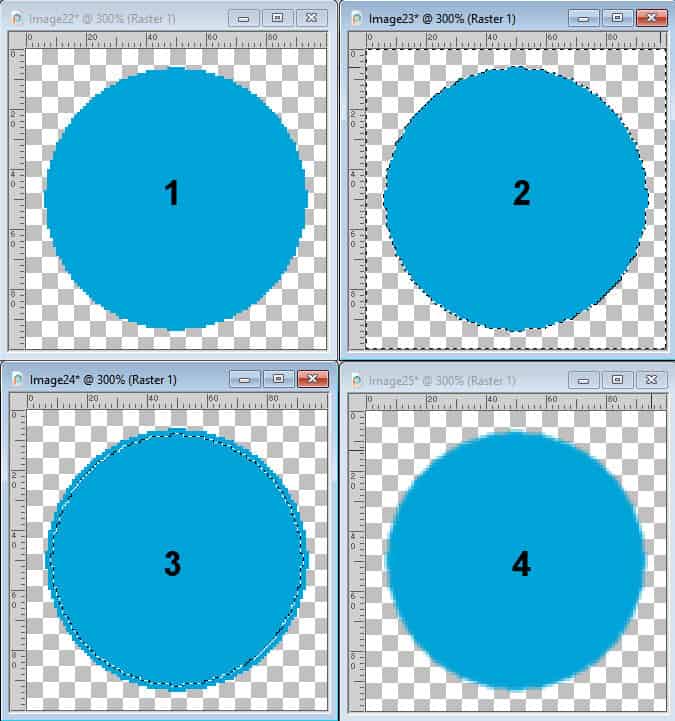
This is a super simple and very effective solution to many pixelated edges.
Smooth
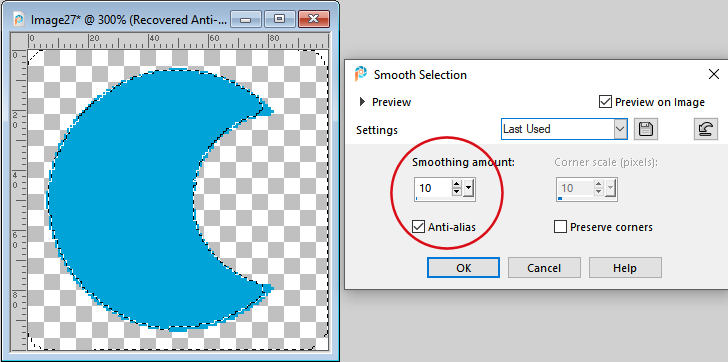
There is another command, in PaintShop Pro that will help you, and it is called Smooth. You can find it under Selections > Modify > Smooth. It does work in a similar way to the Feathering, with an additional option. Let's see how you can use it. We'll start with a similar shape as in the previous example except that we'll add some "corners". The first step will be to use the Magic Wand on the outside of the shape (making sure you checked the Anti-alias!).
Once you go to Selections > Modify > Smooth, you will get this dialog window. The first setting is the Smoothing amount. It is a little like the feathering: the higher the amount, the more the selection will go outward and inward of where it initially was. Notice the sharp points on the shape; they would be removed if you were to delete the resulting selection. At the same time, notice the corners of the image; it moves away from that corner.
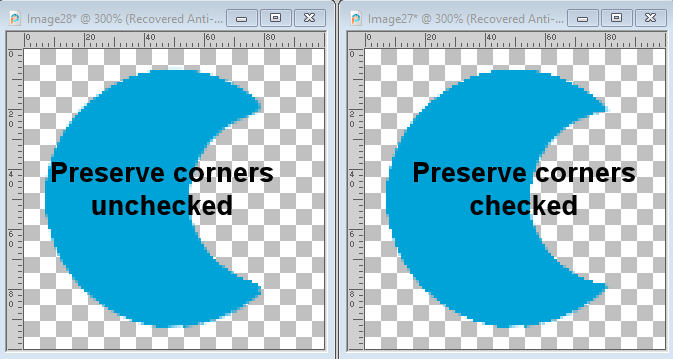
The second setting will become available if you check the box for Preserve corners. Using the default setting of 10, notice how the corners of the shape and the image, are mostly preserved.
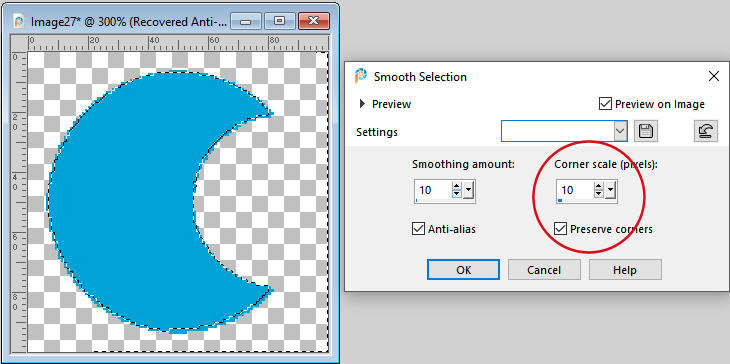
Whether you want to preserve the corners and the amount you set will depend on your preference and the project you are working on. Some fine details might be removed when Preserve corners is unchecked. At least, while you can see the result on your image, you can determine whether or not you need to check that box, and if you do, how much you should enter.
Once you have decided on how much smoothing you want on the selection, you can delete that newly expanded selection.
Smoothening without cutting off
So far, the two processes illustrated always removed the edges of the shape, whether it was by feathering or by smoothing. What if you don't want to remove anything? There is a different process you can use.
Start with the Magic Wand, and select the outside of your shape, and use the Smooth command (let's keep the Preserve corners checked) and delete that selection. You can see that the shape is slightly smaller, as the very edges have been deleted.
Now, select the shape itself, using the Magic Wand, set to Opacity mode. Go to Selections > Modify > Feather. Choose how much feathering you want, but you probably want something proportional to what was removed from your shape (I used a setting of 2).
If you have a single color on your element, you might be able to paint in that color, but you probably will have something with more colors so you will have to use a different method.
Duplicate your layer, in the Layers palette. Activate the bottom layer. Go to Image > Blur > Gaussian blur and choose a setting of 1 or 2 (more if you have feathered more). This will make sure that the colors that will fill that gap will match the image itself.

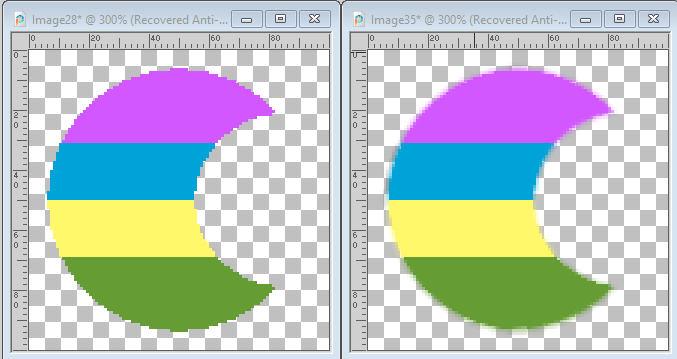
Let's see an example with different colors.
Limitations of the smoothing process
This article refers to any .pspimage or .png image files. These will only apply if you have some transparency around the edges of your element. It will not address sharp lines inside of a drawing (unless it is on its own layer with transparency around it).
If you want more information on how to extract your own elements, you can check these blog posts on A simple way to extract elements and How to clean up an extracted element.
And of course, if you want to skip this manual work, you can always use the Smoothening script.
All screenshots are taken using PSP2021


