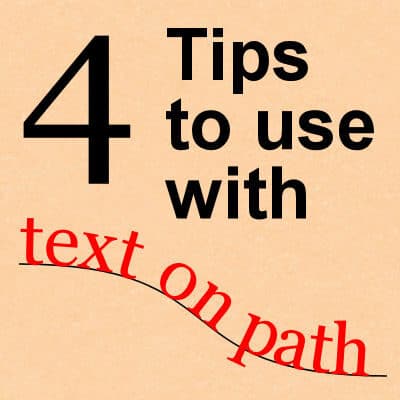

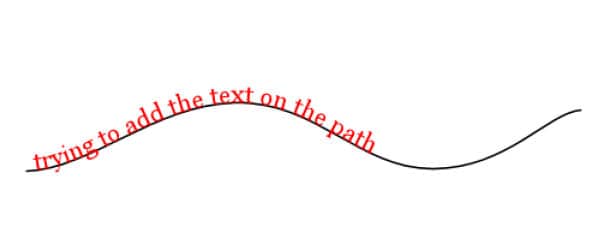
PaintShop Pro gives you the ability to add text along a path, whether it is a circle, another shape or even a hand-drawn path. In a previous post, we looked at how to add text to a circle, specifically when you want it to not be upside-down. Let's look at other little tips.
Anchoring the text
Once you have a path (which can be any vector object), you need to click on it to add your text. If that line is thin, it can be hard to click on the right place to anchor the text and once you start typing, you realize that it is not following the path. Don't worry, there is a simple solution.
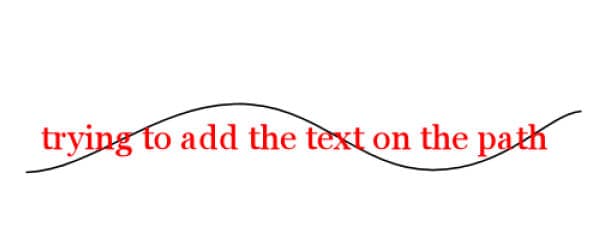
If you end up with the text separated from the path, like this:
as long as they are inside the same Vector layer,
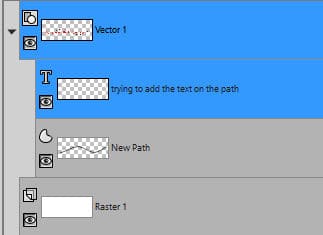
Select both objects (holding the Shift key)

Then, go to Objects > Fit Text to Path
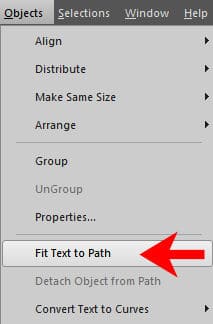
And your text will now be placed on the path that you were trying to anchor to.
Moving the text along a path
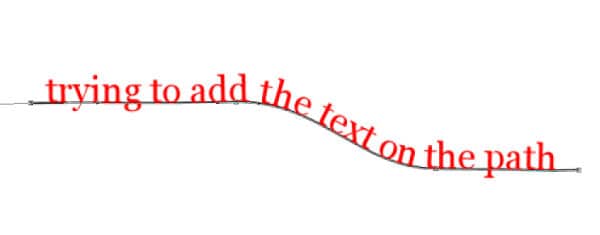
In the example above, the text, aligned to the left, so it does match the left side of the path. If I had set the alignment to the right, or center, it would appear toward the right or in the center. However, sometimes, you might want to move the text only a little bit, either to match the image below or other elements. Can I move the text once it is on the path or do I have to retype it and add spaces? There is a simple solution.
Let's move the text so it starts on the top of the first wave. Activate the Text tool and the text object you want to move (no need to select the path as it will stay where it is). You will see various nodes appear around your text.
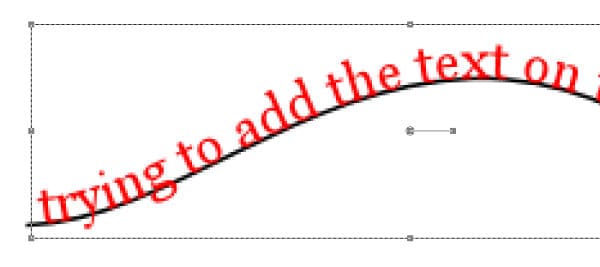
Now, grab the text, anywhere you want and move the text toward the right. In this example, I moved it upward so you can see a little square that appears on the path. It is tiny, so I am zooming in.
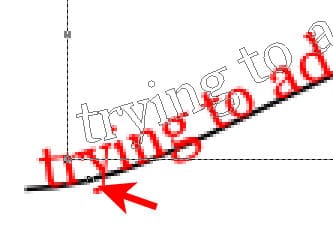
This square indicates the anchor for the text. As I move the text further to the right, that anchor will move too. For this illustration, I want the text to start at the top of the first wave, so I will move the anchor to that location.
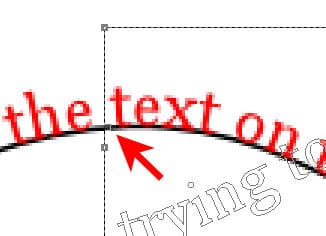
And when I let go of the mouse, my text is now anchored at that point.

If your text was aligned to the right, that anchor point would be at the end of the text, so you could align it to the right side of the path. And if it was aligned to the center, the anchor point would be in the middle of your text.
Tweaking the path with text on it
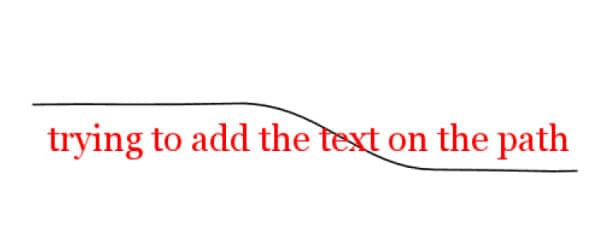
Your text will follow the path, whether it is a circle, a rectangle, or any shape. As long as the text is anchored to the path, it will follow it, even if you choose to modify that path. If you add or remove nodes on the path, if you move those nodes, or change anything else, your text will follow.
Here, I simply moved the nodes from the ends of my path, and you can see that the text simply followed.
Removing text from a path
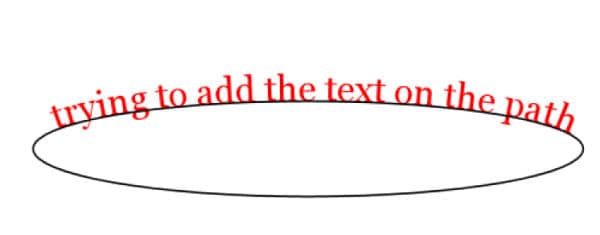
And what if you want to change the path to something completely different? Maybe I would like to have my text on an ellipse instead of an open line. Do I have to start again? Not at all. You can detach the text from the path with Object > Detach Object from Path

and just like when we started, the text and the path are separate.
Now, we can delete the path, in the Layers palette, and add another vector element (in this case, an ellipse). As long as they are still both inside the same vector layer, we will be able to reattach the text to the path, using the Fit Text to Path command.
What will you create now that you can play with text on path?


2 thoughts on “4 Tips to use with Text on Path”
Thank you for those very useful tips !
THANK YOU
this always eludes me once not doing it. Ty
also going to find out when my diamond ends, so I can pay. Got to not run out Love the Campus! thank You