
One fun command in PaintShop Pro is the Balls and Bubbles one. As its name implies, you can create balls (the opaque type) or bubbles (which are translucent). There are many settings available and while playing with them, you can create an infinite number of effects.
The Effect Menu
You can find the Balls and Bubbles command under Effects > Artistic Effects.
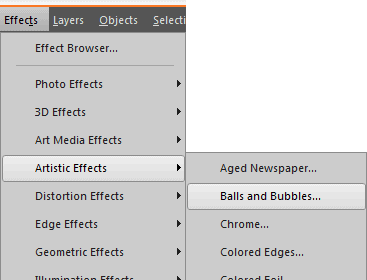
This option will only be available to you once you have an open image. It can be a blank image or not.
The four tabs
Once you access the Balls and Bubbles command, the dialog window that appears will include 4 main tabs:
The Shape tab:
The Surface tab:
The Maps tab:
The Illumination tab:
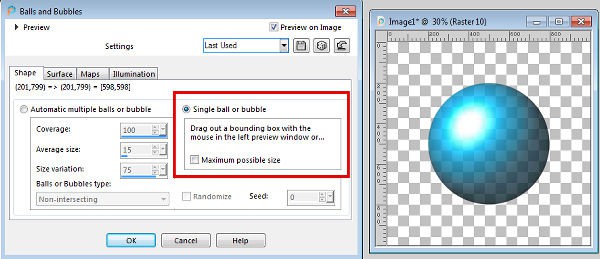
The Shape tab
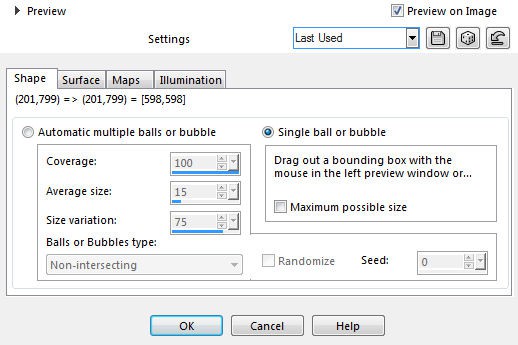
In the Shape tab, you have the option to choose whether you want to create a single ball/bubble, or a layer full of them. You can choose how much of the surface you want to be covered, how large the balls/bubbles will be, and how much variation in the size you will get. All that in a single tab. Let's look at those options.
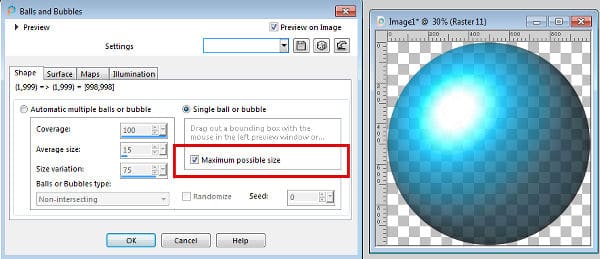
First, you can choose to have multiple balls/bubbles, on the left option, or a single ball/bubble, on the right. This is the default option, of generating a single bubble, which is about 50% of the size of the image:
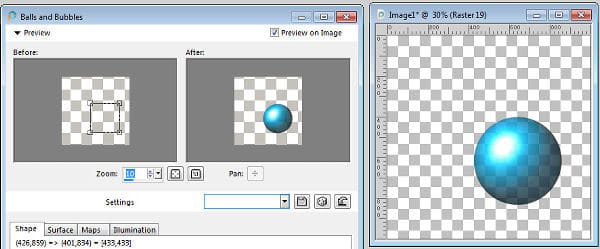
If you want a different size, that is not the full size of the image, you can click on the Preview pane and modify the bounding box on the left pane and get a size that would suit you. You might need to reduce the zoom of the image to see the bounding box.
On the other hand, you might want to create your canvas with the actual size of your single ball/bubble, and use the option to use the whole image:
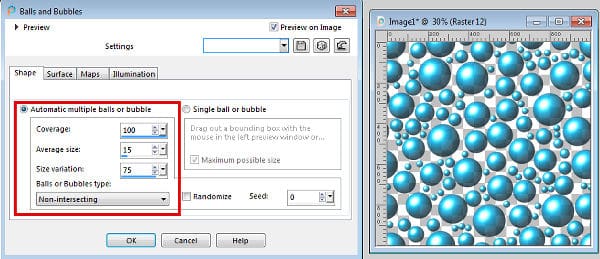
If you want to fill your image with multiple balls/bubbles, you will choose the option on the left, Automatic multiple balls or bubbles. Here are the default settings for that option:
On that image, the whole surface of the image is covered with balls/bubbles, but if you want more space between them, you can choose the lower the coverage which is expressed in percentage. If we choose to cover only 450% of the image, we would get this result:

Notice how the balls/bubbles are more spaced out. If we want larger or smaller balls/bubbles, we can adjust the Average size setting. Remember that this indicates that the average balls/bubbles will be a percentage of the surface to cover, so a setting of 100 will yield balls/bubbles that are, on average, the full size of the canvas. Let's set it to 40%.
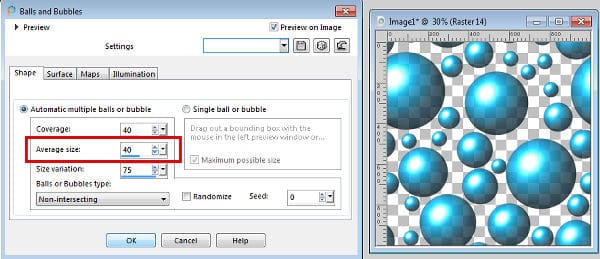
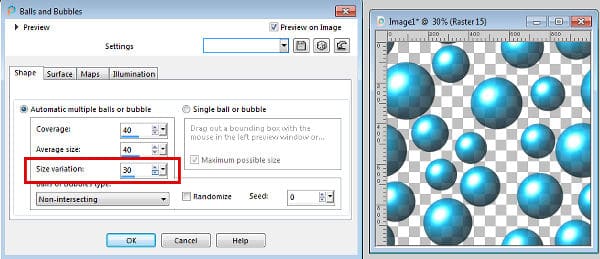
You can see how the balls/bubbles are larger than before. You can also adjust the Size variation, meaning that a higher value will yield balls/bubbles of very different sizes, while a lower value will generate balls/bubbles that are closer in size. Of course, if you set it to 0, all the balls/bubbles will be exactly the same size.
Although these few settings can generate an infinite number of combinations, there is still more. By default, the balls/bubbles will be non-intersecting, meaning they won't touch each other. This is a great setting if you want to extract those balls/bubbles to use separately. You can get varied sizes, and they are easy to select. You do, however, have the option to have intersecting balls/bubbles:
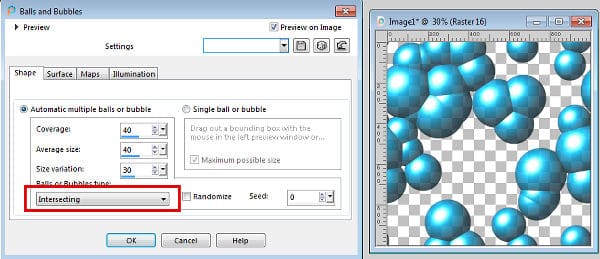
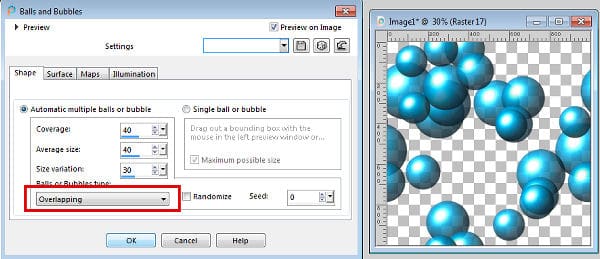
This will look a little like attached bubbles (or molecules, if you have a chemistry background). You also have the option to overlap the balls/bubbles. In this case, they will keep their round shape but will display as if there were some in the front and some in the back.
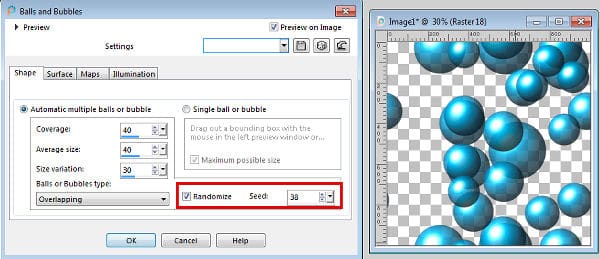
In order to not have always the exact same placement of the balls/bubbles with the same settings, you can choose to modify it with the Randomize checkbox. Notice that the Seed value is now changed. If you change that number (which ranges from 0 to 100000), you will get a different configuration, so that lets you change it 100000 times if you are patient enough!
The Surface tab
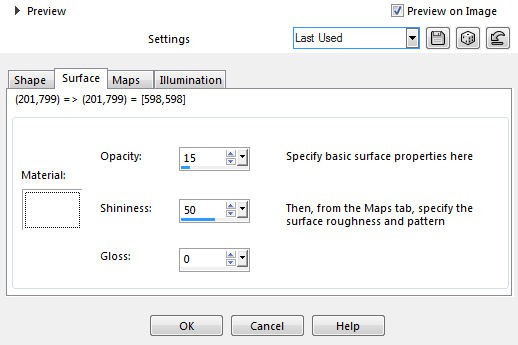
In this tab, you can choose the color, pattern, transparency, and shininess of each ball/bubble. Whatever setting you choose will be applied to all of them, if you have multiple balls/bubbles on your image.
The first setting is the actual material that you want to use for the surface. The default is solid white but we can obviously change it to a different color, like this solid blue.
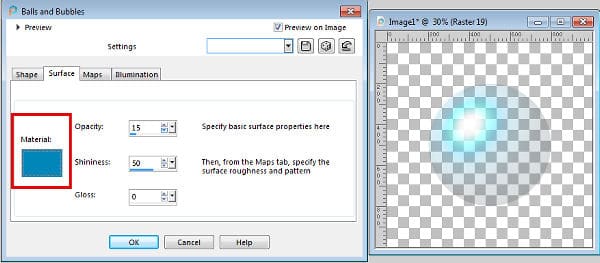
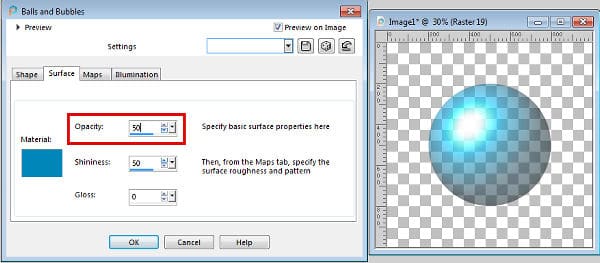
The next setting is the Opacity. As the name implies, it will determine how translucent the ball/bubble will be. By default, it is set at 15%, which is quite translucid. By increasing it to 50%, we will see more of that blue color.
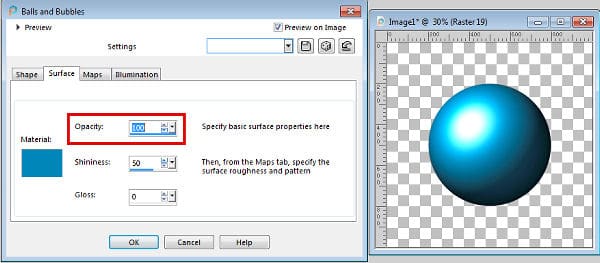
This is great for a bubble but if you want the look of an actual ball, you will want to increase the opacity to 100%.
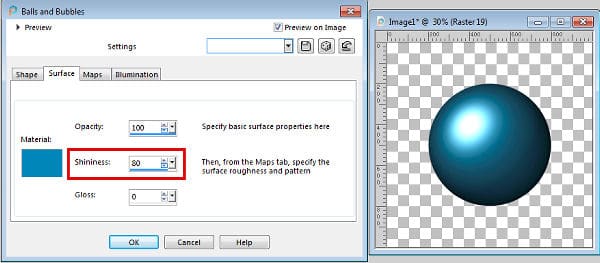
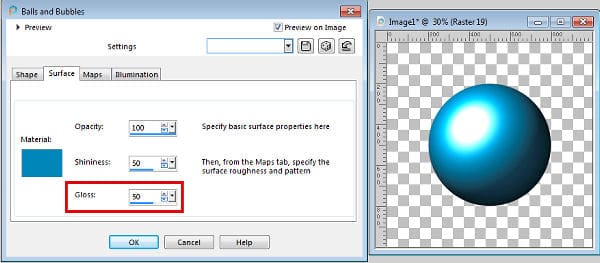
The next setting will indicate how the light will reflect on that surface. Think of a shiny pearl: it will reflect the light and we will see that definite spot.
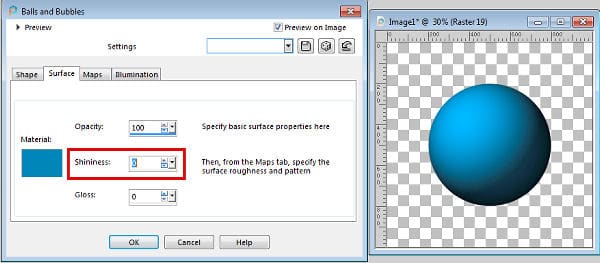
However, if you created the look of a rubber ball, it would not shine and the light will just be more diffused.
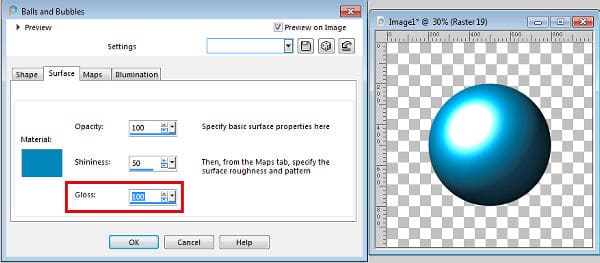
The Gloss value will work in conjunction with the Shininess: the glossier the surface, the larger that light spot will be.
At 100%, it will give the largest spot.
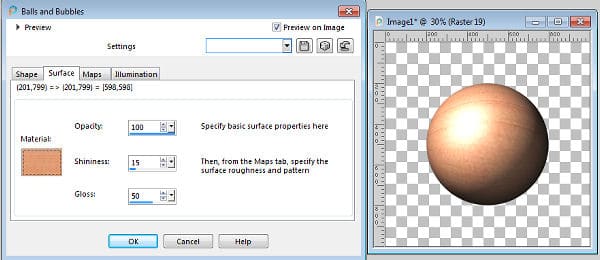
The option to set the Material for the surface offers so many possibilities. Although I used a solid color for the above examples, you can also use a gradient, which can look very interesting, especially if you vary the angle.

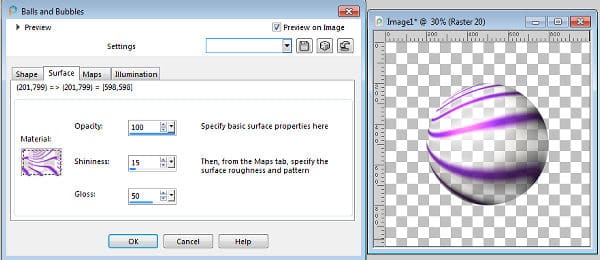
You can use a pattern of any kind, among those you have or the open images you have on your workspace.
And you can even use a png image which will give the look of a glass ball.
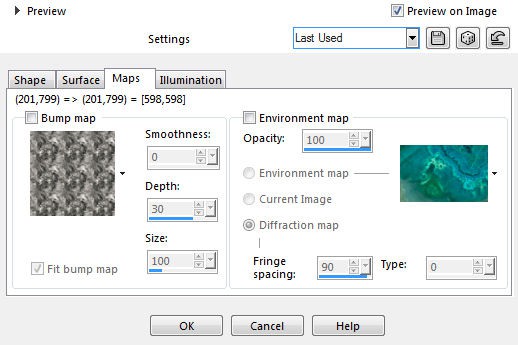
The Maps tab
In the Maps tab, you can choose some additional attributes for the surface of the balls/bubbles. You can choose the Bump map and the Environment map.
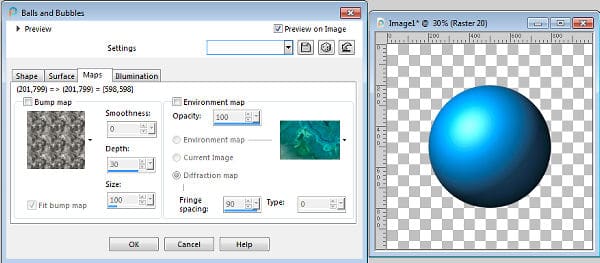
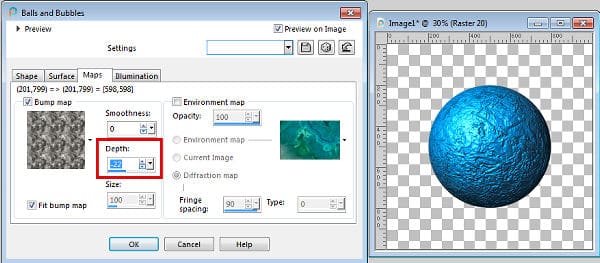
The Bump map is simply the texture that will be applied to the surface. It is similar to the other Textures that you have installed in your PaintShop Pro.
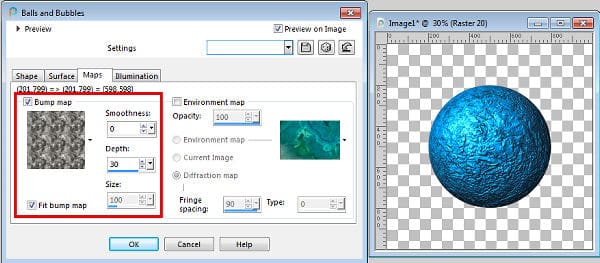
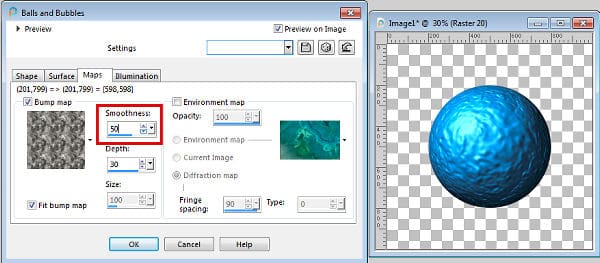
The amount of Smoothness will make the details disappear as it increases.
The Depth will make the same texture more or less distinct and... deep, as its name implies.
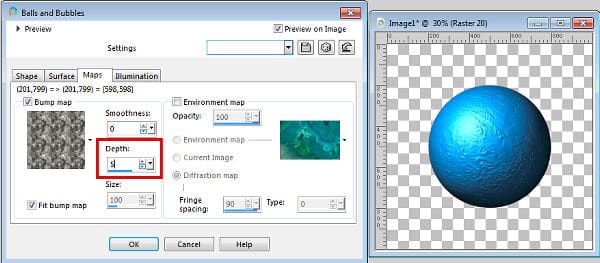
Interestingly, you can choose a negative value for the depth, which will then invert the pattern: the creases will become the bumps and vice versa.
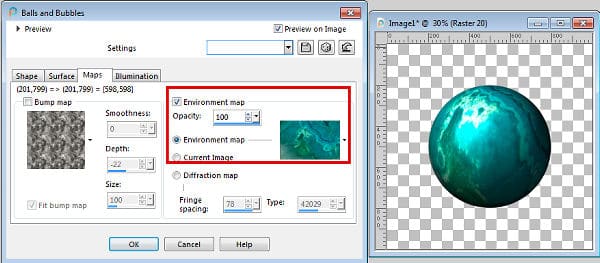
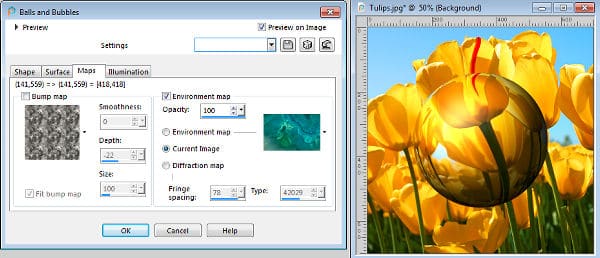
The Environment map is what image will be used. Unlike the Material in the Surface tab, the Environment will be some sort of reflection on the surface. If the Opacity is set lower than 100%, then the Material will show through the Environment map. If you use the first option, of the Environment map, you can use one of the pre-loaded images.
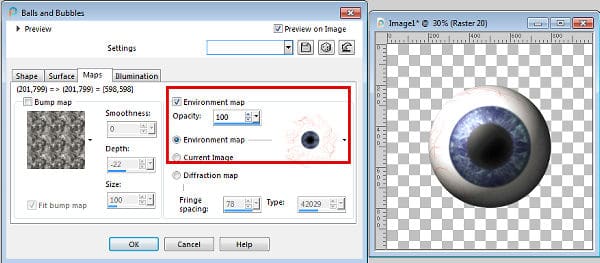
Here is another image that is available by default in the Environment maps. You can surely add some too.
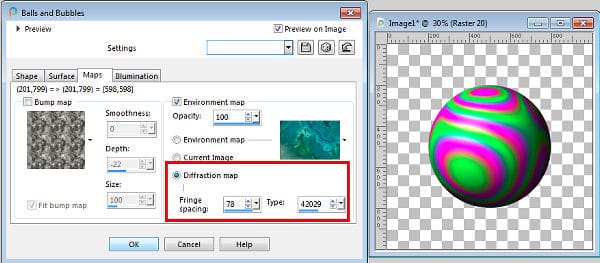
The third option is the Diffraction map, which will give some sort of moiré effect.
Finally, the option to select the Current image will use, as it says, the current image to create a surface on your ball/bubble. It is great if you want to add the appearance of water droplets that will reflect the image behind it. However, this option will only work directly on the image layer so the balls/bubbles will be merged with the starting image.
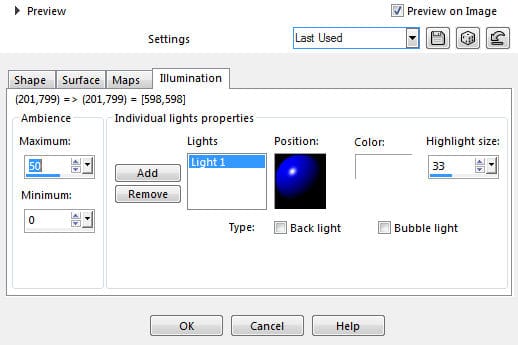
The Illumination tab
As its name implies, the Illumination tab will let you adjust the light variations. It will work in conjunction with the Surface settings as the shininess and the gloss will also play a role in the illumination.
The Ambiance will determine how bright the light will shine. You have a Maximum and a Minimum. Those will be used to set the difference between the lighter and the darker areas of the ball/bubble. By default, they are set to 50 and 0.
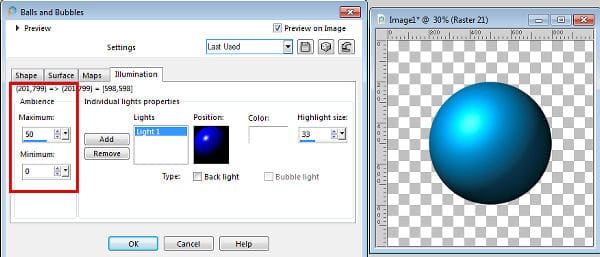
If we change the Minimum to 30, it means that the darker sections will be lighter than when it was set to 0, so the whole ball/bubble will be lighter and you can see how that setting affects the overall look.

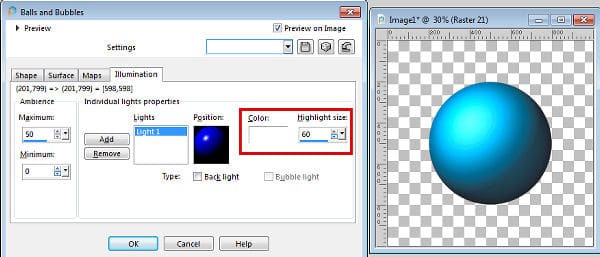
Let's reset that Ambiance value to the default. On the right side of that dialog window, you get the Highlight size. By default, it is set to 33. As you can guess, it means the dimensions of the "light spot". Here, I increased it to 60, from the default value. You can see how that bright spot is larger than before.
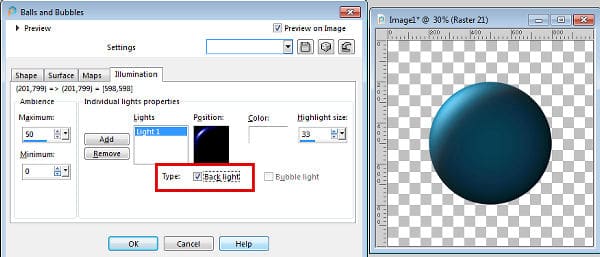
There is also a checkbox to turn that light to a backlight, as if the light was coming from behind the ball/bubble. This will cause the ball/bubble to turn much darker, which is logical since the front area that we look at, is no longer lit.
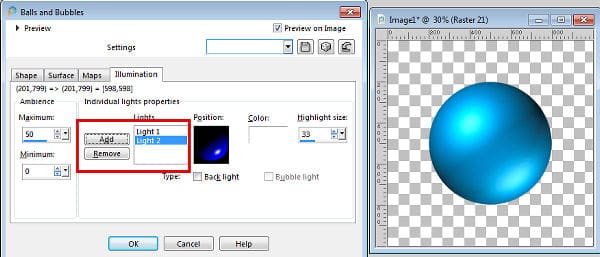
You can add more lights to your balls/bubbles by clicking the Add button. Having more than one light might be a bit challenging to pull off unless the environment of the project is set to have more than one light. In order to move any of the light spots, simply hover your cursor over the little white spot in the Position thumbnail and you can move it directly. This allows you to place it anywhere on your ball/bubble.
What can we do with this command?
The Balls and Bubbles command lets you create a variety of round elements. Those can obviously be opaque or translucent, of any material, with any texture you want.
You can create a string of pearls by using the single bubble shape, and a soft color. You can export it to Picture tubes and place a series of pearls along a path or scatter them around.

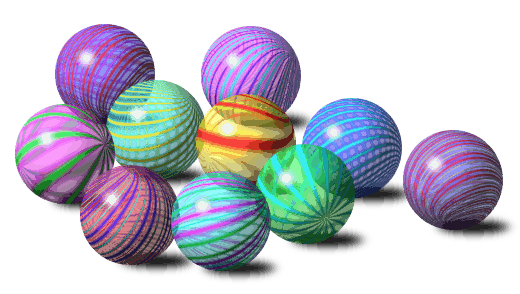
And if you want to have beads that match another project, you can also create them, using colors or patterns from a photo or a kit. After you repeat the process multiple times, you can export all the beads as Picture tubes and place them randomly on a string.

Have you ever played with marbles? You can create using a png pattern as Material.
You can also add some raindrops on your image to reflect the image behind it. For this, you will need to use the image as a Material for the surface, and create the droplets on a separate image.

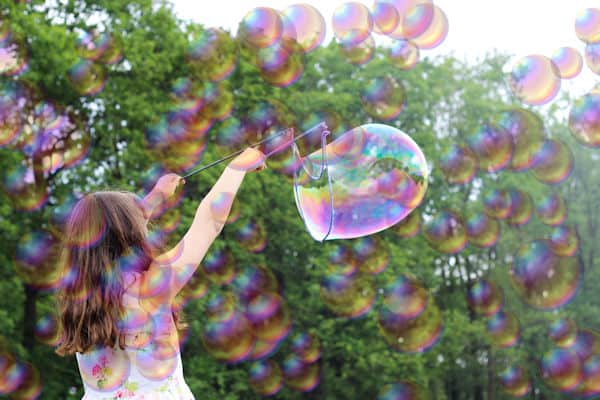
You can also create your own bubbles overlay to add to fun summer photos.
With some time and experimentation, you can create so many more projects and effects.
What will you do now, with the Balls and Bubbles command?
Check out our Bubbles alphabet, hop over to our Self-Care Theme blog post, where you can request it.
And if you want to create some beads or marbles without going through the trouble of making them one by one, use one of these scripts available in the store: Beads, Glass Marbles


5 thoughts on “How to use the Balls and Bubbles command in PaintShop Pro”
Have to tell you that I think this will solve the problem I was working on last night. I had a portion of a photograph that I had separated out as a circle and wanted to use it as a type of “button” on my layouts. Things were not working well with that idea although I had tried so many of the effects- artistic, etc. But I had not tried the balls and bubbles. Will let you know how it worked out.
I had always avoided this feature in PSP but after studying this tutorial it will be a sure thing for creating elements for my scrapbook pages. A wonderfully informative tutorial Cassel. Thank you very much … teacher gets top marks!
great tutorial, after so many years working with psp, i am still learning so much! Thank you for sharing so much and explaining so well and clearly
Thank you for this great tutorial. I have played with some of those settings in balls and bubbles, but this is going to send me back there to play with some of the features I had not tried and some that you explained other uses for.
What a wonderful and helpful tutorial. I am an “explorer” but I have never tried this feature and am very grateful for your detailed guidance. Thank you for sharing your expertise and enthusiasm