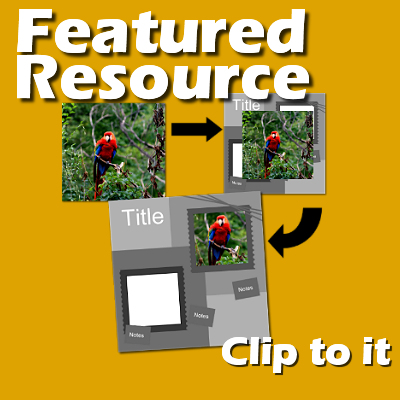

If you are pressed for time and need to complete a scrapbook album for a particular event, you might want to use a template. That will ease the work of deciding where to place this photo or that element or that paper. Templates can definitely be time-savers. Once you have chosen the template and the photos you want, you can go through the creation process even faster with a simple script called Clip to it.
Similar to Photoshop
In Photoshop and Photoshop Element, there is a native function that will allow you to clip a photo (or a paper) to a specific shape, while still allowing you to modify the image further. This function does not exist in PaintShop Pro, so this script was created to fill that gap. The script will "clip" the active layer (likely the photo) to the shape of the layer just below (from the template), creating a mask group which will not trim the photo itself, allowing you to align it, resize it or even rotate it.
Installing the script
You can get this script in the store, HERE. Once you have downloaded this script, save it in the Restricted scripts folder of your PaintShop Pro installation. It should then appear in the drop-down list of scripts in your Scripts toolbar.
Getting ready
Since this script will be running on the active layer, make sure you place the photo on a layer just above the shape you want it clipped to.
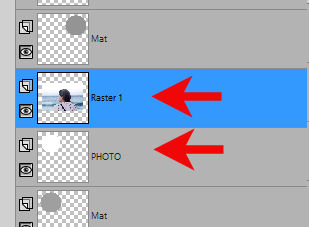
Run the script
Open the Script toolbar with View > Toolbars > Script. Find the script called cass-ClipToIt. And click on the run icon.

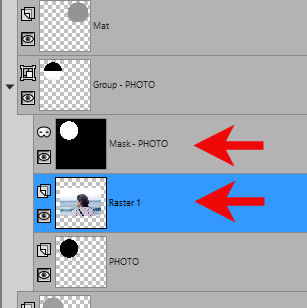
Once the script is done, you will see that a Mask group has been created in the Layers palette. The mask shows the shape you wanted to clip the photo to, and the photo has been inserted below that mask, intact.
Tweak the photo
Since the photo is still intact, this is where you have the opportunity to adjust it. In this example, you will notice that the photo is not centered on the "mask", which does not display the photo. As you can see, only a part of the photo is aligned with the mask.
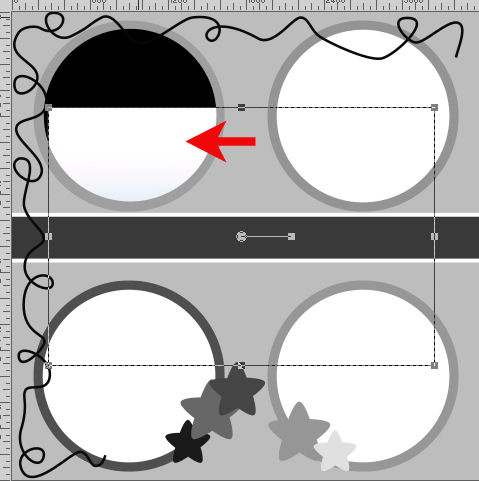
This is the beauty of using a mask as a non-destructive approach to clipping to a shape. Using the Pick tool (NOT the Move tool), you can now move the photo where the subject will be showing. At the same time, you can resize it using the corner handles (making sure the Pick tool is set to Scale).

Since your photo has never been cut or trimmed, you can always change your mind, and move it to another mask group, or replace the photo by another one.
You can use the same script and the same process if you want to "fill" a particular shape with a paper. You just likely won't need to tweak its placement too much unless you have a paper with a design that is not uniform all over and you might want to showcase a specific section.
Once the image was added to my Layers palette, running the script and adjusting the photo in its place took me less than 30 seconds. Imagine how much time you will save, especially if you want to showcase many photos! Go get your Clip to it script in the store, now.


1 thought on “Featured Resource – Clip to it”
Your script is awesome! It made using templates so much easier. Thank you.