
Although you can get some stitching that was photographed and then extracted, you might want to create your own, with a different color, or length, or path. You can do that easily using simple tools in PaintShop Pro.
Using the Text tool
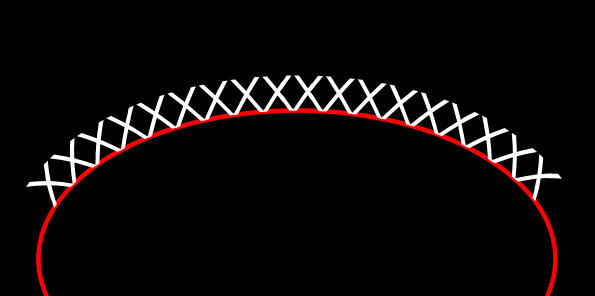
You can often simulate stitching by using simple characters from your Text tool. You can use the hyphen for some straight stitching. You can use a slash for some diagonal stitches. You can use X's for some cross stitch.

With the Text tool, you have access to various fonts which will yield slightly different characters. If you find the stitches are a little too far apart, you can adjust the Kerning value to a negative number and the stitches will get closer together. The exact value will depend on what you want to see, and what the characters look like with the default value of 0.

If you want the stitching in a shape that is not straight, you can create a path with the Pen tool or a Preset shape tool and add the Text along that path. That will create stitching exactly where you wanted it.
Using the Brush tool
Another way to create stitching is with the Brush tool. If you have some brushtips that simulate stitching, it is a great way to use them. For example, I am using here some decorative brushes (available in the store HERE).
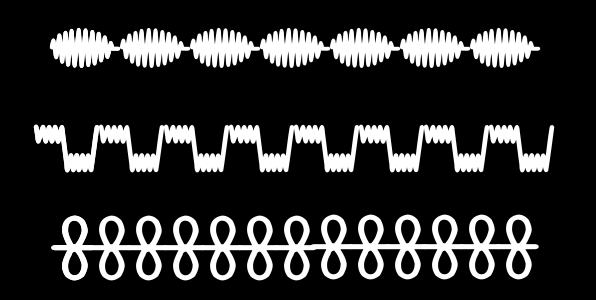
And just like the Text on path, you can place brush strokes along a path, using the VectorPaint script, available for free HERE.
Adding texture
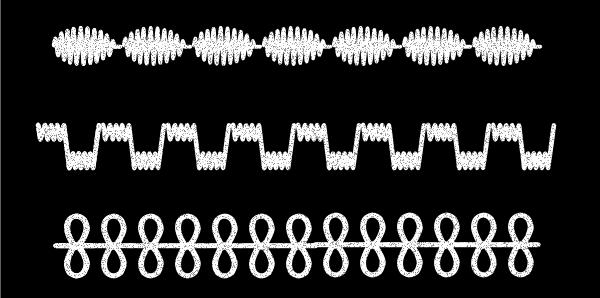
Whatever method you used to create your stitching, at this point, it is still looking pretty flat. You can add some texture in different ways.
You can add a little bit of noise to your shapes.

Although it is not yet perfect, it is adding a little something.
You can also choose to add a texture from the Texture option (available under Effects > Texture Effects > Texture...). From there, you do have several default textures available. It does not really matter which one you use as it will only give SOME variations on the stitching you already have. The effect will also depend on how large your stitching is; for something small, the texture typically won't show much.
Give a bevel
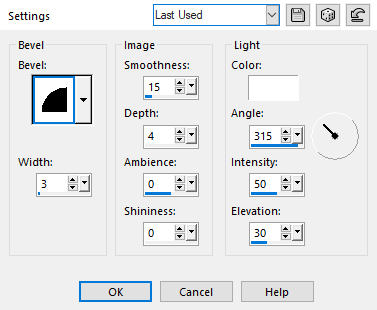
Now, the bevel will really add a look of thickness to your stitching. Make sure you use a small bevel so it can show on the individual stitches. Here are my settings:
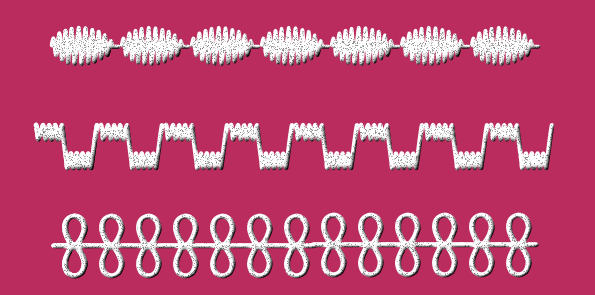
And this bevel will give this result on the stitching (I changed the background color for better visibility).
Add a shadow
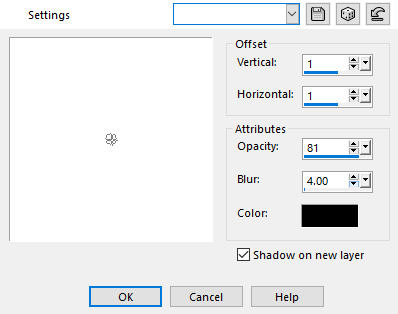
The last step in creating some stitching is to add a shadow. This can be tricky because the wrong settings on the shadow will yield a weird result that will not be eye-pleasing. The shadow has to be small because the stitching is obviously very close to the surface. The shadow does not need to be too blurred, again, because it is close to the surface. So here are my settings:
And the result would be like this:
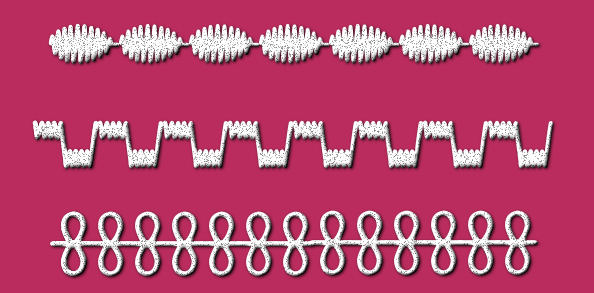
Of course, in this example, the stitching is very large, which is not really what you will have on your project, so the settings will probably change a bit if you are using smaller stitches.
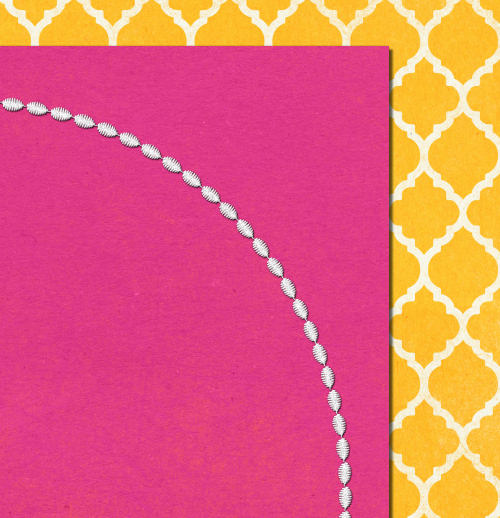
Have a look at the same stitching, on a partial layout. You can see that it looks much more realistic than just the large samples above.
Where will you add stitching? And how will you create it? Remember that stitching can be very versatile as you can use it for fastening, but also for decorating your project.


4 thoughts on “Creating Realistic Stitching”
Thank you Cassel for all the work you have done creating this wonderful place where we can come and learn more about Paint shop Pro and what it can do. I first started off with psp9 that my son bought me for my birthday about 15 years ago. Another birthday a few years later and I have pspx5 ultimate which I have had for a long time now. My long term memory is non existent so your tips and tricks sections is a great place to jog my memory please know that you are appreciated.
I am glad you enjoy the site, and if you forget how to do something, don’t hesitate to come and post in the forum. Everyone would be happy to help you.
Merci beaucoup Carole, je vais essayer prochainement
This looks a lot better than my feeble attempts at stitching. I am going to try this soon.