
PaintShop Pro is a program that offers a lot of options to customize the interface to suit every user's individual needs and preferences. Everyone might use a different set of tools and commands based on their workflow and type of work. One way to make this work faster and easier is by creating a custom toolbar that will include the most used commands in one place.
Create a new toolbar
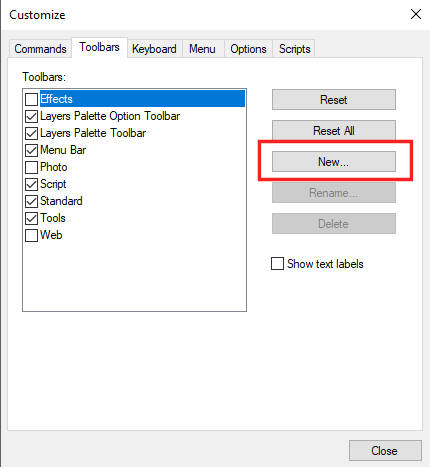
Going to View > Customize will open the Customize dialog window.
Go to the Toolbars tab, and click on the New button and give a name to your toolbar. Since you can have several custom toolbars, you can name anything you want to know what they are for and when to use them.
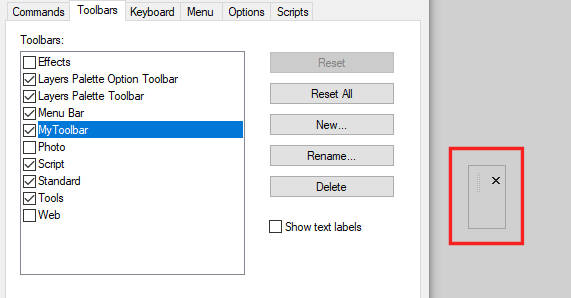
That will create a small, empty rectangle that will become your new, custom toolbar. It will be the same color as the workspace color you have (in my case, it is the grey workspace).
Choose the commands to include
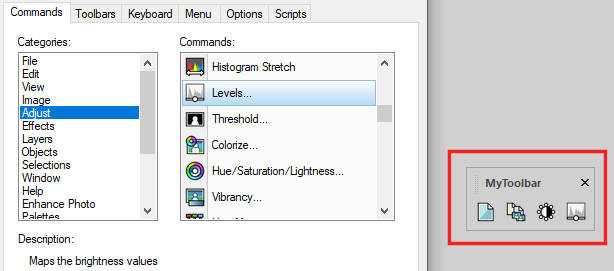
The Customize dialog window will list all the possible commands in PaintShop Pro (even the unused commands). Navigating through the different categories, you can choose any command you want to add to your new toolbar. Simply click on the command, and drag it into that new toolbar you created.
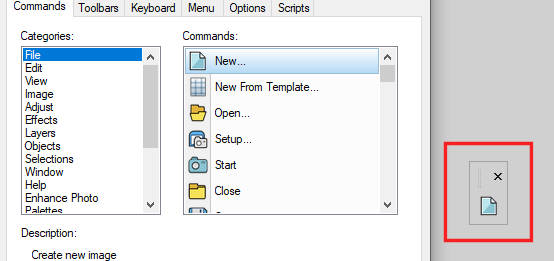
You can add as many as you want.
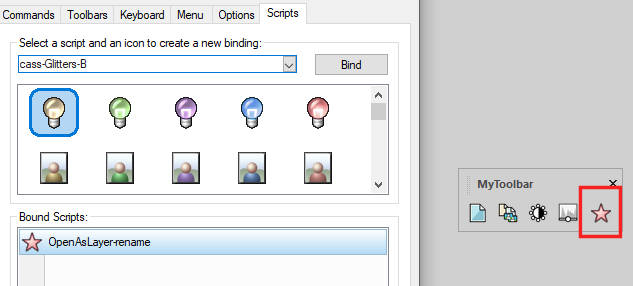
If you have some bound scripts under the Scripts tab, you can also add them in the same way, by dragging and dropping them into your new toolbar.
Customize the display of the toolbar
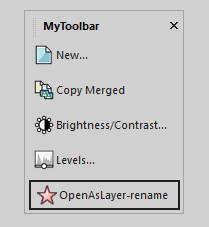
If you want a small toolbar and you are already familiar with the icons, you can stop here as far as customization is concerned. However, if you want to have a more obvious way to know what each icon is for, you can add the matching text to them. BEFORE you close the Customize dialog window (or reopen it if you have already closed it), right-click on each icon, and choose Image and Text.
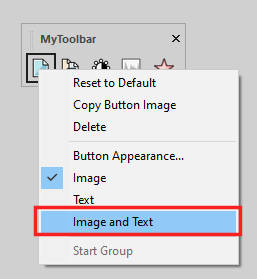
Repeat with all the icons you want to have labeled with text. You don't have to do it on all of them if you want.
Docking your toolbar
Depending on your workflow and your own setup, you might want to dock that toolbar somewhere or leave it floating. If you want it docked, move it upward, and double-click on it. It should dock on its own.

If you change your mind and want it floating, grab the left end of it (you should see some very faint dots) and drag it out of its current location.
If you are working on a project where that particular toolbar is not needed, you can close it by clicking on the X.
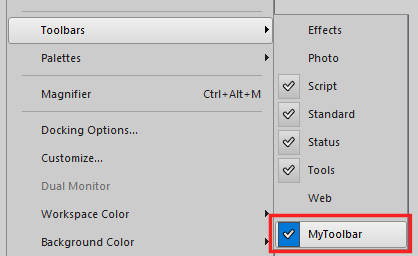
And if you want it back, it is now listed under View > Toolbars > [name of your toolbar].
Now, you have the option to create your own toolbars, to suit your own workflow, projects and personal preferences. Have you created one (or more) already?


1 thought on “Create your Custom Toolbar”
Thank you so much for this tutorial. I will certainly use it to customise my own toolbar.