Scrapbooking is an activity that can mean many things to different people. Some will love the creative aspect of it and will do everything from scratch. Others will like to show photos and tell stories. Some people have a lot of time, others, not so much. Quick pages can be used by many scrappers, also for different reasons.
What are quick pages?
Simply with the name, you can understand that a "quick page" is a scrapbook page that should be quick to complete. In general terms that is pretty much what it is. Instead of placing all the elements one by one, adding the shadows, cutting the papers in specific shapes and sizes, choosing which elements to match and how to place your photos, the quick pages have all that done for you. The page is done, and you just have to add the custom elements, which will be the photos, the title and the journaling.
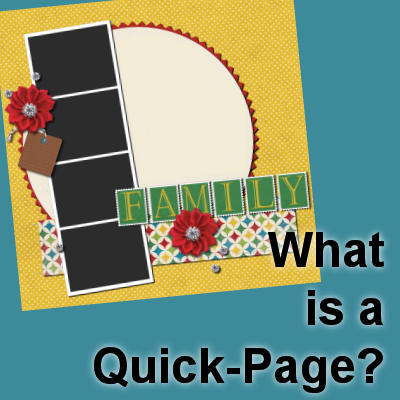
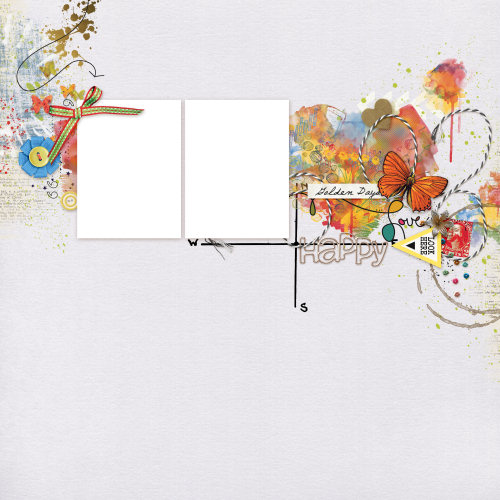
Here is an example of a quick page from Marisa Lerin:
This particular quick page has room for two photos, plenty of space for a story and a title. All the elements are there, and you can't move them. But at the same time, it is done-for-you, so you don't have to wonder if the colors match together, if the shadows are done correctly, etc.
Why use a quick page?
There are a few main reasons a scrapbooker would use quick pages.
They are fast. If you need to complete an album on a deadline or you have a LOT of photos you want to showcase quickly, quick pages can be a great time-saver.
They already have coordinating elements. If you tend to struggle with matching elements in a cohesive look, the quick pages will have that done for you. No more struggling on that.
They already "look good". If you are new to scrapbooking, and you are struggling with creating a good looking page because you always put too many elements, or not enough, or you feel you are unable to create clusters or layering that looks good, the quick pages can be your favorite shortcut. After all, you can choose some quick pages that you like and skip over others that don't match your style or your preferences.
What format are quick pages?
Most of the time, quick pages will come in a flat png format, where the area for the photos are transparent. Using your PaintShop Pro, you would simply slip your photos as a layer below that page and align them as you wish.
Occasionally, some quick pages can come in .pspimage format, with a mask group. Corel offers some quick pages like that, although they call them "Templates" and you can access them through File > New from Template. Since most designers creating quick pages will want to reach a wider customer base, the .png format is usable in more graphics programs (since .pspimage is only useful in PaintShop Pro).
How to use png quick pages?
If you have a .png format quick page, you simply have to copy and paste your image on the quick page layer...
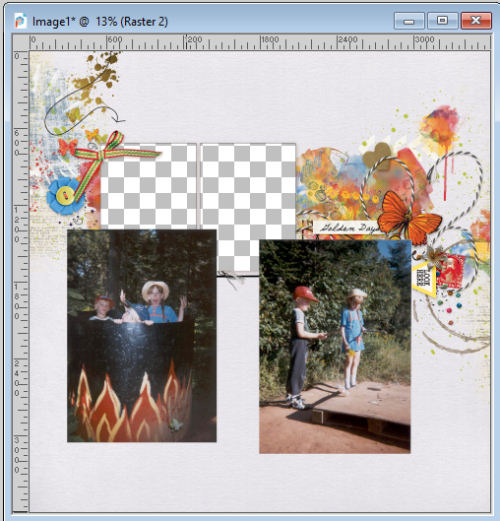
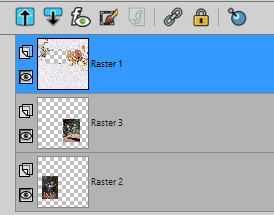
... rearrange the layers in the Layers palette so that the photos are under the page itself.
Then, move and resize the photos using the Pick tool so that the photo is centered in the space allowed. It is possible that it will be larger than the hole. If that is the case, IT IS OK. Don't try to squeeze the photo into the opening, just center your subject in the opening for now.
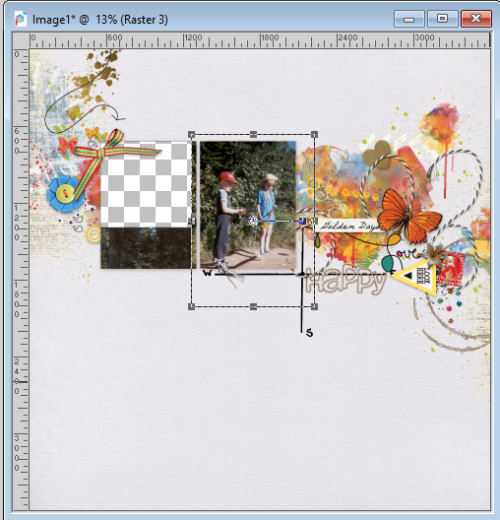
Repeat for each image (if the quick page allows for more than one).
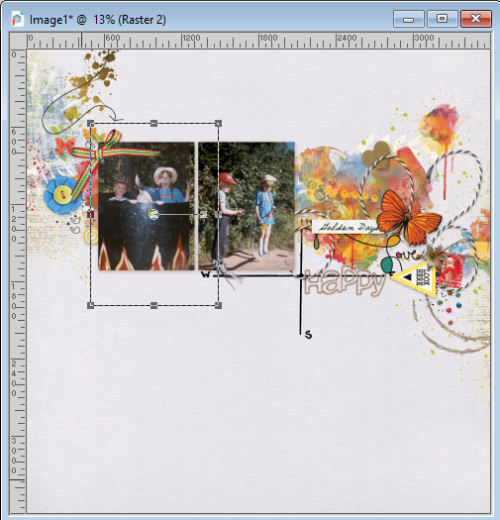
At this point, if you have some photos that are larger than the opening, it might not need any extra steps except if that excess shows up in an adjacent opening, like here:
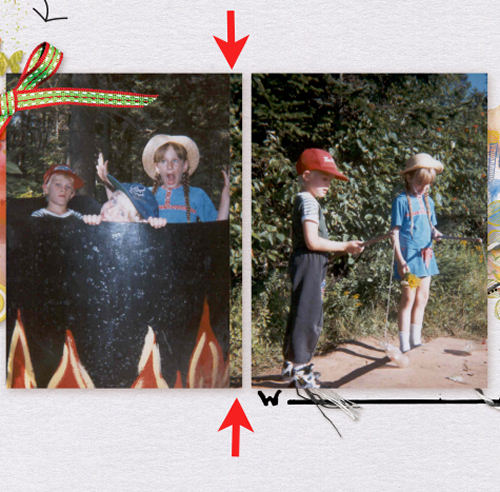
If that is the case, simply use the Selection tool and select that section and delete it on that photo layer.
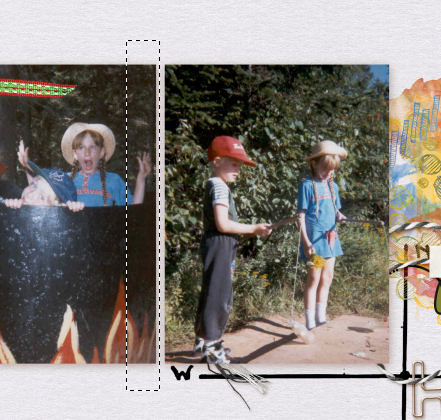
If the shape is not rectangular or has an odd shape, you can also use the Magic Wand, select inside that adjacent opening, expand by a few pixels and delete on the photo that is showing through. Both methods would yield the same result.
How to use a .pspimage quick page?
Unlike the .png quick pages, the .pspimage ones will have mask groups that you can see in the layers palette. Here is a .pspimage quick page.
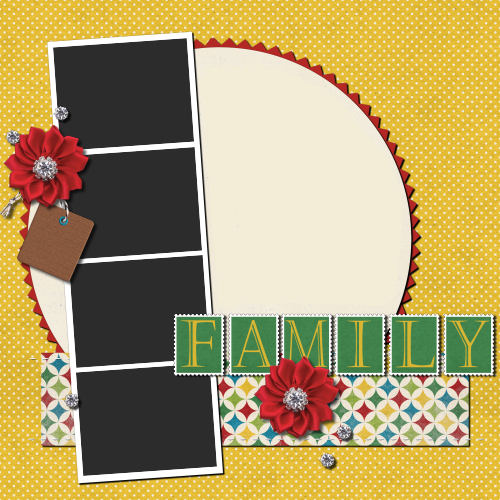
However, the difference is obvious in the Layers palette, as you can now see many layers and groups of layers.
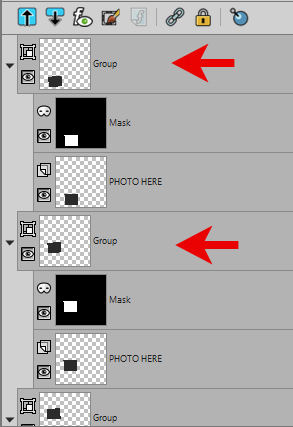
Each group has a Mask layer that is a bit like a "wall with a window" where the photo will show through. You simply have to put the photos UNDER each mask layer. Then, just like for a .png quick page, you need to align your photo and resize it to show what you want through the opening.
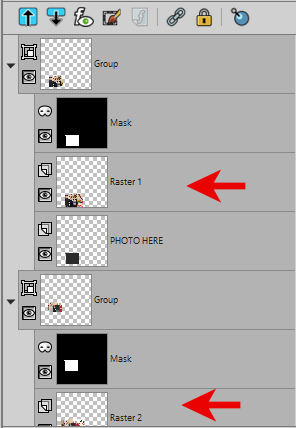
One advantage of using Mask groups is that, even if photos are close to each other, they never "peek" through an adjacent space since they each have their own "window".
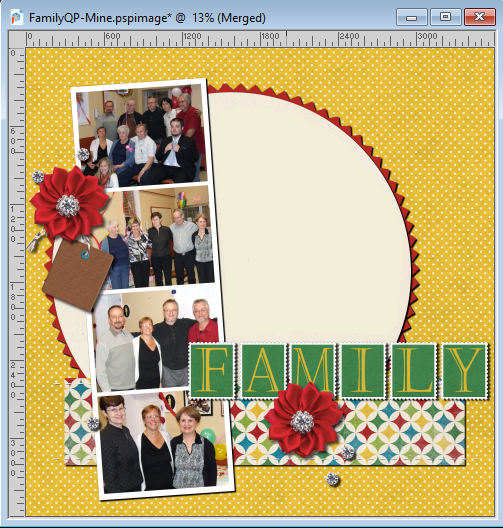
Finishing touches
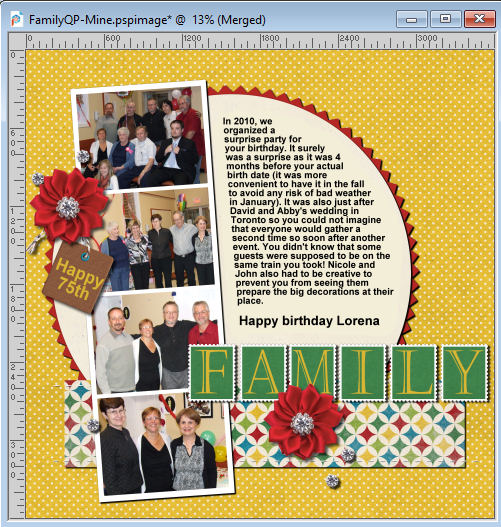
Whether you are using a quick page in .png format or .pspimage format, you will likely want to add some custom details. It could be the title (unless it is part of the QP like in the "Family" one), the journaling (the story), or other details (the 75th on the tag).
Where to find quick pages?
PixelScappers has plenty of quick pages that you can download for free.
Some designers will include one or two quick pages in their kits or as an add-on. It allows you to create one or two pages quickly and then, create your own using similar supplies so the pages will coordinate together.
Some designers will offer quick pages as a freebie to show off their kits so if you like the colors, theme and elements, you might want to purchase the matching kit.
You can check out the Freebies section for a few free resources.
And if you want the Family quick page used above, it is available HERE (scroll to the bottom).
If you want to create a .png quick-page from your existing layout, you can follow the tutorial HERE.




1 thought on “What is a Quick-Page?”
Thank you for this information. It makes things a lot clearer for a newbie to scrapping like me.