

Starting with version X9, PaintShop Pro has a new gradient tool called the Gradient Fill. It added a level of flexibility to the regular gradient tool and makes its use so much simpler. Let's have a look at that tool in more detail and how you can use it in your next projects.
What is the Gradient Fill
Originally, if you needed to add a gradient to your project, your only approach was to create the gradient in the gradient editor window, save it and fill your project, but then, you would find that the colors didn't perfectly match or the alignment of the nodes were off and you had to start over. With the new Gradient Fill, although you can still create your gradient as you would have previously, you have an option to manipulate that gradient directly on your project, which is much more effective in obtaining the effect you want.
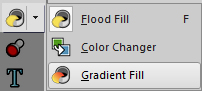
You will find the Gradient Fill in the Flood Fill cluster of tool.
Applying the Gradient Fill
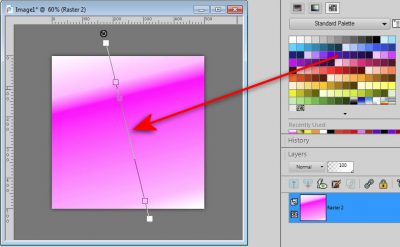
Unlike the regular Flood Fill tool, you don't just click once to fill your image or selection with the gradient you picked, but you will click and drag in the direction you want the angle of the gradient to be.
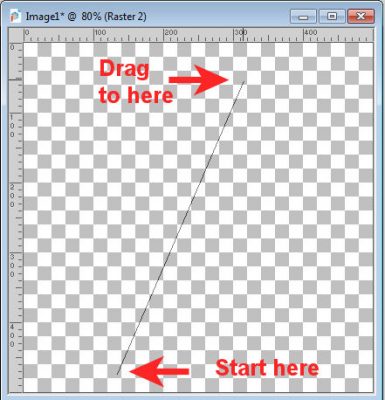
This will immediately apply the gradient you chose in that angle.
Adjust the angle
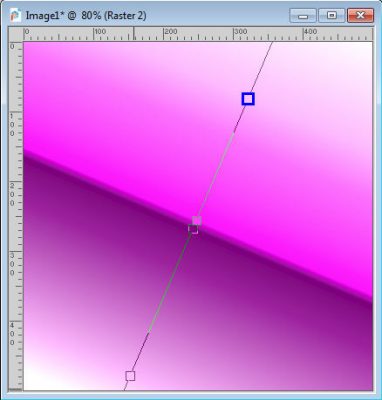
Once you applied the gradient, you will see several nodes that will correspond to where the colors are "anchored". In addition, if you stretch out the image, you will also see one arrow node which will allow you to rotate the angle of that gradient.

So, without having to do anything outside of the image you are working on, you can change the angle and be very precise especially if you need to align with another element.

Adjust the colors
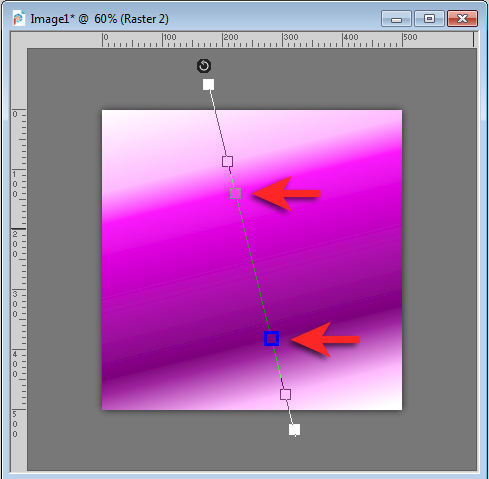
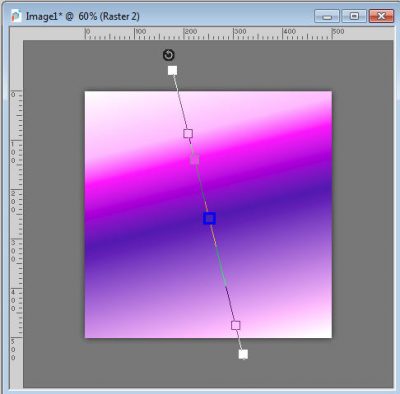
One of the real downsides of editing the gradients in the original gradient editor is the challenge of aligning the color stops with the image you are working on, so you would edit them, save the gradient, apply it to your image and start over again but now, with the gradient applied with this tool, you see those nodes right on your project and you can edit them directly too.
Using any of those nodes, you can change the location of any color stop and the gradient will adjust automatically.
Add/Remove Nodes
Not only you can adjust the location of those nodes to adjust the gradient, but you can also remove existing nodes and add more. In order to remove a node, grab it and drag it to the end of the gradient line. Let's remove that blue highlighted node and we get this new gradient.

If you want to add a node, grab a color swatch from the Materials palette and drag it to the gradient line, and release.
This will automatically add that color to your gradient, exactly where you drop it.
And of course, as mentioned above, you can still move that color stop to get a different result. You can add as many colors as you want and adjust them wherever you want.

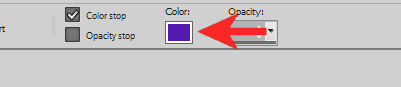
Changing a node color
If you want to change the color of an existing node, you can highlight it (it will turn blue) and drag another color from the Materials palette. It is about the same as adding a node and removing the other. You can also change the color using the Tool Options toolbar.
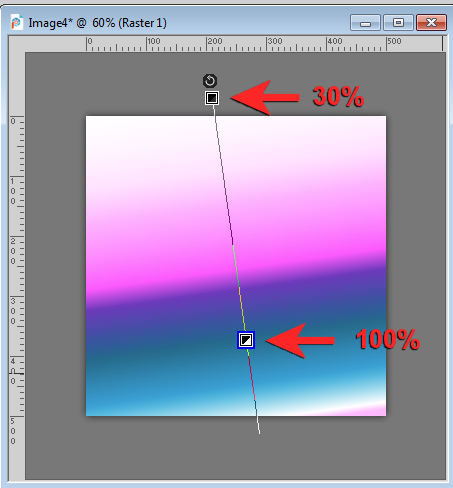
Adjusting the transparency
Although you can change the color of any node, you can also adjust the transparency of your gradient. In the Tool Options toolbar, check the Opacity stop checkbox to see the transparency settings.

On your gradient, you will be able to see the black and white nodes, which can be moved as you need, and then, once they are highlighted, you can change the Opacity setting in the Tool Options toolbar.
Now, you have the option to adjust your gradient to your own project, without having to switch from window to window. Unfortunately, there is no native way to save that new gradient to reuse later. The closest option is to use the Gradient Creator script, which might or might not be as precise as what you have created (it won't save the transparency stops).


2 thoughts on “Using the Gradient Fill”
Thanks Cassel for this great tutorial
greetings Bram
Hola Cassel
Un tutorial muy interesante. Si me dejas, lo traduzco para colgarlo en mi página, en la sección de trucos.
Si quieres, en el caso de que me dejes, que te envíe el link de mi traducción, me dices.
Gracias por el tutorial.
Hi Cassel
A very interesting tutorial. If you let me, I can translate it to hang it on my page, in the tricks section.
If you want, in case you leave me, I will send you the link of my translation, you tell me.
Thanks for the tutorial.
Besoss
Stella
PD_ Mi correo stardesignpsp@gmail.com