

Have you ever played "Spot the differences" in newspaper or magazine publications? They can be fun and depending on the creator, they could be good for kids or adults. Have you ever considered making some yourself for your next family gathering? It could be a way to keep the kids quiet or get the adults scratching their head a bit. With PaintShop Pro, you have a great tool to make just that.
Line drawings
You can find an array of line drawings online, that are meant for coloring. You can search for kids coloring pages or adult coloring pages to get different levels of difficulties in the designs. Line drawings are quite easy to use as you only have to deal with black and white.
If you find a line drawing online, it is possible that the image is available for download in .pdf format. If that is the case, go ahead; PaintShop Pro can open those files, at least if it is one page.
When you open a .pdf, you will be prompted with a dialogue box similar to this one. By default, I always see the 72 dpi, so I prefer to change that to 300 dpi, especially if I want to print it.

Once you have set the DPI, click OK and the image will open on your workspace.

At this point, simply duplicate your image with Image > Duplicate or the shortcut Shift-D. Now, you can work by either adding elements, removing elements or changing them.
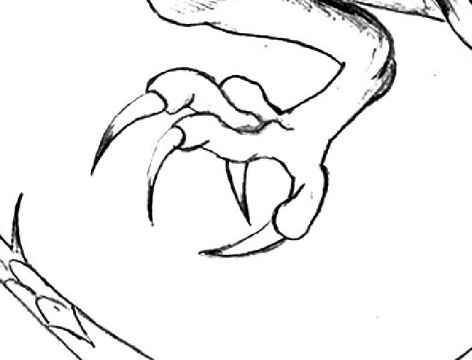
In order to remove elements on a line drawing, it is just as easy as painting in white over a section you want to "remove". On this image, I will remove one of the claws.
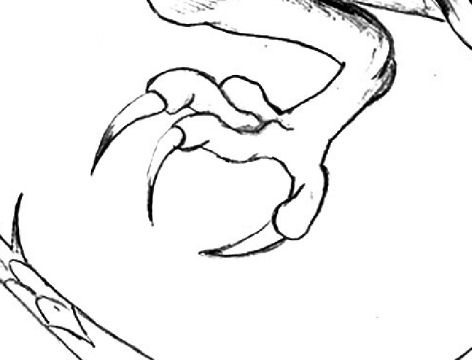
And here is the new section with the claw removed:
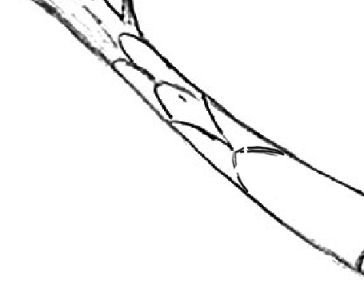
If you want to add an element, you will likely have to draw it. Depending on the style of the starting image, you could use the pen tool (if it is a vector image with even lines) or you might need to use the brush tool or one of the Art Media tools to simulate the same type of lines. Whatever tool you use, work on a separate layer, just in case. Here is the tail where I would like to add one scale.

And here is the scale added using the Colored Pencil (in the Art Media).
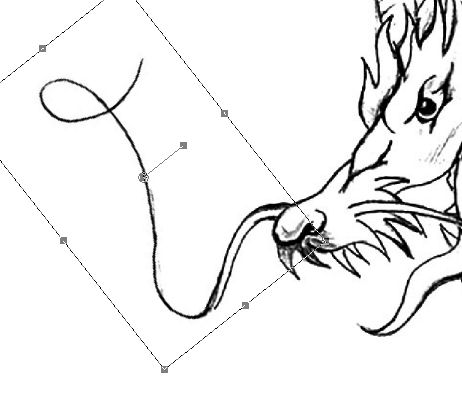
If you want to move something, it is still easy but has a few more steps. Let's look at this dragon and change the location/angle of the "whisker".

Using the freehand selection tool, select around the area or the object you want to change.
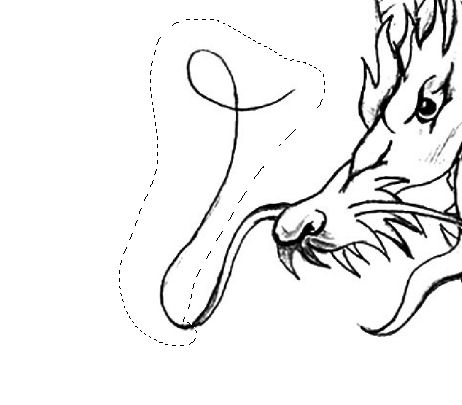
Promote that selection to its own layer. In the Layers palette, right-click on the layer where the drawing is, and select Promote Selection to a Layer. Back to the main layer, flood fill that selection with white, so the previous section disappears completely.
Activate the Pick tool on the new layer that has the element you want to move. Rotate it or move it as you wish until it looks part of the original image.
And here is the final result.

Colored designs
If you have a colored scene, the approach is the same to add, remove or move elements, however, it will require more care as you have to deal with more colors and might need to fill in more details. If your scene is all in vectors, that will be easier as they are their own objects so you can move them separately without having to fill in. Also, you can change colors of a vector much more easily than if it is a flat painting.
Let's see what we can do with this colored image.

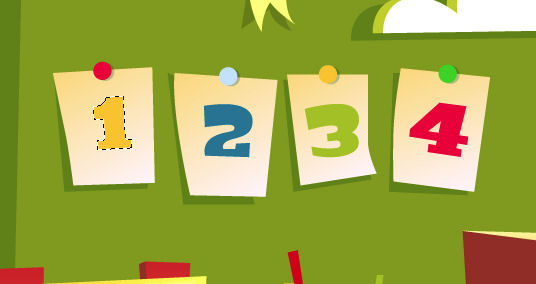
One advantage of vector images (even if you have only a .jpg version) is that the colors are often uniform, so if you want to use the Magic Wand, you can easily select an area to change color. Let's look at those numbers on the wall.

Let's select the number 1 with the Magic Wand.
Let's flood fill the 1 with the color of the number 4, and then repeat with the number 4 and fill with the yellow from the 1.

Now, let's move things around. On the wall, we have stars and waterdrops. Let's switch some. Those would be easy as the background for those particular elements is solid.

One at the time, I will select the elements I want to move and promote the selection to their own layer.

In both cases, I flood filled the selection on the base image with the solid green that was behind. Once done, I have two layers (one for the star, one for the raindrop) that I can simply move over.

Let's try something a bit more challenging: let's move the tractor from the shelf onto the table. First, we need to select the whole tractor. I am using the Smart Selection Brush since the colors are well defined.

I promote that selection to its own layer and since I cannot flood fill the background with a single color, I will simply delete from the base image, and move the tractor on the table. This will give me room to work on the "missing area".

As you can see, the missing part includes the yellow from the shelf, the red from the taller unit and two greens on the wall. Let's use the Brush tool to fill the missing colors.

Notice that the tractor had a shadow on the wall. Since the tractor is no longer there, we'll have to remove the shadow and cover that area with the same green as the rest of the wall.

And voilà. We have changed something on the image and now, you can spot the difference.
As you can see, with PaintShop Pro, you have a great tool to create fun activities for your next family gathering. How about showing us some before and after images and we can play Spot the differences!


3 thoughts on “Project idea – Spot the difference”
You don’t need to reply, I have discovered that PSP is unable to open esp files.
I tried to open an eps file, which are vector files. When I click on the post script renderer, the file is added to a PSP layer as a background, and not as a raster or vector. I’m using PSP 2019.
An interesting concept on spot the difference. I’m going to have a go at that.