
Everyone seems to enjoy animations as you can find more and more gifs on Facebook feed, and such. Photo-Mirage is a new product from the Corel family. It aims at allowing the users to add some type of animation to still photos.
Photo-Mirage
As its name implies, this program is not supposed to create full animation. It should create a mirage where the image will have some kind of "shimmering" effect. The animation will be a loop of recurring movement in a straight line, in one direction at the time. Of course, you can have multiple motions going in different directions but one motion cannot go back and forth. That is the reason why you have to choose your photo carefully. because any animation you have in mind might not translate into a "mirage".
How to use it?
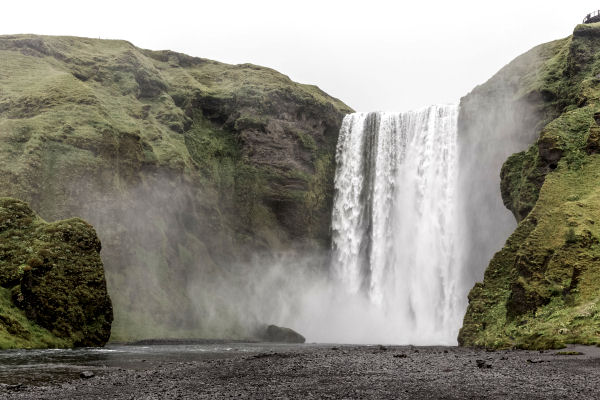
Because Photo-Mirage has a limited number of tools and options, it is pretty easy to use. Let's use this image of a tall waterfall. I will want to make the animation on the water itself, obviously moving downward.
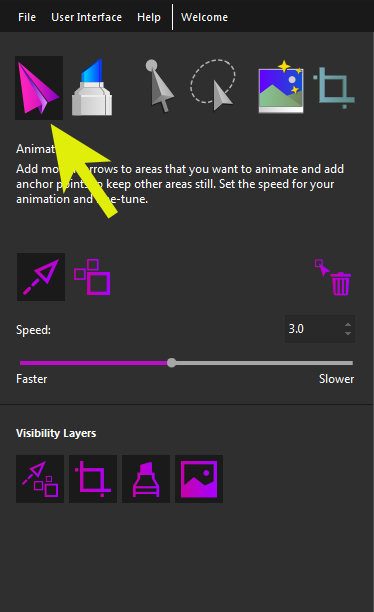
In Photo-Mirage, I will activate the Animation icon. It will allow me to draw arrows where I want the animation to be and in which direction.
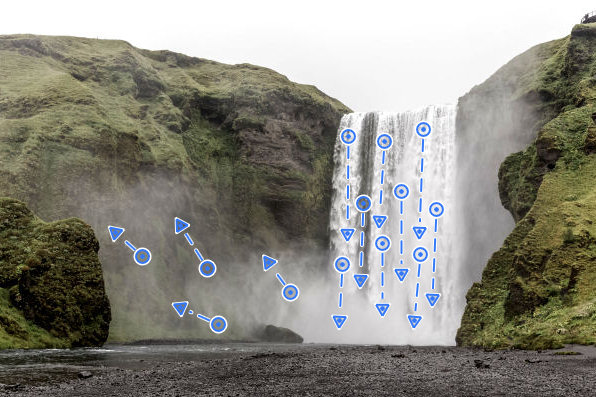
I will add those blue arrows on the waterfall, making sure I stay INSIDE the water because I don't want to get the rock to move along with the water! At the bottom, I see some splashes so I will add some animation in a different direction than the falling water.
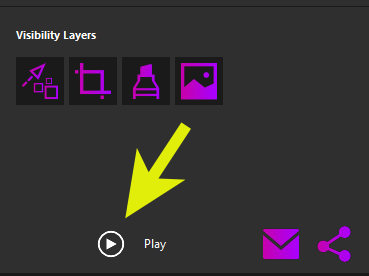
Now, I can preview the animation with the Play button.
My image will now move based on the arrows I added. In this example, I see that the whole mountain is moving downward, which is not realistic, right?

In the Animation window, I have another option which is to add Anchor points. Those are points to indicate where the animation should stop on the image.
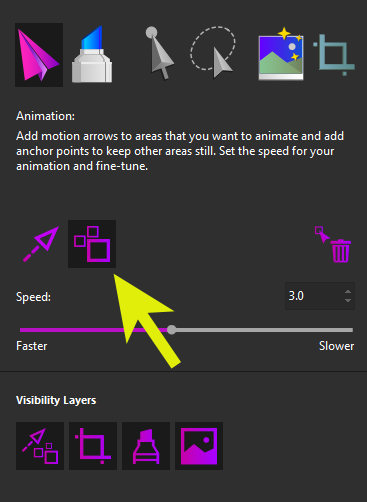
I will add anchor points on the edges of the fall, so the animation will not "grab" the mountain, nor the water at the bottom, and it will remain inside that line of anchors.

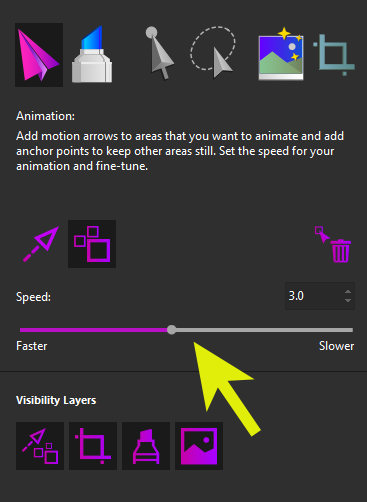
I can also adjust the speed of the animation with this slider. Toward the left, the duration will be shorter, so the animation will be faster, and toward the right will give a longer animation, so it will be slower. It all depends on the image you have and the effect you want to get.
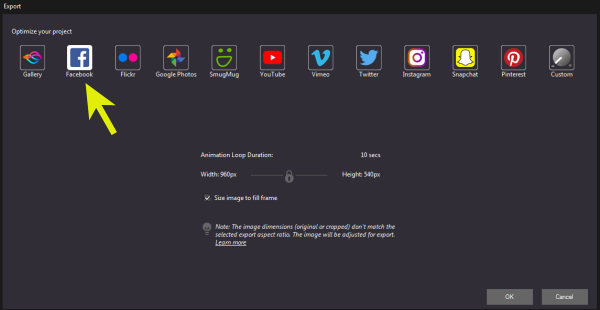
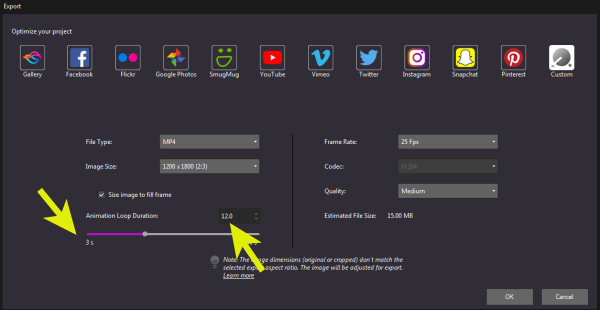
Once you are happy with the animation you are getting using the Play preview, it is time to export it. By default, you will get the Export dialogue window for a custom export. But as you can see, there are many other possible optimizations for different platforms.

You can choose any other platform and you will see the options will be reduced as they will be what is essential for that particular platform. For example, for Facebook use, the size is going to be limited to 960 x 540 pixels with a 10 seconds loop duration.
And here is the final animation.
Tips and tricks
When you choose the duration of the animation while editing, make sure that at the time of export, it will be a multiple of that duration. This will make the loop seamless. You can find that setting here when you do Custom settings only.
Beware of the size options. Depending on where you want to post your animation, you might end up with a cut-off area. For example, a tall image optimized for Facebook will not give a good result as it is optimized for a horizontal image.
Choose the image carefully to get the best results. Typically, images, where you can have a slow animation, will give better results. Clouds, smoke, fire, water, hair can yield good results and give a realistic animation. On the other hand, you can be creative and use other types of images and give them a surreal effect. Here is one animation using fire:
Photo-Mirage is a standalone program however, Photo-Mirage Express is available if you get PaintShop Pro 2019 Ultimate. What is the difference? Unlike the full version, the Express only allows you to export in .mp4 format and not in .gif or .wmv formats. It also does not let you save an editable version of your project to come back to. Once it is done, you can export it and that's it.
If you currently have PaintShop Pro 2019 Ultimate and would like to upgrade your Photo-Mirage version from Express to the full one, you can click the Welcome link on top of your Photo-Mirage and that will bring up the Welcome screen which will include an Upgrade tab that you can use.
If you don't have either version, you can purchase the full Photo-Mirage program.
And of course, you can also purchase PaintShop Pro 2019 Ultimate to get your hand on the Photo-Mirage Express.
Now, if you have some great photos of your travels or adventures, you can turn them into animation instead of making a scrapbook page. Of course, you can do both too!
Some links are affiliates and I get a small commission if you make a purchase using those links, at no extra cost to you.


